I was at the Kopanets, I was at the Topanska, I was at the circle, I was at the fire, I was at the scald. When he was young, he fed people, but when he got old, he began to take swaddling clothes.”
In the old days, anyone could guess this riddle. The hero of the riddle is an ordinary stove pot. Using his example, you can trace the entire path that clay takes before becoming a ceramic product. “Kopants” was the name given to the village potters to the pit or quarry where clay was mined. From the kopanets, the clay fell onto the “topanets” - a flat place in the yard or hut, where they trampled it with their feet, carefully kneading it and picking out the pebbles that got into it. After such processing, the clay went to the “circle”, that is, to the potter’s wheel, where it took the shape of a pot or some other vessel. When the pot was completely dry, it was sent to the “fire,” or rather to the oven, where after firing it became hard as stone. But in order for the pot not to absorb moisture, it had to be “scalded.” To do this, it was dipped hot into kvass grounds or liquid flour mash.
The second part of the riddle figuratively and briefly shows the further fate of the finished pottery. It is hardly worth specially explaining how the stove pot “fed people,” but why it began to “become swaddled” in old age is hardly clear to modern people. The fact is that in the past, housewives were in no hurry to throw away old cracked pots. They were wrapped in narrow steamed ribbons of birch bark, as if they were swaddling. Pots and other pottery wrapped with birch bark could serve for many years.
Living clay
Potters called “living clay” clay that is found in nature in its natural state.
The clay found in nature is so diverse in composition that in the depths of the earth you can actually find a ready-made clay mixture suitable for making any type of ceramics - from sparkling white earthenware to red stove bricks. Of course, large deposits of valuable types of clay are rare, so factories and plants for the production of ceramics arise near such natural storehouses, as, for example, in Gzhel near Moscow, where white clay was once discovered. Every self-respecting village potter also had his own, albeit small, treasured deposits, or more simply, Kopan pits, where he extracted clay suitable for work. Sometimes they had to travel many miles to get the clay they needed, extracting it from deep holes with incredible difficulty. Moreover, one deposit was not always enough, since different products required different clay compositions. For example, rich ferruginous clay is best suited for black-polished ceramics. It is highly plastic, perfectly shaped on a pottery wheel, and after drying it can be ironed to a mirror shine. Dishes made from such clay do not allow moisture to pass through and are highly durable. One problem: oily clay cracks easily when dried and subsequently fired. Products made from lean clay containing a significant amount of sand have a rough surface, and they also strongly absorb moisture. But when drying and firing, skinny clay very rarely cracks. For good clay, the golden mean is preferable when it has medium fat content.
Clay containing less than 5% sand is considered oily, while lean clay contains up to 30% sand. Medium fat clay contains 15% sand.
Where to find modeling clay
You can find suitable clay for modeling and pottery almost anywhere, if you wish. In addition, a small amount of clay can always be “corrected” by elutriation and other methods. Clay may lie immediately below the soil layer at a shallow depth. In garden plots it can be found during various land works. Layers of clay quite often come to the surface along the banks of rivers and lakes, in slopes and slopes of ravines. In the Non-Black Earth Region there are areas where clay is literally underfoot and in wet weather on country roads it turns into a solid mess, causing indignation among passers-by. Even from such “dirt” collected on the road, small decorative items can be sculpted and then fired. But, of course, this should not be done. Even where there is clay soil all around, you need to dig at least a shallow ditch to get to cleaner and more uniform layers.
Clay suitable for modeling can be successfully prepared even in a big city. After all, somewhere nearby, builders are digging foundation pits for a new house, or water or gas pipelines are being repaired. In this case, clay layers that lay at great depths appear on the surface.
You can determine the suitability of clay for modeling in a fairly simple way. From a small lump of moistened clay taken for testing, roll a rope between your palms about the thickness of your index finger. Then slowly fold it in half. If at the same time no cracks or very few of them form at the bend, then the clay is quite suitable for work and, in all likelihood, it contains 10-15% sand.
How to make polymer clay at home
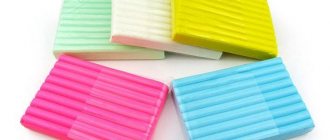
From a material called polymer clay or plastic, you can create the most unexpected elements. It is often used as a basis for jewelry, making bracelets, rings, headbands, or brooches. All these decorations will shimmer with the bright colors that you choose for sculpting. Jewelry on the neck looks especially beautiful - these are pendants, necklaces or just beads. In second place comes dishes that are decorated with polymer clay with your own hands. Glasses, mugs, teapots or spoons - they can decorate your table for months.
- 12 signs that you are absolutely healthy
- How to cut a cat's hair
- 6 ways to maintain healthy bones after 50 and strengthen joints
You can make toys in the form of jointed dolls entirely from polymer clay or make a small dish set for them: its modeling will be especially interesting for a child. Today, skilled craftswomen make from this material everything that their imagination allows - from key rings to a bouquet of flowers, while there are already many recipes according to which polymer clay is prepared with your own hands. If you buy it in a store, the composition contains polyvinyl chloride and liquid additives, i.e. plasticizers. For self-production, the basis is starch, glue with glycerin and soda.
- Tax on buildings on a summer cottage in 2021
- Why is it important for us to get antioxidants as we age?
- The Ministry of Health has expanded the list of COVID-19 symptoms
Polymer clay for modeling from potato starch
The first recipe for making polymer clay with your own hands is based on potato starch. Often corn is used instead. The only difference is that the appearance of potato starch products turns out to be a little grayish. If they used corn for the craft, then they look whiter. The recipe itself will require the following ingredients:
- Vaseline or hand cream – 1 tsp;
- baby oil – 2 tsp;
- PVA glue – 100 g;
- lemon juice – 2 tbsp. l.;
- potato starch – 100 g.
To work you will need an enamel pan. Pour about 1 liter of water into it and put it on fire. While the liquid is boiling, follow the instructions below:
- Take disposable cups. Pour glue into one of them, pour starch into the other.
- Place the glue in another enamel container. Add butter with cream and lemon juice there, mix well.
- Next, heat the mixture over a pan of water, i.e. in a water bath. Just don't do this for too long, or the clay will overheat and become stiff.
- After this, add starch to all ingredients. With such small proportions, you can do it all at once rather than gradually.
- Stir vigorously so that the mixture does not stick to the bottom of the container.
- Lumps will begin to appear in the mixture, it will become like cottage cheese, and then turn into a large lump. At this point, remove the container from the water bath.
- Lubricate your hands with cream and start kneading the mixture.
- Roll the clay into a ball shape, cover it with a layer of cream and wrap it with film to prevent air from getting inside. So the material should ripen in about 12 hours.
Recipe from glue and glycerin
The following instructions assume the addition of glycerin at one stage of the work. This substance helps to avoid cracking of finished products. For this recipe you will need materials in the following proportions:
- PVA glue – 2 tbsp. l;
- cold water – 1 tbsp.;
- glycerin – 10-15 drops;
- potato or corn starch - 1 tbsp.
To prepare polymer clay according to this recipe, follow these steps:
- Arm yourself with a saucepan with a thick bottom. Mix glue and half water there.
- Cook the mixture over low heat for about 3-4 minutes, stirring constantly.
- Take a separate container where you combine the remaining water and starch.
- Place the starch mixture in a saucepan with water and glue, add glycerin there, then mix thoroughly.
- Turn off the heat and leave the pan to cool briefly.
- Place the clay on a table sprinkled with starch.
- Knead the “dough”. It will be sufficient if it becomes pliable and its surface is smooth.
- Form a ball of clay as shown in the photo. Then wrap it in cling film and place it on the refrigerator shelf for a couple of days.
DIY self-hardening polymer clay
Using the latest recipe, you can prepare self-hardening clay. This option will require the following materials and tools:
- baking soda - 2 tbsp;
- water – 0.25 tbsp.;
- corn starch - 1 tbsp;
- spatula for kneading dough;
- waxed baking paper;
- non-stick pan.
Self-hardening polymer clay is prepared according to the following instructions:
- Combine all the listed ingredients in a saucepan.
- Heat it over the fire, stirring constantly. When the mixture has dispersed a little, add a couple of drops of any aromatic oil, such as cinnamon. This way the finished raw material will have a pleasant smell.
- Keep the mixture on the fire until bubbles appear and a large lump forms. All this time, do not forget to stir, scraping the mixture from the bottom.
- When you see that the mass has begun to resemble mashed potatoes, turn off the heat.
- Pour the contents of the pan into another container, the bottom of which is lined with waxed baking paper.
- While the “dough” is cooling, grease your hands with rich cream.
- Knead the mixture into one large lump. Keep it in an airtight container to prevent the edges from hardening.
- The raw materials are already ready for modeling. Roll out thin sheets of it, cut out any shapes with molds, make patterns on them with a toothpick, and then dry in air or in a radiator.
Clay color
Each type of clay changes its color at a certain stage of modeling, drying and firing. Dried clay differs from raw clay only in a lighter tone, but when fired, most clays dramatically change their color. The only exception is white clay, which, when moistened, acquires only a slight gray tint, and after firing remains the same white. The color of “living clay,” which is usually in a wet state, is most often deceptive. After firing, it can suddenly change dramatically: green will turn pink, brown - red, and blue and black - white. As you know, craftswomen from the village of Filimonovo, Tula region, sculpt their toys from black and blue clay. Only after being dried in a kiln do the toys become white with a slightly creamy tint. The miraculous transformation that occurred with the clay can be explained very simply: under the influence of high temperature, organic particles burned out, which gave the clay a black color before firing. By the way, such particles are found in chernozem, where they also determine the color of this soil. The color of clay, both in the raw and fired state, is also influenced by various mineral impurities and metal salts contained in it.
If, for example, the clay contains iron oxides, then after firing it turns red, orange or purple. Based on the color that the clay acquires after firing, there are white-burning clay (white color), light-burning clay (light gray, light yellow, light pink color), dark-burning clay (red, red-brown, brown, brown-violet color). To determine what kind of clay you are dealing with, make a plate from a small piece or roll it into a ball, which, after thoroughly drying, is fired in the oven. Place the prepared clay in a wooden box and fill it with water so that individual lumps slightly protrude above the surface. It is advisable to immediately prepare as much clay as possible. When there is an abundance of clay, only a small part of it is consumed, and the rest will be constantly aged.
The more the clay is kept wet, the better. Previously, potters kept clay in the open air in the so-called clay pit - a special pit, the walls of which were made of logs, blocks or thick boards. The clay had to lie in the clay pot for at least three months, but sometimes it was in open storage for several years. In spring and summer it was burned by the sun's rays, in the fall the winds blew and rained, in winter it froze in the cold and thawed during the thaw, then melt water penetrated into it. But all this was only beneficial for the clay, since it was loosened by numerous microcracks, while harmful organic impurities were oxidized and soluble salts were washed out.
The centuries-old practice of folk craftsmen has shown that the longer the clay is aged, the better its quality.
Polymer clay at home
On the Internet or in special publications you can find many ways to make polymer clay at home. The analogue will exactly match all the properties of the purchased material. There are many methods that are divided into several categories:
- From corn starch.
- Heated in a water bath.
- Using Vaseline.
- From potato starch.
- Cold way.
- Heated on the stove.
- Heated in the microwave.
Cooking methods differ in materials and their ratio.
Glue and cornstarch
Clay prepared according to this recipe will correspond to the purchased version, but this method has one significant drawback: after drying, the craft decreases in weight by 30%, and its size becomes smaller. When making a fake, you need to take into account that the item should be made a little larger than planned.
A product made from clay according to this recipe takes at least 24 hours to dry. A polymer clay recipe at home is available to everyone, because the ingredients for preparing the composition are available in any home. The components are inexpensive. To prepare the material you will need the following ingredients and tools:
- 250 g corn starch.
- 100 g PVA construction glue. It can be purchased at a hardware store. You can use children's glue, it will make the clay softer.
- Baby or motor mineral oil 3 tablespoons.
- 1 tablespoon lemon juice.
- Heat-resistant bowl for mixing ingredients. It is advisable that the container have a non-stick coating.
- A stick or spoon for mixing ingredients.
- Protective gloves.
- Stand for container.
It is not difficult to prepare polymer clay with your own hands: to do this, you need to mix corn starch and glue in a special container. If the amount of ingredients indicated in the recipe is not enough, they can be increased as a percentage.
Starch and glue are mixed until a homogeneous paste is formed, then lemon juice and mineral oil are added to the composition. All ingredients are mixed until smooth. The container is placed on gas and gradually heated, while the composition is slowly mixed. You should get a homogeneous viscous consistency. After this, the bowl is removed from the heat, and a little more mineral oil is added to the composition.