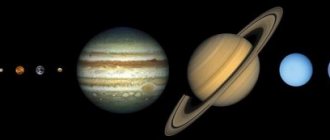
Modeling ideas
Before teaching children to sculpt beautiful crafts from plasticine, you will have to acquire not only the main material, but also auxiliary ones - chestnuts, pine cones, seeds. They diversify the choice of characters for sculpting:
- Fauna - hedgehogs, hares and turtles are easy to make due to their miniature size and minimal colors.
- Flowers - colorful and simple figures, when properly combined, give rise to lovely compositions, and therefore they are sure to please young ladies.
- Festive objects and characters - Christmas trees, stars and snowmen are relevant at the most fabulous time of the year, because they only contribute to its atmosphere.
The corresponding list often includes different sweets, but they are sometimes perceived by children in the literal sense. Nobody wants the risk of eating plasticine. Therefore, it is better to start mastering sculpting with charming animals.
Cute hedgehog
Many fairy tales have been invented in honor of the prickly animal, but how can you see it on a children’s table if hundreds of needles grow on it? Everything is very simple:
- A small ball is molded from brown plasticine;
- The ball rolls out into a drop, which will serve as the body;
- Eyes and a nose are molded from white and black plasticine;
- 20-30 sunflower seeds are pierced into the back of a naked hedgehog.
The seeds should be inserted in rounded parts so that the points point upward. When the hedgehog is fully armed with sharp armor, it remains to be placed on cardboard or colored paper. This idea is relevant for other animals created from plasticine, which will be discussed further.
Romantic cat
Children love to purr, and when they hold a heart in their hands, then they can safely be recognized as the heroes of Valentine's Day. To make one such mustachioed and tailed romantic you will have to:
- Roll out one large, one medium and two small balls from blue plasticine;
- Form a slightly convex body-heart from a large ball, a drop-shaped tail from a medium one, and drop-shaped ears from small ones;
- Roll out several thin sausages from white plasticine and decorate the tail and body with them;
- Attach the tail to the left oval of the body, and the ears to the right;
- Mold eyes, nose and muzzle from white plasticine, and then stick them to the right oval of the blue heart;
- Form two eye corneas and a nose from green and black plasticine;
- Stick the corneas and nose to the white eyes and muzzle;
- Roll out four drops and one medium heart from blue and red plasticine;
- Stick blue drops to the body to simulate paws, and squeeze the red heart with the upper paws.
A child can make such a cat himself as a gift to his friend or girlfriend.
Plasticine airplane
Very often, boys make military equipment from plasticine; a mother and daughter can make such a product as a gift to dad or brother on February 23rd. Let's try to make a plane together.
- Take two blocks of blue and green plasticine, mix them together, you should get a khaki-colored ball.
- from the resulting blank you need to make an airplane body; to do this, stretch it into an uneven oval; on one side it should have a thin pointed tip, and on the other side it should be more voluminous.
- we need to make two more small blanks from which we will make wings.
- On the board you need to flatten the wing blanks, cut out the triangles with a special knife, as shown in the picture, and smooth the edges, making them neater.
- attach the wings to the body of the aircraft, they should be located closer to the bow.
- you need to make three more small triangles, they will be necessary to design the tail.
- attach these triangles to the tail part: place two blanks on the sides and one on top.
- now make a small rectangle, using the blue color you need to make flat rectangles. The cube will be the cockpit, and the flat rectangles will be the glass. We decorate our cabin and place it on top of the plane.
- we add a propeller, make a core and three blades, and place it on the nose of the plane. The product is ready, you can please your men with an unusual handmade gift.
Good turtle
Before you take on the Teenage Mutant Ninja Turtles, you will need to make something simple out of plasticine for beginners. How about a good turtle? Its sculpting proceeds as follows:
- First, you need to roll out one large ball, four medium ones and one small one from green plasticine;
- Next, two balls are formed from brown plasticine - large and medium;
- The next step is to form a shell from a large brown ball (the figure should resemble a helmet or basin);
- The second brown middle ball is divided into many disks, which are superimposed on top of the shell;
- From one large ball of green balls a semicircular head is formed, from four medium ones - drop paws, from one small one - a tail;
- The head, paws and tail are attached to the shell;
- Using a stick, a match or a toothpick, patterns of a smile, nose and eye dents are drawn on the turtle’s face;
- The indentations of the eyes will be filled with disks of white plasticine, which in turn end with the pupils of black plasticine.
When the turtle is ready, it can be placed on blue or yellow colored paper, which imitate the sea and sand.
First crafts
Plasticine is good because if the job is unsuccessful, it can be easily remade. This is the moment that needs to be demonstrated to the baby. Children love magical transformations. Therefore, the child will definitely enjoy the opportunity to sculpt different objects from one piece each time. Training should be gradual, that is, you should first show basic actions with plasticine:
- How to pinch off a small fragment from a whole block. This action must be performed with the thumb and index finger.
- You should try to create something whole from the pieces you receive. It is most convenient to sculpt sausages and balls from plasticine for babies in the first years of life. Then, from several blanks, you can make figures of animals and humans. In the process of creative work, the child must work with his fingers and hands. For example, you need to roll out sausages between your palms.
- Then you need to show the child how to get flat cakes from the balls by kneading the rounds.
- After the baby has mastered these basic modeling techniques well, you can begin more complex actions, that is, create objects from the material. The first creative test could be, for example, an apple. A good work option for this age is a caterpillar figurine.
The child must master all the skills himself, that is, be able to pinch off plasticine, roll it into balls, and make sausages.
Fidget birds
“Angry Birds” is another thing that can be molded from light plasticine. Kids are crazy about these birds, and adults can use this temptation for their next modeling lesson.
Moreover, the thematic trio has light forms:
Note!
Plasticine dinosaur: TOP-170 photos of creative DIY modeling solutions. Methods for making a dinosaur + simple master class
- Plasticine machine: simple diagrams and non-standard ideas for crafts made from plasticine. Step-by-step instructions for making a machine with your own hands with photo reviews
- How to make slime - the best ways to make slime at home. Simple and quick recipes with a step-by-step master class for children (150 photos)
- From blue and blue plasticine you need to roll out three large balls and six small ones;
- Small balls are compressed and adhere to large ones - two per large one (tufts are obtained);
- Eyes, eyelids and pupils are molded from white, red and black plasticine;
- Eyes, eyelids and pupils are attached to the body, and the finished eyes should convey the emotions of each bird individually;
- Three “sausages” are rolled out from red and dark blue plasticine;
- The sausages are compressed and attached to two different ends of each bird to give them beaks and tails.
The resulting trio can be placed opposite each other or around an object.
fruit tree
A figure for modeling is not necessarily a cartoon character. You can also make several trees from plasticine with your child. Moreover, they make a dense forest or garden.
But first, one rowan will be enough:
- You need to roll out a large ball of dark green plasticine;
- A wooden trunk is formed from brown plasticine;
- Dozens of lumps are separated from red plasticine and shaped into balls;
- Dozens of lumps are separated from light green plasticine and shaped into sausages;
- Sausages are attached to a large ball to imitate leaves, balls to imitate rowan berries;
- The ball is placed on a brown trunk.
Next to such a tree you can place all the animals and birds mentioned earlier.
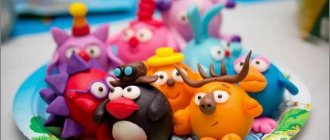
Craft ideas for children of different ages
What can be molded from plasticine and what is easier? Depending on age, you should choose crafts of varying degrees of complexity. But regardless of this, it is better to immediately create a magical story in which the baby will be willingly interested. You can come up with a new unusual country with imaginary animals or offer to make your own farm.
Modeling with children under 2 years old
To play with your child you will need:
- plasticine of different colors;
- modeling board;
- paper with drawings.
At this age it will not be possible to perform complex figures. You can start introducing your daughter or son to plasticine not by creating full-fledged creatures, but by sculpting small and light parts. To do this, teach your baby easy manipulations:
Roll the piece into a ball. Tear off or cut off a piece of plasticine and roll it in a circle between your palms, or clockwise on a non-sticky surface. You can take the color yellow and create a bun or a sun. In the first case, help make the ball's eyes and mouth, in the second - thin rays. A few rolled up pieces will easily turn into a caterpillar.
Knead the rolled ball in your palm. This will allow you to create flat applications. Gently press the resulting volumetric ball into the palm of your hand in the middle, then knead the dense areas. Especially for this, you can print or draw sketches that need to be supplemented with wheels, snowflakes and spots.
Roll out the ball into a “sausage”. This can be done either on a special board or between your palms. Repeat the back and forth motion evenly with your hands until the piece of material becomes long and thin. The resulting stripes can become a zebra pattern, a staircase, or rails. A few colored “sausages” can easily become a rainbow. You can combine business with pleasure and sculpt the first letters from strips.
Twist the “sausage” into a spiral. Gently twist the tip of the strip inward with your fingertip and continue this way until the very end. The finished spiral, supplemented with a stick, will become a lollipop, and the forked tip will make a snail out of a shell.
Christmas tree
If the winter holidays are at stake, then green plasticine will come in handy for sculpting a Christmas tree. The corresponding process does not take much time:
- First, a large cone and a wide trunk are molded from green and brown plasticine;
- Next, the cone is placed on the barrel;
- The next step is to thin out the needle patterns from the very top to the bottom (for thinning, use the corner of a bank card or the edge of a coin);
- Small balls are rolled out from bright plasticine;
- Variegated toys are attached to the Christmas tree.
Note!
Plasticine dog - TOP-180 photos of unusual ideas for creating crafts. Detailed master class on DIY modeling for children
Clay products: basics of modeling, tips for beginners. Master class on making clay crafts + photo reviews
Animals made of plasticine - a master class on creating crafts with your own hands. Unusual modeling ideas + photo examples of finished works
Sometimes adults use scissors as a cutting tool. But the latter are unsafe, so before making a New Year's beauty from airy plasticine, it is better to get a coin or card.
Various crafts
What and how to sculpt ? It depends entirely on the child's imagination and level of skill.
I will show you pictures , videos and photos to motivate you and your kids to do what your little one can do and find interesting.
Figures
All your favorite characters can be molded from this plasticine and not just put on a shelf, but played with. Since they are durable, they do not stain your hands and do not deform after hardening.
View this post on Instagram
We tried air plasticine for the first time. I really liked it. It molds perfectly, holds its shape and sticks to each other, unlike playdoh. It dries up and turns into airy rubber. Very light. These are our first crafts made from it. It has a million uses: you can make casting molds from it, phone cases and full-fledged toys. Plasticine is very pleasant to the touch. It's nice to crush it in your hands. The child enjoyed playing with it, and mom and dad also had a lot of fun. I advise you to buy :) Advantages: Soft, silky to the touch. Beautiful colors. #what to do with a child #daynotes_play
Publication from Elena Selivanova (@daynotes.ru) June 25, 2021 at 7:04 PDT
We showed how we sculpt Kung Fu Panda using regular plasticine here.
Chips for games
Previously, we made chips from ordinary plasticine, but it sticks and loses its shape. But airy plasticine is perfect for making chips and cubes for purchased or homemade adventure games. We often sculpt the figures ourselves, because playing with ordinary cones is not interesting.
For the Minecraft adventure game, we made cubes - the heads of the characters.
For the game “Children's Corridor”, which is in the photo, we made mice and cheese from airy plasticine. By the way, a very interesting game, suitable for children of all ages and even adults. We made the field out of Legos.
Rules of the game in video from Igroveda
Food
You can make these cute cakes, donuts and ice cream yourself. Use them to decorate a child's room, make them as gifts, or use them as a refrigerator magnet.
Do you know how to make these simple cupcakes? When opening the plasticine, cut off a small corner of the bag and then, like from a pastry bag, you can decorate cakes and pastries by pressing on the bag with plasticine. A thin sausage will be squeezed out through the cut corner. By the way, by making such a small hole in the bags you protect the plasticine from drying out.
I’ll tell you a secret, or maybe not a secret: there are a lot of master classes on YouTube, look for “miniature food made from polymer clay.”
Several scans from a book on making tasty treats - enlarge by click.
Cases
In addition to funny toys, we create a very practical thing that will decorate our device and become an excellent gift for friends. You can decorate your case , or you can create your entire accessory from start to finish on a transparent silicone base.
The shape and idea of the cover itself and the appliqué on it may be different.
Great video!!! I really wanted this!))
Clothes for dolls
We prepare the dolls for winter - we make a warm dress, a hat and boots.
How to make a coat with a hood, mittens and boots for a doll.
Video - how to store, dry and remove clothes made from air plasticine:
Flowers
If you have good instructions, you can make from modest bouquets to more complex ones. Such flowers can decorate a mug, become part of jewelry, etc.
Badges
Look what cool badges you can make. If you glue them on a pin, you can decorate a backpack or jacket. If you use a magnet, you can make a superhero refrigerator. And this is literally in a matter of minutes! Even the smallest can do it.
Keychains
There are a huge number of ideas for keychains. These can be goodies, cakes, ice cream and chocolates. Or maybe cute little animals, flowers and hearts, etc.
School supplies decorations
Of course, this is not all! This material is perfect for making chips and cubes for adventure games, clothes for dolls, or handmade Lego sets will look very cool! Any figures, for example, your little one's handprint, a bouncing ball, food or dishes for dolls.
Elegant snowman
In old Russian cartoons, the snowman was completely white, carried a bucket on his head and looked through a carrot. Today the thematic hero has changed somewhat and these changes can be demonstrated when sculpting:
- From blue and white plasticine you need to roll out large and medium balls;
- A red or orange base will be needed to make six balls;
- From six balls you need to mold a pair of legs in the form of bags, a pair of mittens, a winter hat with a bell and a sausage scarf;
- The white middle ball rests on the large blue one;
- Sausage arms are rolled out of white plasticine;
- Each limb is attached to the body, a scarf is tied around the neck, a hat is placed on the head;
- All that remains is to make red buttons and carrots, as well as black eyes to decorate the snowman’s face with.
A smile is formed using a match or a stack. The finished snowman serves as a good companion for a decorated Christmas tree, as evidenced by hundreds of photos of plasticine crafts on a New Year's theme.
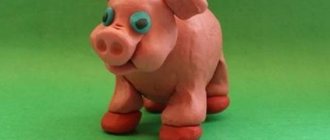
Fauna from plasticine
It is especially interesting for children to create crafts from plasticine in the form of domestic and wild animals.
To create you will also need:
- Plasticine.
- Toothpick or matches.
- Modeling board.
Cat
A familiar character can be performed using a variety of methods. In one of them, the elongated rolled piece should be divided into two parts on each side - these will be the paws. Then you need to attach a sausage as a tail and a bun with ears, eyes, nose, mouth and mustache. The cat is ready.
Whale
Roll out the tip of the blue bun a little to make a large drop. You can use a toothpick to draw a mouth and eyes, or attach them from the same material. Make a heart out of a small cake and attach it to the tip of the drop using a toothpick (you can do without it). Two thin petals will serve as fins for the whale.
Bird
Connect two bright balls and decorate them with two wing petals. You can make a lush breast from a pale material and draw feathers with a needle, glue on the eyes and crest. Two pairs of three connected sticks will become the parrot's legs.
Turtles
It is necessary to make five droplets: four stable, smaller ones and one large one, with a small dent inside. Four droplets are connected and covered with a large one. These are the legs and shell of a turtle. We slightly press the shell on one side and make a long neck with a round head. We make eyes and a drawing on the “house” - it’s done.
Elephant
Four “stumps” - “sausages” blunted at both ends - will become the legs, and a large ball will become the body. The trunk is made like the legs, but longer and slightly narrower. The two petals will become the elephant's ears. Also blind the eyes, and, if desired, the tusks and tail.
Giraffe
The base is made in the same way as for the elephant. It is better to secure the long neck with a toothpick inside. A pair of horns and spots on the body should be made from brown or orange.
Variegated bouquet of flowers
It’s too early for preschool children to pick flowers to give them as gifts. But they can mold them from different plasticines:
- Three sausages are rolled out from a green block, which will become stems;
- Roll out three thin sausages from blue, yellow and red;
- Multi-colored “worms” are twisted into spirals;
- Spirals are molded to the stems;
- Roll out two thin sausages from red and orange plasticine and then tie them together;
- The bouquet is tied with a red-orange ribbon, and it is recommended to keep a bow.
It is recommended to place such a colorful bouquet of plasticine for girls in a small vessel, which you can also create yourself from a brown, beige or white base.
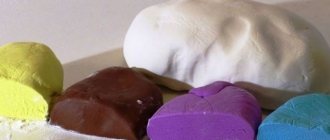
How to make beautiful crafts from air plasticine
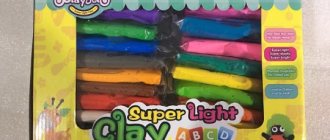
Although it is very easy for beginners and even children to work with such plasticine, some features still need to be known and taken into account. Since the mass hardens quite quickly in the open air, it should be stored in zip-lock bags or special jars with lockable lids. Pinch off the required amount, the rest needs to be tightly closed.
For work you will need: - Light plasticine of different colors; — Various tools: knives, sticks, stacks and all that kind of stuff); — Oilcloth or mat for modeling;
Before starting work, it is advisable to wash your hands, because if your hands are dirty, then all the dirt will mix with the plasticine and it may even change color.
Now we are going to make a delicious cake. To do this, separate a small piece and roll it into a ball; of course, choose the color to your taste; ours is light yellow.
Next, flatten our bun into a flat cake, pressing it with your palm on a flat surface.
We form with our fingers the shape of a basket or, as it were, a deep plate.
So that it is not completely empty, you can put another piece of plasticine in it.
We also make a lid out of the same color and cover the whole thing on top.
The softer the plasticine, the better it sticks to each other, so you need to work with it quickly enough.
Next, take another color and roll it into a ball too.
We distribute this light blue lump on top of our basket.
We do the same with pink.
Use your fingers to stretch the soft plasticine unevenly, making it look like cream or glaze.
The number of layers and colors can be different; there is a huge field for creativity and limitless ideas.
You can decorate the top with a red cherry and make some kind of sprinkles.
The pies turned out all different and very beautiful, just a wonderful thing for children's games. You can make not only food for dolls, but also various dishes; my daughter made plates and saucers. She applied plasticine cakes to the ready-made doll plates and pressed lightly so that the workpiece took the desired shape. Then you need to let it harden a little and after drying you can use the finished dishes.
There are a lot of advantages from such creativity: + firstly, the process itself is very exciting, imagination, creative thinking, fine motor skills develop, stress and irritation are relieved, hormones of joy and satisfaction from the work done and the resulting result are produced. + and secondly, ready-made works that can be used for different purposes. These crafts can be used to play with Barbie, Lol, or other dolls. You can make a souvenir and decorate your interior with them, for example, put it on a shelf with books or make a magnet for the refrigerator with your own hands; besides, such souvenirs can also be used as gifts for family and friends.
I also found an interesting use for myself - this is a decoration for a pencil, or for a pen. This pencil looks very interesting and unusual.
You can make lollipops on a stick, for example, to decorate a festive table at a children's party or photo paraphernalia for photo shoots.
The main thing to remember is that, after all, products made from such plasticine turn out to be fragile, if they are not fastened firmly, then some parts may fall off, and if the craft is too thin, then it may break, for example, I made sandals for a doll (blue ones in the photo above ) due to the fact that they are thin and constantly put on and taken off, they quickly broke. However, if everything is done firmly and all the parts are securely glued together, then such crafts will last a very long time. My pencil with a pie has been serving me for more than 4 months, even though I use it often.
Racing car
All boys like cars. Plasticine is a good basis for making appropriate cartoon vehicles.
Note!
Plasticine crafts for grade 4 - reviews of creative ideas. New products, step-by-step master classes for schoolchildren + 150 photo examples
- Salt dough recipe: TOP 100 photos with simple modeling dough recipes. Ideas for DIY salt dough crafts with examples of finished work
- Plasticine tank: step-by-step modeling instructions with simple work patterns. Master class for children on creating a tank with their own hands + photo reviews
- From red plasticine you need to separate two pieces for the body - large and medium;
- Both parts are formed in a trapezoid, after which the middle shape is superimposed on the larger one;
- On the upper trapezoid, the contours of the glazing are outlined with a match or a stack;
- The lower shape outlines semi-oval curves for the wheels and smile radiator;
- Tires and wheels are formed from black and red plasticine, after which the wheels are stuck to the curves;
- White plasticine is used to form sheets for eye-windows and a smile-radiator;
- The window eyes are complemented by black pupils sculpted from a matching base;
The finished car can be decorated at the back with a plasticine red bumper. There are pictures of ready-made plasticine options on the Internet. After getting to know them, the kids want to make cars of different colors.
Useful tips
For sculpting, it is better to use blunt and harmless objects. Even a match must be cleared of sulfur.
In order for the child to show interest in modeling, on the eve of the thematic event, it is recommended that he be shown a cartoon with the characters and objects that will be involved.
Good plasticine is plasticine with a safe composition. The products “Luch”, “ArtBerry” and “Kribly Boo” meet this requirement. In general, high-quality plasticine should not emit a strong or sweet odor. After all, such products are most likely toxic and will be perceived by the child as sweetness.
Each plasticine has a certain expiration date. Therefore, when choosing it, you need to pay attention to both the corresponding indicator and the date of manufacture. The packaging must also indicate age restrictions and a barcode.
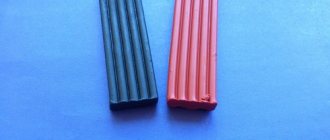
The more plasticine bars in the package, the better - the child really wants to create masterpieces. First, it is better to purchase a package with at least five or six multi-colored bars.