For newbies
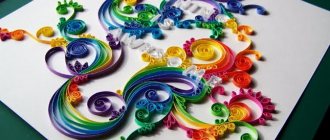
For the New Year, I want to please my family and friends with creative and memorable gifts. Handmade postcards using the quilling technique are a wonderful way to surprise your loved ones. Even if you have just begun to master the art of paper rolling, decorating your wishes with paper will not be difficult. Look at photographs of simple works and try to make the same ones.
For beginners, it can be difficult to completely fill the entire outline with paper. You can add designs to your crafts. To create such a postcard, we used red paper and a felt-tip pen, which we used to work out small elements. The result was an original New Year's composition.
Use acrylic paints with glitter. It is better to apply them on thick paper or cardboard. If you paint modules made from ordinary colored paper, the parts may soften and lose their attractive shape.
From simple details you can create a variety of pictures that can serve not only as decoration on the front side of postcards, but also become a full-fledged panel.
Try connecting several elements without using a cardboard backing. Prepare the parts, and then fasten them together with a drop of glue. Such crafts can be hung on Christmas trees. If you thread a decorative cord through the top.
Themed crafts for the New Year: quilling
To give a pleasant surprise to your family and friends, you don’t have to buy gifts. You can make a gift with your own hands, which will definitely be appreciated much more than any purchased gift. Interestingly, quilling can be done by both children and adults.
If children are making crafts, they should definitely be told about safety precautions and rules for working with sharp objects and glue.
By making crafts from strips of colored paper, children will develop fine motor skills, thinking and imagination. Usually, children do not need diagrams, since their imagination copes well without them. But for beginner adults, if they want to make a craft carefully, but do not have artistic abilities, the diagrams will be of great help at first.
How to make a craft “Snow Maiden”:
- Prepare blue and white strips of paper.
- Twist the white stripe - this will be the Snow Maiden’s face.
- Twist a smaller strip - this will be the neck.
- Twist the blue stripes and make “drops” from the rolls.
- Make a Snow Maiden dress from ready-made elements.
The entire composition can be assembled on cardboard. Or you can glue the elements together and decorate the Christmas tree with crafts. Some decorate the granddaughter of Santa Claus with beautiful wings, imagining her as a fairy fairy.
Mid-level jobs
New Year's crafts in the quilling style can be a little more complicated. Collecting them will require good skill and patience. Below you can see photographs of finished works by mid-level craftsmen. If you have already created many different products and mastered several paper rolling techniques, then you can easily make the same New Year’s decorations.
These crafts can be hung on the Christmas tree. First, several paper strips are glued together and a circle is twisted, and then the inner pattern is laid out. To ensure that the figures last for several years and do not lose their attractive appearance, they are impregnated with glue and coated with a special varnish.
You can collect New Year's paintings, frame them and give them to friends. Here are some interesting ideas:
Supplement New Year's crafts with other types of creativity: drawings, sketches, embroidery or simple appliqués.
Decorate quilling crafts with rhinestones. Handicraft stores sell special sets with shiny pebbles that have an adhesive base. They just need to be separated from the substrate and transferred to the product using tweezers.
Volumetric New Year's crafts look beautiful. They can become an interior decoration or a holiday table decoration.
Openwork Christmas tree
Products and decorations for the New Year look much more elegant and interesting when
Would a child be interested in such a craft?
Not really
quilling is performed with painted corrugated cardboard packaging tapes. Holes in the light create a lace effect, which needs to be emphasized by arranging openwork patterns inside the New Year's tree.
Helpful advice on how to paint cardboard correctly: Dilute a large amount of gouache or acrylic paint to the consistency of liquid sour cream. Pour the mixture into a wide, shallow container. Dip the cut cardboard thin strips into the dye for 1-2 minutes, and after removing them, let the excess liquid drain and place them on the edge to dry in a warm, dry place.
When creating a composition, use curls, hearts, horns and crescents - modules with curved contours. Ideally, the two sides of the tree should be symmetrical, but this is not essential.
Complex crafts
Work with very small parts is considered difficult. If you already know how to carefully work with tweezers and fold small quilling elements, then the next selection of photographs is for you. Try creating similar products yourself.
Contour technique deserves special attention, look at what extraordinary works can come out.
Christmas tree in minimalist style
There is an opinion about the “undignity” of quilling as a type of needlework. Supposedly it looks cheap and looks like it was made by a child. Surprise the skeptics with a stylish handmade card that will take only half an hour.
Simple geometric shapes and clear composition are always in trend.
- On top of a sheet of cardboard folded in half - the basis of the future postcard, glue a rectangle of a contrasting color.
- From very long triangles of eye-catching printed paper, roll into tight thin tubes of varying lengths. Unlike all previous products, apply glue not only to the ends, but also to the entire strip.
- Glue the tubes in a triangle shape with equal spacing between the elements. Glue a Christmas star at the top - 5 foil eyes.
- Complete the composition with a congratulatory inscription below.
Scheme
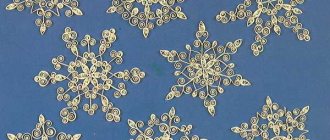
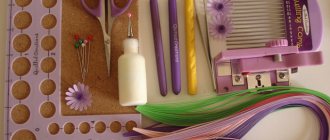
Both beginners and experienced craftsmen need fresh ideas, as well as templates for completing work. Below is a selection of patterns for New Year's quilling. Working with these contours is easy. You need to save and print the picture you like, and then fill out the template with paper details. To arrange the elements to fill the empty space as much as possible, use tailor's needles and a cork board.
