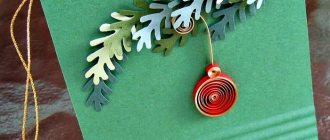
How to make a spider craft on a web?
Spider made from natural material
First you need to decide what or what your spider will be made of. There are these options:
Pine cone spider
You will need plasticine, a pine cone, thin twigs. The branches should not be too dry so that they do not break off completely when bent.
Prepare 6 identical pieces broken off from a branch. Glue brown plasticine onto the cone between the scales.
Place twigs in plasticine to form spider legs. To do this, the branches need to be slightly broken and bent. For reliability, the fracture site can be secured with plasticine.
Next, all that remains is to glue the eyes and the pine cone spider is ready. All my eyes move, but they can easily be made from plasticine. Roll out two balls from white and the same number of balls, but smaller ones, from black plasticine. Glue it on the pine cone and you will get a very funny bug-eyed spider.
Chestnut spider
Prepare brown plasticine, twigs, chestnut and acorn cap. And also purchased eyes or plasticine ones.
Glue a small layer of plasticine onto the bottom of the chestnut, which will hold the spider's legs and branches. They also need to be slightly broken or bent, and the bend points secured with plasticine (optional).
All that remains is to glue the eyes, the acorn cap and the funny chestnut spider is ready.
Acorn spider
Another simple version of a spider made from natural material. It is made in exactly the same way as from chestnut. You will need branches, plasticine, an acorn, and eyes.
You need to glue plasticine to one part of the acorn, and stick 6 bent branches into it. The spider's appearance will be completed by its eyes and nose. I subsequently added plasticine noses to all the spiders.
These are the kinds of spiders you can make from natural materials. For the craft, just one of your choice is enough.
Superhero image details
In order to create a recognizable image, you need to pay attention to the colors and details of the costume. The Spider-Man costume is made in blue and red tones. Patterns that are applied with black paint by hand.
The colors of the outfit must be distributed correctly ; the overall appearance of the product depends on this. The bottom of the product to the knee should be made in blue, but the trouser leg from the knee to the heels should be made of red fabric. The top of the product (jacket) must have a hood, which will subsequently be put on the child’s head and create a mask. The holes for the eyes should be thought out and cut out in the mask.
The colors must be distributed in this order: the hood, shoulders, sleeves and stripes on the back and chest should be red, but part of the sleeves and sides of the product should be sewn from blue fabric. The chest should be decorated with the image of a web with a spider. This decoration is applied with ordinary black acrylic paint and a thin brush. A similar web pattern is also applied to all parts of the costume, which are made in red.
Cutting the product
They made it for the costume and it was impossible to cut it by eye. To do this you need to have a suit pattern . Since the entire costume consists of a T-shirt and sweatpants, the child’s clothes will help us make the pattern. So, take the baby’s pants and T-shirt and turn them inside out. We lay out the parts on a pre-prepared paper sheet and outline them. All available seams must be indicated on the product and allowances must be measured. In order for the template of the lower part of the product to be made correctly, you need to turn the pants inside out, insert one leg into the other, and then trace the back and front of the product.
The resulting costume parts will need to be cut into elements that differ in color.
Assembling the finished suit and processing individual parts of the product
At the beginning of work you need to collect the parts. The product must be assembled in the following order:
- First, the seams on the shoulders are sewn down.
- The hood is assembled and attached to the neck.
- Sleeves must be stitched to the armholes.
- The side seams must be closed.
- The front and back halves of the trouser legs should be sewn along the middle seams.
- The internal and external seams of the product must be sewn.
- The bottom of the trouser legs, sweaters and cuffs must be processed.
An elastic band must be inserted into the upper part of the legs. To do this, you need to make a turn and stitch it.
Decorating a suit with a pattern
In order to create a high-quality spider costume at home, you need to give preference to special acrylic paint for textiles.
It is securely fixed, impregnating the fibers of the fabric. The paint should not be liquid , otherwise it will be applied in wide stripes and spread along the fibers of the fabric.
The paint should be carefully diluted with water. A thin brush will help you do the job carefully. Work on creating a web pattern should begin by creating the rays for the web, after which you can draw curved bridges between the rays. This course of work will allow you to apply the drawing symmetrically. To prevent the paint from bleeding onto adjacent parts of the product, you need to place a sheet of cardboard under the canvas.
When creating a Spiderman costume for a small child, you should give preference, first of all, to the baby’s comfort. For a matinee in kindergarten, you can use a simplified version of the costume. In this case, the child’s main clothes will be jeans and a blue T-shirt. Over the T-shirt, you can wear a cape or vest, which is sewn at home. The cape should be made in red and blue colors. You can complement the look with red sleeves or new gloves purchased at the store.
The design on the cape can be done using a black marker, and the spider patch can be purchased in advance. If there is no black marker in the house, then the web can be embroidered with ordinary threads. True, in this case you will need to spend more time and a little more effort. But the finished product will amaze with its realism.
In addition to the image of Spider-Man, shoes should also be selected. It can also be decorated in the appropriate color scheme, or you can simply take ready-made sneakers or sneakers in red.
Don't forget about the mask, which will add mystery to the image. The mask can be made of fabric or colored cardboard. It should be attached with an elastic band. But what format of mask to use for the image is up to the little hero to decide. As a rule, the mask covers:
To make a Spider-Man mask from fabric, you need to take a child’s hat from a thin material, attach it to the prepared red material, trace and cut it out. Sew the details along the side seams and trim the bottom of the product with tape. Then you will need to sew on special ties that will help secure the product to the child’s head, and cut holes for the eyes. The area around the eyes should be overlocked and outlined with a black marker and white corrector for greater realism.
Making a web for a spider from natural materials
Take 3-4 branches, relatively the same size, connect them crosswise. Secure the intersection with tape. If the branches are very thin, plasticine is enough; thicker branches need to be carefully secured in several layers with tape, ensuring that they practically do not move. Otherwise the threads will sag.
Then you can immediately wind the threads, but it is better to first glue the plasticine to certain areas. The photo shows their location. There are many advantages of this action: the plasticine will hold the thread on the branch, hide it, and leaves can later be glued to it.
Wind the threads. I have them thin, it’s better to take a thicker one. You must first wind one tier, from branch to branch, and several times around the place marked with plasticine. Then the second and third. If desired, you can make more of them.
Everything is ready, glue a large maple leaf onto the plasticine in the center - this will be the spider’s nest. And on the sides there are any small leaves - probably the wind blew them into the web. But more for beauty.
The web has been made, now it’s time to place it in the nest of its owner. Here is a chestnut spider on the web.
And now the home and hunting place of the cone spider.
The acorn spider has settled down quite well.
And now the spiders are all together, although in real life the spectacle would not be for the faint of heart.
This is what a spider on a web made from natural material could look like, simple and as natural as possible.