Panel of cereals and seeds for children 5-7 years old. Master class with step-by-step photos
Panels of cereals and seeds for older preschoolers
Panel of cereals and seeds. Puppy "Buddy". Master class with photos.
Author:
Nefedova Maria Nikolaevna, preparatory group teacher
Place of work:
MKDOU kindergarten No. 10, Epifan village, Kimovsky district, Tula region.
Description:
this master class provides a detailed description of making panels from cereals and seeds.
The master class is intended for children of senior preschool age. The material can be used by primary school teachers, preschool teachers, and additional education teachers. Purpose:
the work can be used as a gift, decoration and interior decoration.
Goal:
make crafts using cereals and seeds.
Objectives:
- develop fine motor skills of the fingers, a sense of volume and shape, logical thinking, creativity, imagination, fantasy;
- cultivate hard work and perseverance, the desire to complete the work started; - cultivate a caring attitude towards nature. Materials:
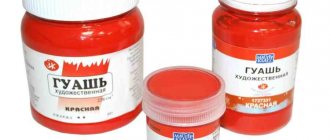
cardboard, glue, watermelon and pumpkin seeds, cereals (rice, buckwheat, millet), black pepper (peas).
Progress:
1. Before starting work, you need to decide on the drawing that we will take as the basis for the craft.
I chose a funny puppy, but if you wish, you can take any other picture. Yu.Sklyarova The puppy has four paws, ears and a funny tail. He is fluffy and shaggy. And licks passers-by on the nose. So let's get started. We transfer the drawing to A4 sheet.
2. Let’s start filling the picture with cereals. It’s more convenient to start with the eyes, since this is the smallest detail of the future panel. We take glue, generously lubricate a separate part of the design and sprinkle it with rice, place one black peppercorn in the middle.
3. Cover the puppy’s nose with watermelon seeds.
4.We continue to fill the remaining parts of the picture with cereals in the same way.
5. Place pepper along the contour.
6. The puppy’s spots will be made from buckwheat.
7. Gradually fill small areas with millet.
8. At the final stage, we lay out the peppercorns along the contour of the entire pattern.
9. Arrange pumpkin and watermelon seeds in a unique pattern. This is such a funny puppy “Druzhok” we got.
We recommend watching:
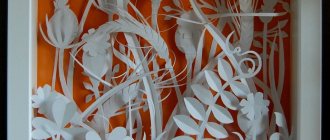
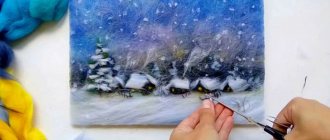
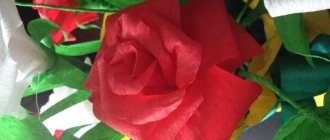
Master Class. Rose made from natural materials DIY autumn crafts DIY panels of dried flowers. Master class with photos Spring inspiration. Painting “Apple tree branch in bloom”
Similar articles:
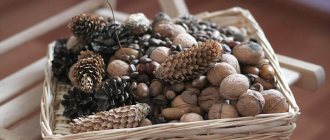
DIY crafts from pine cones
DIY crafts made from natural materials
DIY painting “Summer bouquet”
DIY crafts made from natural materials for schoolchildren
Weaving from pine needles. Master Class
Useful tips
In order for your painting to last as long as possible and turn out to be the brightest and most beautiful, you should follow some recommendations not only when making it, but also about storage and subsequent care.
- Once every six months the painting needs to be re-coated with clear varnish. If you did not initially coat the painting with varnish, you can spray it with super-strong fixation varnish once every six months, then the grains will stick much more reliably;
- If you don’t have a variety of cereals at home or they are all the same color, you can use them and then paint them with paints, but, of course, it won’t look so impressive;
- The finished product should be placed under a press for several hours, so the cereal will better adhere to the glue and will look more neat;
- Excess grains need to be removed from the panel, this is very simple to do: you can just turn the picture over and that’s it. Carefully inspect the product to ensure there are no empty spaces or bald spots.
Related article: Crochet booties: video tutorials for beginners with photos and videos
A picture made from cereals is perfect for decorating a kitchen or any other room in an apartment, it depends on the subject of the picture, it’s just that such a craft will look most organic in the kitchen. You can also give this product to your family and friends for any occasion, because gifts made with your own hands are much more pleasant to receive.
What do you need for work?
Grains of various crops and plants are needed as materials. For this purpose, grains of peas, coffee, corn and other crops are used. As additional materials, you may need various leaves, you can use beads, pieces of fabric, and so on, that is, everything that can be used to decorate the picture.
The tool kit includes the most common items: tweezers, gouache, which is used for painting grains, PVA glue, pencils, superglue, silt and aerosol varnish. The needle is used to adjust the pattern of the painting if necessary, and the finished canvas is coated with varnish.
Thick cardboard is mainly used as the basis for the future painting; packaging boxes from a hair dryer, TV and any other equipment, as well as other hard materials, are also suitable. To prevent the paintings from losing their shape and getting wet from the glue, they are not made of thin cardboard and paper, the base must be dense.
Clock decoupage - master class with simple, step-by-step instructions and photo examples
The finished work will need a frame for framing. It can be made of wood or plastic, or any other material.
Beautiful panel
In the photo you saw a step-by-step master class on making a picture from various grains. Of course, the general principle of action is clear, but still requires some explanation. So, for work you need to prepare:
- A variety of cereals, beans, pasta. They should all be different colors to make the picture bright and expressive;
- Glue;
- A sheet of thick cardboard or plywood;
- Template of the desired image;
- Paints and brushes.
So let's get started. First you need to paint the background of the painting in the color that you have chosen for your composition. For convenience, the cereals need to be sorted, here you can adhere to various classifications, as you wish (by color, by shape, by size, etc.) Now on the basis you need to draw the selected picture, even if you don’t know how to draw at all, don’t despair, always you can use a stencil.
Now you need to apply glue to one element of the drawing and immediately pour the cereal planned in this place according to the plot onto it. When the glue dries, shake off any excess grains.
It is very important: you need to apply the glue in fragments, because if you smear the entire drawing with glue at once, while you work with one area, the others will already dry and the image will turn out to be of poor quality.
When the painting is ready, for reliability it can be coated with transparent varnish; all that remains is to decorate the frame, and the painting is ready.
Related article: Interesting idea for a complex crochet napkin
Panel of seeds and cereals
When creating panels from seeds and cereals, seeds are used in addition to cereals.
The combination of cereals and seeds gives excellent results
Namely:
- Seeds – both pumpkin and sunflower;
- Corn;
- Dill;
- Cucumbers and other seeds that you find on your farm, and which your imagination only tells you to use;
- In addition to seeds, you can use beads, sequins, etc. – the result will be a very original and harmonious combination.
The surface of the panel is coated with waterproof varnish - now your painting can be subjected to a light damp wipe.
We create an original picture
To make it you will need:
- frame;
- pencil or printer;
- cereal;
- PVA glue;
- thick cardboard;
- sample.
A master class that describes in detail each stage of creating a panel will help you make sure that this is a fairly simple process.
Technology for making panels from cereals using templates:
- Using a pencil, draw a template or choose the one you need online and simply print it out, then cut it out. Templates can be different: animals, nature, cities, or favorite cartoon characters. It is better to choose templates with large details, and it will be easier for you, and they usually look more beautiful.
- Glue the template onto the cardboard that will be the base of your painting.
- Spread the design with PVA glue and begin filling the parts with grains of a matching color. For example, buckwheat is suitable for a horse’s mane, and a human body can be made from semolina. The main thing is to use your imagination.
- You can decorate the background with rice colored in the color you like.
- Place your item in the frame.
Related article: Eight-piece cap: pattern for cutting and sewing
Panel of cereals (video)
In conclusion, it should be noted that not all materials for creating panels are listed. Here, undoubtedly, your own imagination will play a decisive role, as well as the variety of your kitchen supplies. Anything can be used: toothpicks, table napkins, plastic spoons and forks, cherry or apricot pits. In short, the final decision in selecting the necessary materials is yours! Go for it, and the result will not keep you waiting. Make your kitchen not only original, but also unique!