It's time for autumn children's crafts. Here you will find two dozen examples, how to make a hedgehog from pine cones, this is the most popular craft in this topic. There are different ways, depending on your imagination. The easiest one is to do this hedgehog made of cones and plasticine, if you want a more thorough craft, make hedgehog made from cones and a plastic bottle, see this article for step-by-step instructions. You can use anything – cardboard, felt, felt, even your mother’s tights.
Just don’t show your child “how to do it right”, let them use their imagination, do as they want, you will only help with technical issues. And of course, do everything together, for children this is an experience, for you an opportunity to spend more time with your child.
How to make a hedgehog from pine cones
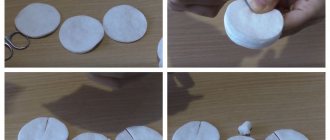
A simple and quick children's craft, a do-it-yourself hedgehog made from pine cones . Prepare felt, a small pom-pom, eyes (you can buy them, but they don’t sell anything right now), glue and scissors.
- Cut out triangular faces from felt
- Glue your eyes
- Glue the pompom (nose)
- Attach the felt with the image of a face to the cone part of the pine cone
- The hedgehog from the pine cone is ready
Remember, when you do crafts with little ones, they will have an experience they will never forget.
Photo source: www.annmariejohn.com/2015/10/pinecone-hedgehogs-craft.html
Hedgehog made from pine cones and a plastic bottle step by step
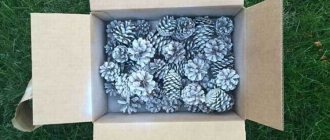
Preparing the buds
After the cones are collected, they need to be processed. Wash them thoroughly in warm water and soak in a 1:1 solution of vinegar and water. Dry the buds. This is if they are already opened. If the buds are closed, you can skip the vinegar treatment; you can just wash them thoroughly in fairly hot water. Then take the following measures:
- Boil for 15 minutes;
- Bake for 1 hour in the oven;
- Process in the microwave.
At one time I tried every method. But I only liked the one where the pine cones are placed in the microwave. When boiling, a lot of steam and smell are released, and the pan becomes hopelessly damaged. In the oven for too long and there is a risk of over-roasting the buds. But in the microwave it’s just perfect. I lined a plate with paper towels, placed the pine cones on it and turned it on for one minute. After that, I opened the door, released the steam, turned the pine cones over and turned on the microwave again for 1 minute. It took quite a lot of these minutes - about 7-10 - for the cones to open completely. But it’s still much faster than fussing with the oven and pan.
How to make a hedgehog from a bottle and pine cones?
All basic and auxiliary materials are ready, it’s time to get down to action. Prepare the cutest cones of the same size, which will be in the first row, that is, closer to the hedgehog’s face. Take the pine cone and place it on the bottle so you can see where it will be in contact with it, because that is the area where you will need to apply glue. Turn on the glue gun, wait 5 minutes, then apply a little glue to the side of the pine cone and quickly press it onto the top of the bottle. In the same way, glue the entire first row around the hedgehog's face.
Make the second row in the same way, pressing the cones tightly against each other and selecting ones that are relatively similar in size and shape.
Cover the entire bottle with pine cones. Here it is no longer necessary to glue it to the side, and it won’t work; most often the cones are subsequently located in a straight position.
Side view.
The back of a plastic bottle covered with pine cones.
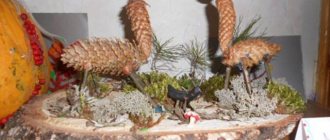
The main work is ready, now the most interesting part is giving the appearance of the hedgehog.
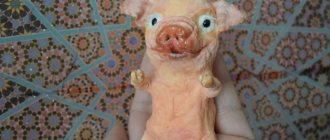
My daughter and I have this hedgehog. That's why we glued her eyes with eyelashes. Eyes can be made from plasticine or paper. We painted the lid with gouache, but it could also be covered with brown plasticine.
And on the side of the cones we attached rowan berries and several leaves with double-sided tape. The craft is quite durable; it can later be glued to a board or foam plastic.
A hedgehog made from pine cones and a plastic bottle is ready, or rather a hedgehog. And it’s not scary that her nose is too big, she’s still a beauty and a fashionista.
From plastic bottles
Plastic containers are used for various crafts. This material is easy to cut and takes the desired shape.
After watching a master class on how to make a hedgehog yourself, you will be able to create an original figurine with your own hands. The bottle will become the animal's body. The paws are attached to it. Use a marker to draw eyes and a nose.
From the second bottle, parts are obtained from which fringe is cut. They are attached to the body using double-sided tape. The product should be decorated.
Craft options and material selection
To ensure that the need to create a craft does not confuse you, you can study this issue in advance and stock up on materials and ideas. Crafts come in the following varieties:
- From natural materials;
- From recycled materials (plastic bottles, caps, matches);
- Made from plasticine;
- From paper.
The second and third options are a little simpler, but the first is much more interesting. One of the most convenient options is to make a hedgehog craft with your own hands. Usually such a product turns out very cute, and most importantly, there are many ways to make it.