Needlework
06.28.2018 Anastasia Prozheva
Lately, handmade work has become highly valued. Today we invite you to talk about the following - “Do-it-yourself fabric paintings.” If you approach this issue very responsibly, you can make a beautiful and original painting that will look much more expensive than paintings by famous artists. Of course, it is not recommended to use cheap fabrics in this case. Today, the market offers the buyer many different types of fabrics, both in color and density.
So, we will present to your attention a few step-by-step instructions. We wish you to be patient. Let's get started.
On a wooden frame
To make a painting you will need the following tools and materials:
- Wooden frame (choose the size you want the picture to be);
- Textile;
- Cutter's scissors;
- Staple driving gun.
First of all, you need to iron the fabric. This is required so that the picture is free of various swellings or other irregularities. Lay out the fabric on the table where you will work. Place the frame on top. Using scissors, cut out the required piece of fabric, do not forget to leave additional spaces on each side, about seven centimeters.
Then you need to stretch the fabric over the frame so that no fastenings are visible. Then we take a staple gun and, stretching the fabric, secure it to the frame. It is necessary to tighten it so that there are no irregularities.
That's all, the fabric painting is completely ready! You can safely hang it on any wall of your apartment or house.
Tools and materials
First, you will need to choose the material that you will use for the frame and stretcher. They can be made of wood or foam.
The wood is more rigid and the material adheres to it better. If you choose a material such as foam plastic to make a picture, then you will not need a frame at all, since the fabric will simply be pressed into the surface of the foam plastic.
Note! Features of choosing wall paint: types and characteristics of products
To make it, you will need scissors with which you will cut the material. It is advisable that these are special tailor's scissors for fabric. You will also need screws, small nails and a hammer, as well as a staple gun and frame slats.
When choosing a material for a future painting, everything is limited by your imagination and the wide choice of fabric in stores.
When purchasing the selected material, it is worth considering that if your frame is made of wood, then the piece of fabric should be slightly larger than your frame, about 7 cm.
Foam option
For manufacturing you will need the following tools and materials:
- Textile;
- Styrofoam;
- Cutter's scissors;
- Satin ribbon;
- Loop for attaching a picture;
- Glue;
- Pins.
Using the finished polystyrene foam, we cut out the fabric. We glue the fabric onto it.
Article on the topic: Patterns of primitives. Doll with a bear
The side parts also need to be made to match the picture. To do this, take a satin ribbon of the required size and glue it to the sides, as shown in the photo:
In order for the completed picture to be attached to the wall, we attach a loop for fastening to the back of the foam.
Using this manufacturing technique, you can make several paintings for one composition.
The painting can be of any size and shape. Imagine and experiment.
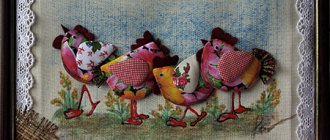
One option is to create a modular picture. As an example, such a picture is shown in the photo below.
Three-dimensional picture
Creating three-dimensional paintings is not so easy, but they look very expensive and rich. The most important rule is to learn how to cut out and make three-dimensional shapes.
For work we will need the following tools and materials:
- Picture frame;
- A sheet of plywood to fit the frame;
- Textile;
- Burning apparatus;
- Iron with steam function;
- Fabric paint (if required);
- Scissors;
- Glue;
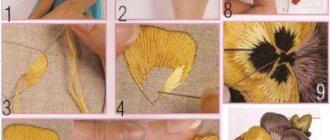
Using glue, we fix the fabric to a sheet of plywood (base). If necessary, apply paint to the fabric. Then we attach the drawing and use a burning machine to make an outline. Then we cut out our drawing and use an iron to attach it like an applique.
The frame for the figures can be made of wire. To do this, we wrap it with cloth and attach it to the picture. If your painting has elements that require a certain shape, then this is not difficult to do. We simply fill them with filler, for example, padding polyester or foam rubber. Be careful in this matter; threads should not be visible in your image.
Then we insert the finished picture into the frame. That's all, you can safely hang it on any wall of your home.
From scraps of fabric
For work we will need the following tools and materials:
- Foam plastic - we use it as a base;
- Stationery knife;
- A simple black pencil;
- Fabric glue;
- Iron thin nail file.
Related article: DIY scrapbooking paper from wallpaper using a master class
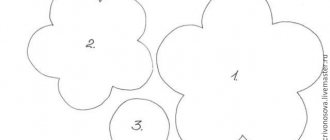
So, on the prepared polystyrene foam we draw the necessary picture. In our case, these are houses.
It is not recommended to use paintings with small details. It will be inconvenient for you to work.
We recommend you this scheme:
You need to walk along the drawn lines with a knife at a depth of 5 millimeters, lubricate them with ordinary glue.
We cut out the necessary parts from scraps of fabric, only they should be a little larger. We insert each of the scraps into the finished slots.
Now we move on to decorating the edges of the foam. To do this, take the fabric and secure it with decorative nails.
This concludes the master class. The painting is completely ready, and you can admire your work of art.
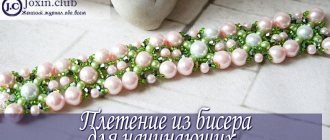
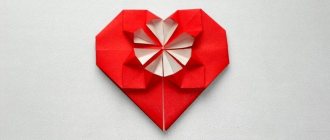
With this method of creating paintings, you can create works of art that no one else has. Basically, in the manufacture of such panels, figures such as flowers are used from scraps of fabric, which can be painted with paints according to your desire. Having got your hands on these masterpieces, you can create much more interesting and original paintings, not with ordinary colors. You can also use beads as an addition to the main pattern.
Schemes of paintings that can be made from pieces of fabric or denim:
Features of Kinusaiga products
The “Kinusaiga” technique is different in that the products are created without the use of needles and threads. They are not sewn together, but attached to the board. Traditionally, Japanese paintings were created as follows:
the artist drew a sketch of the design, which he then transferred to a wooden board;- depressions about 2 mm deep were cut into it along the contour of the pattern;
- the kimono was cut into pieces of a suitable shape with an allowance of only one millimeter;
- they were carefully tucked into the slots.
This is how the masters created magnificent works. The subjects were usually landscapes, less often stylized images of people. Human faces were not usually depicted - this was difficult even for the best artists.
The Japanese technique "Kinusaiga" has spread throughout the world. Today it is very popular among needlewomen. To create modern products, foam plastic is used instead of boards, and ordinary thin fabrics are used instead of silk kimonos. The advantages of paintings made using the “kinusaiga” technique:
- patchwork panels will decorate any room decorated in Provence or country style;
- they will be an excellent gift for friends or family for a holiday or housewarming;
- No expensive materials are needed to make them - everything you need is in the house;
- It will take no more than 3-4 hours to make any panel.
There are two types of patchwork paintings: patchwork and quilting. They differ in the technique of execution and fastening of the patches.