Wood carving is one of the most ancient arts of mankind. Of course, in the era of its appearance, this type of activity did not have special devices, and they cut out whatever they needed.
Our ancestors appreciated wood itself as a material; they identified in it a number of positive properties in the form of:
- Low density.
- Increased thermal insulation.
- In convenience and ease of processing.
Wood, due to its ease of processing, allows you to make a wide variety of designs on it, both simple and incredibly complex, and in particular, flat-relief carving is one of the most successful and widespread methods.
Which wood is more suitable for types of flat carvings?
In total, on a flat surface, the thread has the following division:
- wood carving With this type you can apply any background or pattern to a wooden plane. For example, this variety includes such subspecies as pargori, or Abramtsevo-Kudrin carving.
- The next type of thread, sawing , also belongs to the flat type, but is performed not with ordinary carver tools, but with a jigsaw.
- The next variety is slotted . This type of carving is applied only to flat surfaces, with some parts subsequently removed.
As for what kind of wood may become more relevant, the answer is ambiguous. If experience is not enough, you should work with soft breeds. If the master is far from a beginner, the choice becomes wider, for example:
- Pine, aspen, linden are soft species.
- Ash, beech, oak and walnut to hard ones.
- Very hard ones are hornbeam, acacia and yew.
To perform this type of thread you should prepare:
- Set of files.
- Electric drill.
- Ruler.
- Planer with jigsaw.
- Knife-jamb with hacksaw.
- Strubnin.
- Eraser with compass.
- 2 chisels (up to 2 cm semicircular and flat).
Types of wood carving
Wood carving is a traditional craft of many peoples. This type of applied art has a long history. And during this time, masters created several types of technologies, such as:
- flat-relief carving;
- blind relief carving.
In addition, experts distinguish wood processing in the Kudrin style (Kudrin-Abramtsevo) as a separate variety. The style owes its name to the place of its birth - the village of Kudrino in the Moscow region. It is distinguished by abundant floral ornaments, garlands of flowers, in which peculiar animals and birds are placed.
The type of wood processing gets its name from the word “relief”, which in our case is understood as areas raised above the general surface. Flat-relief carving, in turn, is divided according to execution methods into:
- bas-relief;
- high relief.
The first type has a high relief, the second has a lower relief. A sign of a blind type of wood processing is a continuous carved surface of the background without smooth surfaces.
Step-by-step execution of flat-relief carving
In flat-relief carving, the background is located below the level of the design, and it is selected with a chisel of one type or another. One of the types of artistic wood processing is contour carving. It differs from relief in that a pattern is applied to the surface of the material, the contours of which are selected with a special tool.
The protruding part remains flat, and only the contours emphasize the image, while the relief carving has a figured surface of the design.
Note that slotting involves a complete selection of the background, that is, the drawing seems to hang in the air.
Types of flat-relief carving
Flat relief thread can be:
- With an oval background.
- With a selected contour.
- With pillow background.
- With undercut and selected contour.
In order to make a flat-relief carving with an oval background, you should prepare sketches in advance. The process itself begins with cutting out grooves along the background, which are subsequently rolled out both from the side of the pattern itself and from the side of its background.
After this, using a jamb knife, you should make cuts along the entire contour. Where there are curves, cuts should be made only with semicircular chisels. To remove the background, you can take the same blunt knife or a straight, narrow chisel.
It is extremely important that the cut angle is exactly 30 degrees to the plane of the workpiece. No more and no less.
After the rounding is completed, it is recommended to sand the product with zero grade sandpaper.
The next type of wood carving is with a cushion contour; it differs from an oval carving in that the contour itself is located lower than the plane of the pattern.
This form of thread has positive and negative properties. The fact is that if the sketches for a given work are large, cutting along the contour may take more than one day. In addition, such activities do not allow for the lack of professionalism of beginners, since it is simply impossible to do without dexterity and experience.
Another type of carving, with a selected background, is even more interesting. Its essence is that the contour around the pattern must be removed at a 30-45 degree angle throughout the entire wooden workpiece, and this is where the processing ends. Such a part does not need to be supplemented with other cuts, much less polished.
As for the selected and undercut contour, it is radically different from others in that the drawing itself is always in an elevated state from the surrounding background. This form of execution is considered particularly complex, but also unique and original.
If you look at some photo with completed patterns, not everyone can immediately notice the difference between them. Many masters do not use one technique in their creations, but rather a combination. For this reason, it is difficult to draw definitive conclusions. It is much easier, if you have the desire and opportunity, to take the necessary tools and try to do it yourself, naturally, to start with something simpler.
Flat relief carving
Hi all! As always, Dmitry Derevorez is in touch and today the topic of conversation is flat-relief carving. According to statistics, about 50% of all carvers work using this technique.
I tried to think about when flat-relief wood carving appeared and came to the following conclusion: this type of art originated in the ancient world, when primitive people carved hunting scenes or symbols understandable only to them on stones.
The logic is simple. In fact, drawings on stones are the same carvings, only on the surface of the stone. Stone lives for a long time, so we have the opportunity to see the writings of the ancients and vice versa, if we assume that even then primitive people were picking something on the tree, then we don’t know about it only because the tree has simply decayed.
Perhaps this is what the first “knives” and “chisels” looked like))).
What is flat-relief carving? The obvious answer is contained in the name: this is a plane carving at a shallow depth (3-20mm). The popularity can be explained simply - at the initial stage of learning, it is much easier to cut out some kind of outline or simple design on a plane than to cut out the same thing in volume, but only at the initial level...
Professional carving in this style from a great master is a masterpiece that you can admire endlessly. You can compare it with the paintings of outstanding painters. Next, I propose to move on to illustrative examples of flat reliefs performed by virtuosos of the craft.
In the review “Valery Prostyankin and his woodcarving” I have already described in detail the work of this outstanding Tula master. And now we bring to your attention highly artistic creations that are made in the family workshop of the no less talented and skilled Russian Viktor Dubovik:
Delight! Great prospect! Super realistic stories! Great job with a sharp cutting tool! Incomparable tinting and finishing! The result is almost a 3D photo!!!
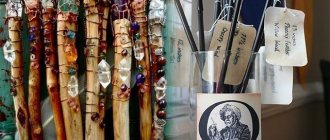
I would like to immediately draw your attention, dear readers, to the instrument. It’s always better to see a master’s chisels once than a hundred... This is the rich arsenal a master has. Victor's contacts ;+7; ; Russia, Bryansk
Another contemporary of ours who knows how to masterfully create on the surface of wood is Kronid Aleksandrovich Gogolev. Quote: “In different reliefs, the artist managed to use the inherent warmth of natural material in wood, plasticity, the play of shades of natural color, to convey the shimmer of water, the breath of forest thickets, the mystery of epic tales of the past...”
Unfortunately, the maestro passed away in 2013, but the creative mark he left is the pride of his descendants throughout the country.
Flat-relief carving has many varieties and is not necessarily cut on a flat surface. For example, geometric carving is a special case of flat-relief carving. Boris Fedoezhin applies carved patterns to any curved surface and does it at the highest level.
The photo below shows the work of Mikhail Rubinov.
Flat-relief carving is good for decorating the interiors of churches, as well as doors, furniture, boxes, wooden elements of weapons, kitchen utensils,... Signs, panels, paintings,... are most often made in this style. For connoisseurs of beauty, the article “Buy wood carvings” may be useful.
That's all for today! Good luck!
Basics of wood carving techniques
The jamb knife is the main tool of the carver. To begin with, hold the knife with the blade towards you and move it along the pattern. Of course, you shouldn’t press too hard, and you should hold it slightly tilted to the side. After this, tilt the knife in the opposite direction and trim.
When the contour has already been completed, it should also be trimmed so that the end result is a straw. Any rounding of the contour should be done with only one corner of the chisel and, if necessary, you can change the radius, which depends on the blade of the chisel itself and its width.
You need to act clearly, but measuredly, because with the right approach, the straw itself separates from the workpiece. Otherwise, all the work will have to start from the very beginning and with a deeper cut.
If it is necessary to cut out curls, they should only be done with a tool with a semicircular blade. Making them is very simple:
- The semicircular blade should be slightly deepened into the material and then turned with the hand.
- Then rotate around its axis.
- This movement should be performed until the curl lines connect.
In cases where this technique is new, it is recommended to use sketches when working, since a sketch on paper can help you navigate and do everything in the right order.
If you watch a video lesson on this topic, it will become obvious that you can make all these patterns yourself. In addition, the process itself is quite interesting and exciting. The main thing in this matter is perseverance and if you figure out what and how from the very beginning, everything will definitely work out.
What tools are needed for the job?
Working with wood is carried out in several stages.
Wood carving stages
And each of them needs its own set of tools and accessories. The first stage is preparing the material. To do this, well-dried wood is selected, the surface of which is leveled and sanded. It is better for beginning craftsmen to use materials made from softwood, pine or linden. Working with them does not require much effort, and if you make a mistake, you can take a new board, because these species are inexpensive and accessible.
As the level of skill increases, the carver will move on to processing more beautiful wood, such as alder, maple, ash, as well as harder wood - oak, beech, etc.
The second stage is choosing a pattern. Having chosen the one he likes, the master makes sketches for carving, that is, transfers the image to the surface of the wood. Experienced craftsmen advise starting the first steps in processing wood into relief with simple geometric patterns.
A selection of sketches and patterns for relief carving
Having mastered the technique and gained experience, you can move on to complex plant patterns.
To work you will need:
- chisels;
- gravel;
- cutter knives;
- incisors;
- hammer for chisels;
- tool straightening kit.
Experts note that each type of wood requires its own set of tools. To treat the surface you also need sandpaper of different sizes and a set for sanding wood. Slotting also requires a set of needle files.
Types of jobs
Wood carving does not provide for precise systematization - the current genre can combine several methods of manual wood processing at the same time. But there are still several main varieties.
Through thread
It is also called slotted or openwork carving, when the wood and background along the borders of the pattern are completely removed. It can be primitive and openwork. The edges of the patterns are processed. This method is used in the manufacture of doors, trims, frames and decorative parts.
Flat grooved thread
It is characterized by the fact that the main thing here is a flat background, while the carvings themselves are recessed into it. There are several varieties of such carvings:
- contour - a pattern on a flat base is obtained with the help of grooves, which can be triangular or semicircular;
- bracketed - the ornament is created by semicircular notches-brackets on a flat background;
- geometric (triangular, triangular, trihedral) - two types of elements are used here: a trihedral pyramid, recessed inside, and pegs. In order to achieve the desired result, special knives are used - joints. Due to the pyramids and pegs, at different angles and at different distances it is possible to obtain drawings in the form of interesting geometric figures: honeycombs, rhombuses, swirls, chains, lights, etc.;
- black varnish carving - here the background is a flat base coated with black varnish or paint. The pattern is created with the help of grooves. The result is a strange play of chiaroscuro due to the different depths and profiles of the grooves, and the black background well emphasizes the contrasting plot.
Important! Very dry air causes cracking of wood, therefore, in order to preserve the original appearance of the carving, it is necessary to maintain the best level of humidity in the room, even before purchasing an air humidifier.
Relief carving
All elements of relief carving are placed either above or on the same tier with the background surface. It is considered the most difficult type of carving. Using this technique, various convex subjects and designs are created: emblems, coats of arms, animals, etc. Moreover, the play of chiaroscuro plays a significant role in the sophistication of the finished product.
House carving
It is actively used for decorative decoration of the exterior of houses with the help of various ornaments and figures on wooden elements. In this way, all sorts of protruding and unprofitable parts of house facades can be decorated: cornices, platbands, balusters, roof blades, porch pillars.