The chestnuts themselves almost fall into our hands, as if they are asking us to make something interesting out of them. And today we will see what crafts can be easily and simply made from chestnuts, even for kids. And which ones are worth working on so that it turns out perfectly beautiful. We'll mostly stick to a fall theme, but we might do something all-season!
If you have already made crafts from vegetables and leaves and need new ideas, then I offer you a huge collection of crafts. There are simple ones for kids, and there are also real decor that can decorate your home.
Quick and beautiful crafts from chestnuts on the theme of autumn
These crafts, although simple, are interesting for kids. And, if the little ones try a little, their work will turn out beautiful!
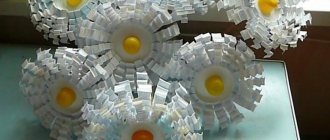
Fungus.
- We choose a chestnut that is similar in shape to a mushroom cap.
- We make a mushroom stem from plasticine. And we attach the leg to the base of the nut.
- Now we use green plasticine to make a base that looks like a clearing.
- We fix the “mushroom” in the “clearing”.
Caterpillar.
- We fasten many, many autumn leaves with thread. You can even fasten 10 pieces together and insert a chestnut between them.
- A chestnut is attached to the front. And it has eyes and a nose.
It is best to secure chestnuts with glue. But, if you want a movable caterpillar, then the leaves are stitched with a thick thread in the middle. A hole is made in the chestnuts and the nut is threaded through a thread using a needle.
Or you can make a snake, as in the photo on the right.
Painting chestnuts.
For painting, you can use a permanent white marker, acrylic paints or gouache. The designs can be simple - patterns, ornaments, just stripes or polka dots.
Or you can draw beautiful flowers or a whole picture or a funny face.
And if you glue the eyes and tail, you can get a beautiful animal.
Cereals and corn for crafts
Spikelets of wheat have long been considered a symbol of fertility. A bouquet of several spikelets of this or some other cereal will decorate the holiday table. You can weave an unusual cereal wreath on the door, decorating it with small yellow leaves.
Corn can be used in fall arrangements or used to decorate a wreath. To decorate the door of a country barn, corn is also useful - you need to take an old pitchfork, put the cobs on the teeth and hang them with the handle down. Not only corn cobs are used for decoration, but also corn leaves, which make beautiful flowers and interior dolls.
Related article: How to wash windows on a loggia yourself?
Crafts from chestnuts with cones and acorns for children for school
With materials such as acorns, pine cones and chestnuts, you can make a lot of different projects. I will show only a few directions. They are completely different from each other.
Wreath.
Cut out a base of the size you need from thick material.
Glue cones, chestnuts, and nuts to the base. You can add leaves or spruce branches.
You can make a wreath only from chestnuts.
Composition in a jar.
- But here everything is simple! I will describe the photo in the center. Moss spreads to the bottom of the jar.
- The gifts of nature are laid out on the moss. For example, you can make a spruce tree from a pine cone. And from a chestnut or acorn - a mushroom.
Topiary.
- We glue cones, physalis, chestnuts and acorns to the foam ball. It is better to pre-paint the base in a dark color so that it is not visible.
- We put the ball on a thick branch and fix it with glue.
- We attach the bottom of the stick to the foam in the flower pot. We decorate the pot.
Below I will show you how to make topiary from chestnuts. But I simply couldn’t pass by this bright craft.
How to make a chestnut house with your own hands
The base of the house will be a cardboard box. If you don't have a suitable size box, you can use a juice box or even a five-liter plastic bottle. In the bottle you only need to cut off the neck itself, and you're done. But for a juice box house you will need 3 packages: two of them are the house itself, and the third is the roof.
- The top two sides are raised in the box. They are glued together with tape. It turns out like a roof slope. All that remains is to glue the triangles into the resulting holes.
- On the sides of the box we draw a door and windows.
- Glue the chestnuts onto the sides of the box and onto the glued triangles.
- We decorate the roof slope with autumn leaves.
If you want, the door and windows can be cut out or decorated with some patterns.
The base can also be made from cardboard, remember how we made houses from cardboard for dolls. And already glue chestnuts onto it. Or you can simply hold the chestnuts together with plasticine, like bricks. Ideas for inspiration in the photo below.
Making a house
This kind of painstaking work is more suitable for older children. And younger children will have to help.
Preliminary blanks
To make a wonderful house out of chestnuts we will need:
- scissors;
- cardboard;
- glue;
- dry leaves;
- chestnuts.
Work process
Just like when building a real residential building, young architects need to decide on the size of the chestnut house. The subsequent steps for making a chestnut house are as follows:
- You need to cut seven rectangles, one of which will be the bottom of the house. Four will be walls, and two will be roofs. Then you need to cut out two triangles for the roof.
- Now you need to glue the house model together with glue.
- The walls of the house need to be covered with chestnuts as tightly as possible so that there are no gaps.
- The roof should be covered with dry leaves.
You can make a clearing around the house and decorate it.
Caterpillar, bear, hedgehog made of chestnuts and plasticine for kindergarten
Now let's try chestnut in different roles. Let's make all sorts of little animals out of him.
Caterpillar.
How to make a caterpillar?
- We connect several chestnuts with plasticine.
- On the caterpillar's head we glue antennae made from thin twigs with plasticine. We make plasticine balls at the ends of the antennae.
- The caterpillar's eyes and smile are also made from plasticine.
Or you can make a real toy by making holes in a chestnut tree and connecting them with rope or wire. Holes can be made with a corkscrew or drill.
Bear.
- First, on one chestnut, the smaller one, we make eyes, ears and a muzzle out of plasticine. If it’s difficult to make a baby’s face, you can mold a thin strip of plasticine and glue it in a half-arc, like a smile.
- Using plasticine, we glue the Bear's head to a large chestnut, with a lighter spot turned towards us (like Bear's belly).
- Glue 4 balls to the large chestnut (Bear's body): 2 larger ones (legs; we glue them at the bottom) and 2 smaller ones (arms; and they are attached at the top of the body).
Hedgehog.
I'll describe the hedgehog at the top left.
- Instead of needles, we use the prickly “shirt” of chestnut.
- The body can be the chestnut itself (then you will need to glue an oblong nose to the chestnut). But it’s better to completely mold the body from plasticine, and immediately make the nose thin and long.
- We make eyes and a nose from beads.
Did you like the crafts? Share your work, show photos of your bear cubs, hedgehogs, dinosaurs.
Here are a few more photo ideas for your collection.
I don’t know what kind of animals these are, but they are quite suitable as a craft with kids.
And here is a cute smiling monkey and funny owlets made from chestnuts and acorn hats.
You can make a spider for Halloween. A web can be made from toothpicks or twigs. We made it from branches. More details on my Instagram.
Pumpkin home decor
Pumpkin is the queen of fall decor. Wreaths, candlesticks and vases are made from it; various patterns can be cut and painted on it. Small pumpkins can be strung on a cord to make an unusual garland. Large pumpkins will decorate the porch, stairs or paths in the garden.
What else can be made from pumpkin?
Whatever of the autumn gifts you use to decorate your interior, it will definitely be bright, lively and beautiful! And the realization that all this was created with your own hands will bring additional joy!
The best posts
- New Year's crafts from firewood: a woodpile of ideas
- Felting felt boots at home: master class with photos and videos
- Liquid wallpaper. Advantages and disadvantages of liquid wallpaper
- Crochet mohair hat with double lapel: patterns with photos and videos
- Do-it-yourself bedside table restoration: removing defects and restoring furniture
- Aluminum horizontal blinds: features and care
- Pillows knitted in a braid pattern
- Provence in the interior with your own hands
How to make a chestnut basket
Such a basket can also be useful at home, like a fruit bowl or a candy bowl. But what do you need to make the basket beautiful?
Inflate the ball. This will be the base to which we will glue the chestnuts. Draw a stripe on the inflated ball exactly in the middle.
We wrap tape around this strip, sticky side out. Glue the chestnuts to the tape. And so on in a circle below we again wrap it with tape and glue it again.
Glue the rows together. And now you can deflate the balloon.
We make the handle of the basket in the same way using a ball and tape.
We fix everything with glue and tape several times so that the craft is strong.
Glue the handle.
You can use an old plastic bowl as a base. And glue the chestnuts directly to it.
DIY chestnut gifts
Teachers will be pleased to receive a gift that the child made himself. Therefore, it is worth choosing work that does not contain complex details. However, to look cool!
Butterfly.
- First we make a base of leaves. We glue 2 pairs of bright autumn leaves to each other: one larger, the other smaller. You should get butterfly wings.
- We decorate the leaves to your liking, using smaller leaves and plasticine.
- In the middle we glue several chestnuts onto the leaves, and between them there are circles of plasticine.
Little mice.
- We glue ears made of shells, nut husks or acorn caps to the chestnut. The material doesn’t matter, the main thing is that it looks like mouse ears)))
- Glue on plastic eyes and a beaded nose.
- We draw hands and a smile. So we got little mice!)
Let's make the mice so cute that no one will be afraid of them!
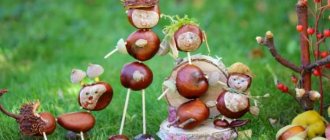
Little people.
Cool and cheerful little people are made from chestnuts, no worse than from acorns.
Master class on how to make topiary (tree) from chestnuts
When it comes to topiary, there are a lot of ideas! I showed above an example of topiary made from several different elements. How to use only chestnuts and make the craft colorful and bright? I will show you now!
For example, if the visible voids through which the base is visible are covered with green paper, like leaves. Or, wrap some chestnuts in sisal fiber and glue on decorative figures of birds and fruits. But there is another option.
If we use a foam ball, we need to paint it. The same needs to be done with the ball that we made from paper.
While the ball dries, wrap the jar with twine.
We have made various works from foamiran more than once. Now let's cut the strip. And we will make deep cuts from one edge.
Let's fold the strip at the tip of the wire, don't forget to fix it with glue.
We do the same with a wider strip and wrap it over the white blank - the middle of the flower.
When we glue the chestnuts, we will place these flowers between them.
Wrap a stick or twig with green ribbon (you can simply paint it or wrap it with twine).
Let's glue the ball to this stick.
And we’ll place the stick itself in a jar. We fix its position with plaster or stearin.
To prevent the stearin from being visible, we place colored thread, sisal or any other decorative material on the jar.
All that remains is to decorate the craft with ribbons.
What do you think of these ideas?
I hope you and your kids really enjoy them!
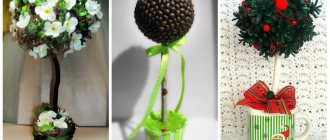
Chestnut topiary
It’s easy to make crafts from chestnuts with your own hands for interior decoration.
An original topiary, decorated with nuts instead of coffee beans, will perfectly complement your home decor.
To work you need to prepare:
- flower pot;
- stick and ball;
- nuts;
- high-quality glue;
- gypsum;
- clear varnish;
- decorative elements.
Operating procedure.
- Using high-quality glue, form the base ball of the topiary.
- Carefully wrap the stick with ribbon and secure with a drop of glue.
- Secure the workpiece in the pot with plaster.
- After the product has dried, decorate the soil. It is easy to paint or cover with moss.
- It is easy to decorate the craft further to your liking and coat it with colorless varnish.
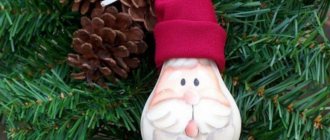
It’s easy to make a New Year’s tree in a similar way. It is convenient to use a cardboard cone or a ready-made base of a similar shape as a base.
Continuing the New Year's theme, it is easy to make a family of funny tadpoles-gnomes in bright caps from chestnuts.
An original visual aid made from nuts with numbers or letters printed on them will help your child learn the basics of counting or the alphabet.
Having collected a large number of chestnut fruits, it is easy to make a beautiful wreath from them, decorate a vase or create an original wall panel.
Creating original crafts will be a great way to spend time with your family.