The approach of the New Year holidays is a great time for a variety of gifts and surprises and a great opportunity to prepare for the next year.
A stylish and original calendar will be a beautiful and useful craft, made with your own hands; such handicraft can turn into a good family tradition.
Looking at the proposed photos of a hand-made calendar, you can visually evaluate the ideas and options for implementing a simple craft.
Such a product, with the soul put into it, cannot be compared with purchased calendars, and can be used to decorate your own home or as an original and unusual gift.
Calendars: beautiful and original home decoration
In order for a calendar made by yourself to fit into the interior design of any room, you need to carefully select the style of its design.
For decoration, you can use any available means and at home you can easily make different types of calendars, which include:
- reversible and wall structures;
- calendars for planning for the month;
- interesting advent calendars for the holiday.
The unique tradition of children's advent calendars, which came from European culture, helps to entertain the child and prepare him for the upcoming holiday.
Every day, opening a new day on the calendar, the baby performs a variety of tasks, and parents are given an excellent opportunity to prepare creative tasks.
Making a tear-off / flip-up desk calendar with your own hands
Today we will make a small desk calendar for 2018, behind which there will be a calendar for the whole year, and in front there will be our stencils for each month. And we will decorate our calendar for the New Year.
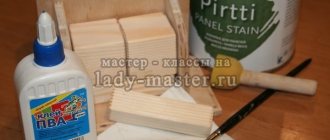
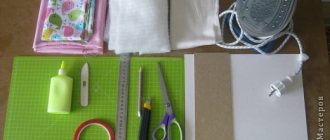
We will need: colored cardboard, glue, a marker or pencil, any beautiful New Year-themed clippings from magazines/newspapers, beads, miniature garlands, wax thread and our templates.
To print templates monthly, immediately select stencils with numbers from 1 to 12 from the attachment, select printing 9 images each, uncheck image by frame size, in total the printer will give us 2 sheets, then cut out each month separately (6cm*6cm). Take a bright marker or pencil and highlight the holidays with a circle or square, or maybe a heart, because we all love to relax
The second version of the monthly templates can be printed out in different colors and attached to each month with some small photographs of your own.
We print out a stencil for the whole year in size 10*15.
Now we take a sheet of colored cardboard and make folds on the wrong side, as shown in the figure. We draw the fold lines with my mother’s knitting needle, or with a pen that no longer writes, or with the rounded end of an iron ruler.
On side A we glue the calendar for the whole year, with the top to the main fold.
We hole-punch the templates with the months, place the templates on the cardboard, mark the locations of the holes and cut out the holes, then fasten them on side B with wax threads of the month on top of the first fold and closer to the right edge.
Interesting links on topics:
Making a New Year's train with your own hands
Coloring letter to Santa Claus
DIY cardboard house
Now let's decorate the calendar with various magazine clippings, lace ribbons, beads and New Year's toys. The last 3 cm fold can be connected to the back of the calendar with a paper clip, and notes can be inserted there. And on the outside we can attach a picture in such a way that we have a pocket, and in this pocket we could put either money or, again, a note. Our tear-off calendar is ready.
In order to turn our tear-off calendar into a flip calendar, you need to make 2 more holes at the main fold above the previous two, and make ties with wax tape as in the picture.
Which version of the calendar do you prefer: tear-off or flip-over?
comments powered by HyperComments
Other materials in the section
DIY candy sleigh for the New Year
How to make a Christmas tree from air plasticine step by step
Plasticine painting
What materials can be used for creativity?
When creating a calendar for children with your own hands or a stylish interior decoration, you can use a variety of materials.
This beautiful calendar easily combines and combines paper and cardboard, wooden bases and plywood boards, candy boxes and soft felt, fabrics and threads.
To give originality to the appearance of the finished product, preference is given to decorative ornaments and decor.
For the creative process, you can use last year's postcards and craft paper, family photographs and beautiful pictures, figurines of animals and birds, and any waste materials.
Beautiful cards
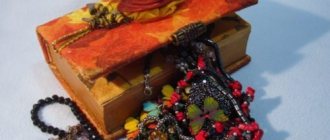
If we make a calendar out of paper with our own hands, then for each month we can use postcards collected over the year.
The upcoming layout is drawn on a cardboard base, a string is fixed on the reverse side using a glue gun, and postcards symbolizing a certain month are attached to it using decorative clothespins.
DIY electronic “perpetual calendar”
This perpetual calendar shows the current date and month. The calendar case is made of acrylic, and the display is illuminated using LEDs. Tools and materials: -Dark acrylic 3 mm; -Dark acrylic 5 mm; -Fixtures; -Colored paper; -Addressable LED strip WS2812; -ESP-01 module; -Buck converter; -DC plug with cable; -Power supply 5V/2A; -Wires; -CNC machine; -Soldering Station; -Jet printer; -Glue gun; -End mill 3 mm; -End mill with 5 mm countersink;
In this project, the master tried to take these problems into account. When displaying a month, numbers that are not present in a given month are simply not highlighted.
As for calendar translation, everything happens automatically. The color of the display in the calendar can be selected as desired. The current day glows in a different color, as do weekends and weekdays. The process is controlled by a microcontroller that synchronizes time with the Internet. For example, this is what February 2021 looks like (the first day of the week is Monday).
Step two: cutting The watch case parts are made from acrylic using a CNC router. The rotation speed of the end mill should be relatively low and the traverse speed relatively high to avoid melting the material. The craftsman uses a 3mm end mill for all cuts at a speed of about 10,000 rpm and a feed rate of about 420 mm/min. For countersinking, he used an end mill with a 5mm countersink. The milling depth was 1.5 mm. For the front part, acrylic 3 mm thick is taken.
Cutting files can be downloaded below. calendar_back.svg calendar_front.svg calendar_grid.svg calendar_support.svg
Step three: table While the machine was cutting out parts from acrylic, the master printed a calendar table on a sheet of paper. The table is made in two versions, white and black. The table contains offset numbers, the name of the month, an inscription (logo or motto), as well as some special signs that the master plans to use in the future. These special characters will be programmed for special occasions.
The table was printed on a regular inkjet printer, but on good quality paper with a uniform texture. To make the black background as opaque as possible, the table was printed 5 times on one sheet of paper.
Files for printing the table can be downloaded below. calendar_1.svg calendar_2.svg
Step four: installation The diagram and installation are very simple. First, the master cut 5 strips of 13 LEDs each + one strip with 7 LEDs from the LED strip and tinned the ends to make soldering the connecting wires easier.
These strips were glued into milled channels at the back of the calendar according to the diagram. Then I connected the wires according to the diagram, for data I used a blue wire, red for + 5V and green for ground. Then I connected the buck converter and the ESP-01 module. The last operation was soldering the power cord.
Step five: assembly After installation, I fixed all the parts with hot glue and continued assembly. I placed the table on the front acrylic frame. Marked and cut out mounting holes. I screwed the back part to the front frame. Trimmed the edge of the paper.
All is ready. In the video you can see how different dates are displayed on the calendar.
Source
Become the author of the site, publish your own articles, descriptions of homemade products and pay for the text. Read more here.
Family photos
You can make a beautiful DIY New Year's calendar by using family photographs, which should be prepared in advance.
The cropped photos are pasted onto the pages of the old desk calendar, and instead of months, the corresponding days are written down, which are counted down until the holiday.
Natural materials
Making a children's calendar with your own hands is quite simple; a large cardboard box decorated with natural materials is suitable for this.
- How to make antiseptic with your own hands: the best instructions for making antiseptic at home + photo reviews
- DIY medical mask - TOP 100 photos and step-by-step instructions with diagrams of the best ways to create
- How to embroider icons with beads - a review of the best ideas with photos and examples from masters
Cones and twigs, dried bouquets of flowers and leaves collected in the fall will be used; decorating such a craft with your children will give you a lot of pleasant and positive emotions.
Felt, cardboard and paper
Soft felt is great for creating a variety of crafts; it can be glued and stitched, and the paper is quite easy to process.
A cardboard base can easily replace wooden boards, and old photo frames will be an excellent base for beautiful and bright calendars.
Perpetual calendar with interchangeable decor and decorations
The technology for making a perpetual calendar with your own hands is no different from the previous options, but to make it you need to choose an original style.
Such a product will last quite a long time, so to implement this idea it is better to choose practical and wear-resistant materials, stylish decor and decorations that are attached with Velcro.
Perpetual calendar
This craft consists of a base and pockets where a new date will be inserted every day. Such pockets will be needed for the month, date, name of the day of the week. You can make an additional pocket for the weather forecast or the names of memorable dates, nice wishes or tips for every day.
Such calendars usually hang in various institutions, but they can be easily made with your own hands, with minimal labor and materials.
In order to answer the question “How to make a perpetual calendar with your own hands,” you need to prepare a base with pockets. The base can be in the form of a table triangle, a hanging canvas, or simply a free space on which numbers will be attached using tape. The base is decorated with appliqués, embroidery, and toys.
Pockets are made of paper, fabric, cardboard in such a way that they contain the necessary data (name of the month and day of the week, date).
It is better to make such data dense enough so that it lasts for a long time. It is best to use cardboard for this purpose.
We recommend reading:
Do-it-yourself brooch: master class from and step-by-step instructions on how and what you can make a brooch from (125 photos)- Chair-bed: examples of modern models + photos of examples of placement in the interior
- DIY birdhouse - the best ideas and tips on how to make a beautiful and decorative birdhouse (video + 120 photos)
Now all that remains is to update the information daily. And it’s better to entrust this matter to the children; they will be happy to start the morning with an interesting activity that will easily introduce them to numbers, letters, and dates.
We make our own advent calendar for the New Year holidays
You can easily make a beautiful DIY Advent calendar from a large sheet of felt with sewn pockets and numbers made of velvet wire:
- Pockets are cut out of one sheet of green felt according to the number of days in the month;
- on the second sheet of material you need to place pockets and sew them according to the pattern;
- numbers must be made from red velvet (chenille) wire;
- using a glue gun, the finished wire numbers are glued to the pockets;
- Wishes or tasks for the child are written on small pieces of thick colored paper;
- pockets are filled with notes, small sweet treats and toys;
- Snowflakes and bells cut out of felt are used to decorate the calendar.
An unusual do-it-yourself advent calendar for 2021 for a child can be prepared in advance, using it as a planner for the next year.
Desk calendar
A desk calendar is a universal gift for your work colleague or you. The gift will brighten up your workplace.
Instructions on how to make a calendar correctly:
- To get started, you will need several sheets of thick paper. One page = one month. Cut with scissors and make a rectangle shape out of paper.
- The next step is to apply the calendar grid onto the paper. Use a standard template or do the work manually.
- It is recommended to do everything yourself (do not use templates from the Internet), because you can decorate the pages as you want, use your imagination. To create, you may need markers, glitter, stickers and other things.
- Next, fold the finished sheets of paper together and make a hole in the middle using a hole punch. Give free rein to your imagination - make a calendar in the shape of a heart, circle or oval.
- You need a base to secure the sheets. To create it, use sheets of cardboard. Cut out 3 rectangles (2 should be the same). The third sheet should be small - 2 times smaller in width than the others. This will be used for the bottom of the base.
- Now secure all 3 finished sheets together. That's it, attach your finished desk calendar.
Read here: DIY phone case - 85 photo ideas and step-by-step instructions on how to make a case