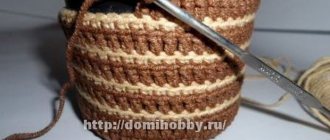
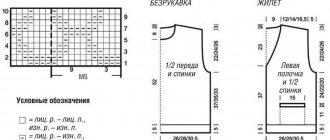
Knitting the front side of the pillow
Row 1: Cast on 42 stitches on circular needles (dark green yarn).
2-3 row: 1 front loop, 1 purl loop, 1 front loop, knit until the end of the row alternating loops.
4-5 row: 1 purl loop, 1 knit loop, 1 purl loop, knit until the end of the row alternating loops.
6-7 row: 1 front loop, 1 purl loop, 1 front loop, knit until the end of the row alternating loops.
Row 8: knit 7 loops with dark green yarn like this: p1, k1, p1, then 28 knit stitches with cream yarn, again 7 loops with dark green yarn like this: p1, 1 knit p., 1 purl p.
Row 9: knit 7 loops with dark green yarn like this: p1, k1, p1, then 28 purl loops with cream yarn, again 7 loops with dark green yarn like this: p1, 1 knit p., 1 purl p.
Row 10: knit 8 loops with dark green yarn like this: k1, p1, k1, then knit 26 with cream yarn, again 8 loops with dark green yarn like this: k1. , 1 p.p., 1 knit.p.
Row 11: knit 8 loops with dark green yarn like this: k1, p1, k1, then 26 purl loops with cream yarn, again 8 loops with dark green yarn like this: k1. , 1 p.p., 1 knit.p.
Rows numbered 12, 16, 20, 24, 28, 32, 40 are knitted in the same way as row 8.
Rows numbered 13, 17, 21, 25, 29, 33, 41 are knitted in the same way as row 9.
Rows numbered 14, 18, 22, 26, 30, 34, 42 are knitted in the same way as row 10.
Rows numbered 15, 19, 23, 27, 31, 35, 43 are knitted in the same way as row 11.
44-45 row: knit rows only with dark green yarn like this: 1 p.p., 1 knit.p., 1 p.p.
Row 46-47: knit rows of dark green yarn: k1, p1, k1.
48-49 row: knit rows of dark green yarn like this: 1 p.p., 1 knit.p., 1 p.p.
Row 50: knit with dark green yarn: k1, p1, k1.
Row 51: bind off the stitches and trim the thread.
Knitted star pillow
Knitting requires more than beginner knitting experience. Knitted on circular needles, purl and knit stitches. To form the rays, make a triple decrease.
The star pillow with knitting needles will measure 40 cm from beam to beam.
Materials
- Knitting yarn Biskvit Raspberry yoghurt and Ecru skein each
- Circular knitting needles No. 10 80 cm
- Hook No. 4 and No. 7
- Hollow fiber 150 – 250 g
- Fabric for the cover
- Wide eye needle
Description of the knitting process
Cast on 120 stitches using Raspberry Yogurt yarn as usual. The cast-on loops must be a multiple of the number of rays, in our case five. Align the cast-on stitches and close the circle.
1. We start knitting a row with 1 purl, then 23 knits. We repeat the rapport 5 times.
2. From the second row we begin to form rays. 1 purl behind the back wall, 10 knits, decrease of three loops, 10 knits. Repeat 5 times.
Perform a triple decrease as follows:
Remove 2 stitches from the left needle from left to right - first the second, then the first.
Knit 3 stitches.
Throw the two removed stitches over the knitted stitch.
Using this method of decreasing, you will get a beautiful braid from facial loops on the rays of a star.
3. Next we knit according to the same pattern. 1 purl, 9 knits, decrease of 3 loops, 9 knits. Repeat the pattern 5 times.
4. Purl 1, knit 8, decrease 3 stitches, knit 8. Repeat 5 times.
5. Purl 1, knit 7, decrease 3 stitches, knit 7. Repeat 5 times.
6. 12. Thus, making decreases, we knit until 10 loops remain on the knitting needles from decreases and purls.
Leave the tip of the yarn about 20 - 30 cm. Using crochet hook No. 7, thread the thread through all the loops, lowering them from the knitting needles. Then tighten the resulting ring tightly. Using crochet hook No. 4, pull the yarn to the wrong side and secure the thread.
This completes one side of the pillow.
We knit the second side with Ecru yarn. You can knit the second part separately and sew both halves using a wide eye needle or hook. Or you can type the second side from the first part. Crochet along the edge, immediately throwing the resulting loops onto the knitting needles. If you cast on the very edge behind the half-loop of the first row, you will get a seamless beam edge. When you type on both sides of the loop for a braid, you will get a beautiful edge. On the front side of the first part you will get contrasting broach stripes.
We cast on 120 loops and knit similarly to the first part. When knitting, the fabric is with the front side facing you.
Having knitted up to the 11th row, fill the inner space with a cover with filler. If the knitted material is dense enough, then you can not sew a cover for the filling, but immediately fill it with holofiber.
Close the stitches of the last row in the same way. Using a needle, hide and secure the end of the thread.
Ideas for Knitted Cushion Covers
The easiest and fastest way to knit a pillow is with stockinette stitch, garter stitch or regular elastic. A product with a “checkerboard” pattern looks a little more interesting, each cell of which is four loops wide and four rows high. A cover with buttons is made like this: first, a rectangle is knitted, the size of which is sufficient to wrap the pad, but the last 8-10 rows are done with a loose elastic band “one on one”. The finished model is simply fastened with buttons.
Having learned to knit pillows with your own hands, you can change the covers from time to time and add fresh notes to the decor of the room.
Sofa cushions not only complement the corner of the sofa, but also look good on armchairs, chairs, and beds.
A pillow with embossed “bumps” is an equally interesting idea. To make a “bump”, three are made from one loop, after which the work is turned twice, knit stitches are knitted on the “front” side, and purl stitches are knitted on the back side. After 4 rows, the extra stitches are again reduced by knitting one, the “bumps” are evenly distributed over the entire surface. A simple relief is obtained from braids knitted with facial loops. The optimal width of such a “braid” is 6-8 loops, the length of each “link” is 10-12 rows.
Beautiful and original pillows will become the hallmark of your home.
The product with an openwork pattern looks very original. An example is “zigzag”, a description of his rapport:
- the number of loops is a multiple of nine;
- 1-4th r. knitted;
- 5th - all facial loops: 2 together, 2 knitted as usual, 7 are knitted from one, 2 regular, 2 together;
- 6, 8, 10th r. – purl all;
- 7th r. – all facial: 2 together, 9 regular, 2 together;
- 9th r. – facial only: 2 together, 7 regular, 2 together;
- then the rapport is repeated until the end of the product.
Original pillows will set your own style in the interior or emphasize the existing one.
Openwork includes “leaves”, as a strip of leaves is made, located in the middle or edge of the pillow:
- rapport – 25 stitches, even rows are knitted with purl stitches;
- 1st row – 1-5 – knit, 2 are knitted in one, knit 2, 2 in one, 9, 11, 13, 15, 17 – knit, 10, 12, 14, 16 – yarn over, 2 are knit in one, knit, two in one , 21-25 – facial;
- 3rd r. – 1-4 – knit, 2 are knitted in one, knit, 2 in one, 8, 10, 12-14, 16, 18 – knit, 9, 11, 15, 17 – yarn over, 2 are knit in one, knit, two in one, 22 -25 – facial;
- 5th r. – 1-3 – knit, 2 are knitted in one, knit, 2 in one, 7, 9, 11-15, 17, 19 – knit, 8, 10, 16, 18 – yarn over, 2 are knit in one, knit, two in one, 23 -25 – facial;
- 7th r. – 1-2 – knit, 2 are knitted in one, knit, 2 in one, 6, 8, 10-16, 18, 20 – knit, 7, 9, 17, 19 – yarn over, 2 are knit in one, knit, two in one, 24 -25 – facial.
There are so many options for knitted sofa cushions and patterns that you are sure to find something you like.
It all depends on how far your imagination takes you.
Tip: If you are going to sleep on a pillow, the cover should not be scratchy. The best material for this is acrylic yarn with a small addition of other fibers.
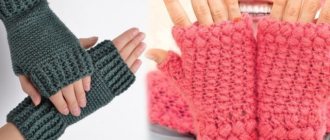
Knitted pillows. Ordinary and very unusual.
Knitted pillows: these products give such scope to imagination that it can be difficult to stop. Ideas come right while knitting! While we are knitting one pillow, we are already thinking about the next one - even more spectacular.
What attracts you specifically to knitting pillows:
- Simplicity. The shape of the product can be the easiest to execute: rectangular, round.
It’s easy to do without patterns, complex decreases and increases. Of course, if you wish, you can complicate the work - for example, knit in the shape of a heart, a star, or an animal. But usually they still have a simple symmetrical shape.
- Any yarn will do. Acrylic, half-wool, wool, cotton - whatever you have on hand will come in handy.
Do you have any thread left over from previous projects? Great! We use them too. Interesting effects are brought about by the use of bouclé and pile yarn for knitting individual elements.
- Available for beginners. You can knit with the simplest pattern - stockinette stitch, garter stitch.
An excellent direction for learning to knit.
- Can be knitted very quickly. Some people don’t have the patience and perseverance to complete knitting a large item. And here your enthusiasm will not have time to fade. Especially if you knit from thick yarn on large knitting needles. Another option for quick knitting is pillows made from Puffy Alize yarn, which has ready-made loops. It is generally knitted by hand, without knitting needles or a hook. In 1 evening you will make yourself a very soft, beautiful, incredibly pleasant to the touch pillow.
- You can use any knitting technique: knitting, crocheting or, as noted earlier, using your fingers. The most varied patterns are used - from the simplest to the most sophisticated.
Satin stitch, “braids”, “bumps”, openwork, arans - everything can be found in the gallery of pillow models. Sometimes they add embroidery, appliqués, and combine them with fabric and lace.
You can also knit a pillow with separate elements (squares, hexagons, circles), which are then sewn together.
The sizes of pillows can be completely different: from a mini pincushion to a large pouf. Yes, and knitted ottomans can also be classified as such products. High and low - they will decorate your interior and be useful in everyday life.
You determine the thickness depending on the purpose: there are pillows under the head, under the back on a sofa or on a chair, as well as lightly padded or even flat, without padding, “seats” on a stool.
They knit either in the form of covers with fasteners (zipper, buttons, ties), or sew completely finished products. In the latter case, they are washed in this form.
In addition to having a pleasant time, knitted pillows will help you create comfort in your apartment. They can be combined with knitted blankets and rugs.
The fantasy options for pillows will give you special pleasure.
Use your imagination and you will find many interesting ideas. For example, in the form of animals: cats, sheep, hippos, hares, etc. Most often the theme of cats is played out. In the form of vegetables and fruits: pumpkin, carrots, banana, strawberry. In the form of flowers. With appliqués, voluminous embroideries, pompoms, tassels, beads and sequins. Unusual shapes: stars, pears, ridges, crescents, clouds, torus.
This, by the way, is very important for children's rooms. The kids will be delighted. These will be pillow toys!
In the hands of experienced knitters, yarn can simply be transformed into handicraft masterpieces. Such handmade works are highly valued and in demand.
Including skillfully knitted pillows. You can also offer products that are simple to make, but made very neatly and stylishly.
Napkin pillows
If you have round-shaped sofa cushions, you can use the patterns of standard round-shaped napkins.
Here, two napkins are also knitted, and when sewing, an additional zipper is used. You can resort to a complete transformation and additionally sew a “lining” onto the pillow, which will be in a contrasting color, which will give the product individuality, because the openwork will stand out against a plain background. Some particularly enterprising craftswomen completely replace outdated products with new ones. They simply rip out old sofa cushions and use the filling further. They also knit pillows in the form of a napkin, combine them with a plain background and shape them using the same filler.
Below is a selection of such products with detailed patterns for knitting yourself.
Round pillow
Materials for work:
- Yarn (100% cotton) brown and green, about 40m/100g long - eight balls each.
- The pillow is knitted with a diameter of about 70 cm, or an option - 20 cm in height, half a meter in diameter.
- Knitting needles will fit 12.75 mm.
The pillow can also be round.
Video selection to help you work:
Beautiful placement in the interior
Knitted pillows are a great way to add fresh colors to your interior. Their uniqueness also lies in the fact that for such products there is no need to select upholstery or a sofa cover (bed blanket) of the same tone.
A great idea for decorating a bedroom or living room would be a combination of knitted pillows with a blanket and poufs.
Since a light tone needs contrast, it is worth adding a pouffe-style pillow to the set, making it a smaller copy of the latter - in gray. The variety of patterns and colors is exactly what you need: such a sleeping place will always be special and beautiful.
If you want to choose knitted accessories to match the tone of the bedding, you should complement the bed with pillows of different sizes and shapes. The only thing worth considering is that the pattern can be repeated in only two pillows, otherwise the interior will become boring.
Pillows made of squares and zigzag stripes, made of bright multi-colored threads, perfectly decorate any (even the most ordinary) sofa without a cover. Moreover, such products always look impressive, even if the set consists of elements of different shapes and designs.
Made in the form of rollers, such products can replace the armrests of sofas that do not have side edges. Decorated around the edges with multi-colored fringe or without it, these pillows will decorate any sofa. They are relevant both in country style and in the interior of a country house.
Knitted pillows with a front fastener (or its imitation) can decorate a classic sofa with armrests. Made in different muted shades with different textured patterns, they will add variety to any interior without disturbing the harmony of the room, maintaining light and warmth.
A candy pillow with a relief pattern in the form of braids and stripes with ribbon ties is a great idea for a living room or children's room. Located near the armrest, it will not take up much space, but will indicate the originality of the style.
The uniqueness of the product lies in the fact that it is easy to put on and take off (just untie the ribbons). To ensure that the product fits harmoniously into the interior of the room, just choose the color of the ribbons.
This video shows how to knit a “Star” pillow from knitted yarn with your own hands.
Knitting pillows
Knitted pillows have one significant advantage - they are much easier to make than it seems at first glance.
If knitting a pillowcase yourself is not your option, you can always make one from old, boring sweaters, all you need is simple sewing skills and fabric glue.
If you decide to sew a product from an old knitted sweater, you don’t have to worry about the pattern and even leave the buttons - the product will have decorative elements.
If the availability of material allows, you can sew a knitted envelope cover with buttons - such products look incredibly stylish, especially in noble dark or pastel colors.
If you are used to handling knitting needles, then knitting with your own hands is very easy: on the Internet today you can find many patterns, classic and unusual, with or without patterns, from different yarns.
Another option: crocheting a pillow; here you can achieve a very interesting effect depending on the choice of yarn. If you use thin threads (for example, “Iris”), you will get an elegant thin pillowcase; such products will perfectly complement the romantic style of the interior.
Using regular thick yarn, you can knit dense or openwork items, as well as individual elements for covers, such as flowers.
Choosing the best filling for pillows depends on the desired shape and hardness of the product. For example, if you need the product to keep its shape, you can use a pillow made of buckwheat husks.
Decorative items
For those who like unusual decorative items, a knitted flower pillow is a suitable option. This is a universal model: you can knit a cover in the shape of a flower (most often with crochet), or you can knit a classic pillowcase with knitting needles with a large floral pattern.
You can make several knitted flower blanks, and then connect them together into one fabric.
Read also: How to choose an orthopedic pillow
When choosing knitted covers, be sure to consider how your pillow will be used. The most common:
- Decorative knitted pillows for the sofa and bed;
- For a children's room;
- For the dacha - on the veranda or gazebo;
- Furniture covers;
- Cushions for chairs.
Don't like going to bed in a cold place? A heated sheet will smoothly warm the bed and maintain the set temperature all night.
Various types of mechanisms are used to fold sofas. Find out here about one of the most reliable - a chair bed roll-out mechanism.
When choosing bedding, be careful with painted patterns, they may be made with toxic paints. At this address you can read about safe, non-fading jacquard bedding with embroidery.
The funniest and most unusual models are children's knitted pillows. Very often these are full-fledged toys: from ordinary square pillowcases with knitted eyes, ears and mouths to various hippos, bunnies and pigs made of yarn.
You can knit such a product yourself, or you can sew it together with your child from an old, boring jumper and decorate it in an unusual way.
Another interesting option is knitted cushions for chairs, and here, too, everything depends only on your imagination and capabilities. If the products are designed to fulfill their direct task - to make hard chairs comfortable and soft, soft, cute products knitted with knitting needles will be optimal.
Crocheted covers in the shape of flowers, hearts or little animals will look interesting as a decorative element - an option for a child’s room. And for country chairs you can knit thick rugs in bright colors.
Covers for stools have become fashionable today - such products are knitted like a kind of warm beret, and then pulled over the seat.
Features of knitted covers
The most interesting are products made from:
- from separate blanks in the form of squares, they are either sewn together, making the fabric a single piece, or tied;
- fragmentary motifs - the base is made solid, the design on it is divided into multi-colored and differently patterned squares;
- from a thread called grass - it is always popular, looks impressive on any product (pillows are no exception), and is very simple to make.
Pillows made from various combinations of wool look interesting.
Models decorated with embroidery and made with openwork knitting (the work is done on knitting needles) will also arouse interest among needlewomen. To do this, thin threads are taken and an unusual accent is added.
In addition, the yarn can be combined: for example, thus - acrylic + “grass”.
A pillow is an indispensable attribute of any home. It is necessary for night sleep, relaxation during the day, and is a magnificent decorative item for a living room, bedroom, or child’s room. It’s especially nice when it’s a hand-knitted accessory.
Knitted pillowcases for sofa cushions with braids
There can be a huge number of variations with braids for pillowcases on sofa cushions; for example, I’m posting several, for which I found specific diagrams and descriptions, and, of course, you can come up with different designs with similar patterns. They always look advantageous and are interesting to knit.
Beautiful pillows with spectacular braids
It is proposed to knit these beautiful bright pillows with cotton threads (50 g/73 m), knitting needles number 4.5.
Knitting density: 10 loops and 26 rows in a square of 10 x 10 cm, pillowcase size - 40.5 by 40.5 cm.
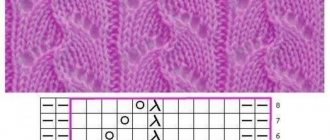
Description of knitting pattern with braids
Row 1: K1, (P2, K2) 3 times, P2, K1.
All purl rows: purl 1, (k2, purl 2) 3 times, knit 2, purl 1.
Row 3: cross 8 sts to the right (slip 4 sts onto an additional knitting needle while working, k1, p2, k1, from an additional knitting needle - k1, p2, k1). Cross 8 sts to the left (4 sts remove onto an additional needle before work, k1, p2, k1, from an additional knitting needle - k1, p2, k1).
Rows 5, 7, 9: same as 1st.
The back part is knitted with 2 x 1 elastic (k2, p1).
After all parts of the pillow are sewn, decorative strands need to be sewn over the seams along the entire perimeter.
How to make a decorative rope
- Cut six strands 244 cm long.
- Place the threads together and twist them to the right.
- Fold the resulting bundle in half and twist it again.
This cord is enough for two sides of the pillow. For the other two, you should make another tourniquet, apparently because a very large one is not convenient to weave.
Burgundy pillowcase
A very beautiful pattern for a pillowcase with intricate weaves in the center, simple braids and a rice pattern in between.
Green pillowcase with cords
The pillowcase is knitted with strands against the background of a rice pattern (alternating purl and knit), but there is no such pattern, I only selected an option for knitting a strand in the center.
And the “berries” are knitted as follows: make a loop twice from the front wall, then from the back, resulting in 4 loops from one.
Next, the 4th loop should be pulled through the 3rd, 2nd and 1st and discard the knitted loops from the right knitting needle.
With braids
Such things, and in this case a patterned pillow - delicate, soft - make the house cozy. When it is knitted from thick threads and decorated with braids, a warm, always comfortable sweater appears before your eyes.
The braided pillow looks super cozy and feels like a warm winter sweater.
For knitted pillowcases for sofa cushions, there are many options with cables.
Additional Information! You can come up with unusual designs with patterns yourself. They look great (always a win-win), and it’s a lot of fun to work on a product like this.
It is suggested to knit pillows with braids using cotton threads (50 g/73 m). For work, use knitting needles No. 4.5.
The pillowcase is knitted square, measuring 40.5 x 40.5 cm. The knitting density is: ten loops, 26 rows in a square of 10 x 10 cm.
There are a lot of options for decorating pillows with braids.
Or this option. Take yarn 280 m/100 g - composition in percentage (2 viscose-48 acrylic-50 wool). Knitting needles N 6, hook N 4.5 are suitable, the product is knitted square (40 x 40 cm).
Additional Information! The product is knitted with a thread folded in half.
Video to help:
We create decorative pillows for the sofa with painting
In our article 10 best things you can do for your home with your own hands, we have already given a simple method for painting pillows and a method with an ombre effect. Today, Dekorin introduces you to stunningly stylish pillows that were painted with... ice.
What does that require:
- White fabric (such as cotton or linen);
- Metal grill (can be used from the oven);
- Sink or large container corresponding to the size of the grill;
- Powder dye for fabric;
- Ice cubes;
- Latex gloves.
First of all, the fabric should be thoroughly wetted with water and placed on a wire rack installed above the sink or other available container. It is not at all necessary to spread the fabric evenly over the surface of the grate; on the contrary, it is better to crumple it so that the pattern turns out to be non-uniform.
Want to make several pillowcases at the same time? Feel free to dump them in a wet pile! Then ice is laid out on top of the fabric and thickly sprinkled with powder dye.
That's all! All you have to do is wait until the ice has completely melted, after which the finished pillowcase will need to be thoroughly rinsed in cool water, dried and ironed. How do you like the result?
Pillow toys
From crocheted chest pillows you can smoothly move on to toy shapes. Crochet toy pillows attract children and adults like them because of their convenience - they are both a comfortable thing on which you can simply relax, and at the same time an interesting toy. The choice of knitting of a certain shape should be based on the age and preferences of the child. If you want to knit a pillow for the interior, be guided by the general design concept and color inclusions.
Simple toys
If you look at crocheted toys, you will find a very interesting detail - most of them are presented in the form of simple circles and oblong legs, the combination of which gives the finished result a toy embodiment. The following is a similar selection, based on which you can use simple knitting patterns and please your child with a new “acquisition”.
Since crocheted toys are popular, we should present the simplest version of knitting, which is offered with a description and patterns - this is turtle knitting. Knitting a turtle yourself is carried out in the following sequence:
- To begin, knit the required number of hexagonal motifs, which, when assembled, act as a turtle shell. The hexagon diagram is offered below, but you can use a different description.
- The motifs collected according to the pattern must be sewn to the fabric - the “belly” of the turtle. To do this, it is better to take dense material of a suitable color. Cut out the resulting size of the knitted shell and sew both parts. This type of stitching eliminates the need for labor-intensive knitting of the tortoise shell edging - during the stitching process it is better to simply gather the corners with thread. You can also use another assembly of the turtle - make a base for the shell from fabric, and sew a knitted hexagon on top.
- Start knitting the head. To do this, cast on 4 chain loops and close them into a ring. Next, knit a row of single crochets - 8 pieces. Next, knit 4 rows, adding loops to them in four places, thus continuing to knit. Having retreated 7-8 cm from the beginning of the knitting, they begin to close the knitting of the heads. To do this, in the last 2 rows you need to make decreases in 4 places.
- Knitting the tail is carried out in the same sequence as the head, only the increase is done in one row. The same is done with decrease.
- Knitting of the paws should be done in the same way as the head and tail. The exception is the length of the products - the paws should be no more than 6 cm in length. The increase is made in 2-3 rows - you should look at the knitting density and be guided by your own preferences.
- Fill the head, tail, paws and shell with stuffing. Sew all the details.
- Eyes are sewn onto the head, and the mouth is also sewn with contrasting threads.
The following is a selection of crocheted turtles. Such products are convenient for further use for their intended purpose, so they are suitable for both children's rooms and sofa additions.
snake pillow
There is nothing better for children than a 2-in-1 product - both a toy and a pillow. One such innovative idea is a crocheted snake pillow - it is easy to knit from leftover yarn. Also, a snake toy is suitable for expressing your own imagination, because the use of shades of threads or patterns allows you to complement the children's room favorably. Knitting such a pillow occurs in the following sequence:
- Close the ring with 5 air loops.
- Knit the first row with single crochets in the amount of 10 pieces.
- Then, in the next 10-20 rows, make equal additions of columns - this depends on the size of the future snake, so adjust the work yourself. The additions are made evenly - in each row you should add from 7 to 13 columns.
- Having reached the desired head size, knit from 2 to 5 rows without increments.
- Next, make decreases, similar to the additions made earlier. Subtract only half of the added loops.
- Continue knitting to the required length of the snake without a tail.
- Having reached the desired length of the snake without a tail, start decreasing - in each row, decrease 3-6 loops.
- Having knitted up to 4-5 single crochets, finish knitting.
Thus, you have a complete selection of knitted pillows with patterns and descriptions. Now you can choose a more interesting option for yourself, as well as come up with something original of your own. Don’t be shy to show your imagination, because knitting is the best way to express your “I”.
Pumpkin pillow
An interesting option suitable for a child’s room is a pumpkin floor pillow made on five knitting needles. Depending on the size, it will need 200-500 grams of orange yarn and a little green. First, you need to cast on 8 loops with green threads, close them in a circle, distribute them on 4 knitting needles, knit 10 rows.
An original pumpkin pillow for interior decoration.
A bright, soft and cozy pumpkin pleases the eye and cheers the soul.
From rows 11 to 20, loops should be gradually added to form a circle, after which the green thread breaks, and knitting continues with orange thread until the pillow reaches the desired diameter. The next 15-20 cm are knitted without increases, after which the stitches are gradually decreased. In order for the pumpkin to take on a realistic shape, it is tightened - using a strong thread to match the pumpkin, the pillow is divided into 8 “slices”.
A charming pumpkin pillow, or maybe a whole family of pumpkins, can take up residence in your home.
In approximately the same way, with the exception of constrictions, a round pillow is created with knitting needles for the floor. The product has a diameter of about one meter, a height of 50 cm. It is knitted with an elastic band, stockinette stitch, or any other pattern. To work you will need 900-1000 g. yarn, knitting needles no thinner than number 10, a sufficient amount of filler (foam rubber, padding polyester) - the ottoman should be quite dense, a knitted pillowcase bag.
The colors of the yarn for this pillow are chosen so that it resembles a ripe pumpkin.
Tip: You can make a “warty” pumpkin, decorate it with “cones”, decorate it with knitted leaves and ladybugs.
Floor models
You can knit a round pillow with knitting needles in the form of a beautiful pouf. To do this, you will need approximately 160 g of knitted yarn and knitting needles number 15. You also need to buy filler and thick fabric for the pillowcase so that the padding polyester does not break out through the holes between the loops.
The work is based on the shawl technique, the execution scheme is simple. You need to work with a thread in several additions so that the process moves faster .
Thirty loops are cast on the knitting needles (more is possible if the product must be oversized). The first two rows are performed with facial loops.- The next line is knitted to the last 4 stitches on the knitting needles, after which the fabric is turned over. Then we knit again until the next last 4 loops from the other edge of the fabric.
- The work is turned, one loop is dropped, knitting is carried out to the last eight loops, turn the fabric again, remove the loop, knit the same to 8 loops on the other side.
- The knitting is turned over, one loop is removed, twenty-two are knitted. Perform another row with all the loops knitted.
- Repeat the procedure until the length of the product reaches 130 cm, then close all the loops.
The knitted pillow cover is ready, now we need to assemble it. Pull the yarn folded in several rows through the arcs of the edges of the fabric, tighten them as much as possible, securely fixing the rest of the thread.
Repeat a similar action for the other side, but do not tighten it too much so that you can insert the pillowcase and fill it with padding polyester. After this, sew two rows of the base to hide the points of contraction. A product made from knitted yarn will not only be beautiful, but also practical, elastic and quite durable for reusable use. In addition, the pouffe pillow is suitable for any type of interior.
Decorative knitted pillows with leaves
Such an incredibly beautiful pattern that it would be a pity to put such a pillow under your head, especially since it is knitted with light beige threads. Therefore, this is most likely a decorative option for interior decoration.
I did not find any recommendations on the composition of the thread, only that the knitting density should be approximately equal to 23 loops per 32 rows when knitting with number 3 knitting needles.
The pillow is knitted from the center on stocking and circular needles.
Cast on 8 stitches on double needles and knit in the round according to pattern A1.
Upon completion of knitting full repeat, there should be 128 loops on the knitting needles.
At the beginning of the row and every 32 loops, it is convenient to attach markers that should be moved as you work.
Next we knit in this way: * pattern A.2 (= 2 p.), 28 p. according to pattern A.3 (= 2 repeats of 14 p.) and pattern A.4 (= 2 p.) *, repeat 4 times . At the end of this stage there will be 240 stitches on the needles.
In the following rows: * pattern A.2 (= 2 sts), 56 sts according to pattern A.3 (= 4 repeats of 14 sts) and pattern A.4 (= 2 sts) * - 4 times.
Simple pillows
You can knit a pillow with knitting needles for beginners using a simple technique. Garter stitch, knit stitch, and the technique of alternating purl and knit stitches are suitable for this. To decorate the surface, you can use decorative buttons, sewn elements or motifs from applied embroidery. The stitching technique also goes well with a knitted surface.
A pattern reminiscent of a wicker basket will look interesting. It is easy to perform, because it consists of two motives. For the pattern, the number of elements is a multiple of 10, and an additional pair of loops for the edge:
- The first row begins with seven purl stitches and three knit stitches. They must be alternated until the end.
- The second row resembles the first, but instead of seven there are already three purl and the same number of knit stitches (that is, you should knit according to the pattern). During the process, you need to monitor the tension of the thread so that the loops are neat and even.
- The next row repeats the first.
- The fourth line is knitted completely with purl stitches.
- Start the fifth row with two purl stitches, then perform three knit stitches and five purl stitches. Alternate like this until the end of the row.
- In the next row, knitting begins with five knit stitches, three purl stitches and two knit stitches. Repeat until the end of the row.
- The seventh row is knitted like the fifth.
- The eighth row, like the fourth, is performed with purl loops.
Having knitted the eighth row, the pattern is duplicated from the very beginning.
If you look at the ornament from the front side, you can clearly see the “checkerboard” pattern. The pillow can decorate both classic style and modern design.
Knitting the back of the pillow
Row 1: Cast on 42 stitches using dark green yarn on circular needles.
Row 2-3: knit rows in this way: k1, p1, k1.
Row 4: knit 15 loops with dark green yarn like this: k1, p1, k1, then knit 12 with cream yarn, and 15 loops with dark green yarn like this: k1 ., 1 p., 1 knit.p.
Row 5: knit 15 loops with dark green yarn like this: k1, p1, k1, then 12 purl loops with cream yarn, and 15 loops with dark green yarn like this: k1 ., 1 p., 1 knit.p.
Row 6: knit 16 stitches in this way: k1, p1, k1, then knit 10 with cream yarn, 16 with dark green yarn: k1, p1. p., 1 person.p.
7th row: knit 16 loops in this way: k1, p1, k1, then 10 purl loops with cream yarn, 16 loops with dark green yarn: k1, p1. p., 1 person.p.
Rows numbered 8, 12, 16, 20, 24, 28, 32, 36, 40, 44, 46 work the same way as row 4.
Rows numbered 9, 13, 17, 21, 25, 29, 33, 37, 41, 45, 47 work the same way as row 5.
Rows numbered 10, 14, 18, 22, 26, 30, 34, 38, 42 are knitted in the same way as row 6.
Rows numbered 11, 15, 19, 23, 27, 31, 35, 39, 43 are knitted in the same way as row 7.
Row 48-50: knit with dark green yarn like this: 1 p.p., 1 knit.p., 1 p.p.
Row 51: bind off the stitches.
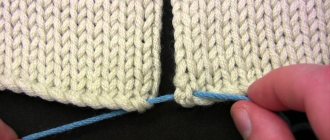
Connect the two halves of the pillow from the wrong side, sew 3 sides with a needle.
Turn the pillow out and fill it with foam rubber or synthetic padding. Sew up the entire edge of the pillow.
The photo shows the front side of the pillow on which the crocheted shoe will be sewn.
The photo shows the reverse side, on which there will be an imitation of a corset on a woman's dress.
For the corset, you need to knit a lace from dark green yarn. The length of the lace is selected two sizes larger than the size of the pillow.
At the end we tie it with a bow. The back side of the pillow is ready.
Knitting a shoe
The shoe is crocheted from red yarn. We start knitting from the foot (where the toes are), cast on a chain of 12 loops, knit 5 rows. In each row, on the front side of the shoe you do not need to knit the outer loop, but on the other side (from the heel), on the contrary, knit two of the outer loops. Then knit only to the middle of the product according to the same principle, knit 7 rows, and then in 2-3 rows we do not knit the outer loops to complete the shoe. The heel is knitted with a chain of 12 loops, and then knitted in the opposite direction. Then the entire shoe must be tied around the edge so that the edge is smooth and the shoe itself is neat.
Sew a red shoe onto the front side of the pillow.
We will make tassels from cream yarn on 4 corners of the pillow. Wind 15 turns of thread around 2 fingers. Then tie it with thread.
Thread the remaining thread into the “cap” of the tassel and tighten. Make 4 tassels.
Attach the resulting tassels to the edges of the pillow.
Elegant knitted pillow – “Lady at the Wheel” is ready!
Knitted pillow – “Lady at the wheel”
Knitted pillow – “Lady at the wheel”
You can give such a knitted pillow to a friend who already drives a car or has just received a driver’s license.
PS Friends! If you like to knit not only clothes and toys, but also decorative items, then I suggest you watch a few more master classes:
- You can see how to crochet a pincushion here.
- Violet in a pot, see here.
- Clutch for girls, Here
- There are many more interesting master classes on knitting, all of them under the heading “Knitting”.
Click on the social media buttons!
Pillow on a knitting machine
A few days ago I told you how easy it is to knit a baby blanket using a knitting machine. Today I knitted a pillow to go with it, and now the gift can be given to my little niece. I hope this gift will come in handy in your baby’s stroller during winter walks.
Perhaps the blanket and pillow will be used differently, but this will be decided by the owner of the gift. Personally, I really liked this set and soon I want to knit a blanket for myself, because in the evening I like to wrap myself in something warm and write to you about what’s new in my life.
To knit a pillow, you need leftover threads that were not used when knitting the blanket (about 1 skein of multi-colored yarn).
We put 72 loops on the needles with green thread using the entwining method. This method of casting on loops is best suited in this case, since the edge will be hemmed and does not need beauty.
We knit at 10 density. After 1 row is completed, we hang the pull comb. After several rows, you can hang side weights so that the outer loops do not jump off the needles.
Advice. We change the color of the threads as follows: 1) Pull the needle into the PNP and hang a thread of a new color (white) on the needle hook. The loop of old thread should be behind the tongue of the needle.
2) Manually knit one loop. To do this, we push the needle into the ZNP, and then into the RP.
3) Cut off the green thread, leaving the tip. We tie the ends of the threads into a knot.
We change the colors of the threads in the following sequence: 0-20 - green 21-26 - white 27-48 - yellow 49-60 - white 61-86 - green 87-98 - white 99-160 - green 161 final row close the loops with a pigtail using Decker.
We pass over the knitted fabric with an iron and steam so that the ends unwind.
We cut out a rectangle from the lining fabric with the same dimensions as the knitted fabric.
We sew the rectangle of fabric in a circle, leaving a small part open for turning. We stuff the pillow with padding polyester.
We sew up the open area of the pillow by hand or by machine.
We sew the knitted fabric in a circle, leaving half of one side open for turning and placing the pillow. Once the pad is inserted, the exposed area can be sutured.
Now the pillow is ready!
To receive the best articles, subscribe to Alimero's pages on Yandex Zen, VKontakte, Odnoklassniki, Facebook and Pinterest!
https://sdelaysam-svoimirukami.ru/1095-vyazannye-podushechki-dumochki-dlya-avtomobilya.htmlhttps://rucco.ru/content/articles/drugoe-spicami/vyazannye-podushechki-dumochki-dlya-avtomobilya/https: //alimero.ru/blog/master-class/podushka-na-vyazalnoy-mashinke.13407.html
How to knit pillows - general recommendations
A few more photos of knitted pillows for inspiration.
So, we have decided on the model, what next?
What yarn to knit from
The simplest pillows can be knitted with knitting needles, striped, smooth, and also with braids from very thick yarn; our Caucasian one is suitable. It will be fast, cheap, and very comfortable. In general, it is now fashionable to knit with thick threads.
Stylish, beautiful pillows are knitted from acrylic, acrylic with wool, acrylic with cotton, and knitted yarn.
For openwork, a thin cotton thread is best.
Consumption will depend on the model, the thickness of the threads, and the size of the pillow. The most average value is 250 grams, maybe more.
How to make a calculation
To calculate the loops and start knitting, you need to decide which sofa cushion the pillowcase will be knitted to. Standard sizes: 40 x 40, 45 x 45, 50 x 50.
Here you need to determine how many loops to cast on. The pillowcase can be knitted the same size or a centimeter or two wider. If it turns out to be 1 cm less, that’s also okay, since the product will stretch on the pillow.
Knit the sample with the main pattern so that one row contains at least one complete pattern repeat.
Wet and lightly squeeze the sample to straighten it and measure its width.
We divide the number of loops in the sample by its width - we determine the number of loops per 1 cm.
We multiply this number by the width of the future pillowcase, round it up to a whole number and add another estimate so that along the edges there are the same number of loops from the pattern in both directions. Don't forget to add two edges!
You can knit two squares separately, at least with one rectangular fabric, which is much more convenient, and also in the round on circular knitting needles.
How to sew
The parts of the cover are sewn together with a needle and thread using neat, invisible stitches. Or you can crochet it along the face and decorate the edge with a border or various beautiful bindings.
About clasps
It is recommended to make pillowcases with a zipper, which is sewn along the bottom edge. If this is especially a gift option, then definitely so.
For myself, I just crochet the edges “tightly”; I don’t like fiddling with zippers, and when washing there’s no problem in loosening them a little.
I would not recommend making a fastening with buttons, since the loops stretch over time and the buttons come undone. They can only be used as a decorative element.
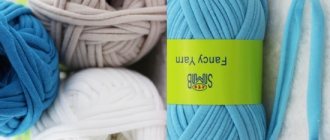
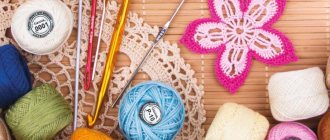
Materials for work
The appearance of the product, its thickness, pattern density and ease of use depend on the selected yarn. Craftswomen advise choosing yarn with acrylic and wool for pillows so that the fabric is moderately soft and elastic. This will help maintain the desired shape of the product during its use.
For decorative items, you can use fancy threads decorated with beads of different sizes. Mercerized cotton in the composition will also add originality to the finished pillow. For openwork interior accessories, it is better to choose thin iris yarn, with which it is convenient to create light and weightless lace motifs and neat motifs.
The size of the loops depends on the choice of knitting needles: the thicker the tool, the larger the knitting will be. But we must remember that the material and knitting needles match, because, for example, a thin thread will not be suitable for a large instrument. Thick yarn and large knitting needles will make a beautiful pattern, and the work process will be quick.
You can knit covers for a ready-made pillow or create everything yourself. For the base, choose a filler that does not allow the product to deform. The ideal option would be a synthetic padding polyester of medium hardness, you can take it in balls, then the pillow will look plump and stuffed, but at the same time it will be soft and comfortable.
It is not recommended to use natural down fillings, since feathers will easily come out through the pillowcase and knitted fabric. As for color combinations and shades, there are no restrictions. The main thing is that the chosen design fits the overall style of the room and matches the furniture and textiles.
Knitting methods can also be different. Experienced needlewomen create a long fabric that is twice the size of a standard pillow, then connect its edges with a crochet hook. This is a practical method, because the result is a symmetrical, even pattern. Beginning craftswomen can practice on small motifs or creating two elements that, after completing the process, will need to be sewn together.