Needlework
07/01/2018 Anastasia Prozheva
Using salt dough you can create unusual and stylish interior details. Due to its availability, ease of use and plasticity, the material even allows you to create paintings from salt dough. You can involve a child in the production of various figures and compositions, who will definitely enjoy the sculpting process.
Preparing the dough
The material is so easy to use that even a small child can work with it. In order to make a craft from the dough, you need to strictly follow certain rules when preparing the dough, working with it and subsequent drying. And even when applying paint, technology must be followed. Only with proper kneading of the dough can you obtain a mass suitable for creating a product. The material will be plastic and soft if the proportions of its components are not violated. Below are the two most common ones, which are suitable even for beginners.
Recipe No. 1
We have to:
- premium wheat flour – 0.5 kg;
- cold water – 0.2 kg;
- salt - 0.2 kg.
The mass prepared according to the recipe turns out to be convenient for modeling, elastic and even edible. The fact that such dough is edible is very important when used by small children. Even if it happens that the baby eats a craft or a small piece, then nothing bad will happen.
Recipe No. 2
This dough can also be used by children, but it is definitely not worth eating, since it contains glue. But such dough turns out to be even more plastic and flexible.
We will need:
- premium wheat flour – 0.5 kg;
- cold water – 0.2 kg;
- PVA glue - 2 tbsp. l.
The resulting mass can be painted. The main advantage of this recipe is that it hardens for quite a long time. This allows you to correct small defects in the composition before it completely hardens.
Related article: DIY kites for children: drawings with diagrams and photos
Before the master class, you should also familiarize yourself with the features of drying and coloring products made from such dough.
Any dough product must be dried, otherwise it will not have strength and may crumble. Drying at room temperature will not impart quality characteristics to the finished composition.
To do this you need to use the oven. It is recommended to place the product in the oven for 30 minutes at a temperature of 120–150 degrees. Large crafts should be left to dry longer, while small ones may dry faster than the specified time.
In order to prevent the dough from sticking to the baking dish, its bottom should be covered with baking paper or foil.
To dry very small parts, the temperature in the oven should be no more than 120 degrees. During the drying process, it is recommended to rotate the parts of the composition for more even drying on all sides. You should not dry it in a microwave or on a radiator, as this can lead to deformation and cracking of the product.
After the figure has completely dried, you can begin painting. It is best to opt for acrylic paint or gouache. To fix the paint and give the composition an attractive appearance, it is recommended to use a clear varnish. It is also possible to add food coloring to the dough. This is convenient when many elements need to be done in one color.
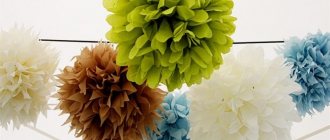
How to make flowers for a panel from salt dough
An interesting decor option for a room - a panel with flowers
A craft in the form of a panel made of salt dough with flowers is a good handmade gift for grandmothers or mothers. A child can make such a product independently under the supervision of parents.
Necessary materials:
- pre-colored salt dough in different colors;
- modeling board;
- stack with a sharp end;
- base for panels made of hard cardboard;
- self-adhesive decorative paper;
- cord;
- PVA glue;
- glue gun;
- clear nail polish.
Step-by-step description of making flowers from salt dough:
- The salt dough is divided into small coin-sized balls. For a flower you will need four or more balls, for leaves - only one.
- To make a leaf, the ball is slightly flattened into a drop shape. The sharp side of the stack presses out the veins on it.
- Next you can start creating flowers. There will be 2 types of them: roses and daisies. To create a bud, one ball is rolled out and wrapped in a tube - this will be the core. A few more balls of dough are rolled out like a pancake and glued at the base to the core of the bud.
- To create a daisy you will need six pieces of material in two colors: 5 balls for the petals and 1 for the pistil. They are rolled out into a pancake and glued in the center.
- Flowers are sent for drying.
- For the base of the panel, an oval is cut out of hard cardboard. Its front side is covered with decorative paper.
- A thick cord is glued to the edges of the panel blank. The easiest way to do this is with a glue gun. At the top you can form a loop from a cord - this is how the craft is often hung on the wall.
- Next, all the parts are assembled together. Completely dried dough elements are glued to the panel. The surface is coated with transparent varnish.
Dough flowers
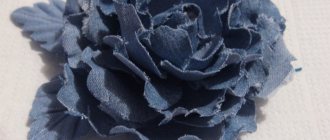
Having learned how to make salt dough, you can quickly master the basic techniques of modeling with your own hands and then perform more complex compositions. Pliable, soft mass will help the child develop his creativity and concentration. The salted mass allows you to create not only beautiful, but also quite realistic flowers. One of the simplest flowers for sculpting is a rose. The finished dough must first be rolled out to a thickness of about one centimeter. Next, use a round cutter to cut out five pieces of the same size, which will be the petals of the flower.
Related article: How to soften hard water with home remedies
Place the future petals horizontally on the board, so that they lie on top of each other, with a protrusion of about a centimeter. Next, twist all the layers together and place one side on the surface of the board. Now all that remains is to straighten all the petals, from the center to the sides, to give them a resemblance to a real rose.
A bouquet of roses will be a wonderful spring gift on March 8th.
Types of crafts
There are a lot of products of this type. They can be used to decorate your home or as a gift as they look very beautiful. Therefore, these crafts are often prepared for some holiday.
In addition to holiday products, you can sculpt from dough just like that. Entire compositions are obtained, so it is worth knowing what the individual elements look like.
New Year's options
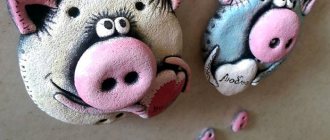
Children will happily take part in creating New Year's decorations. These crafts include Christmas tree toys. The easiest option is to cut out New Year's themed figures, bake them in the oven and paint them. After this, a hole is made in them for the rope. But you can also dream up.
They make a lot of holes in the figurines or decorate them with beads and seed beads (in this case, they should be dried only naturally, without an oven).
Ribbons or sparkles are used as decoration (they are applied after drying to a layer of PVA glue). It is allowed to color the dry dough with markers.
You can make an impression of the child's palm on the test and decorate it beautifully. This toy will remain as a keepsake.
To make such products, you should use your imagination, then you will be able to create original jewelry.
Congratulations on March 8
They are often used as gifts for International Women's Day. The most commonly used types of crafts for this holiday:
- keychains in the form of flowers;
- candlesticks;
- medals;
- pendants, etc.
These items are painted in different colors and decorated with beads, sparkles and beads.
On February 14
The most popular on this day are heart-shaped accessories. From the dough you can make:
- hearts (simple or decorated);
- keychains in the shape of hearts with paws;
- couples of loving hearts;
- Photo frame;
- Garlands.
You can decorate souvenirs for this holiday with sparkles, ribbons, and beads. You can also sculpt additional details - they are also suitable as decoration.
Flower shapes
You can sculpt flowers in different ways. Sometimes they are made flat by simply cutting them out of the dough using a cookie cutter. You can make embossed flowers - they take longer to sculpt, but look more attractive.
In this case, flower fragments are sculpted separately and then fastened together. To give the products a natural look, veins are drawn on them. The choice of technique depends on the design.
A flower is rarely considered as a separate product. Most often it is an element of the composition.
Panel with sunflower
A plate no more than 0.7 cm thick is rolled out from the finished dough. We cut a circle out of it, the edges can be patterned, as in the photo, and a hole can be made at the top for a ribbon. It is better to put the workpiece on a napkin.
Roll out a small piece of dough thinly and form it into a sunflower. To glue the parts of the composition, lightly moisten the base with water. When working with dough, water is used instead of glue.
From thin strips we form a sunflower trunk and a fence fence. Small pieces of rolled out mass are needed for cutting out leaves and flowers. Now all that remains is to make the pot and the corn. When all the elements are ready, glue them onto the panel using water.
After complete drying, we proceed to painting and applying a protective layer of varnish.
Using the same principle, you can make a basket of flowers, as in the photo below: