Of course, a bouquet of paper flowers in a vase looks very cute, but will this surprise anyone? Want to know how to make giant ones? DIY paper flowers? Then these eight simple instructions with step-by-step photos are what you need.
Life-size flowers made from corrugated paper look especially great . Just imagine them at an Alice in Wonderland themed children's party! And what a wonderful backdrop this would be for a photo session at a wedding. Making a large flower out of paper is no more difficult than flowers of regular sizes, the main thing is to figure out how to securely attach it to a stand for life-size flowers . You will learn about all this from the examples presented below.
Large flowers made of corrugated paper: impressive decor for interiors and photo zones
Decorating interiors in a floral style is gaining popularity: giant peonies, roses, sunflowers, poppies are used to decorate wedding celebrations and theme parties, romantic photo shoots and create unusual storefront designs. Even for hats and suits, you can make large flowers with your own hands - it’s no more difficult than assembling a small bouquet or life-size flowers from isolon.
Let's talk about materials
When it comes to life-size flowers, you may not immediately believe that this beauty is created from paper. But the corrugated one has unusual properties - in the article on making small flowers we looked at them in detail. Let us remind you that for tall giants, crepe paper with a density of at least 120 g with A and B flute (folds 1.6 and 3.2 mm deep) is most suitable - this will allow the petals to keep their shape.
But! Not all life-size flowers are made from thick corrugated paper. There are models whose petals should bend, curl or fall freely. For these colors, thin paper is used.
These balls do not require thick paper; thin paper for children's creativity or marked fine crepe is also suitable.
To make large flowers, also prepare auxiliary materials and tools:
- thick cardboard for the base;
- scissors or knife for cutting blanks;
- heat gun - large petals are easier to connect with hot glue;
- wire for the stem frame;
- round nose pliers for bending wire;
- fabric, thread, cotton wool for filling the base or for combining materials;
- foam balls or plastic containers as a base.
You will also need: imagination, good mood and a little magic...
Flower bouquets made of paper material
With the help of compositions made from artificial plants, you can decorate the walls of your home in an original way or decorate a corner of your bedroom by beautifully placing decorative elements in a wicker basket. Carefully executed bouquets of flowers of one type look great, but a combination of different buds, for example: peonies and daisies, hyacinths and tulips or dahlias and bells, will look more interesting.
Multi-colored hyacinths
An elegant bouquet of bright inflorescences will give you a spring mood and will become a wonderful decoration for any interior. Cute buds can be made quite quickly, and the resulting result will definitely arouse admiration among all representatives of the fair sex.
Basic techniques and secrets of creating life-size flowers from corrugated paper
The entire decorative effect of the finished product depends on the beauty of the flower head. The process of its formation is similar to making flowers from isolon, but adjusted for the properties of the material. Let's learn how to create large flowers from crepe paper with your own hands!
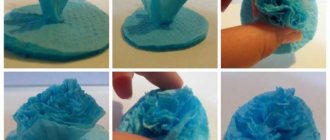
Accordion method
This funny hat can be made with children - the flower is assembled according to the accordion principle.
We will need several sheets of thin corrugated paper 20–25 cm wide. The length and quantity depend on the desired splendor of the finished flower. Before starting work, the sheets must be placed one on top of the other and the edges aligned.
Stages of work:
- Fold the sheets like an accordion and use scissors to give the edges a semicircular shape.
- Mark the middle of the prepared strip and tie it with thread or clamp it with floral wire, forming a loop for subsequent assembly.
- Disassemble the accordion, smoothing the edges.
- Lift the layers one by one, straightening each sheet.
- When all the layers are separated, the flower is ready.
- You can make several flowers and connect them through prepared loops.
The hanging balls from the previous photo were created using this principle. To create such colors, you can combine paper of several colors.
The difference with this design is that the inner part of the flower is cut with fringe separately, and then both parts are combined into a single flower.
And here are more flowers made using the same technique.
Detailed method
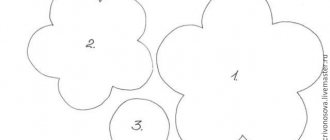
You will use this method if you decide to collect giant flowers from corrugated paper with your own hands. To do this, you need to cut out individual petals and leaves using templates. Patterns for large flowers differ from small ones only in size, so you can use the ones we offered in the article about corrugated paper flowers.
This giant peony hat is made using this method, but you will need some thick paper to keep it in shape.
The size of the petals depends on the author’s idea and the purpose of the decor: the largest petal can reach a length of 45 cm, but during assembly they will need additional fastening together so that the flower does not fall apart.
Since you will need a lot of blanks, it is better to make patterns from thick cardboard or pressboard - this way they will last longer. You can cut the petals with scissors or a stationery knife.
Tip: unroll the roll, fold it several times and then cut it out - you will get several blanks at once.
Next begins the most creative stage in creating a flower - giving shape to the petals. Smooth curves and detailed edge work are achieved by straightening the folds with your hands, stretching the workpiece using a metal ruler or the blunt edge of scissors.
First, use a pencil or stick to curl the edges of the petal, pressing firmly to secure the bend.
The volume is created by straightening the corrugations: slightly stretch them in the upper part of the petal and almost completely straighten the middle.
Finally, you can use the same technique to add wavy edges.
Important! When applying the template to the sheet, you need to make sure that the folds go along the petal - then it can be formed correctly.
This type of MK describes in detail the process of making peony petals:
If you are just learning how to collect large flowers from paper with your own hands, many of the nuances may seem incomprehensible. Let's look at them with an example.
This chrysanthemum is assembled from separate parts, mounted on a branch and placed in a stand made of a flower pot. We'll talk about these assembly details a little later.
For the flower head we will need:
- corrugated paper;
- cardboard circle with a diameter of 30 cm;
- glue gun
Cut out the blanks of petals and leaves according to the pattern, process the edges and give them shape.
You will need at least 30 petals of each size, 6 blanks 20 cm high for the sepals and as many leaves as your imagination and the length of the stem dictate.
Assembly is carried out on a cardboard circle. Let's look at the nuances that make the flower look realistic:
- The petals should be directed strictly to the center, thanks to this we will maintain the symmetry of the flower.
- Filling is carried out in circles, with each subsequent layer shifted towards the center by 1.5 - 2.5 cm. This will ensure a smooth decrease in the diameters of the petals, without the formation of voids. Approximately three rows should be obtained from each type of part. If necessary, you should add these or other blanks.
- The closer to the center, the more the petals should be bent upward, and the smallest ones are bent almost vertically before gluing, thereby filling the middle. This principle is laid down by nature - the petals open from the bud.
Compositions of large flowers on the wall
If you do not need a separate flower for a photo shoot, but a whole photo zone, you need to decorate the wall. There is no need for permanent fastening, since the flowers gather dust over time, may accidentally tear, or simply get boring, so you should use simple options:
- Double-sided tape - tapes or ready-made mugs are sold. This method is not suitable for a wall in a room, since marks remain on the surface. The solution is to use a portable smooth plastic surface as a base and lean it against the wall, supporting it so that it does not fall.
- Hooks – ready-made ones with Velcro are available for sale, but you can attach homemade wire hooks to the back surface with hot glue.
- Velcro – ordinary sewing Velcro is used, which is attached to the surface with a construction gun, and to the back of the flower with hot glue. Adhesive-based Velcro is also sold, which is also better reinforced for reliability.
What all these methods have in common is that you need a special surface to mount flowers.
An example of a stationary photo zone in the salon
But to create an original design, it is not at all necessary to hang the decor on the wall. You can tie a ribbon on a couple of hooks, to which you can attach flowers and threads with petals, as in this photo:
Or string strings under the ceiling to which you attach the decor, creating a magical atmosphere.
Video with visual examples of attaching paper flowers:
However, large corrugated paper flowers can be used not only for photo zones. They can serve as an amazing costume for a theater production or theme party.
Peony fancy dress costume
Flower girls are always spectacular
To create these costumes, the designer combined paper with fabric.
Nothing is impossible for limitless imagination! You can even make a chandelier from corrugated paper. The only condition is that there are no problems with the electrical wiring and that the lamps do not come into contact with the flowers.
And this charming cabbage made of corrugated paper will be an excellent setting for a children's photo shoot. It is made according to the principle of flat flowers - on a cardboard base. To make the baby comfortable, there is a pillow in the middle.
There are a lot of ideas for using giant corrugated paper flowers - fantasize, create beauty and delight yourself and those around you with your creativity!
Author of the article: Elena (ismene)
Apple tree flower (schemes and templates)
Flower inflorescences, buds and twigs are very easily collected from corrugated paper. I would like to invite you to make a flowering apple tree branch based on a real branch from a bush or tree.
We will need:
- beautiful branch from a bush or tree
- crepe paper in ivory or white for flowers and shades of green for cores and leaves
- hot glue
- scissors
- stamens of paper flowers
Ready-made stamens for flowers are sold in craft stores. But you can make it yourself from pink corrugated paper (I’ll tell you more about this later).
Stages:
From light paper we cut out a blank with petals according to this template.
You can choose any size. Depending on your goals. If you want to make large apple tree flowers and decorate your wall with them, cut out large petals. We will continue to create an unfading branch of a blooming apple tree. Therefore, you can see the dimensions from this diagram. We cut out a blank with 5 petals so that the paper fibers run vertically.
Cut out a strip of 4 x 2.5 cm from light green paper. Fold it 4 times. We also bend the stamens in half and put them into the green blank, as shown in the photo. Secure with glue.
We glue the blank with petals onto the resulting core and straighten them with our hands.
Cut out leaves from green paper. If you wish, you can apply veins on them with watercolor paint.
We begin to make an ordinary branch bloom. We plant flowers and leaves on hot glue.
It turns out to be such beauty.
I promised to show you how to make stamens yourself. In the work that we just looked at, the author of the stamens did it himself. To do this, he took ordinary twine, cut it into pieces and then dipped it into wax from a straightened candle. And I colored the ends by dipping a colored candle into a wax solution. I then dried it all on a plate. Such stamens look very realistic.
But if you don’t want to bother with it, the stamens can be made from the same corrugated paper. Cut out a small rectangular pink or yellow strip. We cut it into a fringe on one side and twist each fringe into a spiral. Then we roll the workpiece into a roll. The core with stamens for the flower is ready!
If you are inspired by this work, I suggest you look at a more complex version of making apple tree flowers from corrugated paper.
Master class “Growth flowers”. Step-by-step instruction
Alevtina Sandul
Master class “Growth flowers”. Step-by-step instruction
Master class on making life-size flowers from corrugated paper for decorating a music hall
Good afternoon I would like to share with you a step-by-step process for making a large life-size flower on a stand leg for decorating a music room for the March 8 holiday. life-size volumetric flowers with your own hands very quickly and at minimal cost. Large paper flowers for decoration seem to have been transferred to real life from a magical garden. Large decorations look very elegant and elegant, and delight children and adults. The idea to create a life-size flower appeared after a visit to the “Musical Living Room”
(a regional show of musical performances in kindergartens)
life-size flowers on a stem were used in the design of the dance as decoration . And I really wanted to try to make such flowers to decorate our music room.
The first stage is the preparation of all necessary materials.
Materials for production:
o corrugated paper 2 colors : orange (2 pcs.)
and green
(1 piece)
;
A selection of videos for beginners
We have selected several interesting video instructions, in each of which you can learn a lot of new and useful things, and most importantly, enjoy the result and be inspired to create!
Stunningly stylish and large flower made of black corrugated paper plus coloring:
And this, according to the craftswoman, is an economical option. You can mix techniques to create picturesque flowers for wall decor:
You can make a beautiful three-dimensional rose from white corrugated paper:
You can learn how to make a large flower from corrugated paper with a double stem in this video:
As a bonus, here's another inspiring video on how to make a bouquet of small paper flowers. You can hide sweets in them and give them to a loved one, or decorate your apartment with such a flower basket.
Making your own corrugated flowers: step-by-step instructions
The easiest way to feel the approach of any holiday is to start making home decor for the celebration. This time I decided to figure out how to make flowers from corrugated paper - realistic and stylized. Let's figure out together how to make flowers from corrugated paper and what you need for this.
There are many handicraft techniques in the world that allow you to make beautiful flowers with your own hands - today flowers are made from beads and fabric, ordinary paper (quilling, origami, applique, etc.), they are knitted and felted, but still one of the most popular methods of making remains assembly of corrugated flowers. What are these flowers good for:
- they can be either photorealistic or fantasy;
- they are easy to make in a few minutes (unlike felting or beading);
- easy to recycle (relevant for those who want to decorate a large hall with flowers for the holiday);
- very affordable materials - corrugated paper costs a penny, especially if you buy in rolls rather than sheets;
- no special training required;
- there is no need to use any complex tool;
- it’s easy to get an acceptable result without experience (for example, flowers can be made from paper with candies - even small bouquets look very presentable);
- the products are bright and expressive (which is very important for children).
DIY chrysanthemum flower made from corrugated paper
This beautiful chrysanthemum flower is made from crepe paper. It amazes with its realism, mega size and will always delight the eye with its unfading beauty. It is best to choose sheets of paper of delicate, soft tones, very similar shades to each other. For greater plausibility, use paper for sepals in muted green shades.
We will need:
- champagne corrugation
- dark green corrugation
- green corrugation
- scissors
- toilet paper roll
- glue gun
Making:
Cut out the details from paper:
- 2 pcs. — milky beige 37 by 6 cm
- 2 pcs. - milky beige and salad 48 by 30 cm
- 2 pcs. — salad 37 by 25 cm
On each rectangle we make cuts about 3.5 cm wide, not to the very end (leave 2-3 cm to the end).
Now there is painstaking work ahead - each strip will need to be turned into a petal of this beautiful flower.
To do this, twist the strip in the middle, bend it and fold it with its half. We form a petal by slightly stretching it from the center and then glue it to each other.
When all the petals of the blanks are formed, you can begin assembling the product.
We start with the smallest preparation - salad. We coat the bottom of the entire strip with glue and roll it up with the petals inward. This turns out to be the center of the flower. We coat its base with glue and insert it into the sleeve.
Next, we simply glue all the blanks with petals in a circle, starting from a small size.
And gradually moving on to more.
When the flower is formed, cut out the sepals from a small piece of green corrugation.
Fold several times to the desired size and cut off the edges, getting pointed sepals.
We glue them to the base of the flower, and paste them on top with a green “skirt”. For it, we cut out a strip and stretch one side with our hands.
Mega beautiful, huge chrysanthemum will decorate any interior or special event.
Getting ready for work
What you will need to make flowers from corrugated paper with your own hands:
- several rolls of paper (it is better to choose matching colors and green for leaves and stems);
- wire, floral sleeve or any other devices for stems;
- cardboard for blanks;
- glue;
- sharp scissors;
- breadboard knife;
- threads and fishing line.
It is most comfortable to work at a table in good lighting. If you plan to make large flowers (more than 15 centimeters in diameter), then you can sit on the floor (of course, after sending your children, husbands, cats and your beloved dog for a walk).
Video on how to make a crocus with candy from corrugated paper
Corrugated paper is often used to create flower bouquets with candy. This direction has its own name - suite design. Anyone can learn this skill. One of these master classes is shown in this video. See how easy it is to make an original gift in the form of a candy bouquet of crocuses.
Friends, I will be glad if you vote for the article with stars and by clicking the social buttons, it is important for me to know your opinion! Best regards, Love.
Making flowers
The simplest option:
So, making flowers from corrugated paper in more complex versions almost always follows the same scenario. I will describe it so as not to rewrite one by one:
- first you need to make a petal template;
- cut 15-20 petals for each flower (if you want to make a realistic flower, then make petals of different sizes - for example, five small, five medium, five large);
- cut the petals (when cutting, observe the direction of the corrugation);
- collect the central part of the bud (twist 5-7 petals together, tying them at the bottom and gluing them together);
- Next, the petals need to be slightly stretched and bent so that they take the most natural shape for the plant;
- Glue the prepared petals to the bud;
- fix the flower head on the prepared stem.
How to make a stem:
- We take a piece of wire, a floral sleeve, an ordinary twig - at our discretion, measure the required length;
- cut;
- decorate with green corrugation, or fabric, or paper;
- we imitate leaves, shoots and thorns;
- cut on both sides again.
Flowers from foamiran
Large foamiran flowers look presentable and last longer than paper products. At the same time, working with the material also requires extreme caution.
To create a flower from foamiran, you need:
- prepare the base of the required type (stem, core);
- mark and cut out petals of different lengths, but similar shapes;
- if desired, using a special stencil (mold) or a simple orange stick, you can make veins and patterns on the petals - for this, the material is preheated;
- when the petals are ready, their edges are carefully curled and stretched to obtain a natural waviness;
- the base of the petal is smeared with glue and attached to the stem or core.
The final decoration of artificial flowers can be painting, applying glitter or adding leaves. All you have to do is wait for the glue to dry and place the creation in the chosen location.
Realistic peonies
A peony is a large flower in itself, so it is better not to try to make small flowers, but to collect several really large and beautiful peonies. To make a large flower from corrugated paper, you will need about twenty minutes.
By the way, if you want to achieve a more natural color, you can take white paper and tint it with food coloring - delicate pink and orange flowers will really look like real ones.
The paper needs to be cut into rectangles, each rectangle should be rounded.
Next you need to slightly stretch the paper (as in the photographs) to give it a realistic shape.
Or a more complicated option:
Decorative and stylized flowers
How to make simple flowers from corrugated paper? Step-by-step instructions for making different colors and different methods.
Realistic lilies. Photos of creation step by step:
We make large flowers from corrugated paper - roses.
Such elegant and simple flowers made of corrugated paper can be useful for photo shoots or interior decoration, and they can also be used to create various decorative compositions on the street (just keep in mind that the flowers are quite light and can be carried away by a gust of wind). In general, full-size flowers are often used for decoration, but making them according to the same principle as small flowers is not too labor-intensive.
Photos step by step: stylized poppies, but in miniature.
In order to make lush artificial poppies, you will need paper of three colors (black, red, green), wire, thread, glue or stapler, and of course, scissors.
- From a roll of black paper you need to cut a cylinder about ten centimeters long.
- Tie tightly with thread and cut into a fringe along one edge - this will be the center of our flower.
- You can also make a box in the middle - to do this you need to take scraps and wrap them in black paper to make a ball. The ball is fixed with a thread or a stapler and attached to the center of the fringe.
- The roll of red paper must be unrolled and cut into six parts, each part folded like an accordion.
- Place all the accordions one on top of the other and secure them well with thread.
- The corners of the accordions need to be rounded with scissors.
- All petals need to be well unfolded (we straighten each accordion and it turns out to be a petal).
- Use thick wire or wooden slats as stems - they need to be wrapped in green corrugation, cut out large leaves and attached to the stems.
- Secure the poppy heads to the stems and straighten the petals.
Or a slightly different option on how to make a poppy flower step by step From and To:
Now you know how to make more flowers from crepe paper. If you want to make giant flowers, then for beginners it will not be very difficult, however, it is worth considering some points:
- use high-quality paper - of course, even from waste paper a master can make something beautiful, but for beginners it is better to rely on good materials;
- huge flowers must have weights, otherwise they will simply fall (or fix them with fishing line to the wall);
- do not smooth the petals completely, leave a slight corrugation;
- It’s better to have a lot of petals than a few (large roses with four petals look very pathetic);
- for a field composition, use several shades of green paper - then ordinary herbs and plants will look natural;
- if a child is making three-dimensional flowers with you, take care that he does not cut himself with paper, scissors, fishing line or threads;
- For decoration, use flowers made in two or three shades - more colors may look awkward.
Making a large corrugated carnation
It is always customary to give carnations for holidays. I offer a master class on making a red three-dimensional carnation from paper, which can be made for Victory Day and other significant events.
We will need:
- red and green paper
- PVA glue
- scissors
- wooden stick
Making:
Cut out a long strip of red paper. We fold it as shown in the photo.
Glue one end of the strip to a wooden stick to capture both ends of the paper.
Next, glue a strip of paper, making folds in it and moving each row down a little.
Until you get a bud like this. Fix the end of the strip with glue.
From green paper, cut out a strip with a jagged edge and a regular long strip.
Glue it to the bottom of the flower. And we wrap the second strip around the stick and fix it at the bottom with glue.
With such large flowers you can decorate a hall, a stage, or use them as decoration for various theatrical productions.
