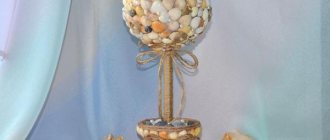
Sisal topiary is not only an original interior element, but also a creative idea for a hand-made gift
Floral fiber such as sisal can be seen in every flower shop today. More than one photo or video master class is devoted to making sisal crafts. Sisal is made from the leaves of the Mexican agave; it is a herbaceous shrub from the subtropics. Sisal fibers are coarse and stiff, but very durable. This fiber is most often used to make ropes, ropes, washcloths, and brushes. That is, production is far from artistic creativity.
But it was the masters of decorative and applied arts who drew attention to the fact that sisal is appropriate in needlework, as well as in a variety of types of decor. And now video instructions tell you how to build such beauty.
DIY topiary made of sisal: preparation of materials
The first thing you will need in the process is a special floral fiber called sisal. Unfortunately, sometimes it can be very difficult to find, so it is quite possible to make this material from scrap materials.
You should start by going to a hardware store, where they usually sell brushes for whitewashing houses. You should only choose an option with natural bristles, which are both thin and durable. However, economic “sisal” has no color, which the future topiary categorically does not accept.
You can add color to it in the following way:
- Buy dye in tablet or powder form.
- Take warm water into a vessel, add a few drops of vinegar, and then the dye itself in the specified amount.
- The brush fibers must be separated from each other and soaked in the solution for several hours.
- After a period of time, the sisal fibers should be laid out to dry on a clean surface.
Of course, when doing the job for the first time, you can use just one color, making sure that all the fibers are thoroughly dyed. In the future, it will be more advisable to mix several shades at once to get a more interesting composition. On this score, there is not a single master class designed to become a real assistant in this matter.
When starting work, it is very important to pay attention to where exactly the sisal will dry. For these purposes, newspaper or paper with a printed print is absolutely not suitable, the prints of which may well remain on the workpieces. A perfectly clean and snow-white surface is the ideal solution!
Shaping the trunk for topiary
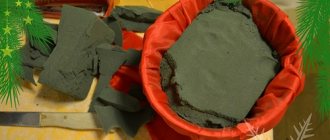
The next step in the master class will be to give volume, shape and color to the trunk of the future topiary. To do this, first of all, I used modeling mass, which you can borrow from your son or daughter or make with your own hands from flour, salt and water.
So, using modeling mass we shape the trunk and branches of the tree. Now you need to wait until this structure dries well.
If you want, you can stop there and just paint the trunk with brown acrylic paint, but in this master class I will tell you the secret of how to give the trunk a more natural shape.
To do this, you need to prepare the following solution: a small amount of water, PVA glue and plaster. We knead the dough from these ingredients, obtaining the consistency of thick sour cream, and cover the entire trunk of our apple tree with it. Our task is not to make the trunk coating absolutely smooth, but rather to create roughness, bumps and indentations using the gypsum mixture. And again you need to wait until the product dries and hardens.
Now we paint the trunk with brown acrylic paint, I did it in two layers in order to paint all areas more thoroughly. I mixed brown paint with a little white, resulting in a beautiful chocolate color. When the paint dries, you can additionally coat the barrel with colorless varnish.
DIY sisal topiary: master class for amateurs
Making topiary from sisal is no more difficult than from any other material.
First you need to prepare the following components:
- Construction gypsum.
- A flower pot.
- Wooden stick.
- Sisal.
- Decor elements.
- Glue.
First of all, it is necessary to “strengthen” the topiary by planting it in a solution of building plaster. At the initial stage, it is enough to secure only the barrel. The crown can be installed after it dries.
While the plaster is drying, you can start making sisal balls that look quite impressive on topiary. It’s too early to glue them onto the base.
The crown of the tree can be a small rubber ball that holds its shape tightly, or crumpled paper tied with twine. It all depends on the capabilities and desires of the master. In order for this element to adhere more tightly to the base, it must be fixed with instant adhesive and held in a given position for several hours. Now you can safely start decorating.
Sisal balls are also securely attached around the perimeter using glue, and then decorated with any elements you like: ribbons, flowers, beads or decorative mesh. The pot in which the tree will grow from now on is decorated in a similar way. Everything is very simple, stylish and elegant.
"Happy" tree
To create a tree in a pot for the interior with your own hands, you will need imagination, as well as: sisal fibers, newspaper, a small skein of yarn (can be replaced with a coarse thread), hot melt glue, a trunk (a branch without bark or sea driftwood will do), a flowerpot or pot, beads and ribbons for decoration.
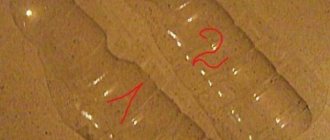
- Form the newspaper into a tight ball. It will be very durable if you master the papier-mâché technique. A wad of newspaper can be wrapped with tape, but in this case the surface of the workpiece will turn out to be angular. To make things easier, buy a styrofoam ball from a craft store;
- wrap the workpiece with yarn according to the “ball” principle if you are using the “newspaper” version;
- roll sisal balls and glue them to the workpiece, leaving space for a hole along the diameter of the trunk;
- place the top of the trunk coated with glue into the deep hole of the ball;
- dilute the alabaster to the consistency of medium-thick sour cream and pour it into the pots, about ¾ full (alabaster can be replaced with gypsum plaster, polyurethane foam or cement);
- immerse the trunk in the flowerpot;
- when the solution has hardened, coat the surface of the pot with glue and decorate it with multi-colored sisal fibers, glass balls, artificial flowers or coffee beans;
- Glue beads and ribbons in the form of bows to the crown.
How to make sisal balls for topiary: simple tips
When deciding to make topiary from sisal, in most cases you have to deal with small balls, which will not be difficult to roll.
For these purposes, the fibers must be separated from each other and laid out on a flat surface. Now, choosing each of them, you need to roll the pieces in your palms. This should be done slowly, with virtually no force. After about 10 minutes, you will have a small but fairly dense ball in your hand, the edge of which can be fixed with glue. Based on the size of the product, you can calculate how many balls are needed for the topiary. Of course, it can take quite a lot of time to make the first one, but once you get the hang of it, you can make them in a matter of minutes.
From such absolutely extraordinary designs, a New Year's gift can be realized - a Christmas tree that can stand for a single year! In addition, this particular tree is popular among all modern designers.
Its main advantages are:
- Ease of implementation.
- Laconic forms.
- The originality of the composition.
What’s remarkable is that you can make balls of different colors and sizes! And the most interesting thing looks like a ball rolled from two colors at once! This will not only make the work more interesting, but will also give the topiary a touch of piquancy!
Themed topiary
Fantasy trees are an original decoration for all occasions. For example, on the eve of the winter holidays, a New Year's topiary made of sisal can replace a traditional Christmas tree or fit seamlessly into the festive interior.
A small Christmas tree is made in the same way as other sisal fiber crafts. Only thematic materials are used in decoration. Decorate the ball with pine cones and miniature Christmas tree decorations, beads and rhinestones. And cinnamon sticks, together with tangerines, will fill the house with a magical aroma.
It is not at all necessary to give the tree a spherical shape. A tree in the shape of a classic Christmas tree looks no less original.
Note!
How to make flowers from cold porcelain: chic floristry and DIY crafts for the New Year step by step
How to make cold porcelain from potato, corn starch, liquid, without soda. Recipes and cooking methods
How to properly make a birdhouse with your own hands from scrap materials: we create an original birdhouse according to sketches
Topiary made of sisal and flowers
When starting to make topiary with your own hands, you need to look around and understand what else might be useful in the manufacturing process. You can decorate it not only with decorative elements suitable for these purposes, but also with fruits or flowers. The latter option is more preferable, however, over time, fresh flowers tend to fade and lose their appearance. The only way out of this situation is to use their dried or artificial equivalents.
In this case, the flowers must be chosen correctly, based on the following rules:
- The chosen option should be a perfect match in color and style.
- It is better to choose small flowers so that the topiary does not look too crowded.
- Before installation, it is better to remove the stems of the flowers.
Topiary “tree of happiness”: materials and tools
- Sisal (canvas or skein does not matter - it rolls into lone balls well)
- Newspapers for the base ball (or a ready-made foam ball)
- Wooden stick or tree branch for topiary trunk
- Gypsum for pouring
- 2 jars or cups: 1st larger, transparent, decorative. 2nd small (you can use jars of paint for gouache, acrylic, etc.) for pouring plaster
- Twine or string for wrapping a tree trunk
- Decor for decorating sisal topiary (flowers, beads, decorative fruits, rhinestones, etc.)
- Satin ribbons
- Clear glue (a glue gun is most suitable, especially when using a foam base)
- Scissors, thread
DIY aerial topiary (photo)
- Author: admin
Rate this article:
- 5
- 4
- 3
- 2
- 1
(1 vote, average: 5 out of 5)
Share with your friends!