Master Class. Ikebana "Autumn mood".
Galina Bogacheva
Master class. Ikebana "Autumn mood".
Autumn sunny day
Filled me with inspiration!
I send you greetings from Kuban!
And autumn !
Autumn is a wonderful time for creativity. After all, it is autumn that gives us wonderful natural materials for creating something extraordinary.
To realize my ideas and fantasies, I also use waste material. By combining two types of material (waste and natural)
I made
an ikebana “
Autumn mood ” .
To make it we will need: cones , waste material, glue gun, acrylic paint, hard wide brush, sharp scissors.
Tip: to make crafts, it is better to use large cones with well-open scales.
Procedure: cut off a wide part of the cone, about 5-7 scales. Cover the resulting part well with paint (paint each scale on both sides)
. Wait until the paint is completely dry. Apply a second coat of paint, carefully painting each scale.
If you want the flowers to be placed on the base at different levels, screw a screw into the middle of the painted cone or glue a small piece of foam plastic.
As a basis for forming a bouquet, you can use various waste materials: a plastic plate, a mayonnaise lid, the bottom of a plastic bottle, etc.
I used: a basket from a dried bouquet and a plastic ball. To make the craft stable, I glued the ball to the bottom of the basket with a glue gun.
Then we form a bouquet and add our imagination to embellish it a little.
Ikebana is ready.
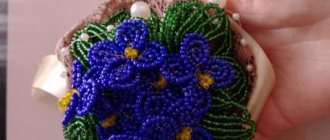
“Flower mood” - beadwork. Master class Master class “Flower mood” For work you needed: – beads of different colors; – thin wire for beads; - an empty jar from. "Autumn mood". Autumn group design Children return to kindergartens, to their home groups. Groups welcome children in a new outfit, in autumn. Autumn is the time of leaf fall. How. Children's master class “Ikebana from cabbage” (vegetable crafts) Hello! Our city's birthday is coming soon! So we decided to decorate our group not just with flowers, but with ikebana. Children's master class “Such different moods!” Children's master class “Such different moods!” The mood was gone. I looked for him everywhere: Under the sofa, under the table, in the yard and around the corner. Master class “Orange mood”. Photo report In anticipation of the New Year 2015, our group held a master class “Orange mood”. Goals: include parents in educational. Master class “Autumn Tree” Hello, dear visitors of my blog! I bring to your attention how my middle school children and I made a magical autumn forest.
Master class “Autumn tree”. Video Good day, dear colleagues. I congratulate everyone on the upcoming Knowledge Day, I wish you success, health and good mood. In July.
Master Class. Corner of emotions “My mood” Dear colleagues, I would like to present to your attention our corner of emotions – “My mood!” To create a corner we needed: 1. Ceiling. Master class “Decorating the group “Autumn mood” Necessary materials and tools: – white cardboard – scissors – moment glue – beads (I have white ones) – blue threads or fishing line. "Spring mood". Master class in the ganutel technique I want to share a master class in the ganutel technique. My composition will be called “Spring Mood” 1. We will need: – a glass,.
Vases
By the word "vase" the Japanese mean any vessel. The only requirement for it will be harmony in relation to the composition being composed.
The following are used as vases:
- wooden, porcelain, earthenware vessels:
- wicker baskets;
- rough ceramics;
- light glass vase.
When selecting a container, special attention is paid to the stability of the composition in the container. For low vessels, the bottom is often lined with kezan: a metal surface with protruding needles. This will help the bouquet stay in the correct place and not fall apart.
Crafts on the theme of autumn Ekibana
But, what’s most interesting: a little later, at 2304 x 3072 · 1075 kB · jpeg Source
Autumn crafts for kindergarten with your own 500 x 667 · 130 kB · jpeg Source
DIY crafts. Autumn. Except 571 x 470 · 54 kB · jpeg Source
Craft “Autumn has come” 454 x 605 · 50 kB · jpeg Source
DIY autumn crafts: “Tree 603 x 504 · 34 kB · jpeg Source
DIY crafts! (piggy bank super 510 x 340 · 48 kB · jpeg Source
Autumn. Crafts from nature 500 x 389 · 72 kB · jpeg Source
DIY seed crafts 520 x 381 · 44 kB · jpeg Source
Crafts from vegetables and fruits 744 x 679 · 73 kB · jpeg Source
Article on the topic of how to make crafts from 641 x 530 · 84 kB · jpeg Source
Dry bouquets of leaves / Master classes 520 x 389 · 46 kB · jpeg Source
From colorful leaves you can collect 640 x 470 · 125 kB · jpeg Source
DIY Ekibana autumn pictures 746 x 617 · 48 kB · jpeg Source
Taller de elaboracion de animales con hojas y castanas | Lengua de 500 x 465 · 88 kB · jpeg Source
Red leaves are a real decoration 480 x 526 · 37 kB · jpeg Source
Children's crafts from nature and 720 x 669 · 117 kB · jpeg Source
Craft product Autumn Festival Modeling 520 x 390 · 52 kB · jpeg Source
This photo is also in the archives 600 x 609 · 104 kB · jpeg Source
Volumetric paper craft traffic light 500 x 616 · 229 kB · jpeg Source
Let's try to preserve the beauty of a woman's 500 x 400 · 76 kB · jpeg Source
DIY autumn compositions: 35 photo ideas for using natural materials
Adding an article to a new collection
Autumn is one of the most beautiful times of the year, you must agree. Here you will find bright late flowers, a huge palette of shapes and colors of autumn leaves, orange pumpkins, scarlet rowan and viburnum, and caramel-colored cones with nuts... You definitely want to bring home at least a piece of this beauty.
If you want it, take it! Moreover, there are many ideas on how to “fit” compositions from natural materials into any interior.
And if you are confused by the abundance of options, we will share with you examples for inspiration.
The easiest option is to collect an ordinary bouquet of autumn flowers and leaves. Although no, it will definitely turn out to be extraordinary and very joyful - after all, autumn gives us so many colors. Use asters, chrysanthemums, marigolds, hydrangea, goldenrod, ageratum, helenium, verbena, rowan clusters, maple leaves - everything that pleases with brightness and color in the autumn.
And you can place all this splendor in the usual glass or ceramic vases, as well as in more exotic wicker baskets or even in hollowed-out pumpkins.
By the way, bouquets can be made not only from fresh flowers, but also from dried flowers - and we have already told you about this in detail.
Another “grateful” autumn natural material is conifer cones. Placed on a small tray or stand, they will discreetly decorate any item in the interior with their texture and color. Of course, you can add any other natural materials to these homemade compositions. Just remember to rinse the cones well in water after collecting and dry them in the oven for 10-15 minutes.
By the way, from autumn cones and nuts, you can make a topiary or “tree of happiness” - a modern stylish decoration designed to bring prosperity and comfort to your home.
The trunk of such a “tree” is made from branches, cardboard or pencils and is installed in absolutely any suitable small container (cup, pot, cup, bucket, etc.). To decorate the crown, you will need any nuts, cones, acorns and chestnuts of different sizes, collected on the basis of a paper or foam ball. However, there can be much more materials - craftsmen also use coffee beans, cinnamon sticks, autumn leaves, tree bark, dried citrus slices... Hot glue and wire will help to connect everything, and you can decorate the craft with sisal, ribbons, beads, moss, burlap, dry flowers.
Of course, when it comes to autumn crafts for the interior, many people will first remember the beautiful pumpkin. This is where it is a good material for a decorator - this vegetable comes in any size, and the color varies from yellowish-green to bright orange and beige-brown, and is easy to cut.
And if you think that only creepy faces can be cut out of pumpkins for Halloween, we hasten to dissuade you - its potential as a decorative material is much wider. We have already written in detail about how to decorate your home with pumpkin products. Therefore, today we will limit ourselves to just a few ideas for using pumpkins in the interior.
DIY autumn ekibana
Novikova Maria Vyacheslavovna
Ekibana is the ancient Japanese art of intelligently arranging natural materials. Although initially it was used exclusively for sacred purposes, over time the religious aspect ceased to be of great importance. Today, ekibana is a great way to decorate a home and add some new touch to it. And it doesn’t have to be exactly oriental motifs, because this art has gained popularity all over the world and there is an incredible number of schools and methods that will help you with your choice.
This is especially true for autumn Ekibana. Why? The answer is simple. After all, it is in the fall that there are fewer and fewer fresh flowers and making bouquets to decorate the house becomes more problematic. At the same time, an incredible amount of other natural material appears (dry leaves of amazing colors, acorns, chestnuts, pine cones, tree fruits, dry grass, etc.) which can be perfectly used for making natural autumn compositions. In addition, such material is much more practical because it does not succumb so quickly to the destructive influence of time and will be able to please you for many months.
It is better to start preparing for the production of autumn ekibana in advance at the beginning of autumn. After all, autumn weather is so fickle and unexpected rains or frosts in the middle of October can ruin all your plans. Therefore, it’s better to take a short walk in the nearby forest on a beautiful September day and collect everything that may be useful in making your masterpiece. These can be dry leaves, the last autumn flowers, tree bark, fruits, dry grass and in general anything that seems original to you.
This is interesting: Victoria and Anton Makarsky
When you have already collected a sufficient amount of material, it is important to prepare it correctly. Leaves and flowers need to be dried. You can do this by hanging them upside down in a dry, dark place. If you want the color to be brighter, you need to leave your material in glycerin diluted with water 2 to 1. You can also spray twigs, dry grass and other materials with hairspray (possibly with glitter). After this they will look even brighter.
For the shape of the autumn ekibana, you can use a tall narrow or wide vase. Or, more original, artificial coasters. A cut of a tree or a pumpkin is perfect for these purposes.
To attach the parts of the autumn ekibana to each other, use wet sand, ceramic drainage, and foam. Heavy branches are best secured using a gypsum solution. You can also make holes in a piece of wood using a thin drill and fill them with putty, but be sure to match the main color.
In general, the process of making autumn ekibana completely depends on your imagination and capabilities. The only requirement before starting work is the formation of the main “backbone” of the composition. Think it over from the very beginning in order to approximately understand what result in form you are striving for. Next, you can completely leave your creation to creative flight. Add small leaves and roots, already prepared dried flowers or twigs coated with varnish - do whatever you want. The main thing is that the end result looks harmonious and that the colors you use combine perfectly.
If you want the autumn ekibana to look even more original and go beyond the generally accepted canons, do the following. Stick dried flowers and leaves into orange or grapefruit peels. This will give your composition some tropical shades against the backdrop of the delightful Russian nature. Also, actively use soft and flexible branches for connection; willow ones are perfect; they will help you combine all the elements of the autumn ekibana so that they look more organic.
Thus, autumn ekibana is a great way to decorate your home and workplace for a long time. This is also a wonderful way to express your creativity, because the manufacturing process requires a fair share of extraordinary solutions. Imagine, create, create something out of the ordinary and let your loved ones be proud and enjoy your masterpieces!
Vegetable garden and more
How to make a craft on the theme “autumn” with your child?
What crafts can you make from autumn materials with your child in kindergarten?
What can you do for the autumn holidays in kindergarten with your own hands?
Step-by-step photo with description, master class
more than a month ago
I suggest making autumn crafts for the garden from leaves together with your child.
Beautiful leaves in yellow, orange, and red shades can be collected in a nearby park or just under the trees on the street.
Before using the leaves for crafts, they must first be dried.
The leaves are usually dried between the pages of old magazines or newspapers under pressure.
You can make a cute hedgehog applique from dried leaves.
To do this, you need to help the child and cut out the basics of the hedgehog’s silhouette from paper, after which let the child himself glue pointed leaves in place of the hedgehog’s needles.
You can also make other figurines of birds and animals from leaves.
Another beautiful idea is making a crown for the autumn ball.
Cut out a strip of thick paper.
Collected and dried leaves can be further painted by dabbing the paint that has been washed out on the palette with them.
The leaves can be placed symmetrically on the crown, or you can create a non-symmetrical pattern.
Examples of crafts made from autumn leaves with children can be seen in the picture below.
the author of the question chose this answer as the best
Making crafts is a creative activity that will help your child learn a lot of new things. By helping your child with this task, you can easily establish friendly contact with him and strengthen family ties. First you need to go for natural materials. Of course, the greatest variety of suitable gifts of nature can be found in the forest, but the square, alley or even the backyard of the house closest to the house will also do. Suitable materials for crafts include colorful leaves, rowan berries, moss, pine cones, etc. If you go to get materials to work with your child, you can tell him why the leaves change color and fall off, ask him to tell him your observations about what other changes occur in the fall, so the child will be able to learn a lot of new things.
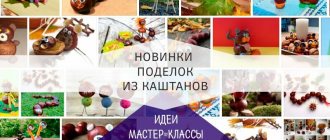
Beautiful craft made from chestnuts and cones for school
Autumn materials make very beautiful complex compositions, for which you can come up with any plot you want. I found an example of such a craft for you today and, unable to resist, decided to include it in the selection. Let's watch and enjoy.
Necessary materials:
- Chestnut fruit;
- Artificial flowers;
- Gouache;
- Plasticine;
- Cover from a cardboard box;
- Tree branch;
- Wire;
- Cardboard and colored paper;
- Chenille;
- Glue gun with sticks;
- Awl;
- Dry rose hips and rowan berries;
- Scissors;
- Toothpick.
Read also: Britannica cottage community forum
Subsequence:
Take a chestnut and use an awl to make 4 holes on both sides. This is the basis for the spider figurine.
Using wire cutters, tear off several small pieces from the wire. They will be needed to make the legs of the figurine.
We give the wire the desired shape and insert it into the prepared holes, pre-lubricating it with glue.
We paint our spider black.
We make eyes for him from plasticine or take ready-made ones from the toy store.
From a piece of colored paper folded like an accordion, you get this golden leaf. We put a spider on it. If desired, the leaf can be replaced with a real one.
Let's start decorating the lid. We cover it with gouache, creating an autumn motif using color combinations.
Using a glue gun, place the composition elements on the lid.
We make these mushrooms from chestnuts and pieces of tree branches.
Plasticine can be used to create a wonderful company of ladybugs.
And the already familiar chestnuts will turn into a very cute caterpillar.
Black and red rose hips and rowan berries will perfectly complement the composition and convey the autumn mood.
This cute hedgehog is also not difficult to make. All you need to create it is pine cones and plasticine. By the way, I have already looked at examples of such crafts in my other articles with MK.
It turns out very interesting, doesn't it? Such work can be presented at any school competition without fear of losing.
Let's see how else you can use chestnuts in your creativity. There's a whole selection of ideas here!
We already understand that chestnuts and cones are great for creating various figures.
How do you like this kind of work? The harvest in the fall not only needs to be harvested, but they also need to feast on it.
Another funny forest character to add to your collection.
As you can see, there are just a lot of options.
DIY ekibana from leaves “Autumn”: creative ideas. How to create an original composition
When autumn comes into its own, painting the world around us with multi-colored cheerful colors, you want to endlessly wander in the garden, rustling the fallen leaves. And in order to preserve the mood of autumn longer, you can create compositions with your own hands from natural materials, which this season gives people in abundance. An excellent product would be a DIY “Autumn” ekibana made from leaves. In addition to fancy forms of foliage, you can use dried flowers, vegetables and fruits.
What can be done?
From the materials that autumn presents, you can make various compositions together with your children. These will be absolutely free crafts made from pasture materials, but their value will lie in the warmth of the relationship between an adult and a child. In addition to the moral benefits, such a pastime is also beneficial for children physically: fine motor skills of the hands develop, which is necessary for speech, sensory abilities, and imagination. This is especially important for young children in the early stages of their development.
Natural materials will allow you to create simple crafts and children's toys, appliques, herbariums, and educational structures. An excellent craft would be an ekibana made from autumn leaves.
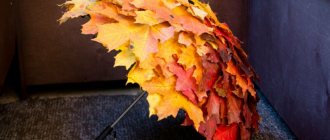
The adult theme developed by the designers will allow you to place exquisite panels, paintings and compositions on the walls of the rooms, for which you can use mixes of foliage of different tree species. Chestnut, maple and oak leaves go well together.
Preparation of materials
Before making an ekibana or other composition, it is important to properly prepare the source material. This is done in several ways:
- Autumn leaves are placed between the sheets of albums and pressed on top with a weight so that they do not curl when drying. Healthy, whole leaves are selected for planting. This preparation method is suitable for making herbariums, children's appliqués or sheet collages.
- To make voluminous crafts and bouquets using autumn foliage, the latter must be processed in a special way, which will be discussed below. This is necessary so that the foliage does not crack when twisted, is pliable and does not lose its original appearance. This method is suitable for making topiary or dried flower arrangements.
With proper preparation of the raw material - leaves - the crafts will retain their beautiful appearance, and the composition of leaves will not turn into twisted, shapeless, cracked masses. After all, you can make something like roses, cornflowers, chrysanthemums, daisies and water lilies from foliage. Moreover, their color will not only be natural - red or yellow - the products can be painted with colored acrylic primers. You can apply a variety of patterns on top with a gel pen and then varnish it.
Flower and vegetable ensemble
Pumpkin is one of the most versatile gifts of autumn. It can be used as an independent object in a bouquet, or it can be made into a magnificent vase.
Advice: despite the fact that pumpkin is a very large and thick-skinned vegetable, it is very fragile, therefore, to prevent it from cracking, you must use only well-sharpened tools.
Here are some options for fall arrangements using pumpkins.
A video on creating an autumn pumpkin composition is in front of you.
Activities with your child: ideas for ekibana
For manual creativity, you can offer the following ideas:
- Application. For it, you can use dried castings and flowers for the herbarium. On a thick sheet of paper, you need to lay out the available materials, combining them by color and shape. When the desired location is achieved, each element is glued using PVA glue or photo glue.
- Collage-ekibana on the theme “Autumn”. This composition is made for a frame. A layer of large bright leaves of dark colors is laid out on a thick sheet of cardboard or paper, smaller and greener ones on top, and small bright yellow and red leaves at the very top. You can mix in dried autumn flowers to create a three-dimensional picture. You can also make various shapes from foliage and flowers.
- Beautiful compositions can be made from leaves, flowers and pine needles, securing them to cardboard with wire.
- The fallen branches are fixed in the form of a tree, and leaves and flowers are attached to it.
Preparation of raw materials for volumetric crafts
Volumetric ekibans from natural material “Autumn” are not made by folding dried leaves, as they will break. Therefore, the material for such work is processed in a special way.
This is done like this:
- Prepare a solution consisting of 200 ml of glycerin and 400 ml of clean cold water.
- Place fresh fallen leaves evenly and carefully in a plastic bag and fill them with the prepared solution.
- The edge of the bag with the contents is hermetically sealed using a heated knife or carefully sealed with adhesive tape.
- The bag should be left for three to four days in a cool, dark place, and then removed and the foliage placed on a paper towel to dry.
Leaves treated with this method will be flexible, retain their original appearance for a long time, and flowers of various shapes can be arranged from them to create a stylish and original composition of leaves.
Crafts made from plasticine and pine cones on the theme “Autumn has come”
Autumn has arrived, and with it all the forest inhabitants who are not averse to enjoying the harvest that has arrived. Just like these little bunnies from pine cones and plasticine that we are going to make now.
For this you will need:
Subsequence:
We roll balls from pieces of gray plasticine and attach them to the base of the cones. These are the heads of our figures.
Next, from plasticine flagella of the same color and small pieces of pink plasticine, we make ears for the hares.
Add details of the faces: noses and eyes.
We will have a boy hare and a girl hare. Therefore, we make a beautiful bow for one figure, and a very stylish tie for the second.
We return to gray plasticine and use it to make arms and legs for the bunnies.
The girl will hold a flower in her hands, and the boy will hold a carrot. You can change these parts as you wish.
We make small clearings from green plasticine and place our bunnies on them. All is ready!
Read also: Closed sauna stove
Well, again, I’ll give an example of a couple more figures that can be made from pine cones and plasticine.
Very nice, isn't it?
In fact, any character can be played like this. There would only be a desire.
Preparation of material for flat compositions
For flat crafts, there are several methods for drying raw materials:
- Dry with a hot iron. Autumn foliage and some small flowers are dried with an iron. To carry out this operation, the raw materials are laid out evenly on thick cardboard and covered with thin paper. Then all this is carefully ironed until the moisture has completely evaporated. The iron should not be very hot.
- Drying naturally. For this method, collected flowers, folded into bunches, are hung on a rope in a dry room where there is good ventilation. The bunches are arranged with the inflorescences facing down. A DIY leaf ekibana “Autumn” created from such material will have an original natural look.
- Oven drying. This method is great for drying and preparing large single flowers (roses, tulips, peonies) for making ekibana and compositions. To do this, the temperature in the oven is not very high, within sixty degrees Celsius, and the raw materials, laid out on the base, are slowly dried. At the same time, you need to carefully ensure that the flowers do not begin to turn brown or lose shape.
- Volumetric drying of flowers. This drying method best preserves the color and natural shape of the autumn flowers that will make up the leaf ekibana. With your own hands, you can preserve autumn in this way for a long time. After cutting, the flower is placed in pre-calcined and dried sand for about one month. A container with a fine mesh bottom and a retractable bottom can serve as a container for this. Terry volumetric flowers, such as roses, dahlias or lilies, are placed with their stems down, and flat inflorescences-baskets of flowers such as asters, buttercups, forget-me-nots or daisies are placed with their stems up. At the same time, holding the flower in the desired position, it is carefully sprinkled with sand in layers to the top.
ideas for schoolchildren for a technology lesson or for decorating an apartment, photos and videos
Ekibana Autumn, made from natural material with your own hands, can perfectly fit into the design of absolutely any home. By creating such a craft with your own hands, you will fill every room with the atmosphere of autumn and add zest to the interior of your home.
The creation of ekibana becomes relevant in the autumn period. Due to the fact that in autumn there are fewer and fewer fresh flowers, and the desire to decorate your home with floral motifs does not weaken, despite the gloomy rain outside the window.
And this does not mean that there is no opportunity to find different natural materials for making compositions on the theme of autumn. A huge variety of all kinds of unique and colorful elements can be found during this period - all kinds of cones, tree fruits, autumn leaves, acorns, rowan berries and other autumn gifts.
Compositions created on the basis of natural materials will be endowed with special energy and will bring peace and tranquility to your home.
In the case where you need to create an ekibana for the autumn ball yourself, you need to think about preparing the necessary materials in advance. You need to start collecting the necessary material for the composition from the very beginning of the autumn period, because most of the vegetation quickly withers and disappears.
You can choose a favorable sunny day and take a walk through the forest or park, where you can find a wide variety of leaves, see a riot of colors and choose the necessary material for making ekibana. You should choose only the material you like. Or you can collect everything unusual and beautiful, since all this can be useful in the future.
Preparation of necessary materials
Before you start creating an ekibana, you need to prepare the required material. To create a beautiful composition of autumn leaves, you should select only undamaged and healthy leaves.
The material should be dried in the middle of the pages of a book or album, placing them under a load. This manipulation is required in order to eliminate the possibility of leaves curling in the future. Having prepared autumn material using this method, it can be used for children's applications, collages and herbariums.
Volumetric buildings
If you need to create a three-dimensional structure, autumn leaves should be soaked for three to four days in a solution of glycerin (200 ml) and cold water (400 ml). Having processed them in the described way, the leaves become flexible, pliable and retain their original beautiful appearance.
Flat crafts
There are four methods to prepare leaves for flat buildings:
- The natural way. Having collected natural material, it must be tied into bundles and hung on a thread in a dry, well-ventilated room.
- Dry using a hot iron. Place the leaves on thick cardboard, place thin paper on top and gently iron with a hot iron. This procedure should be carried out until the moisture from the leaves completely disappears.
- Volumetric drying. Using this method, flowers best maintain their shape and volume. The flower must be cut and placed in dried and calcined sand for one month.
- Oven drying method. To do this, you need to set the oven to a low temperature, no higher than 60 degrees Celsius. Place the prepared natural materials on a baking sheet and dry slowly. During this procedure, it is necessary to constantly monitor the condition of the leaves and flowers; they should not darken or lose shape.
Autumn themed ekibana can be placed in a decorative vase, basket or on an artificial stand. If you show more creativity and creativity in this matter, then, for example, the vase can be replaced with a pumpkin or a small hollowed out log.
The procedure for making a composition on the theme of autumn depends entirely on personal imagination and preferences. It can be varied with various details. But do not forget that the initial task when composing a composition is to make a base or “backbone”. You need to think it through in advance.
If you want to create a composition with your own hands, you can find a variety of photo ideas on how to make it on the Internet.
To fix the craft, it is better to use plasticine or foam rubber, which must be placed in the selected container.
An autumn composition made with your own hands will help complement the design of your home. You can do this process with your children. For children, schoolchildren and even adults, this activity will be educational and exciting.
Video on the topic of the article
webdiana.ru
Tools for work
Before making Ekibana, you need to prepare the following tools for work:
- scissors, for adults - large, long, and for children - small with rounded tips;
- stacks - for children and a stationery knife - for adults;
- an awl with a thin tip and a comfortable handle;
- manicure tweezers, the front part of which is folded and twisted - for twisting some parts and wires;
- long tweezers - for small parts;
- thin, durable and flexible copper wire for frame crafts and toys 0.35 mm in diameter;
- foil paper and foil for decoration;
- threads and sewing needle - for fastening parts and bouquets.
Materials for work
To create a do-it-yourself ekibana “Autumn” from leaves, the following materials may be needed:
- types of paper different in thickness, color and density (wallpaper, corrugated, parchment, velvet, copying, wrapping and landscape);
- multi-colored polymer clay and plasticine - for sculpting additional details of compositions;
- BF, PVA or “Mars” glue;
- brushes and gouache or watercolor paints are useful for painting materials and flat compositions;
- For large-scale work you will need soft squirrel brushes and acrylic paints.
