Rating: 5/5 (11)
According to legends, people received satin stitch embroidery as a gift from the gods. From Asia, this skill, which became a mastery, migrated to Europe, where it became incredibly in demand. The most skilled embroiderers spent 24 hours a day decorating fabrics, bed linen and thin handkerchiefs with flowers and ornaments.
And modern models with embroidery, even machine embroidery, sometimes cost a fortune.
Features of the satin stitch embroidery technique
Satin embroidery includes many techniques in which the design is made with small stitches. Thanks to the dense layering of threads, the pattern gains additional volume. Its uniqueness is that, using special techniques for one pattern, you will get completely different patterns.
Satin stitch requires preliminary preparation, and it is worth mastering the step-by-step technique of satin stitch embroidery for beginners, with diagrams and tips from craftswomen. But by spending time on training, you will learn to create incredibly beautiful, subtle and exquisite paintings.
Varieties of smooth surface
There are several types of satin stitch that can be combined in one pattern.
It is important to know the features of each technique in order to select it for the final result. A simple satin stitch looks the same on the back and front sides, so it can be used to decorate kitchen towels. The stitches lie parallel next to each other. This method is best suited for learning embroidery. It is not recommended to take complex motifs; you can start with simple drawings to master the technique and get better at it.
When embroidering in satin stitch with overlay, the design element is filled with simple short stitches and embroidered on top with a simple satin stitch. The pattern turns out voluminous.
Colored artistic satin stitch is made with threads of different colors. This uses a special type of stitch. This technique is characterized by transitions of shades and their chaotic alternation. This creates a volume effect.
Chinese satin stitch on silk or satin fabric is a more complex type of embroidery, as it involves smooth color transitions. The complex play of shadows is the charm of plant motifs that look lifelike.
Russian smooth surface ( Vladimir ) is made with plant or animal motifs, as well as repeating patterns. Most often, one color of thread is taken - red, green, blue, yellow.
Artistic
Chinese Vladimirskaya
Do you like satin stitch embroidery?
Not really
Ideas for satin stitch embroidery with patterns
There are actually a lot of satin stitch embroidery techniques. They differ in stitch length, the presence of flooring and the density and thickness of the threads. But before moving on to the intricacies of different techniques, you need to practice, as they say, get your hands on the simplest and most popular ornaments and designs.
White satin stitch embroidery (patterns for beginners)
White-on-white embroidery creates unusually feminine patterns and is why it is so popular when creating wedding dresses. This work is extremely painstaking, and machine embroidery is often used to create large designs.
But from the first minutes we will not aim at whole dresses and remember that bed linen, towels, tablecloths and handkerchiefs are decorated with white on white. Monograms with initials are especially popular. Exquisite curls surrounded by floral and plant patterns will decorate a hand-crafted gift.
- White threads on a white background create associations with frosty patterns.
- The thickness of the threads should be comparable to the thickness of the fabric.
- If you use thin silk threads, then the fabric should be silk, cambric or chiffon. For cotton threads, calico, linen and cotton are suitable. A denser “floss” fits well on burlap.
- For beginners, the best base is starched cotton fabric (calico, for example).
- Embroidery on very thin fabric does not require special equipment - you can use special tracing paper for satin stitch embroidery.
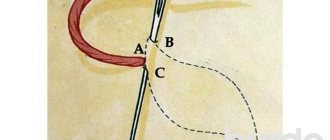
- The pattern can be transferred to the fabric in several ways: apply a film with a pattern to the fabric and embroider the outline with a “forward needle” stitch (as shown in the figure), after which the film is removed and the pattern is sewn up with even stitches.
- White satin stitch requires additional tracing of the finished pattern, which is done with the same threads as the embroidery itself using the short straight stitch technique.
- The most beautiful design is considered to be the one located diagonally in the corner of the fabric. But for beginners, you can simply practice on a small, flat area.
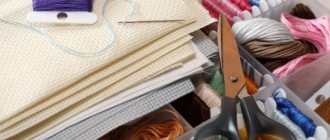
Tools and materials
For embroidery, you need to purchase the necessary materials and tools that will match each other and be suitable for this technique.
- The basis . They embroider using Vladimir satin stitch on fabric, not canvas. It is better to use linen with a uniform weave of threads, which will ensure even stitches. With traditional patterns, unbleached looks especially attractive.
- Threads . You can use floss or silk threads. Sometimes wool is chosen, but this material cannot be called traditional for Vladimir patterns.
- Needles . Their size should match the embroidery threads and base fabric. The end of the needle should be sharp, and not rounded, like tapestry needles. If experience does not allow you to determine what thickness of the tool is needed, you can look at the special correspondence tables in our article about embroidery needles.
- Carbon paper (copy paper) . Used to transfer a pattern onto fabric. Drawing on matter is much more difficult than on paper. Therefore, the finished pattern should be transferred to the base material, and not try to depict it directly on the canvas.
- Hoop . Embroidering on fabric that does not have strong tension will not work. The stitches will be too tight, tightening the base and causing wrinkles to appear on it. For large projects it is better to choose a frame, and for small ones - a classic round hoop.
Editorial Voice
Matryona
Fan of embroidery and sewing
Ask a Question
a thread organizer when working . It will allow you to distribute the floss or silk by color and prepare the threads in advance, cut to the length required for the work. Since Vladimir satin stitch does not imply the use of a large number of colors, it is practical to use thread spools made of plastic or cardboard placed on a metal ring as an organizer.
Basics of flower embroidery in satin stitch with diagrams and patterns for beginners
Floral motifs are probably the most popular subject for embroiderers. -Russian folk embroidery - used and depicted all known flowers and plants on clothing, by which one could determine where a person came from.
- The main idea of the technique is that the stitches should fit tightly to each other, without leaving the slightest gaps. But at the same time, they should not overlap each other, so as not to create visible thickenings. You should kind of duplicate the fabric, but with certain patterns.
- Flowers and floral arrangements are often transferred to children's clothing, because satin stitch embroidery patterns offer an unprecedented variety of options from very simple daisies and bells to complex bouquets woven into the ornament.
- To embroider paintings using satin stitch, an “embroidery machine” is often used, because the quality of the work also largely depends on the tension of the fabric. It is difficult to hoop clothes, so the best option would be small individual flowers or leaves. You can cut out the finished embroidery and transfer it to clothing in the form of an applique.
- Larger parts can be decorated with long stitches, while thin branches or stems are best done with short, small seams.
- Flowers are suitable for decorating girls' dresses and shirts. The decor for boys' clothing should be more restrained, and you can choose cross stitch patterns for a variety of themes.
Schemes of satin stitch embroidery of poppies and lilies
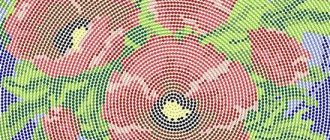
Poppies have always been a popular pattern on clothing, but even today this pattern has not lost its relevance. It is with poppies that craftswomen primarily decorate boring jackets, coats, shirts and even bags.
Embroidery is at the peak of popularity today, so you can not only hone your skills, but also get a designer item.
Operating procedure:
- transfer the drawing onto tracing paper or simply trace it, attaching the diagram to the glass;
- stretch the fabric onto a hoop or machine so that the finished embroidery is perfectly even;
- Place the design on a section of fabric and begin embroidering the outline using a needle-back stitch;
- After creating the outline, remove the tracing paper (carefully remove the remaining fabric from the seams with tweezers);
- shades always go from light to rich colors, and when embroidering flowers, the stitches should be of different lengths, so the flower looks more voluminous and natural
- The middle of the finished flower can be additionally decorated with beads; for this there are simple bead embroidery patterns.
Embroidering a lily requires more skill, since it involves more shades and you need to correctly position and combine them on the petals. Irises are also very popular - they are especially loved by craftswomen who are fond of embroidering pictures.
Stitch embroidery of roses with patterns for beginners
Rose is the queen of flowers and one of the most favorite themes for experienced embroiderers. The complex contours of the petals, many shades and transitions are an indicator of skill. But you can start, as they say, with the basics - with a contour, on which you will hone your skills and gradually move on to more complex ornaments.
A small flower can be used to decorate an item of clothing. Choose threads to match the finish or in contrast - in any case, the flower will look beautiful.
If you are interested in the topic of creating floral motifs on fabric, check out rose ribbon embroidery.
Oak leaf satin stitch step by step
The classic version of the embroidered sheet is made with a fishbone stitch. Be careful when placing threads side by side. The threads should completely cover the fabric. I draw along the center line to ensure the stitches are always neat and centered.
Watch the video : only 11 minutes
