Tools and materials that are necessary to perform work using the decoupage technique
- Hard brushes for applying glue and varnish;
- semi-rigid brushes for applying primer and acrylic base;
- soft artistic brushes for applying background and decorative paintings;
- spatula, palette knife or plastic stiletto from plasticine for surface treatment;
- fine-grain sandpaper or other similar abrasive material;
- sponge;
- scissors (optimally manicure scissors);
- glue: PVA or special decoupage;
- varnish: special decoupage or regular parquet (depending on the nuances of the structure of the base surface);
- paints: primer, acrylic, sometimes gouache;
- file (in cases where an additional dense base is required to transfer the design to the item being decorated);
- decoupage napkins or cards;
- various additional decorative elements: ribbons, lace, beads, clay figurines, foil, gold leaf and so on (everything that the master’s imagination suggests).
Decoupage cardboard box. Step-by-step instruction
It is important to remember that cardboard is paper, which means it easily gets wet and rubbed at the joints. Measures must be taken to prevent this. These measures will be the first steps.
- Tape all the joints and corners of the box with scraps of paper or masking tape.
- Open the surface of the box with white primer. Wait until dry and clean with abrasive material. Repeat at least 3 times.
- After making sure that the primer is completely dry and the cardboard base is well protected from getting wet, paint it in the background color.
- After the paint has dried, apply a layer of glue to the walls and lid of the box, and on it - pre-separated top layers of decoupage napkins with the desired pattern. The most convenient way to smooth out napkins to remove air is through gauze.
- Complete the missing elements of the napkin designs, as well as additional details of the image, with paints.
- It is possible, but not necessary, to artificially age the edges of the box to enhance the natural effect. This is done by sponging brown paint onto all joints and corners.
- The final stage is to coat the box with several layers of varnish (at least 3). Apply each subsequent layer only after the previous one has completely dried.
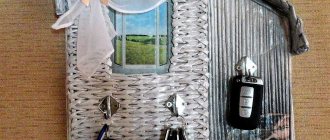
Cardboard boxes decorated using decoupage can be used as cases for gifts, as boxes for storing haberdashery or jewelry, and as decorative stands.
Decoupage in different styles
Decoupage for beginners is a creative activity. Even using the instructions does not deprive the product of its originality. After this technique, the box or book will become original of its kind. Before you begin converting a product, it is worth considering all available options.
Design can be done in different styles:
- vintage;
- Provence;
- shabby chic.
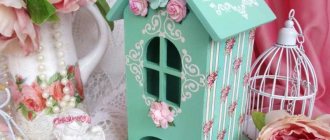
vintage style decoupage . With the help of certain tricks, the box can be somewhat aged. To achieve maximum effect, experts recommend using the craquelure technique. The aging effect is created using paint, which is applied directly to the prepared surface. To begin with, dark paints are used, and lighter colors are applied on top of them.
Decoupage boxes in vintage style
Stages of decoupage in vintage style:
1. The first layer can be applied with brown paint, then wait for the surface to dry.
Related article: Creative refrigerator using decoupage technique
2. Next, they begin to create the worn effect. To do this, apply a small amount of wax to the edges of the product. This will make the second coat of paint look somewhat worn.
2. A second layer of paint is applied, only in a lighter shade. The best option is white, light gray and beige.
3. When the paint has dried, lightly sand the areas with sandpaper. Processing is carried out until the bottom layer of paint comes out.
3. At the final stage, the product is decorated. The best option here would be retro pictures, roses and other patterns. The craquelure technique is also often used for decoration. This box made using decoupage technique will become an original decoration for any room interior.
No less popular is decoupage in Provence . The work is performed in the same sequence. Of course, there are some peculiarities here. Flower designs or rustic motifs are used for decoration. It is rational to use paint in bed shades. The aging effect is also appropriate here. Using the craquelure technique, you can create the appearance of cracking of the design.
Decoupage boxes in Provence style
Provence style is ideal for transforming a round box.
A box in the shabby chic is decorated almost the same as in previous techniques. Characteristic features are bed colors, old pictures, images of flowers, twigs and other “delicate” details. Shabby chic is used to decorate various items, regardless of their shape and size. This is especially true for products made in the form of a book.
Decoupage using the shabby chic technique and using printouts (2 videos)
Interesting ideas for decoupage boxes (41 photos)
The best posts
- Is it possible to glue wallpaper onto wallpaper: how to glue non-woven wallpaper, will wallpaper stick to paintable wallpaper, water-based paint, vinyl, liquid, video
- What should be the dimensions of window openings according to GOST
- Finishing the floor on the loggia and balcony
- Quick-drying, odorless paint for the floor of your country house
- DIY kites for children: drawings with diagrams and photos
- Stylish and fashionable: interior like Zverev’s [house review
- Types of hinges for cabinet doors and their installation
- Silk: types, properties, fabric care
Related article: Original do-it-yourself photo frames (+50 photos)
Decoupage of a wooden or plywood box. Step-by-step instruction
Wood and plywood perfectly absorb dyes and adhesives and are a good basis for decoupage. The only negative is their fibrous structure, which can spoil the appearance and prevent the uniform adhesion of napkins and cards. Therefore, an important stage of work is the preparation of a wooden or plywood base.
- Sand the surface of the box with sandpaper or other abrasive material.
- Treat the inside of the box with stain.
- Apply primer, white acrylic paint or stain to the base (depending on the desired subsequent tone of the product).
- After drying, successively apply two or three layers of acrylic paint for the background of the product onto the base. Allow to dry thoroughly. (If stain is used for the background, this item is skipped).
- Apply a layer of glue to the areas on which the picture will be applied.
- Cut out or tear out the required pictures from decoupage napkins, soak them on a file, attach the picture to the placement area on the box.
- Iron the picture thoroughly with a hard flat brush until the air is completely removed and evenly straightened.
- Complete the missing elements and patterns with paints.
- Finish the job by coating the box with several layers of varnish.
- If desired, you can use gold leaf, beads, bows, and sprigs of artificial greenery as additional decorations.
Such a box is useful for storing bulk products in the kitchen, newspapers and magazines in the hallway or in the living room, toys and construction parts in the nursery; for the presentation of wine and cognac bottles, fruits, sweets to guests during the holiday.
The process of decoupage of metal and plastic boxes is generally similar to the process of decorating wood products described above. But it should be borne in mind that the preliminary stage of working with a metal or plastic base is its complete degreasing. It is best to use alcohol for these purposes.
Decorated metal and plastic boxes are convenient for storing small, easily lost items. Metal boxes are also indispensable for storing tools, strong-smelling substances, and medicines. Plastic boxes decorated using the decoupage technique make excellent boxes, flower pots, and containers for spices.
An interesting effect of a single whole with the base can be achieved on wooden, metal and plastic surfaces by implanting a printout. In this case, the pictures from the napkins are transferred to the base not from the back, but from the front side.
Decoupage technique
Having all the necessary materials and tools, you can proceed directly to creative activity. It is worth noting that wood is considered the best option for decoupage. If desired, a book or plastic product can be used.
Stages of decoupage of a wooden box:
1. First you need to prepare the surface of the box. If we are talking about something made of wood, then the base should be carefully treated with sandpaper. High-quality surface preparation will be the key to successful decoration of the box. This is especially true for older products.
2. If the item has metal decorative elements, it is better to remove them for a while. This issue can be resolved using a screwdriver or other available tools. Once the surface is prepared, you can begin tinting it. Here we are talking about painting it completely with acrylic paints.
Related article: Making a wedding album: master class (+50 photos)
3. At this stage, the selected pattern is transferred to the surface. Ready-made drawings can be purchased in special stores. The part with the image on it is carefully separated from the napkin.
4. Elements of the design are carefully applied to the prepared surface. Selected areas on the product are treated with decoupage glue. After this, you will need to wait until the glue is completely dry.
5. At this stage, the item is varnished several times. When the surface is completely dry, you can begin direct decoration. To begin with, the previous decorative elements are fixed in place. At the same time, they take into account the style in which the product itself will be designed. In some cases, a rational solution would be to change or completely remove certain decorative elements.
You need to consider the style in which the product itself will be designed. Decoupage of a wooden box involves decorating it, including changing all decorative elements and fittings.
On video: Decoupage of a box with antique scuffs
Step-by-step instructions for implanting a printout
- Apply a thin layer of acrylic varnish or special gel polish to the prepared, cleaned and primed base.
- Soak the pre-cut or torn picture in the same varnish.
- Place the picture face down on the base, smooth it out and leave it there until it dries completely (about one day).
- The next day, moisten the picture with water and carefully remove the paper layers with a sponge until the picture is fully developed.
- Complete the details of the picture and patterns.
- Cover the product with three to four layers of varnish according to the general rules of decoupage.
Tips for thematic and compositional design of boxes
- For products that will be used in the nursery, it is best to use images of fairy-tale and cartoon characters, drawings of flowers and butterflies; the colors should be light and joyful;
- for those boxes that will be used in the kitchen, images of fruits and vegetables, flowers will be optimal;
- for boxes it is best to use common interior design motifs, such as Provence or kitsch;
- for boxes in which gifts will be presented, it is most natural to use motifs and colors that correspond to the gender of the gift recipient: for women, bright, rich colors, patterns and designs are suitable; men will be more pleased with discreet shades and images from the sphere of male interests (cars, weapons, armor, maps, etc.).
Decoupage a box is not too difficult and quite a fun activity. Proper efforts will give things a second life.
Decoupage of shoe boxes.
Don't limit your imagination, let your imagination run wild! Create masterpieces with your own hands! Decoupage of shoe boxes can be completely different, and doing it at home is not difficult.
Decoupage of shoe boxes: master class
1. You can cover the box with fabric. Fortunately, there is now a lot of it for different tastes. Can be glued using PVA. The only drawback is that the cardboard can get wet from it, so you need to use it very carefully.
2. In addition, it can be covered with self-adhesive film. This is very convenient because you don’t need to use any glue. In addition, after decoupage, such boxes can be wiped and even washed with soap.
3. You can also use leftover wallpaper. If the wallpaper is washable, it also turns out beautiful and quite practical. Instead of PVA, you can use a stationery glue stick.
4. And finally, you can simply paint the box. When painting a box, you can create various effects. For example, aging or craquelure effect.