Applications
Paper is a material that is easy to cut, bend, and glue. A master class video will help you make an applique of an original paper cat.
Another option is appliqué using pieces of fabric.
For work you will need the following materials and tools:
- foam base 3 cm thick, size 50x80 cm;
- multi-colored pieces of fabric;
- marker;
- scissors, manicure file, stationery knife.
A cat is drawn on the base sheet; you can use a stencil. All details are cut with a stationery knife.
A piece of fabric is cut out a little larger in size than the applique piece, placed on top of the design and carefully tucked into the slots with a nail file. The edges are secured with glue.
Cat from a simple disk
You can make a classic origami cat craft, but this is a slightly outdated idea. Today, a craft made, for example, from an ordinary CD disc can be considered unusual.
The following materials will be needed:
- any CD or DVD disc;
- paper of different colors;
- felt-tip pen;
- corrugated paper with double-sided tape;
- scissors.
In order to make such a craft yourself, you must first look at a photo of the cat craft to understand how it should look in the end. After this, a circle is cut out of paper of any dark color.
It is important that its size is slightly larger than the size of the hole that is on the disk. Next, the circle is glued directly to the center of the disk so that the hole is completely closed. That's all - the cat's nose is ready.
All that remains is to cut out the eyes and ears from colored paper. They can be of absolutely any shape.
Volumetric figures
It’s not difficult to make a three-dimensional cat craft with your own hands. There are options that will interest children of different ages.
Option 1
For this craft you need 2 cardboard tubes, paints and glue.
Progress:
- Fold the ends of one tube inward on one side and cut off the corners. This is the torso.
- The second tube is a cat's head. Diagonal cuts are made on the sides to create triangular ears.
- Both bushings are glued together.
- The background is tinted, eyes, nose, and mustache are drawn or pasted on.
- The tail is attached to the lower part of the body.
Option 2
A cat on springs is a toy that will interest older children. The work requires a little paper and patience.
Option 3
For the cat figurine you will need:
- white and orange paper;
- pencil, ruler, scissors;
- glue;
- markers.
Cut out the cat details:
- From orange paper:
- rectangles 6x13 cm and 7x14 cm are the torso and head;
- paws 4 parts 2x6 cm;
- oval tail 2x8 cm;
- 2 ear parts.
- From white paper:
- stripes on the body (3 elements 1x14 cm);
- stripes for the tail (6 parts 1x2 cm);
- oval muzzle 4x6 cm;
- ears (2 parts).
Glue the strips onto the body, roll them into a tube, and glue them together.
On the muzzle, draw or glue eyes, nose, mouth, glue the muzzle to the head, roll the part into a tube and fasten the ends with glue.
Glue white parts onto the orange parts of the ears and attach the ears to the head.
Connect the head and body.
Fold the paw parts, glue the edges, and glue them to the body.
Glue strips on both sides of the tail, the tail to the body.
Option 4
Their regular packaging cardboard is cut out with a cat's silhouette. Make 2 cuts at the bottom so that the figure can stand.
Glue on a muzzle made of colored paper and a mustache made from skewers.
The body is wrapped with colored woolen threads.
This cat will be warm even in the winter cold!
Origami "Cat"
In the technique of creating compositions from paper, the art of origami always comes up; for beginners, the figure of a cat will not be difficult.
First you need to take a regular sheet of paper and make it square. To do this, pull one corner towards the other edge of the sheet to form an isosceles triangle, and cut off the excess part of the sheet.
The first part of origami: a square folded in half, but we already have it in stock since we did the previous step. We fold this triangle in half again to make an even smaller triangle. This is necessary to outline the middle line on the large triangle. From this center line we need to wrap two side corners into small triangles. If you put the piece on the table, it will look like a tulip with three petals. The last step in creating the cat's face is to bend the upper corner of the part to the two previous triangles. On the other side of the part you can draw eyes, mustache, mouth. When folding origami, you can use the following scheme:
For the body, you need to again make a square sheet, which is also bent in half. Holding the piece with the two free vertices of the triangles towards the left hand, bend the corner on the right slightly upward to form a cat's tail. After this, we attach the head to the body; you can also make a collar for the cat from a cord. You will get a product like this:
Related article: Do-it-yourself organizer for small items made of fabric according to a master class
Origami
Origami is an interesting way to make a “Cat” craft with your own hands. This technique develops thinking, logic, and accuracy.
The master class will help you cope with this task. A three-dimensional figurine of a pet will delight a child.
Chenille wire
Required:
- 2 foam balls with a diameter of 2 cm and 4 cm;
- wire white, brown, pink;
- heat gun.
A hole is made in the ball on one side, glue is applied, and a brown wire is inserted. The ball is wrapped around her. The same actions are performed with the second ball. Then the parts are glued together - these are the body and the head.
For the paws, take white wire and twist it in the shape of a trefoil. One part is glued to the body.
The white wire for the ears is twisted into a spiral, and pieces of pink wire are inserted into the middle.
The ears are attached to the head.
The muzzle is formed from white wire, the tail is made from brown, the parts are glued, the mustache is secured - and the cat is ready!
Plasticine
You can make a cat from plasticine or plastic mass. To create a more complex craft you will need:
- Draw the outlines of a cat on a beautiful background, drawing all the details in color.
- Make a lot of balls with a diameter of 2-3 mm from plasticine of different colors.
- Attach plasticine parts to the drawing of the cat.
It turns out to be a mosaic cat! Using the same scheme, you can make a panel with a cat, using multi-colored sand, beads, pebbles, cereals, pasta and other small objects as finishing materials.
Important! In this case, the parts must be attached immediately, otherwise the adhesive base will dry out quickly and the craft will look sloppy.
Soft cats
Handsome cats are made from felt or felt.
If a child knows how to sew, then using the template he can make a phone case, an anti-stress cat or a bookmark.
Felting wool is also useful. For the craft you will need wool of 1-2 colors, 2 foam balls, beads, and tools - a needle for felting.
The balls are wrapped in wool and carefully pierced with a needle, creating an even soft layer on the surface.
Ears and paws are laid separately.
The parts are connected to each other by placing pieces of wool or gluing them together. The cat is decorated with a ribbon, beads are glued instead of eyes. The DIY “Cat” craft is ready! Patterned cats
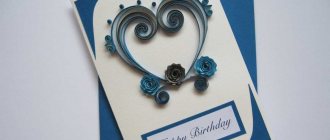
The quilling technique allows you to create original panels.
Required:
- strips 5 mm wide;
- scissors, tweezers;
- quilling stick;
- glue;
- basis for work (designer cardboard, beautiful printed background).
A contour drawing is made on the base.
5 turns are formed for the head, 6-7 for the body, several parts in the form of a drop.
Ears (in the shape of drops) and paws are glued on, and whiskers are attached - wound on a stick and straightened strips.
Interesting cat crafts
To make a cat with your own hands, you can choose a completely different needlework technique. For example, for a cat made by quilling, you will need:
- strips of paper 5 mm wide;
- tweezers;
- tool for twisting strips;
- scissors;
- glue;
- paper.
For the head you will need a piece of five turns of paper, for the body - six, slightly elongated. The parts are glued and glued onto canvas paper. The ears are curled in the form of droplets, the legs are in the form of semicircles, and are also seated on glue. The whiskers are cut out in thin straight strips and attached to the muzzle, the tail is made from a strip curled at the end. You will get a cat like this:
Related article: Tatyana Lazareva patchwork: video tutorials
In addition to this type of cat-themed paper art, you can use this material to make bookmarks, packages in the shape of cats, even a hat, the printable details of which are given below.
To make a bookmark from colored paper, you need to cut a strip measuring 10x5 cm. We design one of the edges of the strip in the form of a cat's head, cutting out pointed ears and drawing the cat's face. Just below the head, on the body, you need to draw two identical U-shaped paws directed along the length of the strip. These paws should be outlined with a blade or a stationery knife, but do not cut through the area of the paws at the top. After this, the cat bookmark is ready:
To make a paper cat package, you need to print the following template for the body:
Then you need to make the parts “tail”, “eyes”, “ears”, “nose”, “paws” and glue them to the body. You will get a package like this: