Master class No. 2 - Large rose made of corrugated paper
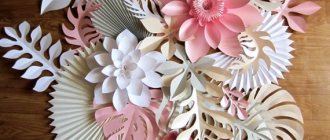
Large hand-made flowers are good for decorating photo zones, ceilings and walls at special occasions (for example, at a wedding or birthday).
They can also become spectacular props for a photo shoot. To work you will need:
- A roll of corrugated paper of the desired color 50×200 cm (1 roll/1 flower);
- A roll of green corrugated paper (for the stem and sepals);
- A4 paper (you can use office paper);
- Hot glue gun;
- Scissors.
How to make large paper flowers:
Step 1. First we will make the stem. Take a sheet of white A4 paper, place a pencil on the corner, then roll the paper into a tube.
Step 2: Unroll the crepe paper roll completely. First fold it in half, then double it again, then fold it again... is it a rectangle? Now fold it in half to make a square measuring approximately 25x25cm.
Step 3. Cut the folded paper into a square at all folds using scissors. You will get two identical stacks of square sheets, from which we will then cut out the petals.
Step. 4. Fold each stack in half. From the first rectangular stack, cut out a half-heart shape, as shown in the diagram below. From the second stack, cut the same shape, but smaller.
Unfold the stacks to make petals like this.
Step 5. Twist the ends of the petal with a pencil or pen, and stretch the petal itself a little and bend it inward.
Step 6. Give the petal an even more rounded shape by making two folds at its bottom and securing them with hot glue.
Step 7. Let's start forming the bud. Roll one of the small petals around the stem quite tightly.
Step 8: Start gluing on the remaining small petals, following a staggered pattern. When the small petals run out, continue to grow the bud with larger petals. In total, your rose will “overgrow” 15 petals (+1 petal in the center of the bud).
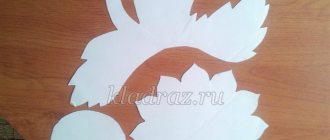
Step 9. Fold a square sheet of green corrugated paper (25x25 cm) diagonally to form a triangle, then fold the triangle in half 2 more times. From the resulting multi-layered triangle, starting from the fold line (!), cut out the shape as in the picture below. When you straighten the cut out piece, you will get a quatrefoil.
Step 10. Make a small cross-shaped cut in the center of the quatrefoil (see picture above), through the resulting hole, put it on the stem up to the bud, then glue the leaves with hot glue.
Step 11. Hurray, our big rose is almost ready. All that remains is to wrap the stem in green paper. To do this, you need to roll it into a roll, then cut off an approximately 2-centimeter wide piece from the edge (that is, the same as if you cut a piece from a roll). Now unravel the resulting tape and wrap it around the stem, securing the upper and lower ends with glue.
From the following video you will learn how to make large flowers from paper with your own hands.
Master class on a very simple method
The first time I saw such a flower, I thought that a lot of time and effort had been invested into it. And that it was done by a cool professional, but after watching the master class I realized that anyone can do it, even a 5-year-old child. And the result is incredible. You can combine different colors to create a wall of flowers for a photo shoot.
All we need:
- Corrugation or silence;
- Scissors;
- Wire.
Making:
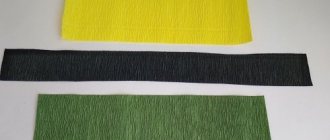
We will need 2 multi-colored sheets of paper. Pink – 33 cm wide. Yellow – 16.5 cm. Length of both – 51 cm. Yellow rectangles – 2 pcs.; pink – 7 (5 – dark pink and 2 – light). And also green - 2 pcs. green is the same size as pink.
We put all the sheets like this: green at the bottom. On it - 2 dark pink ones, then a light one. Again 2 dark ones. Light again. The next layer is dark. Top middle – yellow.
We fix the sheets on one side with a paper clip.
We begin to fold it like an accordion on the other side. If necessary, cut off the excess edge, trimming it.
We bend it well so that all the bends are fixed.
Separate yellow, green and pink.
Fold the yellow accordion in half. We make cuts 2-3 cm deep from the edge.
Fold the pink accordion. We cut and round the edges (first on one side of the strip, then on the other).
We also fold the green accordion in half and cut off one corner from the edge.
Again we lay out the accordions one on top of the other, just as they lay before. We make sure that they do not move to the side. Place folds within folds.
We collect and trim. We tie it in the middle with wire.
Carefully take out each layer and lift them up. First yellow, then pink.
And at the end - green. Only the very last green layer is not raised up.
When all the leaves are raised on one side, straighten them.
We do the same on the other side.
DIY large flower made of corrugated paper. Author MK
Such a flower will look very cool in the interior of your apartment. They can be used to decorate curtains, walls, or make a whole bouquet in a vase.
Instructions for creating a simple rose and hearts
There is a simple way to create quite beautiful roses, the splendor of which will be determined only by the length of the sheet of corrugated paper. In general, all you need to do is twist the prepared strip correctly. Typically the width of the workpiece is slightly less than ten centimeters.
- Since only one side of the strip is curled, the other needs to be properly processed to create something like the edge of a pie.
- They begin to twist the second side, as shown in the photo below.
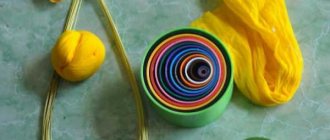
That's all. Using green thread, you can create a sepal, or add wire to create a full-fledged stem. It is unlikely that it will be possible to place a full-fledged core inside such a rose, but it is quite suitable for other options. This element is very simple to make.
- A material like cotton wool is used as a base.
- A small ball is rolled out of it; the size is selected based on the dimensions of the flower for which the core is made.
- The finished ball is wrapped in squares of yellow corrugated paper.
- You can place some green paper at the bottom of the core. All this is secured with glue.
Such elements are perfect for buds collected using the ribbon method. This is how you can make, for example, a beautiful chamomile. The method is very similar to curling a strip of paper, only in this case the petals are cut, rather than folded, at the top edge. You can use the diagrams below.
Daffodils
Daffodils made from corrugated paper turn out to be very neat and impressive, and from a distance they even resemble real ones. Collect a whole bouquet of them or put them in a beautiful flowerpot. Or you can take paper of different colors and make a real flower meadow! In addition to paper and a decorative flowerpot, you will need a glue gun, scissors and wire cutters, polystyrene foam and green sisal.
To fill the pot, cut a piece of foam to its size. For the stems, take a wire with a diameter of 1 mm and a length of 20 cm. For the stamens, cut yellow corrugated paper into rectangles 5x1.5 cm. For the middle you need a yellow rectangle 5x3.5 cm, and for the petals - white 5x2 cm.
Flower assembly
As a base for a large growth rose, you can use a small diameter plastic tube instead of wire. A flower with an arched stem looks beautiful. To do this job, use a metal-plastic flexible pipe. First, use hot glue to secure the smallest parts on its top, forming a dense bud. It holds its shape well if you insert a ball of foil in the center. With each subsequent row, the size of the petals increases. Masters advise making sure that your palm fits freely between the petals, otherwise the rose will turn out flat.
Before assembling the rose, stretch each petal on the outside a little in different directions so that they are wavy, and spread the small parts for the bud wide in the center, giving them roundness. At the base, the entire gluing needs to be hidden under the sepals of green paper and wrapped around the entire pipe to the very bottom.
Sakura branch
The most revered flower of the Land of the Rising Sun delights with its beauty. Every spring, the Japanese strive to celebrate under the cherry blossoms, enjoying the first warm rays of the sun.
We offer a simple master class that will help you bring delicate spring decor to your home. To create a flowering branch you will need: a dry branch, corrugated paper in muted colors, PVA or silicone glue, scissors, cardboard or paper for blanks, a pencil.
1. Draw stencils of stamens, petals and leaves on the materials for blanks and cut them out.2. Cut the corrugated paper into rectangular pieces for leaves and petals, as well as squares that will become stamens.3. Align the parts for the petals in the center with a pencil or scissors.4. Create a stack of all the rectangles and cut according to the templates. Cut the squares from one edge into strips.5. Press down a little and roll all the elements in the middle into a bundle. Lubricate the lower part of the stamen with glue and twist it.6. Fasten the lower parts of the three petals together. Give volume to the leaves.7. Glue the stamen and leaves to the bottom of the bud.8. Dry the glue, and then glue the flowers to the branch.
Original crafts
You can make a lot of interesting things out of paper. An excellent solution would be a green Christmas tree that will decorate the house. For work you will need the following materials:
- cardboard;
- corrugated paper;
- scissors;
- glue;
- beads, bows or other decor.
It will take a minimum of time to create a green beauty. The base of the tree will be a cone made of thick cardboard. We choose any height. The cone needs to be covered with green paper.
Afterwards, you need to cut strips 16 cm long, the width of which is 1.5 cm. Using scissors, a fringe is made on each element. The parts are neatly twisted. For a small Christmas tree 14-15 cm high you will need 130 elements. They need to be glued to the base.
All that remains is to decorate the forest beauty with beads, small bows made of thin ribbon, and gold braid. The souvenir is ready. You can put it on the table at home or in the office, hang it above the window. Adults and children will definitely like it and bring a festive mood to the house.
It’s easy to make various crafts from corrugated paper:
- picture;
- pompom garlands;
- animals.
Use your imagination and get to work.
Children will be happy to take part in creating original things to decorate the house. A simple and useful activity will help develop new skills in your baby, teach him to understand colors and types of materials. A pleasant activity will distract parents from worries, allow them to relax and have fun with their family.
Lilac
Lilac is one of the most spring flowers, and the voluminous clusters of its inflorescences always look impressive. At the same time, the flowers themselves are of a very simple shape, so making them from corrugated paper couldn’t be easier. All that remains is to secure the lilac scattering on the branch using thin beaded wire and a glue gun.
For the buds, cut a strip of paper 5 cm wide and cut it into small rectangles of only 7 mm. And for one flower, take a strip 2 cm wide and cut into the same pieces - 7-8 mm each. But keep in mind that you will need a lot of petals and it is better to form each one separately.
Carnations
Graceful and delicate carnations will become a charming decoration of your interior. Arrangements of carnations go well with wildflowers such as yarrow or gypsophila. This decor fits perfectly into the rustic style - the so-called “country”.
Stock up on the necessary tools and materials: wire for making a stem; scissors, tape, glue; corrugated paper in green and white or pink; chalk pastels.
1. The first step is to create the petals of our carnations. To do this, we need to make two pieces of white paper: one – 5 cm, the other – 3 cm.2. Using a lilac chalk, paint over the edges of a small strip so that one tip is more saturated. We do this on both sides.3. Next, we will cut small teeth along the entire painted edge of the strip, after which we will fold it 4 times and make 4-6 shallow cuts.4. We twist the strip into a bud. When about 10 cm remains to the end, stretch the remaining part and get a wavy bend along the entire length. Fix with glue or tape.5. In the same way we create large petals, but so that they are a little wider. 6. Using wire and corrugated paper, we will make a stem and glue the finished bud to it.7. We make a sepal and a couple of leaves from green paper. To make them look more natural, they should be stretched to give volume.
Making large flowers from corrugated paper: a detailed master class
Large flowers made of corrugated paper are a beautiful and delicate decor that can be used in a festive interior, decorating a photo zone or living room. In one of the previous articles, we already told you how to make flowers from corrugated paper with your own hands; in particular, in one of the master classes we demonstrated how to make large roses with stems, as well as small lush paper flowers.
With each new craft, your hand becomes stronger and stronger, which makes it possible to move on to this type of work, such as decorating large flower arrangements.
In the next master class, we will learn how to make a three-dimensional peony together, thanks to which your holiday - a wedding or birthday - will turn into an exciting stylized event with fabulously beautiful decor.
To work you will need:
- several rolls of corrugated paper of different shades;
- glue;
- needle;
- thread;
- balloon;
- old newspapers.
First of all, we start making the base, onto which we will subsequently glue each of our petals.
We inflate the balloon and cover it with pieces of torn newspaper in several layers using the papier-mâché technique. Let the mold dry, carefully deflate the ball and cut the mold into 2 unequal parts so that the smaller part is 6.5-7 cm high. We insert it into the larger part of the mold and stitch it along the diameter. We soak the top with glue.
The second stage of working on a peony is making the petals. Each type of petal is produced in quantities from 4 to 30 pieces. The shape of the different petals is clearly visible in the photo, as is the size indicated in inches. In this regard, we recommend using the following formula: 1 inch = 2.54 cm
Please note that on the scale the maximum petal height is 7 inches, i.e. almost 17 centimeters
In this photo, be aware that the width of petal number 6 is 23 cm.
We cut out petal number 7 with a height of 20.3 cm.
It's time to collect our unusual and lush decor. Let's start with petals number 1, which will form the central part of the bud. Fold one of the petals in half, securing it with glue at the bottom. Wrap the second petal of the same type around the first one, fixing it with glue at the base. Treat the lower part of the petals with glue and secure in the center of the base.
Place the same petals (about 10 pieces) around the base of the bud.
Mask the edge of the mold with corrugated paper of the same shade.
Let's move on to petals numbered 2-5. Here's how we'll work with the petals: stretch the petal until it becomes slightly curved, like a plate or vessel. Bend the lower part of the petal back and treat it with glue. Glue the petals to the base tightly to each other so that they resemble a bud.
Using this simple pattern, move further from the center of the blank to completely fill the mold and get a voluminous pompom in the shape of a blooming flower. In this particular case, 8 petals were used, numbered 2-4, and four petals, numbered 5.
We fix the petals at number 5 with glue.
We will also need 4 large petals numbered 6. We will attach them along the edges, from the outside of the form, so that their tops are at the same level as the other petals.
Our flower is almost ready. All that remains is to cut off the excess parts of the base and mask the remaining space with petals numbered 7 and 8.
You will need about 30 petals numbered 8; they need to be slightly bent and fixed at the base with glue. If there are gaps in the composition, they should be filled with small petals, and then bend the large petals towards the flower and glue them at the base.
The idea of using paper flowers for celebrations and various holidays is not so new, but today it has received many beautiful embodiments and creative interpretations. Thanks to master classes and tips from video lessons, everyone can transform their interior for the better. If your holiday has a medium budget, you can safely cover expenses by saving on decorations and decor.
Basic techniques and secrets of creating flowers from corrugated paper
Master florists have come up with hundreds of ways to make flowers from corrugated paper with their own hands. However, there are basic techniques that, by combining and transforming, can achieve almost perfect resemblance to the original.
Stem
Please note that the stem for any type of flower is created according to the same principle:
- The base is floral wire, a wooden stick or a paper tube.
- You need to attach the stem to the head of the flower at the initial stage (it is threaded through the layers of paper that form the petals) or the flower is collected directly on the stem.
- The stem can be decorated either with a thin strip of corrugated paper with glue or green tape.
- To make it look more like a real branch, you need to cut out the leaves and attach them to the stem, masking the junction with tape.
How to easily roll a thin paper tube is explained in this video:
Stamens
Flower stamens can have different appearances, but they are made according to the general principle:
- Cut the floral wire into several small pieces. The length depends on the size of the flower.
- Cut a strip of paper and, depending on the type of flower, give it a shape - cut it into strips or place a ball of cotton wool for volume.
- Collect the center or stamen in accordance with the appearance of the living plant.
The photo shows various examples of stamens and centers. They are suitable for: chamomile, rose, lily, carnation, chrysanthemum, dahlia and other flowers of similar structure.
Everything is clear with stems and stamens. Now let's look at several techniques for creating flowers from corrugated paper with your own hands - they are presented in order of increasing complexity.
Layering
This peony is made using exactly this technique:
We only need: corrugated paper, wire, glue and paper for the template. Manufacturing principle:
- From thick paper, cut out a template for the future petal - a circle with wavy edges. To make the finished peony lush, you need to make several templates of the same shape, but of different sizes.
- Cut out at least 10 petals from corrugated paper. Stack them, aligning the center.
- Carefully thread the wire into the center, bend it and bring it out again, wrap it around the free end, securing the future flower head to the stem.
- Lifting the petals layer by layer, collect the flower. To give a natural look, some edges can be folded or cut into a carved shape using scissors.
- Finally, we decorate the stem.
Advice. You can experiment with the color of the layers and alternate them: choose different shades of the same color scheme, or take contrasting ones for an unusual result.
Screw assembly
Having mastered this technique, you will be able to create branches of flowers such as lavender, lilac, hyacinth and the like. Let's look at this technique using two examples, they are similar, but there are some differences.
First you need to cut a strip of about 4–6 cm, make frequent transverse cuts, not reaching the edge 1.5 cm, then, using a toothpick, twist each strip into a curl. Assembling the branch starts from the top: place the edge of the strip on a wooden or paper stick with glue and wind it with an offset downward; finally, the stem is decorated and leaves are added.
This lavender is also made using the rolling method, but the process is different.
We will need:
- 2 strips of corrugated paper 1 cm wide - purple 50 cm long and green 100 cm.
- Floral wire or thin paper tube.
- Scissors and PVA glue.
The following video shows in detail the procedure for creating lavender sprigs:
Rolling
This technique is very simple, and the flowers collected in this way resemble carnations and are suitable for creating bouquets or topiary.
Use a ready-made strip of corrugated paper in two or more colors, or you can cut it out from a sheet yourself. The layers are sewn down using a sewing machine.
Gathering should be done immediately - then you will not be able to pull out the thread without damaging the paper.
Then the workpiece is wound in a spiral around a rod or attached to a surface, and the collected waves create volume.
Roses for this ball are also made by twisting.
But in this case, a strip of corrugated paper is folded in half and then rolled into a roll. To prevent the flower from falling apart during assembly, it must be glued as the roll increases. Finally, use your fingers to carefully straighten the curls, forming an open rose. The base is a foam ball onto which the roses are glued.
Flowers made from corrugated paper using a similar technique are shown in a master class on creating a rose with an original curled edge:
This technique is popular for making chrysanthemums, daisies, daisies, carnations and other flowers with many small petals. The base is a long strip with cut fringe or cut rounded petals. For example, this charming rose.
A little further we will show several patterns of these colors.
Flowers from individual petals
These delicate flowers are made without a base, by joining individual petals cut out according to a template.
For sakura flowers you will need:
- three long rectangular strips with rounded edges for petals,
- one long rectangular strip with pointed edges for leaves,
- for the core, a short strip with transverse cuts.
The petal and leaf blanks should be folded in half, mark the center and straighten the edges, forming a bend. Assembly is carried out using glue by simply connecting the blanks one on top of the other, and a twisted core is attached to the center of the resulting flower.
Blanks for pansies are cut out of multi-colored paper; if desired, the middle can be tinted and veins drawn. The assembly of the flower is carried out by connecting the petals to each other also with glue or thread. Floral wire would be appropriate here as a stem.
This chamomile is collected using a similar technology, but to make a bouquet, a stick is used as a base.
To make this tulip as similar as possible to the real one, it was necessary to create a core using a special technology.
This article shows visual examples of making such flowers. Here are several patterns of various petals, including examples of the finished work.
Examples of patterns
Patterns and number of petals
Patterns for flowers with fringe
Flowers on a flat base
Such flowers are specially created for decorating photo zones, decorating gift boxes and other one-sided compositions. In addition to corrugated paper, glue and scissors, you will need a cardboard circle with a diameter approximately the same as the lower petal.
Advice. If you glue double-sided tape to the back of the cardboard circle, the flower can be attached to the box. And using a wire hook threaded into a cardboard base, the flower will be easy to hang on the press wall.
All petals in a peony are the same shape, but each circle will require different sizes: from the largest for the outer layer to the small ones inside the flower. Therefore, you will need several templates. Then on each petal you need to make a carved edge in a random order with scissors - this will give the flower a natural look. To add volume, bend the middle of each petal with your fingers, slightly straightening the corrugations. The flower is assembled in circles, starting from the edge and moving each layer towards the center.
The closer to the middle, the smaller the petals. To decorate the center, you need to cut out a rectangular strip, make cuts on it, twist it into a spiral and glue it.
A similar technique for creating a flower on a flat base:
You can decorate the middle not only with paper strips or balls: beads, half-beads, buttons, decorative flowers and rhinestones are suitable. Such a flower would be especially appropriate on a postcard or gift box.
Flowers on a fixed basis
There are many varieties of flowers that are made using this technique: daffodil, tulip, chamomile, but the most common is the English rose.
The peculiarity is that the petals are wound onto a base - a foam or paper ball, which can be replaced with a small round candy.
MASTER CLASS ON THE TOPIC
This DIY bouquet of sweets is assembled using exactly this principle.
Progress:
1. Cut strips of corrugated paper approximately 6 cm wide and 10 cm long. Colors can be combined at your discretion: a delicate milky core and rich yellow, orange or red outer petals.
2. Fold the blanks like an accordion along the width of the petal, rounding the edges.
3. Using your fingers, slightly straighten the corrugations, forming a wavy edge, then use toothpicks to wrap the petals, giving a natural shape.
4. The petal blank should be stretched, giving it a semicircular shape - this will facilitate the formation of the flower.
5. We wrap the base of the flower in a rectangular strip without cuts, pulling the corrugations so that the paper tightly envelops the ball or candy. We fix it with a drop of glue and tighten the bottom with thread.
6. We lay all subsequent petals overlapping in a circle, tightening them with thread. At the end of the work, we decorate the assembly site with a sepal of green or any other color in accordance with the intended composition.
Advice. If you want to make a bouquet on stems, then sticks should be glued with hot glue to the base of the flower - a ball or candy - before the flower begins to form.
Here is a slightly simplified, but no less spectacular version of this flower.
Master Svetlana Bormotova proposed a simple technique that turns an ordinary rose into an exquisite flower:
This decorative artichoke is also created on a fixed base. An incredibly beautiful decorative element!
You may not immediately guess that there is a candy hidden in the graceful daffodil - you will definitely be sorry to disturb such grace:
Master class on creating a daffodil
Origami flowers
Flowers made using the origami technique, of course, are not so similar to real ones, but they have their own charm
In addition, this technique helps develop fine motor skills, which is very important for children, and adults too. How can such original things be made from an ordinary square of paper?
Calla lilies
Paper is most often used to make children's appliques. We suggest adding some chenille wire to it and making beautiful flowers that look like elegant calla lilies. And when creating the flowers themselves, you can introduce the child to the basics of origami techniques. The entire process of making such an application is given in this master class.
To create such a craft, we prepared:
- white cardboard;
- red, orange, pink and green paper;
- glue;
- chenille wire;
- pencil;
- scissors;
- ruler.
The flowers for this application will be made of colored paper using the origami technique. Therefore, initially we prepare a square blank. In our case there will be a square with a side of 8 cm.
Fold it in half diagonally.
Now let’s unfold the blank of the future flower and begin to bend the sides towards the middle line.
You need to bend it symmetrically on both sides.
Next, we bend the upper parts of the bent elements back. We try to do this symmetrically. This is the template we have for a flower.
The center of the flower will be a piece of chenille wire. It is enough to take about 4 cm. We use orange chenille wire, but if desired, such a center can be made of chenille wire of any color. We fix this piece with PVA glue.
We bend the bottom corner of this flower to the reverse side and glue it.
In a similar way, we make flowers from pink and orange paper.
Now we distribute the flowers on white cardboard, and then fix them with glue.
We cut out narrow strips from green paper that will become the stems on our applique.
We also make flower leaves from green paper. To do this, fold it in half, and then cut out the outline of half the leaf. We cut out 3 leaves of different sizes. We glue them onto our craft. The applique with flowers made of paper and chenille wire is ready.
Tulips - master class (3 options)
Step-by-step photos of the process and diagrams:
Video on how to make snowdrops from paper using the origami technique:
Video on how to make spring lilies of the valley. Valeria uses a large sheet of paper to make it clearer, but for miniature flowers you need to take 5 x 5 cm squares and repeat after the author:
Lily - step-by-step master class
An original craft using the origami technique - a magic paper rose cube:
***
Where to begin
Before you make a craft from corrugated paper, you need to choose high-quality glue. The strength of the structure depends on this component.
Beginners should use a special gun, which is considered a glue gun. Since it is easiest for them to attach various small parts, of which, as a rule, there are many in a design.
When studying a video where crafts made from corrugated paper are described step by step, you should pay special attention to how the structure is strengthened
Since it is not only important to create the decor, but it is equally important to deliver it directly to its destination.
This is necessary so that the design not only fits harmoniously into the interior, but also decorates it. This decor can even be suitable for creating a unique area for photographs. It will be individual, and guests will be delighted with bright photos as a souvenir.
Rose
There is nothing easier than making a rose from corrugated paper, and at the same time it will turn out very impressive. This can be achieved due to the volume and number of petals, so for large flowers, stock up on more paper. Unusual shades, such as light green, blue or lilac, look interesting.
For one rose you will need 11 petals 6.5x3 cm and another 7 pieces 6x3.5 cm. But first, form a bud - wrap a small paper ball in a stretched corrugated circle. Simply glue the stretched and rounded petals one after another so that each next one covers the previous one.
Bouquet in a pot - an idea for children
There are unusual ideas for children where you can not only show your imagination, but also decorate the house.
I suggest making an interesting bouquet in a real flowerpot. You can use any store-bought pot, or maybe you have an already used one lying around somewhere.
A sheet of green paper needs to be drawn in strips 1 centimeter wide and 8 centimeters long.
We cut them to the line and glue the edges.
We place the finished grass in a flowerpot, having previously wrapped it with double-sided tape so that the leaves do not come out.
We cut out the buds and cores ourselves.
Glue the cores in place and go to complete the craft.
I was also impressed by the daffodils that stood on my grandmother’s table during my childhood, only they were made of plastic, but they looked exactly like in the photograph.
Let's start making them. For one flower we will need three levels of petals.
For them, take squares with a side of 6 centimeters.
Fold them in half twice and cut out the petals, not reaching the center 1 centimeter. There should be four petals.
We lay out the flowers and see if all the buds have received petals.
We make a fringe from a strip of corrugated paper, 2.5 centimeters wide and 16 centimeters long. The paper stretches easily, be careful.
We roll up our core and glue it to the bud.
You can stick the finished flowers directly onto the leaves or form a stem from the wire, wrapping it with green paper or ribbon.
Roses with a collection of petals
Paper roses can be made in a huge number of ways. And we even have a separate article on this topic. More precisely, we have an article about paper roses in principle, including using the origami technique. There are also master classes on creating a rose flower from crepe paper. In general, we recommend that you read:
51 photos
Paper rose
Master class: how to make a paper rose with your own hands?
And here we will look at two ways to create a rose from corrugated paper. They differ significantly, resulting in completely different compositions or flower blanks that can be used in the future to create some kind of craft. In the simplest version, ready-made paper flowers are simply arranged in the form of a bouquet and placed in a beautiful vase.
Roses made of corrugated paper master class
So, to create a rose you will need the following materials:
- paper of any suitable shade;
- if necessary, take green paper to create the stem and leaves;
- wire;
- scissors;
- PVA glue;
- thick cardboard;
- simple pencil.
Materials for creating roses from corrugated paper
There are two ways to consider making roses from corrugated paper. One method is more complicated, but the second can be done in a few minutes.
The first method involves a kind of painstakingness of the whole process.
It is important to observe accuracy and restraint here. To make a rose using the presented method, follow these steps:
- Draw rose petals of different sizes on thick cardboard. It is recommended to use 3-4 templates. If you use more, the rose will look better.
Rose petals on thick cardboard
- Cut out all the drawn petals and prepare corrugated paper in red, scarlet, white or pink.
Cut out all the drawn petals - Fold the paper into an accordion shape, taking into account the width of the largest petal.
Fold the paper like an accordion - Attach all the blanks to the paper and cut out petals from it in large quantities at once.
The petals should be prepared for assembly. To do this, stretch the edges of each piece of corrugated paper, grasping them at two rounded corners. In the middle of the petal, use your finger to make a notch inside the future bud. Petals in large quantities - Using the same principle, prepare leaves for the future rose, if necessary.
The edges of the leaves should not be stretched; the shape can be given during the process of joining or after all actions are completed. Leaves for a future rose - Take the wire and cut several pieces of equal length.
Connect them in your hand, bend one formed end using pliers. This will be the “core” of the bud. Wire of equal lengths - Wrap the smallest petal around the wire core, after gluing the lower part of the paper blank to the future stem.
We wrap a small petal around the wire core - Form a bud by gradually gluing the petals according to size - from smallest to largest.
Forming a rose bud - Wrap a green ribbon, a thin strip of corrugated paper or green thread around the base of the bud several times, creating a sepal.
Wrap the base of the bud several times - Continue wrapping the entire stem from the sepals, first gluing the prepared leaves to the wire in suitable places.
Forming a rose stem - At the end, secure the material used to form the stem with PVA glue.
We wrap the entire stem and mount the leaves - Spread all the petals and leaves. Let the flower dry.
We straighten all the petals and let them dry.
Corrugated paper rose is ready
Make several of these and place them in a vase. You will get a beautiful bouquet. You can also make roses in a similar way for subsequent arrangement in a wicker basket. Use your imagination.
You may only need buds, then the wire stem is cut off after the formation of the bud and sepals, leaving a small margin of 1-2 cm.
DIY corrugated paper roses
Using the presented method, you can collect any autumn flowers from corrugated paper with your own hands, which contain petals. An exception may be the preparation of pistils and stamens. In addition, the cores may differ slightly, but the attachment of the petals almost always occurs in the manner described.
Color schemes and patterns for beginners
And now, especially for beginning needlewomen, I will present a whole set of templates and patterns for making flowers. Following the instructions below, we begin making buds, and then use them as decorations. By the way, you can create a whole masterpiece from such buds. For example, if you take several types of products and combine them in one pot. The main thing is to listen to the color scheme and choose colors that suit each other.
Here is one of the first options. Basket of asters, please note that it is made in rather gentle colors.
A fairly simple scheme that does not require additional skills.
And look at what carnations you can create yourself, for example, for the holiday of May 9th. And then give them to all your relatives, and not leave dear veterans without attention.
Here's a pretty interesting example. And the technique is very simple, the main thing is to choose corrugated paper with a lower density. Italian won't work here, but Chinese will come in handy.
And now the bright poppy has arrived in our collection of flowers. By the way, you can use floral tape to wrap the stem. It is very convenient for these purposes.
Now the orchids have arrived, a nice present with some sweets. By the way, using a similar technique you can create a rose. It is a little more complicated, but even a beginner can do it.
But here is a more detailed diagram of the rose, everything is quite simple. The main thing is to take your time and everything will definitely work out.
Please note that most craftsmen prefer to make a rose from corrugated paper. And all thanks to its practicality. It is quite simple to do, and it looks very good with other types of flowers.
And here are the templates that you will probably need when working with paper.
There is also a more complex technique, if you have mastered the previous options, then feel free to proceed to this.
Here are the necessary templates for this stunning composition. Cut them out on thicker cardboard, and then transfer them to corrugated paper and get down to business.
Here we have such a pleased and extensive selection of flowers. Now we choose the appropriate equipment and get to work. I'm sure everything will work out for you. If you have any questions, write below in the comments.
Flowers from napkins
Crafts are very easy to make - flowers from paper napkins.
Napkins can be cut and fluffed, as shown here: Bouquet of flowers from napkins - master class
These crafts are very simple and easy for children. Photo and step-by-step description by Elena Ermasheva on how to make a bouquet of napkins with your own hands.
For such an original bouquet you will need:
- paper napkins: yellow and pink (35 pieces);
- bamboo kebab sticks (13 pieces);
- PVA glue;
- bronze acrylic paint with glitter;
- green paint;
- brush;
- scissors;
- felt-tip pen or pencil;
- plastic jar;
- decorative shavings;
- satin ribbon;
- linen fabric;
- 0.5 liter plastic bottle;
- small pebbles.
Paint the sticks with green paint and let dry.
For a bouquet of 13 roses, you will need 117 circles of napkins with a diameter of 8 cm, 9 pieces per 1 flower. Cut out the required number of petal blanks.
For 1 flower you need to fold 7 circles in half.
Grease the edge of the fold of each circle with glue. Place the stick on the semicircle and twist the petal onto the stick.
In this way, carefully glue the remaining petals.
Pierce two circles in the center with a stick.
Lubricate the upper circle with glue in three places. Glue to the finished petals.
Glue the last circle in the same way, the flower is ready.
Let's make a vase for the bouquet.
Cut the plastic bottle in half.
Wrap a plastic jar with linen cloth. Secure the fabric with a satin ribbon. Place some decorative shavings inside the jar.
To stabilize the vase, wrap the stones in napkins. Place them at the bottom of a plastic bottle.
Insert the bottle with pebbles into a plastic jar.
Place decorative shavings inside the finished vase and insert roses. When arranging a bouquet, shorten several stems of roses.
Paint the edges of the flowers with pink petals with bronze acrylic paint with glitter.
The original bouquet is ready!
Or you can use paper napkins to make a festive table decoration: how to fold paper napkins in the shape of a flower - step by step.
***
Master class step by step
List for creativity:
- corrugated square;
- gift box;
- stationery knife;
- PVA;
- skewer.
Cut the square into 14 equal circles. To speed up the process, fold the corrugation three or four times and get several fragments at once.
Sharpen the bottom. To do this, use PVA.
Glue the circle as follows: 6 petals along the outer edge of the cardboard base, five pieces form the middle circle, the remaining 3 form the outer circle.
We make pestles. Quietly fold the tape in half. Use a knife to create a fringe. Wrap it around a toothpick, securing it with PVA.
Glue the stamens into the middle of the sepals and your handmade is created!
Bouquet of paper daffodils
Careful viewing of handicraft lessons will allow you to more confidently handle the source material and in the future begin to independently make more complex crafts. Let's look at step-by-step instructions for making daffodil crafts from colored crepe paper with your own hands.
You should prepare multi-colored wavy folded paper, polyvinyl acetate glue in a tube, and thin wooden knitting needles in advance. Artificial flowers do not necessarily have to match natural shades.
Flowers are made in the following sequence:
First you need to make an inflorescence. To do this, take beige crepe paper, roll it into a cylinder with a diameter of fifteen millimeters and press it tightly with a weight to form a multilayer strip. Now small and frequent cuts are made with scissors to create a curled fringe.
The fringed strips are wound tightly onto wooden knitting needles and fixed with glue. The same operation is performed with dark green crepe paper. Using a light shade of green, cut out two quadrangles of arbitrary shape, fix them with glue to a wooden stem and give them a convex-concave shape.
Using this method, several more plants are made from the most fantastic shades, tied with a bright ribbon and a collection of amazingly beautiful flowers is obtained.
Corrugated paper crafts for men
You should not think that such material can only be used to create crafts for women’s holidays, since there are also many interesting ideas for men.
The most common option is the varied decoration of bottles of expensive alcohol, which are so often presented to men as gifts. This way, not only a bottle, but also any other gift can complement crafts for February 23rd from corrugated paper.
A man will definitely appreciate the creative approach, which will not only remain in his memory, but will also have a positive impact on the next Women’s Day. Therefore, it is worth using your imagination and complementing the gift with unusual packaging.
How to make flowers from corrugated paper with your own hands?
To understand the general principle, let's start with something simpler and see how to make such bright poppies from corrugated paper. They will be a wonderful decoration for any costume, a voluminous decorative composition, or will fit perfectly into the interior.
List of materials:
- Wire;
- Scissors;
- Black threads;
- Green tape;
- Red, black and green corrugated paper;
- Paints and brush;
- Glue gun;
- Plain paper.
Subsequence:
We start by making the base for the future flower. To do this, we string a ball of ordinary offset paper onto a wire and wrap the entire resulting structure with green corrugation. We wrap the ball itself with black thread, as shown below.
Now, from a strip of red paper 5x35 cm, folded 6 times, we cut out identical petals.
We paint them at the base with black paint applied to an almost dry brush.
We fold a strip of black paper in six and make small cuts along its entire length to create a kind of fringe. Then we unfold it and wrap it around the base of the flower, securing it with tape.
Now we plant red petals on the glue, after giving them the desired shape. Forming a flower. We do all the other poppies the same way.
Much more complex compositions are also created from corrugated paper.
Let's just see how it looks and enjoy the delicacy of paper flowers.
Look how airy they are!
Corrugated paper flowers are often used to decorate interiors.
You can also make wonderful bouquets with sweets from them (in secret - this is what our next step-by-step instructions will be about).
You can also use them as decor to decorate various crafts or greeting boxes, for example, as in this case.
Interesting three-dimensional compositions are made from paper flowers:
Or even funny hats like this are made.
... And - eternal spring. Making tulips and crocuses
There is no person on earth who does not love spring flowers and does not regret the short time allotted for their blossoming. But nature decided this way... But we decided it differently. It is possible to extend the life of tulips and crocuses using ordinary corrugated paper.
Materials and tools: to make both types of flowers you will need corrugated paper (green and other colors, at your discretion), scissors, glue, wire.
Tulips
- Cut a fairly long strip measuring 3 x 18 cm.
- Fold it in half, then in half again, and so on, until you get a size that matches the actual size of a tulip petal. Try to fold as carefully as possible so that you end up with identical petals.
- Cut out the petal: the top is an oval, and the bottom is optimally narrowed (you can cut a small triangle on both sides).
- Separate the resulting petals from each other and now work with each one separately: crumple the narrow bottom and twist it with a flagellum.
- The top of each petal must be bent, giving them a natural shape: to do this, you just need to slightly stretch the paper.
- Form a bud by folding all the blanks and giving them the shape of a tulip.
- Attach the narrow, rope-like part of the tulip to the wire and secure it well.
- Wrap the wire with a narrow strip of green paper and attach two narrow sheets folded in the middle. The tulip is ready.
Many lovers of paper crafts also supply their own tulips with stamens. And others don’t bother with stamens, believing that such flowers are an ideal option for creating bouquets of sweets and corrugated paper.
Crocuses
To get a realistic crocus out of paper, you will need toothpicks and glue.
- Having arranged the corrugated paper so that the resulting relief runs along the short side, cut out the blanks - rectangles 8x4 cm.
- From rectangles folded like an accordion, cut out 6 identical petals and lightly twist the tip of each onto a thin toothpick.
- Prepare the stamens: cut a rectangle of yellow (white) paper into a fringe, leaving a narrow solid strip, not reaching the edge.
- Twist each element of the fringe like a flagellum and roll the stamens into a tube, wrapping a skewer or toothpick in paper.
- Lubricate the bottom of the stamen part with glue and begin attaching the petals one by one.
- At the final stage of work, wrap the wooden “stem” with green paper and glue the leaves.
Tulips with candy
Candy in a box is boring, uninteresting and banal, because even the most elaborate store-bought packaging no longer surprises anyone. But round little candies can be hidden in beautiful tulips made of corrugated paper!
To make tulip petals, cut a strip 4-5 cm wide, cut in half and fold each half in half. For one flower you need three such blanks, twisted in the middle. Form curved boat petals and wrap them around the candy that was previously wound to the skewer-stem.
Candy and paper bouquets: buy or create yourself
Bouquets in the style of suite design can be purchased in stores, or you can create your own works of art yourself; fortunately, there are many master classes on this interesting type of creativity.
Bright tulips will decorate any corner of the house
Few materials are required, but the result will please you for many years.
Flowers made of corrugated paper with candy filling, and even more so bouquet compositions made from them, can become a wonderful element of interior decor, if only you ask yourself about their use indoors and seriously engage in this fascinating creative process.
Bright ranunculus
To create design suites with your own hands, you need not only to purchase sweets, but also to decorate them beautifully.
Necessary materials
- high-quality, thick corrugated paper;
- satin ribbon;
- organza;
- scraps of fabric;
- if necessary, a beautiful box;
- vase;
- wicker basket;
- Styrofoam;
- threads;
- scissors;
- heat gun;
- fishing line;
- wire and other elements.
These are the basic things for suite design, but the list can only be limited by your own imagination.
A lush bouquet of flowers made of corrugated paper is an excellent gift
Making flowers
The simplest option:
So, making flowers from corrugated paper in more complex versions almost always follows the same scenario. I will describe it so as not to rewrite one by one:
- first you need to make a petal template;
- cut 15-20 petals for each flower (if you want to make a realistic flower, then make petals of different sizes - for example, five small, five medium, five large);
- cut the petals (when cutting, observe the direction of the corrugation);
- collect the central part of the bud (twist 5-7 petals together, tying them at the bottom and gluing them together);
- Next, the petals need to be slightly stretched and bent so that they take the most natural shape for the plant;
- Glue the prepared petals to the bud;
- fix the flower head on the prepared stem.
How to make a stem:
- We take a piece of wire, a floral sleeve, an ordinary twig - at our discretion, measure the required length;
- cut;
- decorate with green corrugation, or fabric, or paper;
- we imitate leaves, shoots and thorns;
- cut on both sides again.