05/03/2020 Beaded cats Share
Beadwork is a type of decorative and applied art and handicraft. The beads themselves, types of beads, beading techniques and robotic techniques have been known since the times of Ancient Egypt. Flat weaving is also called parallel because the finished products look like they are made of parallel rows.
Simple kitten
We will need:
- black beads - for ears, head, paws and torso, nose
- green beads for eyes
- wire
Scheme
Progress
We start weaving from the ears.
Row 1: place 1 black bead in the middle of the wire.
Row 2: Place 2 beads on the left tip of the wire and use the second tip to secure our set. It turns out to be an ear. We make the second ear in the same way.
Next we braid the head. Let's put the ears aside for now.
Row 1: Place 3 beads on the tip of the wire that comes from the right eye. Place 4 beads on the left tip and secure (we pass one tip through the beads that we collected onto the other tip of the wire, and then vice versa). We will hide both ends of the wire (you need to pass it through the bead, which is located between the ears in the row below; we fix it).
Row 2: we put black, green, 2 black, 1 green, 1 black beads on the first tip of the wire and fix it with the second tip of the wire.
Row 3: collect 6 beads and fix the set.
Row 4: 4 black beads and fix.
Row 5: 3 beads and fix the set. The wire needs to be tightened.
The head is ready.
We weave the body: we collect 6 black beads on the first tip, 3 on the second, fix (to do this, you need to pass the tip of the wire through the 4 outer beads of the set on the second wire.
Making the front leg:
Row 1: put 3 beads on the left end of the wire, fix with the right end.
Row 2-5: again 2 beads each and secure.
Row 6: 4 beads, make a loop out of them, pull the ends of the wire and hide them.
Torso:
Row 1: additional in the middle. string 4 beads on wire.
Row 2: cast on 6 beads, secure. Pass the right end of the wire through 3 beads of the cat's chest.
Row 3: with the same end, pick up 5 beads, fix with the left tip (we pass through the 4 outer beads). Tighten the ends.
Back foot:
Row 1: string 4 beads onto the left end of the wire and secure with the other tip.
Row 2: collect 4 beads and fix.
Row 3: 3 beads and fix.
Row 4-6: 2 beads each.
Row 7: 4 beads. Pull and secure.
Ponytail: we braid it separately.
Row 1: Place a bead on the middle of the wire.
Row 2-10: 2 beads each and fix. We attach the tail to the body.
In the future we will publish beading lessons with patterns.
Black cat
We invite you to make a beaded cat with your own hands with us. Beadwork today is gaining particular popularity among needlewomen. This type of needlework is becoming widespread, so there are a huge variety of different patterns, techniques and ideas.
From beads you can create not only beautiful and complex jewelry, but also flat or three-dimensional figures. Today we will try to weave a wonderful and cute cat with our own hands. In order for the product to look neat and of high quality, high-quality material is also required. If possible, for the durability of the product, use glass rather than plastic beads.
Before starting work, prepare your work area, cover the table with a light cloth, so it will keep the beads from falling and scattering. It is advisable to pour the beads into a convenient container, it can be a box with low edges, lids, etc.
We cut approximately two meters of wire and make a knot at one end so that the beads do not fall off.
For work you will need the following materials:
- black beads
- white beads
- pink beads for bow and nose
- wire about 2 meters
- scissors
- a pair of green beads for the eyes
- scheme
We start weaving from the foot; to do this, we collect four white beads onto the wire. In the last two we go through the wire in the opposite direction. At one end we collect one black bead, and at the other end seven black beads and four white ones. We make the second paw for the cat from white beads in the same way as the first.
Now we collect fifteen pieces of black beads, of which we pass the wire into the last 14 in the opposite direction. So we continue weaving with beads according to the pattern from rows 1 to 15. We carefully and securely fasten and cut all ends of the wire.
For a cat, you need to weave the ears, and then fasten them onto the cat’s head; we weave them according to scheme No. 1. We also braid the cat’s tail according to scheme No. 1.
The cat must be decorated with a pink bow. We will weave it according to pattern No. 2. You need to draw the ends of the wire to the central bead and use the same ends of the wire to carefully secure the bow on the cat figurine. It is necessary to fasten in the tenth row between beads numbered 1 and 2. Now our black kitten is ready.
By following the correct sequence while working, you will get a wonderful result that will delight you and force you to create even more complex products.
How to weave cats
There are a lot of patterns for weaving cats - some are very easy, which are suitable for beginners, others are a little more complicated, but you can gradually master them if you wish. There are also various master classes that describe one or another beading technique. However, you can change them to your liking, get creative and add new details, because there is no limit to creativity. Moreover, the more diverse the kittens are, the better and more interesting.
The most popular are:
- volumetric weaving pattern;
- parallel weaving technique;
- monastic weaving or cross-stitch technique.
Before you weave a toy, think about its future image. How do you see your cat? There are also a lot of options here: perhaps it will be a cute kitten Woof or a funny cat from the cartoon about Shrek, or a cute fashionable cat Kitty, etc.
Kitty
A kitten made of beads can become original or funny, charming and cute, just like a real animal. Lovers of these animals not only get this animal, but also collect various symbols. It won’t be difficult to weave such a cat, the main thing is attention and perseverance.
For such a souvenir you will need:
- 1.3 m of fishing line with a diameter of 0.25 -0.3 mm
- 125 pcs (20g) beads for the back, dark color
- 40 pcs. or 10 g light-colored beads for the tummy
- for cheeks 2 round beads
- yellow 2 beads for eyes
- 1 small red bead for the nose
You will need to perform parallel weaving with beads on a fishing line. It is important to learn this technique well.
Scheme
We perform the two ends of the fishing line towards each other. First, you need to put beads of the 1st and 2nd row on the fishing line at the same time. After this, we pass the second end of the fishing line through the beads of the 2nd row and go towards the first end. After that, we take the two ends of the fishing line in our hands, and pull all the beads until they stop in the middle of the fishing line. Next, we continue stringing, gathering all the beads of the row onto one end of the fishing line. In this case, the second end needs to go towards the first end of the fishing line.
Thus, the product will be voluminous, since when pulling up, all even and odd rows are laid parallel to each other. They thus form space. It is worth remembering that if during work there is a need to lengthen the fishing line, then 5-7 cm before the end you need to tie a new piece. In this case, you need to try to keep the knot closer to the product, leave the ends uncut and continue weaving. After the work is completed, you need to go through each of the left ends in the direction of weaving and then just trim the ends. Upon completion of the work, the ends of the fishing line are pulled up and tied in two knots.
Weaving a cat
We start weaving from the tail according to the pattern. After the work is completed, it is necessary to give the cat's head a vertical position so that it is stable. To do this, we fasten the 22nd row to the 18th row.
For a tabby cat, when weaving even rows from the 2nd to the 18th row, it is necessary to alternate white and black beads. The tail and paws of such a cat are also woven alternately, sometimes with white and sometimes with black beads.
After completing the work, each end of the fishing line must be walked back along the weave, and then trimmed off the ends.
Options for making a volumetric animal
There are a large number of both simple and complex cat weaving patterns, but the most common are: volumetric weaving pattern; technique of parallel and monastic (cross) weaving.
You just need to choose the most suitable option for yourself and stock up on high-quality beads.
If you want to weave a voluminous kitten, then you need to prepare:
- Two small balls - for making the head and body.
- Acrylic paint matching the color of the beads.
- Fishing line and wire.
- Scissors and glue.
- Beads of several colors and large beads, for example, for making eyes - two green beads, for a nose - three pink, and for a mouth - three red.
In order to weave a black and white cat, you need to paint the ball black, painting a small circle with white - this will be the belly. Weaving can begin only after the paint has completely dried.
To make a beaded kitten, the diagram for beginners describes in detail all stages of the work:
Weave a chain according to the cross pattern in the circle of the ball - the body. You can fix it with fishing line, pierce it crosswise, and pull the fishing line through the ball using a long needle.
Weave the belt in two directions at the same time, not forgetting about the white belly of the cat. If the row turns out to be too wide, start decreasing one bead at a time on a dark tone.
Then you need to make the paws and tail. To do this, you need to fold a piece of wire in half and string a bead in the middle of it according to the color of the paws. Twist the structure, leaving tails 3 cm long. You will also need an additional 2 cm from the desired length of the legs. Then, using this segment, you can twist them.
Make five such blanks: identical short pieces will be the paws, and the longest one will be the tail. Attach them to the body. To do this, you need to stretch the wire through the bead in the required place, twist the rest of it around and trim off the excess.
Once everything is attached, you can begin to braid the tail and paws with beads. In order to complete the first row, you need to follow this pattern: hook it to the beads of the body and braid it with a mosaic strand, using 3 beads as a base, and then 5. So, reach the edge, and then take white beads and beads. Cross braid a large bead for the end of the paw. Do the rest of the paws and tail in the same way.
To create a cat's head, you need to prepare a suitable ball and braid it in the same way as the body. Just do not use white glass pieces.
If you wish, you can weave a small heart that the cat will hold in its paws. To make it, you need to weave two pieces with a cross: one side should consist of five crosses, and the other - of three. Sew a heart on the sides, and to make the product voluminous, put beads inside. Then sew the heart to the paws.
To make eyes for an animal, you need to sew two green beads symmetrically on its face. And then weave the mouth and nose between the glass muzzles.
To make ears, you need to put a corner on the wire and weave the rest. And to make a mustache, pass several pieces of fishing line through the face using a hook.
Finally, attach the head to the body. To do this, you need to weave another row of crosses along its lower circumference (at the location of the neck). Sew on the head and pull it tight, and melt the ends.
Kitten Woof
In order to weave a charming kitten, you need to prepare:
- Yellow beads are the main color, brown beads in two shades are for making the paws, tail, ears and face, and light yellow is for the inside of the ears.
- Details - 17 black beads for the nose and eyes, 24 blue and 2 white for the eyes, 2 red for the mouth.
- Fishing line, wire, glue, needles.
First of all, you need to make blanks from balls. If desired, they can be made from plasticine, pasting them with paper and marking with a pencil where the beads change color on the face.
The eyes and ears must be woven using hand weaving techniques. Stuff the kitten's torso and paws with cotton wool. After braiding the head, it is necessary to continue making rows with additions.
The paws need to be made with mosaic weaving, and then attached to the body. Next, start weaving the back; no beads are needed on the paw side. The back to the tail should gradually taper, and having reached the base, you need to stuff the craft with cotton wool and weave the body to the end. Then attach the tail and make antennae from black fishing line.
For making a three-dimensional cat made of beads, the diagram is presented below.
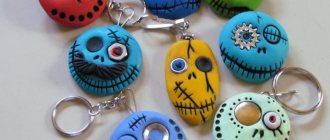
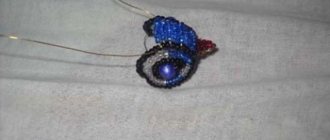
Keychain cat
We use brick weaving to make a keychain from beads, we will need fishing line (monofilament) for the main work, wire to make the tail, and the beads themselves - black for the body and contrasting to indicate the eyes.
Scheme
We start weaving from the longest row, from the middle of the head, after which we move first in one direction, then in the other. To master brick weaving and understand its principle, watch the video
When the body is ready, we make the tail. To do this, we pass the wire between two beads in the right place, fold it in half and collect beads on both ends.
When all the beads are in place, bend the ends of the wire in the opposite direction, bend the tail and only after that fasten the wire, making a turn with each end around the last bead, pass the ends along several more beads of the tail in the opposite direction, and cut it off.
The result of our work - a cat - can be placed anywhere: as a keychain on a phone or bag, as a pendant for decoration, and maybe even on a New Year tree.
Kitten on a chain
The pendant in the shape of a cat's face looks original and unusual. To create a flat cat from beads, it is important to strictly adhere to the pattern and do all the work using the technique of mosaic (or brick) weaving.
After the muzzle is ready, you need to make a small loop on top between the ears for a lace - the product is ready, you can wear it with pride and receive compliments.
As you can see, with a little effort and patience, you can create real masterpieces yourself and delight your loved ones with wonderful original gifts.
Keychain pink cat
Such a kitten, made independently, can be an excellent souvenir gift for the holiday or serve as a toy for a child. A gift from the heart will always be pleasant and touching, especially if it is made with your own hands and a piece of the soul of the craftswoman is put into it. Children will especially like it because of its small size, which you can always carry with you. It’s easy to weave such a cat; the work will soon captivate you and bring you a lot of pleasure. Be creative and don’t stop in your endeavors.
To work you will need:
- white beads
- pink beads
- 4 things. black beads
- 1 PC. red bead
- fishing line 2.1 m long (can be thread)
- ring with cord for attaching keychain
We put five beads on the fishing line and close the ring. We got two ends that came out at point E, as indicated in the diagram. Now you need to cast ring number 6. We collect 3 beads on the right end of the fishing line, and seven beads on the left end. With the left end we pass through the three beads that are on the right end of the fishing line and through the bead of the central ring. Then we continue to string rings 7,8,9 and 10.
After this, we move on to the second row of rings, and move from right to left, while looking at the diagram in Figure 2. We begin weaving the subsequent rings after we string 5 rings from No. 11 to 15. We make subsequent rows, focusing on the diagram in Fig. 3 -4.
Now we are weaving the cat’s head, we do this starting with a simple ball - a fullerene. The head is somewhat larger than the body, and therefore we will start with six beads that are closed in a ring. We focus on the diagram in Fig. 1-3. In Figure 4, the diagram of the cat’s face is shown; we will make it by weaving it onto a ready-made ball.
When we finish weaving the head, we begin weaving the muzzle and do it according to the pattern in Fig. 5-6. We also prepare the ears according to figure 7, two legs according to figure 8, as well as the tail, this is figure number 9.
When all the parts of the kitten are ready, they need to be put together. We carefully sew all the details together. For the antennae, insert a bundle of wire and simply tie it around the red bead of the cat’s nose. The result of the work is attaching the ring for the keychain to the kitten. Now the kitten keychain is ready.