How to weave sakura from beads with your own hands? Photo
The work of making sakura is not so difficult as it requires perseverance and attention.
Your imagination will tell you what kind of sakura you want to make. You can use ready-made ideas or add your own twist to existing master classes.
You can make a classic cherry blossom with lush branches densely strewn with pink flowers.
Or with less dense branches, but very delicate and graceful.
Variant of sakura with large flowers.
The size of the tree can vary, ranging from the smallest to the largest.
A look at culture from the outside
Sakura is a decorative cherry tree.
It is often used to decorate city parks, private gardens and gardens. The plant belongs to the “Pink” family and is distinguished by beautiful flowering. In its natural environment, the culture is found in Japan, China and Korea. Some specimens grow up to 20 m. Its trunk and branches are covered with smooth bark. Horizontal cracks, painted in the following shades, are clearly visible on it:
- grey;
- green;
- red.
Beneath the bark lies flexible wood with a high resin content. Leaf plates with a shiny surface have an exquisite decorative effect. They come in spear-shaped or oval shape. The edges of the foliage have a jagged edge. During flowering, sakura is covered with many inflorescences. Each of them consists of several terry buds, painted white or pink.
Japanese breeders have developed varieties with crimson, yellow and red flowers.
As a rule, the bush blooms before the leaves bloom. A huge number of bouquets tightly cling to bare branches, turning the plant into a delicate and lush “cloud”. When the buds begin to fade, greenery appears. In this outfit, Sakura looks even more attractive. Flowering lasts about 2 weeks, depending on the weather and variety.
After pollination, fruits form on the tree. They are small berries that resemble cherries. In fact, it is a bone tightly covered with a thick skin. The fruits taste very sour, so they are used to make jam or wine. The leaves of the shrub are pickled or salted and then added to dishes as a seasoning. When cooked, they acquire a sweet and sour taste.
What beads are needed for weaving sakura? Set of beads for sakura
The main material for making sakura is beads . You can use one color of beads, for example pink. But most often two colors are used: pink and green. The color of the beads, in addition to shades of pink, can be white or purple. Various types of beads are suitable:
- Bugle beads
- Matte
- Transparent or opaque
- Melange
- Fibrous
To simplify your job of finding suitable shades and textures of beads, you can buy a ready-made set of beads for making sakura.
Sakura tree made of beads for beginners. Master Class
First, try to make a not very lush sakura. You will need:
- Beads pink and green (about 100 g)
- Spool of fine copper wire (0.3mm)
- Thick wire for sakura trunk
- Masking tape
- Gypsum
- Acrylic paint for barrel
- Glue
- Foil or plastic bag
Master Class:
- String beads onto thin copper wire. Length about 45-70 cm.
- Then step back a distance of 10 cm from the edge and make a loop out of 6 beads
- Make about 7 of these loops. Wrap the loops around yourself
- Fold the branch with seven loops in half, the fourth loop will be the top of the branch. Wrap the loops to form a twig
- Make 100 of these little branches
- Then take 5 small branches and twist them into one big one
- Continue forming larger branches. One hundred small branches make 20 large branches
- Now make the branches even larger: we connect two or three branches into one. As you can see, the size of the branches is getting larger
- Let's form a tree: attach each resulting branch to a thick wire. Attached, now wrap the next branch, then again and again until you get a tree
- Wrap the barrel with masking tape
- Dissolve the plaster in the stand and quickly insert the wood into it before the solution dries
- Cover flowering branches with a bag or foil so as not to stain them
- Meanwhile, coat the barrel with this mixture: plaster, glue and a little water (the consistency should be similar to sour cream)
- Wait until the trunk is dry and paint it with acrylic paint
Flower weaving pattern
You can go this way when flowers bloom on the branches and birds sing in their nests. This type of weaving will be useful for beginning craftswomen. The exciting process is a lot of fun.
Preparatory stage
Before you begin, you must have the following materials available:
- Bugles in 2 tones - pink and white.
- Wire with a diameter of 0.3 - 0.4 mm.
- 5 pieces of 40 cm thick copper wire.
- A stand for placing a tree.
- Tape or adhesive plaster.
- Nippers, scissors.
- PVA glue.
- Foil.
- Plasticine.
- Gypsum.
- Acrylic paints.
- Varnish.
- Sisal.
- Nest with birds.
Weaving flowers
The principle of a loop with a loop is applied. The wire length is 130 cm and is designed to create 3 flowers. The following is the sequence:
- Pink glass beads are strung along half the length of the wire.
- A loop is made from 7 pre-counted beads.
- A loop of beads with a pair of twists at the base is made above it.
Petals
By analogy, 4 more petals are made so that they fit tightly, their edges touching each other.
Stamen
An important component of the craft is the production of stamens:
- 1 white bead is strung on a wire 40 cm long. If you bend it and twist it 10 times, it will look like a leg.
- In the future, the progress of work is absolutely similar to the previous one. You need to try to ensure that the stamens are located as densely as possible in space.
- On one piece you are supposed to place 10 pieces of the core and roll them tightly.
- A bunch of stamens is passed into the middle of the flower and by twisting at the base.
This technique allows you to create a full flower.
Flowers
The composition combines 2 shades of pink beads. Guided by this rule, the weaving will consist of light beads for 70 inflorescences and darker beads for 50 pieces.
To form 1 branch, clusters of 5 flowers are collected. It is taken into account that twisting occurs up to the end branches of the wire. With this order you should get 24 branches.
Branched trunk
- 5 pieces of wire are placed in such a way that, when they are in a container for wood, they look like an open palm.
- For this purpose, the wire is bent like 5 fingers of a hand, taking into account their unequal length. Some fingers are longer, others are shorter.
- Next, the trunk is secured with an adhesive plaster at the point where the bunches begin to diverge. The palm formed in the middle is set aside for a bird's nest.
- Using a similar principle, branched rods are wrapped in several layers.
Blooming sakura made of beads. Master class on weaving sakura from beads
For sakura with flowers you will need the same materials, only you will additionally need yellow beads for the stamens.
Flowers are made using the circular technique:
- First, place 6 beads on the axis
- Then form three or more arcs on each side. Makes one petal
- Form five petals using a circular technique
- Stamens are made using the needle technique: collect 8-9 yellow beads on a wire and twist the needle. Then move on to the next needle
- When the flowers are ready, you should collect them into one whole, forming a tree
- Then proceed as in the previous master class: form a trunk, fix the tree in plaster, paint the trunk
Now let's pay attention to the details.
How to make a sakura trunk from beads? Scheme
The trunk of sakura is formed by twisting branches:
- All branches are connected into one and thus a volumetric rod is obtained. Next, this part must be wrapped with either masking tape or corrugated paper. The trunk still doesn’t look very aesthetically pleasing
- If you used brown or black corrugated paper, then you don’t have to do anything further with the barrel. If you used paint glue, then the barrel must be painted
- Before painting the trunk, coat it with this mixture: 1 tsp. gypsum + 1.5 tsp. PVA glue + a little water
- Let the trunk dry. Now it has acquired a more stable and thick appearance
- You can use a toothpick to make indentations to make it look like real bark.
- Paint the trunk with acrylic brown paint
How to make a stand from beads for sakura?
The easiest option is to put the sakura in a small flower pot, fill it with plaster and sprinkle it with beads or broken glass.
You can also try and make a whole landscape at the base of the sakura.
A stand can also be a flat piece of wood on which you attach the tree.
How to assemble a sakura bonsai from beads. Photo
Bonsai is a dwarf tree. Therefore, we will make this tree small and with small branches.
You will need the following materials:
- Beads
- The wire is thin and thicker
- Threads
- A mixture of glue and plaster
- Dye
Master Class:
- String 8 beads on a thin wire 45 cm long
- Then fold it into a loop and wrap it around several times.
- String the next 8 beads, make a loop
- Make 8 loops in total. It turned out to be a small fluffy twig
- Make 100 of these branches
- After this, form the tree. Twist 2-3 branches together, securing them with regular sewing threads
- Form branches, retreating from each other a few millimeters
- Make branches of the first, second, third order
- Attach a thick wire to the barrel to make the barrel more stable
- Place your bonsai in any stand
- Treat the trunk with glue and plaster, after drying, paint it
Focus on details
At a close distance, sakura flowers look no less impressive.
The work, consisting of a single branch of sakura, is aimed at carefully “drawing” each element. An appropriate master class will help you take into account all the nuances of painstaking work.
You should prepare:
- pink and white beads;
- small brown beads;
- golden oblong glass beads;
- wire;
- wire cutters;
- brown threads.
Two pieces of wire of different lengths are twisted along the length by 2-3 cm. The base is a short piece of wire.
Related article: Blanket “10 loops”: master class with description and video
The long part is considered working. 3 pink and 5 white beads are strung on a short wire, and 2 more white beads on a long wire.
A long piece wraps around the base.
Using the working wire, several similar symmetrical arcs are made.
In this case, each arc is fixed with turns on the main wire, and the new row is increased by several beads.
This is how flower petals are formed. One flower contains 5 identical petals.
The stamens are created using one brown bead, which is strung on a separate piece of wire. Both ends of the segment are threaded into glass beads. Each flower contains 3 stamens.
The prepared elements are twisted together into 3 stamens and 5 petals. Additionally, flower buds are made. To do this, pink and white beads are strung on a wire in a ratio of 3:10:3. Pink beads are located along the edges.
After two twists, the next bead loop is made, then another one in a similar way. The ends of the segment are twisted.
Flowers and buds are connected in any way, forming a single branch. The visible part of the wire should be tightly wrapped with brown thread, which is fixed with glue.
The finished sakura branch can be placed in a miniature vase with a narrow neck.
How to make sakura from beads with your own hands: tips and reviews
Valentina, 55 years old : “Bead weaving is my hobby. It is very calming and brings peace of mind. Now my apartment is decorated with two beautiful sakura trees, I want to make more trees.”
Marina, 30 years old : “My 10-year-old daughter and I also love making sakura. We buy ready-made sets, it’s very convenient. The barrel doesn’t have to be painted; you can wrap it with brown yarn.”
If you have a lot of free time, make sakura from beads for yourself or your loved ones and friends. Sakura is a symbol of prosperity and will bring good luck to your home. This is what real cherry blossoms look like.
master class with photos, do-it-yourself templates, how to make a flower
It is quite possible to make an interesting decoration in the form of sakura from foamiran for interior decoration with your own hands. The island of Japan has always been interesting to the inhabitants of the continent for its distinctive culture with its unique aesthetics and original philosophy. When the simple Japanese cherry tree, sakura, blooms for a week, it becomes a national holiday for the residents of the country. The Japanese love their cherry very much; for them it is the most beautiful flower in the world. A Japanese can spend hours admiring the cherry blossoms and the beauty of the moon. For everyone this is romance, for them it is a national character trait. If you want to feel like a Japanese, perhaps sakura from foamiran will help with this.
Tips: how to make sakura from foamiran at home
Anyone can recreate the national symbol of Japan with its beautiful small pink flowers. In almost any home there will be the necessary things, the only thing you will have to buy is foamiran, a decorative synthetic material used for needlework, the most important difference of which is the ability to have a small stretch of about 10%, sufficient for the material to take and remember the required shape.
Before you start making decorative sakura flowers, you should prepare foamiran of the desired color in advance
To get started, just prepare in advance:
- Beads with caps for them;
- Hole puncher with decorative holes;
- Decorative wire;
- Pencil;
- Paints;
- Brush;
- stick;
- Green tape;
- Pink foamiran;
- Sewing needle;
- Sewing threads;
- Awl;
- Iron.
In the absence of pink foamiran, you can get by with white foam by repainting the material in the desired color.
There are types of foamiran that only need the warmth of human hands to change and maintain the desired shape.
For such handicraft-friendly characteristics, foamiran was nicknamed “rubber paper.”
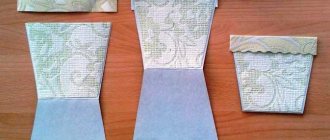
Preparing templates for sakura from foamiran: home stationery
When we have all the necessary components for needlework on hand, we first begin to create the necessary templates for the petals and sepals.
In order for the sakura petals to turn out neat, you should prepare a special template in advance
When preparing templates, you will need:
- Decorative hole punch;
- Scissors;
- Cardboard or similar material.
If you have a decorative hole punch, we prepare petal templates with its help. To make the branch beautiful and lush, you will need a lot of flowers. Otherwise, having decided on the size of the future petals and sepals, we draw out the necessary details on cardboard. For example, a wonderful product is obtained if flowers of two sizes are used in a branch, then we draw 2 drops on cardboard with the following dimensions: 2.5x2 cm, 1.5x1.2 cm. On cardboard measuring 5x5 cm, 3x3 cm, we draw sepals and direct the ends of the leaves into the corners from the center of the sheets to the edges. Having cut out the necessary parts, we get ready-made templates.
For the above parts, similar templates of different sizes can be made, giving the products a more natural look.
Sakura flowers are not large, so their implementation is a painstaking, detailed work that requires clear detailing, complementing the flowers with stamens, leaves and stems.
Beautiful sakura made from foamiran with your own hands
Prepare the required number of necessary parts using the templates, then we proceed directly to the manufacturing process. To give the flowers a more natural look, use a brush or a damp cloth to apply dark pink paint to the middle. Heat each future sakura flower on an iron for about 2 seconds. When heated, the flower shrinks, becoming more plastic; all that remains is to slightly correct the edges with your hands, giving the desired look. You can use an ordinary sponge for these purposes: transfer the petal from the iron to the sponge, press it in the middle with your finger, fix it for a minute, the flower is ready.
To heat the flowers, the iron must be set to “two” or “wool”.
Beautiful sakura made from foamiran will be an excellent decorative decoration for the interior
Having performed the operation sequentially with each flower, we obtain the required number of Japanese cherry petals. Next, in the middle of all products, we make 2 holes with an awl. We insert the existing decorative wire into the resulting holes, putting 3 flowers on each. Don't forget to decorate them by inserting stamens made of wire and beads. Finally, having secured the tape under the base of the flower, we wrap all the decorative wire. From the resulting branches we make a composition, fastening them together at different levels with green tape.
The resulting inflorescences can also be used to create:
- Bouquets;
- Paintings;
- Hoops.
To make it more natural and similar to reality, it is advisable to choose natural colors: using various shades of white and pink. For the same purpose, instead of a simple straight stick, you can take a knot from a real tree. Having learned how to make a sakura flower, you can then create miracles with it, using them to decorate the interior of your room or office, make a hairband or an original brooch.
Homemade sakura from foamiran: master class on creating
The skills acquired in creating sakura flowers from foamiran with your own hands can be used to create three-dimensional paintings. If the flowers themselves have already been prepared, then to create a voluminous canvas you will need very few things.
You can learn more about how to make sakura from foamiran at home from an interesting master class
It will be enough to find:
- Acrylic paints;
- PVA glue;
- Glue gun;
- Picture frame with a base of the required size;
- 4 white paper napkins.
On the prepared base, we create a sketch composition with a pencil: the symbol of Japan - Mount Fuji, a small building in the Japanese style. We come up with the background image we need; any master can show the maximum of his imagination. For example, we cover the upper part of the painting with sky blue, paint the middle in lighter colors, and the lower part of the base can be made dark blue. After the background of the painting is well dried, we draw out the mountain and the building with paints.
On a separate sheet of paper, the same size as the picture, we draw silhouettes of branches, 2-3 will be enough. To obtain volume, apply PVA glue to the torn pieces of napkins for better impregnation. We carefully glue the napkins onto the contours of all the drawn branches and give them time to dry. After drying, carefully and slowly separate the branches from the paper, glue them onto the base of the picture, and tint them brown. All that remains is to add cherry blossoms from foamiran to what was received, and the master can admire the picture created with his own hands.
To give the picture a special charm, you can use luminescent paints when depicting Fuji.
Making sakura from foamiran (video)
Having learned how to make sakura from foamiran with your own hands, you can conduct a master class and show your loved ones, relatives and just acquaintances your art. Bring them closer to the mysterious and so alluring art of the East. The Japanese say that anyone who has had the chance to see sakura blossom will never forget this beauty. Maybe, having seen its artificial flowering made of foamiran, someone will want to look at real sakura.
Examples of sakura from foamiran (photo)
Attention, TODAY only!
Add a comment
kitchenremont.ru