How to make soft plasticine at home
Even the smallest children can play with soft plasticine, because it is very malleable and can take any shape. We offer a very simple recipe.
Necessary materials:
- dye packaging;
- 1 tsp sunflower oil;
- 1 tbsp. spoon of salt;
- 2 tbsp. spoons of flour.
Manufacturing stages:
- Place the dye in a small bowl.
- Add sunflower oil, mix well with a teaspoon.
- While continuing to stir the mixture, add a little water.
- In a separate container, combine salt and flour. Add this mixture in small portions to a container with water and sunflower oil.
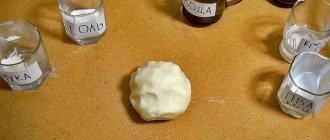
- Mix the total mass well until you get plasticine.
How to make smart plasticine at home with your own hands
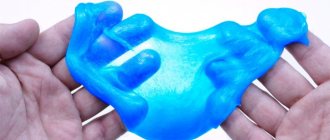
Smart plasticine is also called handgam. Its consistency is similar to chewing gum. It's a pity that you can't put it in your mouth. But playing with her is interesting and fun.
Necessary materials:
- 1 tbsp. PVA glue;
- food coloring packaging;
- 2 bottles of sodium tetraborate;
- stirring spatula;
- cooking container;
- essential oil for aroma.
Stages of work:
- Pour PVA glue into a clean container. In order for the mass to be of high quality, choose only glue that is no more than 3 months old.
- Add essential oil and food coloring, mix thoroughly to obtain a homogeneous mixture. Handgam is ready!
Important! Handgam should only be stored in the refrigerator, placed in a closed container. In other conditions it dries quickly.
If this does happen, moisten it with a small amount of water and knead it in your hands.
Chewing gum for hands: why pay more?
Surely, your children have heard about “smart” plasticine, and, of course, asked to buy it! This is a very popular toy today. Outwardly, it is an eerie stretchy mass that changes its shape. It is called Handgam (Slime) or simply “chewing gum for hands.” You can also easily prepare it at home without spending a lot of money! And you can store it for up to 5 years!
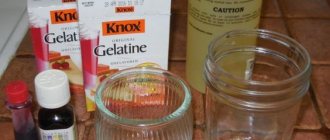
How to make such plasticine? To do this, you need to visit any pharmacy and buy sodium tetraborate. Don’t be intimidated by such a complex name, this is an affordable drug and it costs no more than 50 rubles. We will also need PVA glue and dye (you can use gouache).
Mix glue with dye in a wide form. When the mass becomes uniform in color, add a teaspoon of that same “terrible” pharmaceutical product. Stir until thickened. Place in a bag and knead well with your hands a few more times.
If suddenly your pharmacy doesn’t have tetraborate, it doesn’t matter! Then you need to buy silicate glue at the office supply store. Mix it in a 1:1 ratio with pure medical alcohol. Knead well. Rinse the mixture with water and your “smart” plasticine is ready!
How to make ball plasticine with your own hands
Ball plasticine has a special, heterogeneous consistency, so it causes real delight in children. If your baby likes it too, make it at home.
Necessary materials:
- food coloring;
- 0.5 tbsp. cold water;
- 0.5 tbsp. hot water;
- 60 PVA glue;
- Styrofoam;
- 1 tbsp. l. Boers.
Stages of work:
- Add 1 tbsp to a clean glass. spoon of borax, pour half a glass of hot water, set aside for a while.
- Add 60 g of PVA glue to another glass and mix with a bag of dye.
- Place the foam balls in a plastic bag, add the contents of two glasses, knead well with your hands.
There is another cooking option.
Necessary materials:
- PVA glue;
- sodium tetraborate;
- food coloring;
- tight package;
- polystyrene granules.
Stages of work:
- Add polystyrene granules to a tight bag.
- Fill the contents of the bag with glue, add dye, shake so that each component is evenly distributed.
- As soon as the mass becomes homogeneous, add sodium tetraborate 1 drop at a time. The less it is, the denser the finished mass will be.
Types of plasticine mass
Are you wondering why salt dough recipes are called plasticine? The word plasticine literally means a material for modeling.
Two centuries ago it was made from clay powder with the addition of fats, which prevented drying. Currently, plasticine mass is made from high-tech materials and painted in different colors.
It is worth clarifying that real sculptural plasticine, also called polymer clay, has special properties. It is more flexible and allows you to sculpt small and large parts with a high degree of accuracy. It is used to make molds and for medal work. Sculptures are made from it in art schools and workshops. This plasticine contains: petrolatum, paraffin, pine rosin, machine oil, kaolin, chromium oxide and carbon black. As you can see, factory-made polymer plasticine contains completely different components, but the mass prepared at home is also excellent for children's creativity - it is convenient to sculpt from it, and crafts harden well. In addition to the listed components, zinc white is added to the solid variety. Before use, the plasticine mass needs to be warmed up a little in your hands or placed on a room heating radiator.
In addition to the listed types, crafts from which become solid, there is also the so-called smart plasticine or handgam. The recipe for making it at home is simple. Handgam has interesting properties: it can flow, tear, break, etc. Thanks to special components, some types of handgam can be magnetic. Home craftsmen have also learned how to make this kind of plasticine.
Recipe for making smart plasticine:
To prepare handgam with your own hands you will need:
- PVA glue 100 g;
- sodium tetraborate from the pharmacy 1 tbsp. l. powder or about 100 ml of solution;
- container and kneading stick;
- dye;
- water from 60 ml.
Cooking sequence:
In a prepared container, mix water, glue and dye. The amount of water may be slightly more than in the recipe; this determines how fluid the handgam will be.
Add sodium tetraborate to the adhesive mass and mix well. If the mass does not fold well, add another drop. Sodium tetraborate powder must be diluted in half a glass of water before use. If the product is purchased in solution, 1 bottle per 100 milligrams of glue will be enough.
When the mass thickens, place it in a plastic bag and knead it with your hands. Now the handgam is ready, you can take it out of the bag and sculpt it.
How to make magnetic plasticine at home
Handgam is used as the basis for magnetic plasticine. In order for it to acquire the ability to attract metal objects to itself, it is necessary to add a developer to it.
You can buy it at computer stores. It is used to refill laser printers. The total mass needs to be mixed well and, of course, checked for magnetic properties.
Magnetic handgam retains its qualities even after several weeks. Of course, if you store it in a closed container on the refrigerator shelf. Otherwise, it dries quickly and cannot attract metal objects.
When stored in improper conditions, magnetic handgam becomes very thick and can be used as a sealant. In addition, it can be used to take impressions and molds of small objects.
Another unexpected property of magnetic plasticine is to collect small debris from contaminated objects. It is enough to run a piece of plasticine over the surface and it will be cleaned.
How to make sculpture plasticine at home
The main advantage of hand-made sculptural plasticine is its safety. You can make it for your children and not worry about it harming their health.
Method No. 1
Necessary materials:
- 30 g citric acid;
- 300 g flour;
- ½ liter of water;
- 25 ml vegetable oil;
- 300 g table salt;
- food coloring.
Stages of work:
- Boil water, combine with a tablespoon of vegetable oil.
- In a bowl, mix citric acid, salt and flour. Add hot water, knead the dough using a tablespoon.
- Cool the mixture slightly and knead it thoroughly with your hands to obtain a homogeneous mass. Divide it into separate pieces. Make a small depression in each of them, add dye, and mix thoroughly.
Method No. 2
Necessary materials:
- food coloring;
- 2 glasses of water;
- 1 glass of table salt;
- 0.3 kg flour.
Stages of work:
- Knead the dough from water, table salt and flour. Divide the total mass into parts. Paint each part a different color.
- Place the plasticine in a plastic bag and store it in the refrigerator.
Method No. 3
Necessary materials:
- PVA glue;
- a glass of potato starch;
- 0.2 kg table salt;
- ¼ liter of clean water;
- 0.4 kg flour;
- a few drops of vegetable oil;
- food colors of different colors.
Stages of work:
- Mix salt and flour in a deep container.
- Pour in water and add dye of the desired color.
- Slowly combine the 2 prepared mixtures and mix.
- Add starch and mix well with your hands again.
- Add oil and PVA glue one at a time. The consistency of the mixture should be elastic and harsh.
- To store the plasticine, wrap it in a plastic bag or place it in a container with a lid. Store sculpture clay in the refrigerator.
Even if the plasticine does not dry for a long time, it is not used for a long time. Better make a new batch - it will be softer and more pliable than the previous one.
Method No. 4
This version of plasticine can be prepared in the microwave.
Necessary materials:
- 0.4 kg flour;
- 0.2 kg table salt;
- 0.125 l of water;
- 1 glass of vegetable oil;
- multi-colored food colors.
Stages of work:
- Prepare a deep container. Avoid using a metal bowl or mug as they cannot be placed in the microwave.
- Add all the necessary ingredients, mix thoroughly.
- Cover the container with a lid and place in the microwave for 5 minutes.
- Remove the container with plasticine and let cool. Transfer it to the table and knead. Store the mixture in a plastic container.
You can find out which day of the year is the longest from the publication on our website.
You can learn how to make wall-length bookshelves with your own hands from this article.
From here you can get ideas for face paintings for children.
Cooking methods
Making plasticine mass at home is not at all difficult. The important thing is that it will be completely safe, even for the smallest children. Creative modeling activities with such plasticine can be started from an early age. For young children, safe cooking recipes are used, reminiscent of kneading salt dough. Products for it are not difficult to find, not difficult, and the process of making the mass with your own hands will not take much time and effort. The piece of plasticine will be pleasant to the touch, flexible, and will not stick to your hands. You can color it with food coloring or natural vegetable juice (in the second case the color will be paler).
You will need the following components:
- dyes;
- water 500 ml;
- vegetable oil 20 ml;
- salt 320 g;
- flour 320 g;
- citric acid 25 g.
The sequence of preparing plasticine material at home:
Bring the water to a boil, when it boils, add vegetable oil (1 tablespoon).
Mix flour, salt and citric acid in a bowl. Pour hot water into the mixture of flour and salt, and use a spoon to knead the dough.
When the mass has cooled slightly, knead it well with your hands until it becomes an elastic, homogeneous dough.
Divide the resulting mass into parts. After making a depression in each piece, add paint. The paint must be diluted in a drop of water. Drop the paint into the recess and knead the piece. You can add a few grains of dry food coloring to the flour before adding hot water. But then the whole mass will turn out to be the same color.
Method 2
This method is simpler, without brewing, even a schoolchild can handle it.
To prepare you will need:
- flour 320 g;
- salt 1 tbsp.
; - water about 2 tbsp.;
- dyes.
Cooking sequence:
A plastic dough is kneaded from flour, salt and water. Divided into parts, each of which is painted a certain color.
Store this plastic mass in a plastic bag or tightly closed plastic container in the refrigerator.
You don’t have to add dyes to the plastic mass when mixing, painting ready-made, dried products in the desired colors.
Methods of painting in different colors
Painting with acrylic paints
Acrylic paints can be used to paint figures made from different materials. Coloring plasticine is not much different from coloring polymer clay or salt dough. If you painted figures made from these materials, you can easily paint figures made from plasticine.
If you often sculpt figures from homemade plasticine, we recommend purchasing a large box of paints. Acrylic paints are sold in tubes. After use, they need to be tightened well so that they do not dry out prematurely.
Using basic colors you can create new shades. If you want to get some unusual color, try experimenting with basic tones.
You should also purchase brushes of different sizes for the job.
Stages of painting plasticine figures:
- Apply the first coat of paint to the figurine using a large brush. Don't be afraid that you will distribute the dye unevenly - at this stage it's not a big deal. Let the first layer dry. Blot the figurine with a napkin. If there are uneven surfaces, paint them additionally with a small brush.
- Use thicker paint to paint the details. This can only be done after the previous layer has completely dried.
Coloring with food coloring
This option is suitable for coloring plasticine at the stage of its creation. You can paint a piece of plasticine with several colors at once, and you will get a material that simply “plays with colors.”
Or you can divide the finished mass into several parts and paint each of them separately.
Methods for coloring homemade plasticine
To color homemade clay, you can use food dyes, such as those used to color Easter eggs, or paint it with instant drinks.
But the best option is natural dyes. These can be root juices, tea infusions or coffee, coloring spices.
If the child is old enough and does not put plasticine in his mouth, then you can use ordinary paints, for example, gouache.
To give the plasticine a more interesting, shimmering look, you can add glitter to it.
How to learn to sculpt from plasticine
Modeling from plasticine is one of the most favorite children's activities. However, it can be difficult for the youngest children to master this process. The parents’ task is to show and tell how to work with plasticine and what can be made from it. Take a few practical tips into account:
- To get acquainted with modeling, choose soft plasticine that will be easy to sculpt from. To begin with, you can take a mass for modeling - it is very plastic, so children's fingers can handle it without any problems.
- The first technique that kids need to master is pinching off small pieces. To make it more interesting for your child to do this, turn this process into a game. For example, green pieces can be used to make grass, blue pieces can be used to make raindrops, etc.
- To help your child learn to feel the material, teach him how to knead. First, pinch off small pieces, and then gradually increase them.
- The next stage is rolling out. Teach your child to sculpt flagella, sausages and balls from plasticine. After mastering this technique, the child will learn to sculpt snowmen, caterpillars, Smeshariki, etc.
- Flattening. Children really like this technique, because with its help you can make ears for a bunny and a cat, a roof for a house, make a textured background, etc.
https://youtu.be/7TPmmELzhHw