- 8941
- 1
The story of the writer JK Rowling about the adventures of the young wizard Harry Potter so amazed and inspired the whole world more than twenty years ago that new generations of young people are still excited about the idea of becoming part of the vibrant world of sorcery.
Undoubtedly, one of the most important items in the arsenal of any novice wizard is a magic wand . It is from its creation that you can begin to become familiar with magic. If children ask to help make a real magic wand according to all the rules, then it is the duty of any parent to help novice sorcerers and witches in this difficult task. Where to start, and how best to make a magic wand with your own hands, we’ll tell you in our article.
What can you make a magic wand from?
The first thing that comes to mind is a simple question: how to make a magic wand at home ? There are several ways to create a magical assistant with your own hands. But the first thing you need to do is choose the material for the magic wand . It is preferable that all materials used in this magical work are of natural origin. The only thing is that decorations for the handle may be an exception.
See also...
✅ How to make an amulet for good luck and money with your own hands?
✅ Making a love amulet with your own hands
✅ How to take a screenshot on a laptop: tips for Windows and Mac OS
✅ Do it yourself: edible paint for children's games
A magic wand can be made of the following materials:
- Wooden stick;
- Papier mache;
- Tools at hand.
Let's look at all the ways to work with materials in order, and the photographs will inspire you to create a special magical assistant.
Made of wood
The classic option is to create a magical assistant from wood. It is believed that the correct magic wand is selected in a forest or park . You cannot cut or break branches from a tree; a stick can only be made from branches that are already lying on the ground. It should be a beautiful looking stick or twig that can be found on a path or under a special tree.
They say that a little wizard or sorceress needs to feel that it is their wand that is in their hands - they should really like it, even in its original form.
The shape, size and color of the magical attribute - all this does not matter, the main thing is that all the parameters are suitable for the person choosing it. At the end of the selection process, you must mentally thank the forest or a specific tree for such a gift, and also assure the surrounding nature that no evil deeds will be committed with its help.
What should you do with the chosen stick to make it look like a real magic assistant? The next step will be processing the wooden product.
- Stage No. 1: Preparation for processing
- Pour water into a container suitable for the size of the stick and add 5-10 tablespoons of salt, depending on how much water is in the container;
- We send the found twig into the water, press it to the bottom with a pebble and leave it in this position for a day;
- After this, you need to leave the twig in an open place for a whole day so that it dries (first in the rays of the sun, then in the moon);
- During this time, you need to think about what you want the finished branch to look like in the finale.
It is important to remember that a magic wand can have any shape, be smooth and neat or rough and knotty. It is important that the novice wizard likes her. It needs to be processed in accordance with the plan: if there are unnecessary elements on it, they can be ground off, or simply decorated with softer fold lines.
What magical assistants might look like.
- Stage No. 2: Main work on the future magic wand
At this stage, the work is especially important, because it determines what the final version of the stick will look like.
- First you need to sand the surface of the stick with sandpaper or sandpaper;
- If desired or necessary, you can change its shape, for example, make the end thinner and neater;
- After this, the twig can be polished;
- If there is such a need, it can be coated first with paint and then with varnish.
If that's not enough decoration, there are ways to add more interest to your wand's personality, but we'll get to that later.
Papier mache
If it is not possible to create a beautiful magic wand from real wood, you can try making it from plain paper and PVA glue. This art is called Papier-mâché, and it is very fun to do.
To make a magic wand in papier-mâché style you will need:
- A simple pencil - for the base;
- Old newspapers or white album sheets;
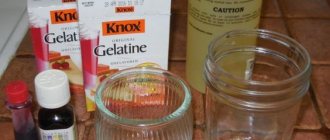
- PVA glue (or starch, gelatin, stationery, carpentry);
- Container with water.
How to make a magical paper craft:
- We tear newspaper or landscape sheets into small pieces (squares or free-form);
- We wrap the pencil in cling film and leave one end of the film sticking out (it cannot be touched, thanks to it you can pull out the pencil at the end of the work). You can also cover the film with hand cream or oil so that at the end it can be easily removed from the future stick;
- Take a leaf, dip it in a container of water and apply it to a pencil;
- We take the next leaf and repeat the procedure again and again until we completely cover the entire surface of the pencil with small paper sheets - the result should be a thin layer of paper coating;
- Coat the layer with glue;
- Apply about 3-4 layers on top in this way;
- The result will be the body of the future magic wand;
- Leave the papier-mâché to dry for a day;
- We take out a pencil in film from the center;
- Cover the hole with a small layer of wet paper in the same way as before;
- Leave the stick to dry;
- We apply paint, drawings, natural wooden stains to the paper structure and let the decor dry;
- We coat the product with varnish.
From scrap materials
Ideas for decorating magic wands made from a variety of materials.
Another possible way is to combine the two previous ones: make a magic wand out of wood, but not ordinary wood, but from a pencil. To do this, you can take a thick colored pencil, sand off the excess corners and colored coating from it with sandpaper, give it the correct shape, paint it and further decorate the magical product, and then cover everything with varnish.
How to make a stick from scrap material
In order to make a magic wand with your own hands the first time, it is not at all necessary to wander through the forests or use torn paper.
This item can be made using available materials as a base. These can be sushi sticks or simple pencils. Making a magic wand from such material will not take much time, and the result will be no worse.
To make a magic wand from a sushi stick, you need to perform the following sequence of actions:
- On the stick, mark the place where the handle of the stick ends. The approximate size of the handle is a third of the base, but it is recommended to focus on the width of the young wizard’s palm.
- Apply a pattern to the surface of the stick using hot glue and a gun.
- If desired, decorate the handle with small objects (threads, beads, beads, etc.).
- For the top, apply a thicker layer of glue closer to the base. To apply the glue evenly, you need to constantly turn the stick in your hands.
- Wait about a minute for the glue to cool slightly.
- Until the glue has hardened, but no longer sticks to your hands, form the desired top.
- Allow several hours for the glue to cool completely and dry.
- Using paints, give the stick the desired base color. You can paint not only the surface of the base, but also the glue areas.
- After the main color has dried, paint the decorative details.
After the paints have completely dried, open with varnish. It is advisable to do this outdoors.
Making a magic wand that will help a young wizard cast magic in the name of good from a pencil is no less simple. Using sandpaper or sandpaper, you need to remove the colored coating and excess corners from the pencil. Afterwards, you can modify the surface of the pencil, giving it the desired shape according to the plan. At the end, all that remains is to paint the finished surface, apply decor and varnish. The product can be safely used.
How to decorate a wand with your own hands?
Once you know how to create your own wand, you just have to remember that you can make it special with a variety of decorations. Here are some simple ideas to help you create a truly unique wand.
How to make a beautiful magic wand:
- Carve signs on it (runic or Kabbalistic symbols, elven drawings, and so on);
- Use a glue gun (papier-mâché or plasticine) to make knotty layers or decorative mounds on the handle;
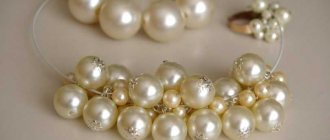
- Decorate the finished wand with wires and crystals;
- After carving wood (or layers of glue), you can decorate the material with paints to highlight important nuances.
Share with your friends!
Subscribe to our Yandex.Zen channel or Yandex.Messenger
Manufacturing process
In order to make a working tool from the resulting branch, it is given the desired shape. It doesn't have to be as straight as a pointer. The main guideline is the feeling of correctness of its owner.
Magic wands don't have to be straight
Instructions on how to make a real magic wand include several steps.
- Use a knife to carefully align the cut area of the branch.
- Measure the length of the artifact, cut off the second end of the branch.
- Use a knife to cut shoots from the branch and remove the knife. Further actions are performed without it.
- Using nails, the bark is completely removed from the workpiece.
- Allow the base to dry for 12–15 days.
- The stick is carefully polished with fine-grained pumice, and the upper end is sharpened slightly if desired. The workpiece is leveled along its entire length, making its surface smooth.
- Sand small cracks that appear over the next months.
- They wait until the stick stops cracking and remains smooth.
- The future artifact is wiped with beeswax, sea buckthorn oil, and wrapped in a piece of natural fabric until activated.
Varnish and paint seal the energy of the material, so they are not used. A core of crystal, feather or other object is placed inside the wand only if an artifact is being created to work with the power of a specific natural element.