DIY fleece snowman
Even a child can sew fun textile toys using a detailed master class. Seams can be done by hand or by machine.
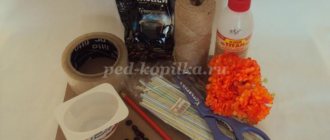
To sew snowmen we will need:
- white and blue fleece;
- sequins, beads;
- beads for eyes;
- clay for making a spout;
- dry blush, acrylic paints;
- embroidery threads – iris or floss;
- filler;
- transparent glue;
- sewing tools.
How to sew a snowman
First, let's sew a big snowman from three parts.
We mark the elements on the material - circles with a diameter of 6 cm, 8 cm and 10 cm. Cut out the circles. Draw and cut out the pattern of the handles.
To make handles, we sew together two pieces of fleece in white and blue colors. Then we mark the details of the handles on the material folded in half. Sew along the contour, leaving a gap for stuffing. Cut it out, turn it inside out and stuff it with filling.
Next, let's start sewing clothes. It will be a little - a scarf and a hat. We cut out two rectangular blanks from blue fabric. We determine the dimensions for the hat by taking measurements from the toy’s head. Fold the cap in half and stitch along the edge. On one side we cut the fleece, imitating fringe. We sew this edge of the part, gathering it into a pompom. We also make cuts at the ends of the scarf. If desired, you can decorate the hat and blue mittens with bead embroidery.
Let's start assembling a snowman with our own hands. We sew round parts of the body along the contour. We tighten the thread without cutting. Fill the parts with filler and tighten the thread if necessary. Fasten and cut the thread.
Let's start designing the face of the toy. We fasten the thread to the uncovered part of the upper part. We gouge it out in place of the peephole. We sew on eyes - beads, embroider a mouth. We make a nose in the shape of a carrot from clay. We paint the part with carrot-colored acrylic paint. We draw lines with a marker, giving a natural look to the root vegetable.
We connect all the parts of the snowman. To do this, they can be sewn or glued. We highlight the cheeks with dry blush.
Let's continue making snowmen. For kids we use simple templates.
The manufacturing process completely repeats the previous MK. Options for hat models and their decorations can be varied according to your wishes.
DIY snowmen. Five master classes
Needlework
07/05/2018 Anastasia Prozheva
Remember how we loved to make snowmen as children? And so it must be with carrots. And how my mother scolded me for carrying this valuable vegetable outside, and not only mine, by the way. From our entire group, everyone took turns dragging carrots from home for a new masterpiece. It was fun, but now I give my children carrots myself, and I like to sculpt snowmen with them. But this is a small digression, nostalgia, so to speak. To you, dear readers, I suggest you make these funny snowmen from a variety of materials. The master classes are interesting and creative, and the snowmen themselves can be placed under the Christmas tree for the New Year, next to the Snow Maiden and Santa Claus!
Master class No. 1: do-it-yourself soft snowman toy
Such a soft toy will come in very handy for decorating your home in the New Year, and as a pillow on the sofa, it is good; in general, a universal, cuddly soft toy, sewn with your own hands, will come in handy everywhere, even in the summer - as a reminder of the New Year holidays =)
Materials
- fleece
- cotton ribana.
Pattern:
The pose of the soft toy snowman, so “frozen”, is especially touching to the soul - hinting at warm hugs and, of course, the inscription “Brrr...”, but what you need in order to sew it with your own hands is white fleece, something knitted-knitted-already -unnecessary – but it’s a pity to throw it away – it will do somewhere, for example, an old knitted sweater and of course love =)
Step 1
. We cut out the details. Knitted hat and mittens. The bottom is made of the main fabric and of hard dublerin.
Step 2
. We duplicate the front half of the carcass with non-woven fabric. To make it easier for us to embroider the face and letters.
Step 3
. We write letters with a disappearing marker.
Step 4
. We embroider with floss threads (3 threads) using a “back needle” stitch.
Step 5
. Embroidered letters.
Step 6
. Now the muzzle. I embroidered everything in black, the mouth could have been pink.
Step 7
. There shouldn't be a seam!!!! It's just that I didn't have enough fabric.
Step 8
. The hat is almost finished, all that remains is to sew it on.
Step 9
. Mittens. It was too late when I realized that an allowance should have been made after all.
Step 10
. We sew handles.
Step 11
. We cut with zig-zag scissors or cut along concave lines. We cut off the roundness.
Step 12
. We stuff it, the shoulder should remain empty so that the handle lies.
Step 13
. Be sure to cut the mitten between your finger and palm. Just without fanaticism!
Step 14
. Stuffed mittens. We leave room for tension at the bottom.
Article on the topic: Crochet beret for a girl with a diagram and description for the summer
Step 15
. Pull it over your hand and secure it with pins. The allowance is about 0.7-1 cm.
Step 16
. Fold the seam allowance inward and sew the mitten to the hand using a hidden seam.
Step 17
. This is what happened. Let’s put this beauty aside for now.
Step 18
. Attention! If you sew from fleece, the details must be basted. Pins are not for this case.
Step 19
. Sewed - cut - turned inside out.
Step 20
. Stuffed.
Step 21
. Now we sew along the bottom of the carcass with a regular seam.
Step 22
. Pull it down to the size of the bottom.
Step 23
. And the bottom I have is like this, with a sticker.
Step 24
We sew the bottom to the carcass with a hidden seam.
Step 25
. That's how it will be.
Step 26
. We pin the hat to the head, again sew it with a hidden seam.
Step 27
. We form folds and pin them.
Step 28
. We fix the folds with single stitches.
Step 29
. Let's try on our hands.
Step 30
. The arrows show where the handles are attached.
Step 31
. We cut out the patch.
Step 32
. We pull out a few threads on each side.
Step 33
. Sew it to the snowman's body with careless stitches.
Step 34
. Now the most interesting part: the nose. We will need: acrylic paints (I don’t have orange, so I mixed them), a sharpener, a disposable sushi stick, sandpaper, a knife (not included in the shot).
Step 35
. We sharpen the stick, if necessary, correct it with a knife and sandpaper.
Step 36
. Let's paint.
Step 37
. It is necessary to paint at least 2-3 times. Allow each layer to dry thoroughly.
Step 38
. After complete drying, rub your nose a little on a dish sponge to remove uneven paint.
Step 39
. Dip it in acrylic varnish, let it drip, remove excess varnish with a non-woven cloth. Just blot it lightly.
Step 40
. After the varnish has dried, cut off the tip with a knife.
Step 41
. We sand the bottom of the nose for better adhesion to the glue.
Step 42
. Glue the nose with a glue gun.
Ready snowman. BRRRR!!!!!
Master class No. 2: DIY snowman made of polymer clay
Cute snowman figures are made from polymer clay. Delicate in texture, they look like real snow women. Making a snowman with your own hands from polymer clay is not difficult. The main thing is to follow the step-by-step instructions exactly.
Materials
To create a New Year's craft, prepare:
- white polymer clay;
- round nose pliers;
- wire;
- old sock;
- thread;
- a needle;
- beads;
- chalk;
- brush;
- glue for hard materials;
- twigs.
Step 1
. Roll three balls of different sizes from polymer clay. They will make up the body of the snowman.
Step 2
. Place the balls on top of each other, press them a little and insert a piece of wire into the middle. The length of the wire should protrude slightly from the figure. Bend the wire at the top into a loop with pliers.
The wire is needed to hold the snowman more firmly. The loop can then be used as a ribbon attachment so that the figure can be hung.
Related article: Painting on wood with acrylic paints: techniques for beginners
Step 3
. Make a snowman hat from a sock. Cut off the top part and cut lengthwise with scissors. Adjust the fabric to the volume of the figurine's head. Sew the resulting hat pattern from the wrong side and turn it right side out. Tie the cap at the end with threads of a suitable color.
Step 4
. Place the cap on the snowman's head. Carefully thread the wire loop through the fabric. Use a pencil to draw a line where the bottom of the cap will go and coat it with glue. Glue the cap so that it does not slip off later.
Step 5
. Make a snowman's face. Attach the beads using nails, shortening them. The latter are usually used for making jewelry or attaching paper to a writing board.
Step 6
. Using a brush and pink chalk, draw cheeks on the figure’s face.
Step 7
. The final touches of the figurine will be buttons, a smile made of black beads, a scarf in the form of a braid made of threads, and also twigs. Attach them with glue and nails.
The snowman is ready!
{google}
Master class No. 3: DIY pom-pom snowman
You can make a snowman out of pompoms with your own hands very quickly and easily. The figurine looks funny. This can not only decorate a room before the New Year, but also present it as a craft at a school exhibition.
Materials
For this craft you will need:
- a ball of white or cream colored yarn;
- cardboard;
- scissors;
- brush for cleaning tubes;
- twigs;
- beads;
- buttons;
- ribbons;
- glue.
Step 1
. First, start making the snowman's body. These will be two pompoms with a diameter of 9 and 6 cm. To make them, you can use a special bobbin for making pompoms or simple cardboard.
Step 2
. Connect the body and head of the figure together by tying long threads in a knot.
Step 3
. Bend a thin brush for cleaning the tubes into the shape of warm fur headphones. You can do this by hand or using pliers.
Step 4
. Glue two beads to the snowman's head for the eyes and one for the nose. Instead of beads, you can use small felt balls. They also look great on a similar toy.
Step 5
. To complete the look, glue twigs, buttons and ribbon to the snowman as a scarf. Carefully singe the edges of the ribbon or glue them on the wrong side so that they do not crumble.
The snowman figurine is ready!
Master class No. 4: DIY snowman Olaf from a sock
Olaf the snowman, beloved by many children, can be made very quickly and for this you will need the simplest and most available materials. Even a child can cope with such a task, and such figures can be used not only for the New Year, but also for a children’s themed party.
Materials
To make your own Olaf snowman from a sock, prepare:
Related article: Clothes for a knitted doll: we crochet outfits for toys
- white children's sock;
- rice;
- threads;
- cotton balls;
- hot glue;
- adhesive-based eyes;
- scissors;
- pieces of fabric or felt in black and orange colors.
Step 1
. For convenience, pour the rice into a wide bowl. Take a sock and fill it one third full with rice. Form something like a ball and tie this part of the sock with thread.
Step 2
. Similarly, form two more parts of the snowman's body. They should be slightly smaller in size and more elongated in shape than the base of the figurine.
Leave a small tuft of fabric at the very top of the sock.
Step 3
. From felt or fabric, cut out the main details of a cartoon character: hands, buttons, crest, nose and mouth. Glue them all onto the snowman figurine using a heat gun.
Step 4
. Remove the adhesive backing from the eyes and glue them onto Olaf's head.
Step 5
. Glue cotton balls to the lower part of the body - these will be the character’s legs. You can replace the balls with small yarn pompoms or felt balls.
Olaf is ready!
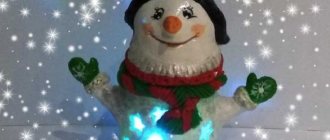
Master class No. 5: DIY snowman on a Christmas tree from a light bulb
Another simple and unpretentious basis for making a snowman is a burnt out light bulb. This figurine can easily be used as a Christmas tree decoration, and the method of making it is very simple and understandable. If you wish, you can experiment with decorative materials and make even more interesting versions of the toy.
Materials
To make a snowman for a Christmas tree from a light bulb with your own hands, you will need:
- bulb;
- spray glue;
- twine or tape;
- acrylic paint;
- dry glitter;
- twigs.
Step 1
. Wipe the light bulb with a dry cloth, clearing it of dust, and cover it with aerosol varnish. While the polish is still wet, sprinkle glitter on the light bulb. Let the polish dry completely and remove any excess glitter.
Step 2
. Tie the light bulb base with twine or ribbon, forming something like a loop.
Step 3
. Break off two branches of the same size and use hot glue to glue them to the sides of the light bulb.
Step 4
. Using acrylic paints, paint the eyes, mouth, nose and buttons on the snowman's body.
After the paint has dried, you can decorate your Christmas tree with a light bulb snowman.
See also other snowman master classes (pictures are clickable):
The best posts
- [Plants in the house] 6 house plants that protect the house from the evil eye and damage
- Crochet sweater (women's and men's): how to knit with diagrams and videos
- DIY stamps: products made from potatoes, wax and nuts
- DIY New Year's wreath: step-by-step master class with photos and videos
- Selection of wallpaper for a small room, successful interior
- How to paint pine doors: step-by-step instructions
- DIY snowman made of threads
- Crochet shirtfront for girls: diagram with description and video
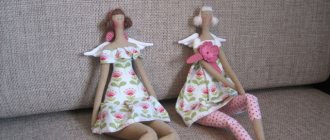
Snowman "Brrr"
This Tilda snowman will surely become children's favorite New Year's toy. And such a fairy-tale character will also come in handy for adults during Christmas.
To sew a snowman with your own hands using ready-made patterns you need:
- white and blue fleece;
- filler;
- buttons for decoration;
- sewing tools.
Description
We start by making a pattern. Print it out in full size and cut it out.
On white fabric, folded in half, we mark out the main details. We cut out palms and a hat from blue fleece. We sew the parts along the contour, leaving small holes open. On the body we leave the bottom edge open. Cut out the parts and turn them inside out.
Fill the body with filler.
Sew the bottom with hidden stitches.
You can immediately perform decorative embroidery. It is advisable to choose threads close in tone to blue fleece.
Cut out the handles. We put filler in the parts and sew them together.
We cut out a strip from blue fleece and sew it on like a strip, closing the seam.
The edges of the plank need to be folded to the wrong side.
Sew a hat - a cap. Sew the cap onto the head using a hidden seam. Cover the joint with a decorative strip made according to the previous algorithm.
We sew on the handles and fix them in the “I’m cold, brrrrr” position. For the spout, you can use a piece of a toothpick and paint it orange with varnish.
We draw eyes with a marker, and cheeks with dry blush.
The cap is large enough that you can wrap it like a scarf around your neck. We fix this position of the part with several stitches. The toy is ready!
Funny company
If you use your imagination when making such a simple toy as a snowman, it turns out that there are a lot of design options. For example, clothes for a snowman boy and a girl should be different. Even the design of the face can be done in different ways. The hat can be in the shape of a bucket, or it can be very glamorous with a brooch. Let's try to sew soft toys in different versions.
To make a large company of snowmen you need:
- fleece in different colors;
- thick dark-colored felt for the feet of boots;
- thin black felt for a hat;
- green felt for the Christmas tree;
- light wool yarn for hair;
- filler;
- threads matching the color;
- beads and buttons.
Description
Let's start with two-color white and yellow toys.
The patterns used are very simple - two circles for the head and body, one rectangle for the hat.
For the head we use white fleece, the remaining parts are sewn from yellow material.
We sew the parts of the body and head with small stitches along the contour and gather them together.
Fill tightly with filler and tighten the thread. Fasten the thread and cut it off.
The result was funny balls.
For the scarf, cut out a narrow strip and cut narrow kititsa at its ends.
Fold the hat blank in half with the right side inward and stitch the edge with a blanket stitch. We assemble part of the hat by tying it with a strong thread or a narrow cord.
We sew together the parts of the head and body, joining them with open parts.
We dress up the snowman in a hat. To decorate the face, we sew on black beads for the eyes and a red bead for the nose. The body can be decorated with buttons.
We perform the second snowman in the same way.
Now let's start making a snowman - a girl. We will have her in a pink hat and brown boots.
Cut out the snowman stencil.
We cut out the details of the head, body, and arms from white material.
We cut out a hat, a tassel for it, a scarf and mittens from pink material.
Stylized boots - we cut out the stand from felt.
We fold the parts of the body with the front side inward and grind them down, leaving the upper section free. Through it we turn the part inside out and fill it with padding polyester or other filler. We make the round head in the same way as described above for the previous toys.
We sew the pink mittens from two parts using an overlock stitch and fill them with filler. We insert the parts into the sleeves and stitch them. In this case, the edge of the sleeve should be sewn with a slight overlap, which is gathered into the frill.
We fill the handles with padding polyester and sew them to the body.
We make a blank for a brush from a narrow strip.
Sew it to the hat.
Attach the snowman with glue to a stylized shoe stand. We put on a hat and sew on small beads for the eyes. We will make the nose from a pink bead.
We tie a scarf.
The next toy will be a snowman - a boy in a fashionable hat.
The snowman pattern is presented below.
We cut out all the elements according to the patterns for the boy from white material, except for the boots. Let's make them red.
We sew the parts of the handles in pairs, making the seam on the wrong side. Turn it inside out and stuff it with padding polyester.
We sew the legs from two parts - red boots and a white top.
To sew the body and head we use the previous patterns. We collect all the details.
Then we sew the toy.
Let's start making a hat for a boy. It is sewn from three parts - crown, bottom and brim.
We sew a hat. Cut out a bright scarf from red fleece.
We make bangs from light wool yarn. After wrapping a suitable template several times, we tie it in the center. We cut the resulting loops.
We sew on the bangs, put on and fix the hat. Sew on the nose and eyes using beads.
We tie a scarf.
To complete the composition, cut out a blank for the Christmas tree from green felt.
We roll and sew the cone of the Christmas tree, fill it with padding polyester.
Sew on the bottom.
Attach decorations.
The company of snowmen is ready for the holiday!
Video: How to sew a snowman Tilda
This tilde-style snowman put on a warm hat and mittens to stay warm on New Year's Eve, and has already decorated the Christmas tree. You can decorate your room with this toy for the New Year.
To make a New Year's snowman we will need: white fleece, striped knitted fabric, a small piece of red felt, green felt, brown felt, padding polyester, two white mother-of-pearl buttons, black, red, green, brown and white threads, mother-of-pearl beads of different sizes.