What is iris folding?
The unusual technique was first noticed in the Netherlands, where craftsmen liked to create works from paper.
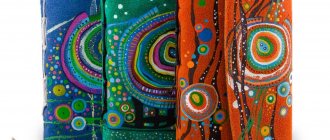
Literally, the name of the work is translated as “iris folding” - and indeed, works made in this way resemble the iris of the eye, especially if paper of the same color is used for the execution. Some craftswomen also notice that finished cards give the impression of weaving from paper strips.
In fact, everything is much simpler: the master prepares a diagram in advance, onto which paper ribbons are glued in the right order, creating the impression of a twisting spiral. A single-color sheet is glued on top, in which a window of a certain shape is cut out. Through this hole you can see the work you have done using the Iris folding technique.
Iris folding is often used as an auxiliary technique to create three-dimensional cards in the style of scrapbooking, decoupage, origami and even quilling.
This type of creativity is so simple that you can do it even with children! Rest assured: preschool children will be seriously interested in how to make original cards and colorful pictures with their own hands.
Most often, iris folding is used to decorate the following things: postcards, photo albums, paintings, panels, women's bags, pillowcases, furniture.
The list can be expanded endlessly - just show your imagination and use this style to decorate almost any flat surface.
Horse using iris folding technique
Horse using iris folding technique. Master class with step-by-step photos
Master class: “Symbol of the year” - panels using the iris folding technique
Purpose: Work for an exhibition, gift About the iris folding technique. Iris Folding is a technique of filling a picture cut out along the contour with multi-colored stripes in the form of a twisting spiral. Works done using this technique often resemble the aperture of a camera or the iris of an eye. Hence the name Iris Folding - rainbow folding. This technique originated in Holland, where local craftsmen made their work from colored paper. Currently, to work in this technique, not only various types of paper are used, but also fabric and ribbons. This technique can be used to design postcards, photo albums, collages, etc. Works made using the Iris folding technique look very unusual, at least for a person who does not engage in such creativity every day. “Rainbow folding” only seems complicated, in fact, this technique requires attention and accuracy, but at the same time it allows you to easily make spectacular crafts. And I offer you a master class of work done using the Iris folding technique.
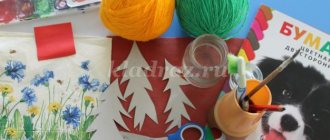
Materials for work: colored cardboard (golden in this work), white satin ribbon (4 meters), tape, scissors, pencil, ruler (for constructing an iris template), paper clips, horse template
and iris template.
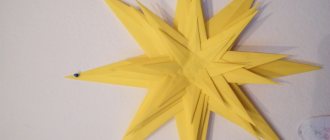
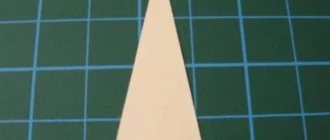
1. Iris templates can be found on Internet sites. But I suggest you get acquainted with the principle of constructing an iris template. On a sheet of white A-4 paper, draw a template of a horse (head) and draw a suitable geometric figure around it - in our case it will be a quadrangle.
2. Moving clockwise, lay out the same segment on each side of the vertex. This segment is called a step and it is the same for the entire construction of the template. Most often it is 1-1.5 cm. Ours is 1.5 cm.
3. Connect the points marked on the sides with straight lines. We will get a new quadrilateral.
4. On this new quadrilateral, we will again lay out segments of the same length, moving clockwise from the vertices.
5. Connect new dots with each other. The result is a new quadrangle.
6. We continue construction in the same way. The result will be a small quadrangle, and the constructed lines will create an interesting effect of twisting spirals.
7. Let’s put symbols on the template that will help us not get confused later while working. We already have the lines along which we will place the strips of tape. Now let's number the sequence of gluing them. We start from the upper right corner - put the number 1, bottom right 2, bottom left - 3, top left - 4. Then we continue numbering clockwise. Iris template is ready.
8. Take our colored cardboard and draw a horse template on the wrong side of it.
9. Using scissors or a stationery knife (whichever is more convenient), cut out the template.
10. We place the Iris template under the cardboard so that it can be seen in the cut-out window. We will work on the wrong side of the cardboard. We fasten the sheets with paper clips.
11. Ready white satin ribbon.
12. Fold it in half. The width of the folded ribbon should be slightly larger than the pitch on the iris template.
13. Apply the fold of the tape to the line at the number 1, measure the required length (it should completely cover the cutout on the cardboard), cut it and secure the ends with tape. Be careful and careful - the tape should only be placed on the back of the cardboard. It should not fall on the iris template and beyond the borders of the cardboard.
14. We do the same for numbers 2, 3, 4. 15. Move on to number 5.
16. We continue working from number to number clockwise. 17. In this work, it may happen that some number in the “window” will be missing - there is no number 37 here.
But there are no numbers 45 and 46 here.
Don't be upset, they (these numbers) just didn't make it into the cutout. Do the following in order. 18. The last step is to cover the center of the work with a straight piece of tape.
19. Remove the paper clips and cover the wrong side of the work with white paper, thereby hiding all the stickers.
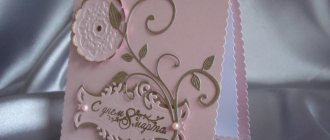
20. Let's turn the work over to the front side - this is what happened.
21. Use curly scissors to trim the edges and make a frame.
Happy new year dear friends! May the Horse and the sparkling snow bring you joy and laughter, May resentment, bitterness, and restlessness pass by. May this year, like a welcome guest, solemnly enter your home, bring fun, joy and happiness with it!
We recommend watching:
DIY Unicorn toy
Horse magnets made from salt dough. Master class Papier mache horse. Master class Only horses fly with inspiration...
Similar articles:
DIY horse from a plastic bottle
DIY paper horse
How to make a horse with your own hands
DIY New Year's paper crafts. New Year's souvenir
DIY paper horse. Master Class
Materials and tools
Traditionally, for the Iris folding technique, different types of paper are used: regular office paper, colored paper, thick paper, crepe paper, papyrus paper, and watercolor paper. Don’t forget also about regular and corrugated cardboard in different colors and densities.
Recently, craftsmen have begun to use other materials both for the strips with which the pattern is laid out and for the base covering them on top.
For example, now a design can be made from fabric, lace, cardboard, plastic strips, and foil. Some even use dry leaves, trying to diversify the appearance of their products.
The two main components of working in the iris folding technique are a diagram and a template. The diagram allows you to correctly arrange multi-colored lines in a spiral-shaped intertwining pattern. A template is needed to cut out a beautifully shaped window through which the work will be viewed.
Both of these things can be purchased in special art stores, found on the Internet and printed or drawn yourself - in this case, your work will receive a touch of originality and uniqueness.
In addition, choose an adhesive that is suitable for the selected materials: for example, regular PVA can glue paper, while silicate glue can help with fabric.
Scissors are also needed for cutting strips and cutting out window shapes from paper. Use any convenient model of scissors.
Some craftsmen also use curly scissors to make a carved patterned edge on the stripes.
Craft for the New Year using the iris folding technique
Handmade souvenirs and cards are considered popular New Year's gifts. Such gifts are unique and original; in this way the giver shows his respect and special affection for the person for whom the New Year gift is intended.
DIY applications from paper napkins: detailed master classes Flowers made from beads. How to make DIY crafts with children 3 years old