New Year's panel made of salt dough
Winter panel for the New Year “Snowman”. To understand how to make a panel, you should know how to knead the dough correctly.
To make the product look brighter, it is better to use artistic gouache
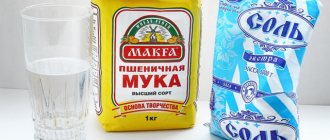
To create a figure you will need:
- Salt;
- Flour;
- Water;
- Container for kneading dough;
- Toothpicks;
- Paints;
- Brushes of different sizes;
- Garlic press;
- Varnish;
- A little starch;
- Glue.
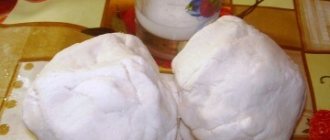
You need to prepare the dough as follows: mix 1.5 parts flour, 0.5 parts starch (it will make the dough elastic, which is especially important for sculpting small parts), 1 part salt (fine), 1 part water. Liquid is added as you knead. Some masters advise adding 2 tbsp. l. PVA to make the dough stronger. The composition is mixed using a mixer or by hand, resulting in a white, tight mass. It is wrapped in cling film and placed in a cold place for 40-50 minutes.
You can make a panel in a photo frame; in this case, the pictures can be placed on the wall.
You can do the work on a standard modeling board. First, the head and body are formed from rolled balls. They should be flattened on the board and the edges aligned.
All parts of the face are made using a toothpick. Eyes, eyebrows, nose - made of dough. It should be noted that when kneading the dough, you can divide it into several parts and immediately add the corresponding colors to each of them - blue, light blue, golden, red, silver. This method will help you avoid painting the craft in the future.
You can decorate a snowman using colored plasticine
The body of the snowman is designed identically - that is, you need to make arms, legs, mittens, buttons. One arm needs to be bent in order to further insert the broom into it. Separately, mold a bucket from the dough; in principle, you can make any headdress with a lapel, bubo or without accessories. A snowman with a scarf looks beautiful. To make an item of clothing, you need to roll out a rectangle, divide it into 2 parts that are connected to each other. Use a toothpick to separate the fringe. The color of the headdress should match the color of the scarf.
The snowman always has a broom. It is done using a garlic press. A small portion of the salt dough is squeezed out to create multiple strings that are attached to a toothpick and directly to the snowman's hand. By the way, the sharp edges of the toothpick should be cut off.
If it is planned to make a craft from dough of one color, then after its creation, the snowman is painted in the corresponding colors.
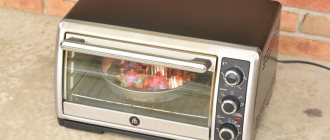
At the end, the figure is transferred to a base with a frame; it is advisable to treat the back side of the snowman with PVA and let the craft dry (at least 15 hours). Drying occurs step by step. To do this, it is better to use an oven. Place the craft in a preheated oven (t +1800C) for 10 minutes at intervals of an hour. You need to do this 5 times and then leave for another 10 hours until completely dry. The final stage is coating the surface of the product with colorless varnish.
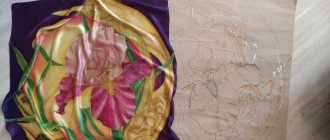
Summer theme
For a panel of sunflowers you will need the same things as for all other works.
Let's look at the implementation step by step. First we prepare a textured frame with a background. Glue the surface with PVA and prime it. Paint it with paint.
Paint part of the dough green. These will be the stems of the plant. The rest is yellow.
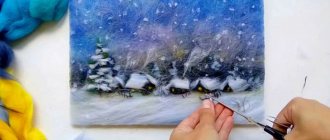
On a dried background, draw a sketch of a design in the form of sunflowers.
Please note that you should draw what you like; it is not necessary to use exactly the same image as shown in the master class.
Roll out the stem, petals and other details in advance.
Cover the background with an adhesive solution (glue + water in proportions 1:1). Then carefully apply the figures separately.
To prevent the dough from sticking to your hands, you should use dry flour, as in normal cooking.
After each application of a layer, dry the parts well and for a long time. Paint over all the spaces between them. It should look something like this:
Related article: Patterns of crocheted flowers - violets poppies roses calla lilies
If your result is not similar enough to this composition or is bad in your opinion, don’t be upset. This technique is mastered over the years. Every time you do it, you will get better and better!
Salt dough panel: master class
Before starting work, it is important to prepare everything you need.
Before creating a panel, you should paint every detail: if this is done on a finished product, then the brush will not be able to get into all the hard-to-reach places
Needed for work:
- Salted dough of two colors - emerald and scarlet;
- Old CD or DVD disc;
- Three birch branches (according to the size of the disk);
- Paints;
- Colorless nail coating.
First of all, leaves are made from green dough, the lamellar structure of which is drawn with a toothpick. They should be approximately 5 cm in size, quantity – 24-25 pieces. Sculpt directly onto the branches, giving the leaves a natural shape.
The berries are then formed and attached to one of the upper sides of the disk, between the leaves. Use a toothpick to make a small hole in each berry so that they look as real as possible.
Using gouache, you can shade parts of the craft and make the rowan branch more natural. Apply a clear nail polish to seal the surface. Dry at room temperature for 24 hours.
Salt dough panel for the kitchen
For the kitchen, using the methods described above, various still lifes of vegetables or fruits are made. Or beautiful wall paintings with dishes. To create a craft, you do not need any special knowledge or skills. The main thing is to maintain the proportion when kneading the dough.
In addition to vegetables, you can hang a panel depicting folk motifs in the kitchen
A split panel made from salt dough is made using paper stencil sketches. This can result in very beautiful and cute cats, fish, and monkeys. Roll out the dough (layer thickness - 4 cm), attach the sketch and cut out the edges using a stationery knife. Such a panel does not need any basis. You can apply any three-dimensional drawings on any subject to its surface. It could be bunches of grapes, a church, a bottle of wine, houses, a sea anchor or a steering wheel.
You can create a decorative element on various surfaces - an old unnecessary board for cutting food, cracked plates. It is better to first paint the base with white acrylic paint, then apply the desired shade with gouache and then sculpt.
Paintings and panels made of salt dough for the kitchen (21 photos)
The kitchen is the hearth, the heart of the house, the most comfortable room in my opinion. This is where housewives spend so much time preparing food. Therefore, this room should also be beautiful. Usually the kitchen is decorated with paintings of flowers and still lifes with food.
You can buy ready-made decor, or you can make it yourself from salt dough, whatever your heart desires. Create something to suit your interior, your understanding of comfort and family. Therefore, we make salt dough according to this recipe, choose a suitable idea from the photographs below and create the decor with your own hands.
Magic baskets with fruits and flowers are a symbol of prosperity for your home. The author is an amazing master of testoplasty from Poland, Olivia Art Deco. A separate article on my blog is dedicated to her golden hands and the secrets of her work. If you are into sculpting, be sure to read it.
And the next two works were made by the famous master Olga Rodionova (Bioceramics). If you want to learn how to make such beauty, then go to her master classes. For many years, Olga has been teaching the secrets of sculpting, painting and giving step-by-step lessons on specific works.
Panel with vegetables made from salt dough for the kitchen.
Baskets with daisies, poppies, roses, sunflowers, lilies and strawberries made from salt dough. True, these baskets are placed on a shelf and have nothing to do with paintings, but, nevertheless, they are intended specifically for the kitchen.
Works of an Italian master of testoplasty. Unfortunately, I don't know the author's name.
This Italian-style panel is simply chic; the decor is stylized as a napkin with tomatoes, peppers and olives. It looks very original and stylish.
Another napkin panel, but with cherries. Are there any readers who like this berry?
Another unusual work - a panel stylized as a bouquet of flowers - roses and tulips. I'm very interested in what the back of the work looks like and how the suspension is made, but we won't know.
Another miracle. Classic salt dough wreath with cauliflower, green peas, grapes, apple and peach. At the bottom of the wreath - pay attention - there is again a napkin or towel made from a layer of dough.
This master has an amazing imagination - now this is a stylization of a woman’s hat with vegetables and fruits. Grapes, green leaves, apples, pears and a pink and white hat ribbon with a bow.
Now let’s look at 2 works by the French master, unfortunately, I also don’t know her name, and the works are not signed.
Panel - basket with cherries made from salt dough
And another basket, but with apples and pears made from salt dough.
And here is the original panel in the shape of a jug with houses and sunflowers. The author is also not signed, but rather it is a needlewoman from Ukraine or Russia.
And such a picture for the kitchen with beer and crayfish made from salt dough will always cheer up your husband. Author: Olga Zherekhova.
A beautiful and cozy painting with poppies from a famous needlewoman from Ukraine - Natalia Bortual.
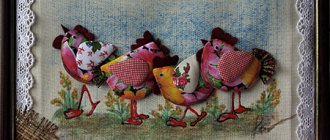
And here is another panel from Natasha, in a cartoon style, bright and positive. Time for snacks, coffee and tea.
And here is another basket, but this one is strict, made of dyed dough. Author: Olga Shultz.
But here are the original works of the master Antonina, known in the Country of Masters under the nickname Antka.
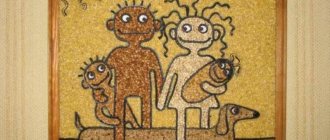
A panel with 3 mice, created based on Disney's "Cinderella".
The famous split panel with a bottle of wine and grapes.
Another split still life panel.
And, of course, the popular pendant cats with fish, birds, and sausages based on the works of Vichy from the Land of Masters.
I hope I have inspired you to create your own kitchen decor. You can choose any style, any color scheme and create something truly warm and cozy, the highlight of your kitchen.
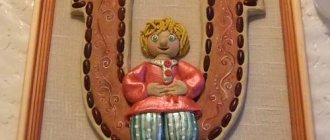
DIY kitchen amulet made from salt dough
You will need a stencil; it is cut out of paper, then applied to a layer of dough and cut out. The work is carried out on a plastic board. The amulet is hung on the wall, so you will need a beautiful braid. The craft has the shape of a horseshoe, in the unconnected edges of which holes are made so that after drying, the braid can be pulled through them.
A talisman made with your own hands is more effective than its store-bought counterpart.
On the horseshoe you can glue figures in the form of a broom, coins, daisies, lilies, various inscriptions on pieces of paper (“for good luck”), and fir branches. Crafts made from natural materials should be dried not in the oven, but at room temperature.
How to make sunflowers
PVA mixed with white gouache is applied to the fiberboard sheet to eliminate yellowness. To make sunflowers, you will need four colored dough pieces - yellow, green, black and red. The last shade is for decorating sunflowers with ladybugs. To make modeling easier, it is better to make a paper sketch of all parts of the drawing. Applying them to the rolled out layer, cut out shapes - flowers, pour. Roll the stems out of the dough and attach to the base. It was already said above that for elasticity, starch should be added to the dough. You cannot stretch the mass when making the stem. This will cause cracks during drying. The structure of the leaves is made with a toothpick.
A panel with a picture of a sunflower is most suitable for a living room
There should be 5-6 large and 6-7 small green leaves. Yellow flower leaves - 30 in two layers. All elements must be pressed to the base. A black round dough is placed in the middle of the sunny flower. To imitate seeds, indentations are made with a toothpick. Later, you can make a ladybug from red dough. The surface is coated with a colorless fixative varnish and dried for 2 days.
Small recommendations
This composition is chosen taking into account the aesthetic features of the room where the future panel will belong. In a well-lit room, it should be 1-2 shades darker, otherwise the architecture of the room will merge with the work of salt dough. If the room is poorly lit, the panel should be made from a brighter color scheme. The interior color should also be taken into account. Even the prevailing mode, style and decor plays an important role in the manufacture of the product.
It is also not a good idea to place the work on a windowsill in direct sunlight; when heated, the paint or the material itself from which we will sculpt may leak. All ingredients used should be looked for in advance! You need to choose dishes that you won’t mind getting dirty in the future.
Have you ever thought about the fact that such a large amount of salt is added to the dough? You can just knead a lot of flour. Since ancient times, it has been the case that salt repels rodents and other unwanted animals. And this tradition has been preserved to this day.
Related article: Felting wool hats for a bath: master class with photos and videos
Salt dough pictures: technique
The technique of making a painting or panel is reminiscent of modeling with plasticine. But if the latter does not harden, then after drying the dough becomes strong and durable, and the panel becomes durable. The basic rules are patience and accuracy. The technique of sculpting panels from dough does not require any special skills or knowledge. If the material sticks to your hands, then you need to grease your hands with flour.
Unlike plasticine, the dough is devoid of any dyes: therefore it is recommended for small children
This method of making crafts is not only simple, it has many advantages.:
- The dough is safe and environmentally friendly, so this kind of creativity is allowed to be used even in kindergartens;
- Does not cause an allergic reaction;
- Promotes the development of motor skills in preschool children;
- Expensive materials are not needed to prepare the dough;
- Absolutely all paints are used to decorate panels, including inexpensive watercolors.
The main thing is to show maximum imagination and a little patience. From salt dough you can make a decorative three-dimensional panel for any room - living room, nursery, hallway, bedroom, kitchen and even bathroom.
Summary
Whatever you say, salt dough is an excellent material for creating something special and unique. Moreover, the decoration you create with your own hands is doubly, no, even three times more pleasant than the purchased one.
On our website you can watch videos containing master classes on creating such masterpieces from salt dough. We are sure that you will find a lot of information for yourself, and will also discover the subtleties of working with this material. Interesting ideas and inspiration for you!
Kitchen panels made of tiles - see here.
Did you like the article? Subscribe to our Yandex.Zen channel
Great article 0