Master class on making a “Fish” craft from a paper accordion
Evgenia Cheshko
Master class on making a “Fish” craft from a paper accordion
Make a craft to decorate an adaptive space.
- develop eye and fine motor skills,
- develop creative imagination,
- form and develop aesthetic needs and tastes;
Colored xerox paper size A4 , glue stick, PVA glue, scissors, ruler,
1. an accordion of orange paper , dividing it lengthwise into equal 32 parts. We bend the accordion in half - this is the body of the fish .
2. Divide half of a green leaf into two parts: 7 cm for the tail and 3.5 cm for the fins. Fold like an accordion .
3. Cut a 6 cm blue strip, fold it like an accordion and divide it in half .
4. Glue the strips on the body of the fish on both sides at a distance of 1.5 cm from the edge and glue it by inserting the tail (green accordion 7 cm wide )
.
5. Divide the green accordion To make the fins thinner, we will fold them into accordions , dividing all their parts in half again.
6. Glue eyes from paper circles or you can take ready-made eyes. Cut out a heart - this is the mouth. We finalize the design of the fish . You can play with color and shape. Happy creativity!
"Fish" Children's master class on crafts made from accordion-folded paper. For “Fish” you needed: - strips of tinted paper in four colors; - glue stick; - scissors. At the beginning of the work, we take multi-colored strips.
Master class on making a Christmas tree toy from papier-mâché “Goldfish” Lozina Olga Olegovna MASTER CLASS Christmas tree toy from papier-mâché “Goldfish” Every year in our city the city competition “New Year’s” is held.
Master class on making three-dimensional crafts “Cake” master class Cake author Yulia Sochilova Necessary materials: corrugated paper, colored double-sided paper, colored cardboard, scissors, glue, so.
Master class on making a paper toy “Elephant” Special attention should be paid to the development of speech in young children. After all, by the age of six, a child should not only speak clearly, but also have.
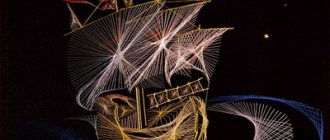
Fish made from wire and nail polish
Non-standard materials for creativity always give an unusual and interesting result. Nail polish is hardly the most convenient material - it dries quickly and does not provide a wide range of possible actions, however, if you try and still dare to play with it, you can get very, very interesting results. Combine it with wire - and small but very nice fish will settle in your home.
How to make a fish from wire - master class from journeycreativity
Application made from colored paper using a fish template
Kids begin to study aquatic inhabitants with simple and uncomplicated fish. The best way for them to remember what they look like is to draw or make something. Of course, young creators do not always do this accurately, and therefore the fish template is an excellent solution for creativity, as well as for getting to know sea creatures.
To create a beautiful and neat applique together with your child, it is best to use fish templates for outline. Such stencils can also be used as parts. Children love to color ready-made pictures; they will a priori have neat contours, and the kids’ task is to add color to the picture.
How to make a fish template?
First, it’s worth talking about where to get a template for cutting out a fish. If you have basic artistic skills or are good at drawing, then it’s easier to prepare the stencil yourself. Make a sketch on a regular piece of paper. The simpler the figure, the better, because the child should gradually study the smallest details.
It is best to stock up on cardboard and cut out fish stencils from it, since dense material is stronger and more convenient to trace.
If you don't know how to draw, then you can go another way. A quick and easy way is to download ready-made fish stencil templates from the Internet and print them on a printer. The picture will have to be cut out along the contour; if desired, it can be decorated with colored paper or colored with felt-tip pens together with the child. If you don’t have a printer, you can redraw a picture found on the Internet from a computer monitor. This is easy to do: place a thin sheet of paper on the screen and trace the outlines with a pencil.
Unusual solutions
Pasta fish is very simple and very quick to make.
A shape is cut out of thick paper or cardboard. The eye and outline of the head are drawn.
Dry pasta is covered with transparent strong glue and placed on the mold.
By bending small pieces of paper into a fan shape, we get the tail and fins of our fish. Glue the parts to the places where they should be.
We decorate the remaining part of the canvas with paper in the shape of seaweed. You can also use pasta of a different color as decoration, they will become pebbles. Or attach real beads or pebbles to the bottom of the picture.
The pasta fish is finished. This painting can definitely be suitable as a craft for a kindergarten or as a decoration for a child’s room.
Video on how to easily and simply crochet a goldfish, even if you don’t know how to knit. The lesson provides a detailed diagram and description of the knitting process.
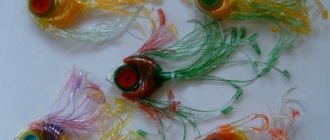
DIY beaded fish:
Application using the “Goldfish” template (Master class)
Applique is a very useful activity for children. They learn to use glue and scissors, practice accuracy, imagine by combining colors in a picture, develop hand motor skills and abstract thinking. Working with bright colors and creating images from small details is also good fun for children over 4 years old.
To create an application you will need:
Creating an application using a template includes several stages:
1. Take one of the simple fish stencils and outline the details, prepare cardboard templates for the child.
Fish pattern details
2. Find thick cardboard for the background and several sheets of colored paper. First, outline the body of the fish, cut it out and glue it to the cardboard. Make the tail and fins the same color, carefully glue them next to each other.
Glue the body and tail
3. Make the scales - this is the most interesting part of creating a goldfish. Trace the prepared template, and on it with a simple pencil, draw several scales, placing them evenly over the part.
Drawing scales for cutting
4. After cutting out the scales, bend them at a right angle. Apply glue to the part and glue it on top of the fish. The scale will add volume to the future craft and a touch of originality. Unusual crafts are a guarantee that your child will be interested in working with you.
Glue the fins and the part with the scales
5. Of course, a fish needs an eye. After cutting out a circle from white paper, place it proportionally on the heroine of the applique. Make a pupil out of black paper in the same way. Next is a matter of taste and flight of fancy.
Glue the eye
6. Decorate the background. You can also cut out seaweed or stones from colored paper.
Glue the details in the form of algae and stones
The goldfish is ready. This is how easy it is to make a little sea creature from colored paper. Your child will definitely enjoy working with bright sheets of paper, and the templates for the golden sea lady will simplify his work.
DIY fish applications (2 videos)
From waste material
From scrap material you can make an excellent goldfish that will decorate your home or become the central figure in any postcard or painting. Now we will tell you how to do this.
What we need to take:
- thin cardboard;
- acacia leaves or maple seeds;
- regular PVA glue;
- a can of gold paint;
- scissors;
- tape with double-sided adhesive surface;
- regular pencil;
- blister packaging for medicine;
- black button;
- hairdressing varnish;
- shiny ribbon.
The first thing we need to do is draw the outline of our fish on cardboard. The larger the seeds, the larger the fish should be. We cut off the excess cardboard so that we only have the working shape of the fish. Starting from the tail, cover the mold with glue and place leaves and seeds on top, leaving no gaps between them. These materials will act as fish scales.
Next we need to work on the head of our craft. We form the head from the same cardboard. At the point where the eye will be located, we make a hole and attach a plastic blister mold there. Don't forget to put a button in the blister - it will serve as the pupil.
The first stage is completed. Next, cover the product with gold paint and let it dry. Now let's finish working with the head of our fish. We glue the blister with a button inside with double-sided tape to the fish’s head. See how it was done in the photo. Using a regular pencil we draw on the eyelashes. You can also paint a mouth or a few scales on the fish. The final stage: to prevent the paint from getting dirty, cover the fish with hairspray. We tie a shiny ribbon to the ponytail.
Related article: Knitting for children: pattern of socks for a child
The master class is over, our fish is ready. All that remains is to find a use for it.
Volumetric applique “Fish in an aquarium”
Bright and nimble waterfowl attract all children, so they will definitely love the voluminous applique “Fish in the Aquarium”. But the fish themselves in this work are quite complex. Therefore, if children are small, it is better to make simple multi-colored fish in a flat form. You also don’t need to make a very small aquarium, since making small fish using this technique is quite problematic, especially for children.
How to make an aquarium out of paper?
Draw a round aquarium on a white piece of cardboard and cut it out. Don't make it very small, because small voluminous fish are very difficult to make.
Place the aquarium on the blue paper and circle it. And then draw a parallel inner line next to it, since the water should follow the contour of the aquarium, but be slightly smaller. Draw a wavy line at the top. Cut out the water.
Fill the aquarium with it, that is, glue the blue paper to the white cardboard blank.
What would an aquarium be without algae? Cut simple wavy stems from green paper. Also cut out circles of different sizes from white paper, which will be air bubbles.
Glue the parts, now the aquarium is completely ready to receive its inhabitants. At this stage, kids can cut out very simple fish, but older children can be advised to make voluminous fish.