One of the most interesting areas of polymer floristry is miniature food.
Tiny vegetables and fruits made from polymer clay, sweets and cakes, sausages and sandwiches, pizza and other miniature dishes attract the attention of a huge audience.
The colorfulness and realism of such products cannot leave anyone indifferent, from children to adults.
But, like every creative direction, mini food has its own subsections. And crafts with vegetables, fruits and berries are an exciting area of creativity for craftsmen in which they can realize their skills.
Vegetables made from polymer clay
If almost all sculpting masters make sweet food from polymer clay, few ceramists are involved in creating vegetables, and definitely in vain!
After all, the vegetable world is so diverse in nature that vegetables made from polymer clay can inspire the creation of many interesting still lifes both for children's games and for interior design.
Among the most outstanding vegetable compositions it is worth noting the following:
- Decorated tableware for food;
- Miniature vegetable farms;
- Vegetables canned in jars;
- Vegetable jewelry;
- Vegetable sets for children, for example, a developing vegetable garden;
- Original kitchen panels.
At the same time, craftsmen are not limited in the choice of vegetables for their crafts. In addition, the fruits have different textures, which allows you to create different vegetable combinations.
But among the most textured fruits, most vegetable plants highlight the following:
- Artichokes;
- Broccoli and cauliflower;
- White cabbage and Brussels sprouts;
- Corn;
- Cucumbers;
- Asparagus;
- Tomatoes and peppers.
Working with them is interesting, although it takes longer than with other vegetables.
By the way, regarding the work with vegetables itself, professionals advise beginners to repeat master classes from famous vegetable growers on Youtube or Instagram.
And among the recommended ones, it is worth highlighting such as Yulia Bukharova (manufruktura profile) on Insta, Anna Oskina and Valeria Maslova on Youtube.
But if their master classes seem difficult to perform, then you can easily find other easier ones on the Internet. Some of the simple lessons will be discussed here.
Master classes on making vegetables from plastic
Making many miniature vegetables with your own hands is quite simple. All you need to do is take a closer look at what ordinary garden fruits look like in the garden beds.
Of course, some polymer clay vegetables are more difficult to sculpt than others. But rather, this difficulty depends on training and the ability to choose the right color.
In the first case, you need to practice more in assembling vegetables, and in the second, you need to have knowledge about coloring plastic. By the way, you can learn about this from the article “How to paint polymer clay.”
But still, for beginning craftsmen, when working, it is worth choosing not multi-layered plants, such as broccoli, regular cabbage or cauliflower, but whole fruits, for example, eggplant, potatoes or beets.
It is also not difficult to sculpt zucchini and pumpkin, instructions for creating which we will reveal in two master classes.
Master class on creating zucchini in polymer ceramics
Natural zucchini in the garden stands out with its soft light green color. And the main task of vegetable painting is to convey not only the shape, but also the color of a given vegetable.
Therefore, the instructions for making this garden fruit will be as follows:
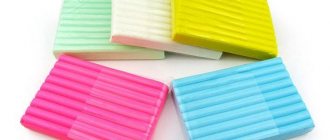
- Let's take baked clay of white, green, yellow and brown colors for production;
- We will also need tools such as a blade and a needle;
- Initially, use a blade to cut off the required amount of green and white plastic in a ratio of 1 to 5;
- Mix the white-green mass until the color is uniform;
- Add a drop of brown plastic and knead again until smooth;
- Roll and form with your hands an elongated shape of a zucchini fruit 25-40 mm long;
- Let's form a cut stem from green plastic and use a needle to give it shape;
- Attach the stem to the base of the zucchini;
- From drops of white, yellow and brown plastic we will make the remains of a peduncle;
- Attach the flattened zucchini pimple on the side opposite to the stem;
- Let's make several copies and bake the crafts in the oven, let them cool.
The color of the products will become brighter, and the mini zucchini will look great!
Master class on creating a polymer pumpkin
Pumpkin is a bright orange culinary vegetable. And in any polymer composition it especially stands out. That is why masters of polymer ceramics love to create it not only as a doll toy, but also as a compositional center for miniature dishes.
But in general, even single copies of this large orange-colored fruit are not difficult to complete in stages:
- To create a pumpkin you will need a blade, a stack with a ball, an awl and baked clay in green and orange colors;
- First, cut off some orange plastic and roll into a ball with a diameter of 20-25 mm;
- We take a stack and press a depression on top of the ball;
- Using a sharp awl, we form longitudinal grooves from top to bottom;
- Then we cut off two pieces of green plastic. From the first we make a flattened oval, from the second a small shoot. We connect them together;
- We attach the resulting shoot to the recess created at the top of the pumpkin;
- Again, cut a rectangular piece from the green plastic. We form a thin strip and roll it into a rope;
- We wrap the tourniquet around an awl and form a tendril of the fruit;
- Carefully remove the tendril from the awl and attach it to the shoot at the top of the pumpkin;
- Bake the product until done.
In addition to pumpkin, craftsmen also produce many other interesting vegetable fruits. You can see examples of how this is done in the following master classes:
But it is worth saying that not only miniature vegetables, but also fruits and berries become the subject of work for many masters of polymer ceramics.
Fruits made from polymer clay
Today, culinary miniatures are quite popular both among ordinary people and among costume jewelry and interior designers.
Therefore, polymer clay fruits are used not only as children's toys, but also as designer decorations and home decorations. And many craftsmen make the following products from fruits:
- Interior plates and drawers;
- Fruit paintings and panels;
- Hanging and tabletop fruit-rural compositions;
- Decorated mugs and saucers;
- Fruit sweets made of polymer clay;
- Brooches, rings, earrings and bracelets;
- Beads and necklace;
- Combs and hair clips.
And this is not the entire list. At the same time, crafts are created both from cold porcelain and from baked clay using various techniques.
But among all the techniques, Caning or Cane especially stands out - when the fruit is cut into pieces. Products in this style look unusually attractive. And the most memorable fruit canes are:
- Orange;
- Grapefruit;
- Pear;
- Kiwi;
- Lime;
- Lemon;
- Mandarin;
- Apple.
However, only professionals can produce such fruit products with high quality. For beginners, it’s better to start by creating simple fruit crafts using simple lessons from masters.
Baking with polymer clay is safe
Of course, discussions about the toxicity of polymer clay always raise the question of using a specialized clay oven for clay baking. This is absolutely and definitely not necessary. Please take a moment to read this safety information provided by Polyform, the makers of Sculpey and Premo. You will find that polymer clay does not emit toxic fumes or create sediment in your oven when baked as directed. Or even when baked a little hotter than indicated.
In fact, it is well known among professionals that baking 10-20 degrees hotter makes the clay stronger.
When polymer clay burns, it releases hydrogen chloride gas, which is caustic and will burn your lungs (but is not entirely toxic). But polymer clay doesn't burn until it reaches a temperature of about 350°F (175°C). So if your oven is accurate, this won't bother you.
For more information on baking polymer clay, including how to get the best results, how to minimize odors, and how to prevent darkening and discoloration, see Baking Polymer Clay.
Many people find the smell from polymer clay baking to be unpleasant and may cause headaches for some sensitive people. If this worries you, be sure to place your stove in the garage or on the porch. And cover your project while baking. Rest assured that baking polymer clay does not produce toxic fumes.
These wonderful wine glasses were decorated with polymer clay by Melody Tallon
Master classes on making fruits from polymer clay
Quite often, many craftsmen choose various fruit plates as food miniatures.
Masters combine different types of fruits on plates, often adding large berries to them.
And among the most common combinations are the following:
- Bananas, kiwi, apples;
- Apricot, orange and fig;
- Orange, watermelon and pear;
- Mandarin, pear, lemon and strawberry;
- Pears and apples;
- Bananas, melons and apples;
- Oranges, bananas and grapes.
At the same time, on the plate you can see not only whole fruits, but also cut into slices or halves.
But for beginners it is still easier to work with the creation of complete products, which is why we will choose a master class on creating a plate with several oranges, a sprig of banana and grapes.
So, let's start the workflow and execute it step by step:
- We select materials and tools: clay and dry pastel of the desired colors, liquid gel plastic, varnish for coating, a wooden egg, round cutters, a brush and tassels, an awl and blade, a rolling pin, sanding material, napkins and work gloves;
- We create a plate - to do this, we roll out the clay and squeeze out the shape with a cutter, and then give it a rounded shape using an egg. We set the shape of the bottom by pressing the blade, then bake it;
- Let's create bananas - for this we will need sausages made of polymer clay. We make them in the required quantity and cut them into oblong pieces. We decorate each piece of sausage into a banana. Then we combine the finished fruits into a bunch and tint the strokes with pastels for a natural color;
- We create oranges using the same principle as bananas. But we cut the sausages into equal parts and give them the shape of a ball. We create the roughness of the surface with a brush, and the middle with an awl. We also add green pastel to the pressed center;
- We create grapes - first we make the base of the bunch, and on it we place grapes made from sausages;
- We collect bananas, oranges and grapes into a composition on a plate using gel plastic and then set it to bake;
- After cooling, sand and varnish. And after a short time, the fruit product will be ready!
Similar to this master class, you can make a fruit basket, an example of which is available in the video:
Bread and sandwiches in miniature
Fresh loaf
Take a piece of bread-colored polymer clay and roll it into a ball and then into a sausage. Press the stack of strips. A loaf, carrot or banana is food for dolls that is not at all difficult to make. It is somewhat more difficult to make, for example, cut-away berries.
INTERESTING: How to make a gnome from different materials
Sandwich with black caviar and cheese
Operating procedure:
- From a layer of dark brown clay we form a slice of bread. Using a toothpick we give it a relief structure. We form a lettuce leaf from the green layer. In 3-4 places we pinch its edges with our fingers, slightly crumple the leaf, giving it a waviness. Place the salad on the prepared slice.
- From the yellow layer, cut out a rectangle of cheese about 3 mm thick. We make holes in the cheese with a knife or special molds. We form half an egg from pieces of white and yellow clay and place it along with the cheese on the bread. Next, let the sandwich bake. When it has cooled, spread the middle of the lettuce leaf with transparent glue and sprinkle a small amount of black beads on it, which plays the role of caviar. The delicious sandwich is ready!
https://youtu.be/kYfjyx-rBxI
https://youtu.be/jeb_Pnu5eLo
https://youtu.be/u6bjyu6rsbI
https://youtu.be/3doJcqqoAKY
Berries made of polymer clay
Along with vegetables and fruits, berries made from polymer clay have also become extremely popular.
A berry miniature made of polymer clay arouses keen interest not only among girls who play with Barbie dolls, but also among modern fashionistas who wear bright accessories.
Among other things, these bright natural elements fit organically into kitchen decor in such crafts as:
- Cakes made of polymer clay, decorated with berries;
- Baking berry pies;
- Berry lollipops;
- Brownies with berry cream coating;
- Donuts with berry decoration.
Making all these sweets for the interior is not so difficult; the most important thing is to learn how to make berries.
Among the easy-to-make berries, experts note the following:
- Grape;
- Cherry;
- Blueberries;
- Kalina;
- Rowan;
- Currants;
- Blueberries.
More complex fruits are:
- Blackberry;
- Strawberries;
- Strawberry;
- Cloudberry;
- Raspberries.
Moreover, the latter is most often used in various crafts despite the painstaking nature of its production. Therefore, it is important for any beginning craftsman to learn how to sculpt this berry in miniature.
Miniature fruits and berries
Bananas
Cut the yellow clay into equal pieces and roll them into balls. Roll them into cones, forming a banana. We stick a little green clay to the very tip and smear the edges. We combine several bananas into a bunch. Cut off the excess and blacken the end of the cut.
Strawberry
- Fold white, yellow and red clay tightly and roll into a thin sheet.
- Roll a tight tube lengthwise and form a brick. Cut it across and insert thin white plates into the cuts. Cut in half lengthwise and form them into two halves of a berry using polymer clay.
- In the same way, make a plate from three colors (beige, yellow and white), twist it, form a cone and insert it inside the berry. Slice the strawberries into thin slices.
Oranges made of polymer clay
You can make beautiful food for dolls with your own hands if you practice a few simple techniques. For example, an orange can be made using three colors of clay: white, orange and yellow.
- Roll orange sausages, cut them lengthwise, insert yellow clay into the cut and roll again.
- Wrap the sausages in a thin white sheet and flatten them slightly on one side.
- Place 8 sausages together, wrap them again with a white clay plate, and then with an orange one.
- Roll a long orange over the grooved surface, creating a citrus peel effect.
- Cut the orange into slices, drawing a design on them in a stack.
Lemon wedges
We use 3 colors of polymer clay:
- White Fimo classic
- Translucent yellow Fimo Effect
- Yellow PREMO Sculpey