Interesting on the topic
Fairy costume Tinkerbell
07.12.2016
Headband "Bats" for Halloween
14.10.2013
The New Year holidays have passed, in the bustle and haste the carnival costume of Little Red Riding Hood was being completed for my daughter for the first New Year's party in her life. Now, finally, I got around to writing a master class.
This time I won’t talk in detail about how to sew a New Year’s Little Red Riding Hood costume with my own hands and post photo instructions. I’ll just tell you schematically what I did and how.
In front of me stood this image: a red skirt, an apron with ruffles, a white blouse, a black vest or corset, and, of course, a basket with buns for my grandmother).
DIY New Year's Little Red Riding Hood costume: materials
- For the skirt and hat:
- Fabric for the skirt and hat (mine is red stretch gabardine)
- Soft white tulle for lining the skirt
- Sewing to decorate a hat and apron
- Elastic band 2 cm wide.
- White calico for an apron and a napkin in a basket
- Decorative red braid for decorating a napkin in a basket
- For the belt:
- decorative black braid;
- a piece of old jeans;
- black thick knitwear.
Skirt for Little Red Riding Hood costume
The question of how to sew a skirt didn’t even arise in front of me. I definitely decided to wear a half-sun skirt with a soft tulle lining.
Constructing a half-sun skirt with an elastic band and one back seam was not particularly difficult.
Only two measurements were needed: Product length (DI) and hip circumference (HG) (since the skirt is without a fastener and has an elastic band, if the skirt comes with a set-in zipper, then the half-waist measurement is used).
1. Construct a 90 degree angle with the vertex at point O.
2. Calculate two radii, where R1 is the waist line and R2 is the bottom line of the skirt:
- R1 = (From + 5cm) / 2 π (where π ≈ 3.14, 5 cm - allowance for loose fitting);
- R2 = R1 + Di.
3. From point O, we lay down and to the right the lengths R1 and R2. The segment from line T1 to H1 is equal to CI.
4. Connect points T and T1 with radius R1, H and H1 with radius R2.
5. The outline of the skirt drawing passes through points T1Н1H2T2.
6. We cut out the belt in the form of a rectangle, the length of which is equal to the circumference of the hips + allowance for a loose fit, the width is 7 cm.
We recommend: Bats Halloween headband
7. If you have an elasticated skirt, you will also need a hip measurement. We will need to draw another radius, OB = R2 = (Rb + 5cm) / 2 π
Features of the Little Red Riding Hood costume and what it requires
Little Red Riding Hood is a young girl with a big red hat as her distinctive feature.
The image is complemented by a basket of pies, which she should (according to the plot of the fairy tale) take to her grandmother on the outskirts of the forest. Another peculiarity is that, usually, the fairy tale takes place in the summer. This season of the year means that the girl is wearing light clothing (dress, stockings, light T-shirt, etc.). However, if the weather outside is fierce, it is better to wear a “red winter cap” suit - the image will not suffer and will not lose its uniqueness.
To create the “Little Red Riding Hood” look at home, you will need:
- Women's apron. The older it looks, the better - the fairy tale takes place in medieval times. A more vintage look will only be a “plus” to the whole suit. You can use decorative flattering weeds (burrs and others) - imitation of difficult to pass flattering paths through which the heroine of the fairy tale was forced to make her way;
- Cap. The cap can be replaced with a regular cape hood. Mandatory condition: the top of the head must be red;
- Skirt. It is preferable to wear a skirt in red or dark tones of red - this will harmonize the overall appearance;
- Corset. This item of clothing can be worn at will. At the same time, it will add authenticity and completeness to the image.
Important! If you have the opportunity to use a large wicker basket, use it! It is necessary to take into account that the basket may be inconvenient when “operating” the suit. Also, it can get lost - you should take this into account!
Sewing procedure for a sun skirt:
1. From soft white tulle I cut out three rectangles 1.5 cm long longer than the length of the stretch gabardine part, each 1 m wide for gathering. I ended up with three layers of tulle for the lining.
2. I stitched each piece of tulle separately along the short side. I laid a stitch along the wide side of the tulle rectangles and pulled it to a length equal to the length of TT1 on the pattern. I joined all three pieces of the lining together using machine stitching.
3. The back seam of the main part of the skirt was stitched. Using a basting stitch, I connected all three layers of tulle with stretch gabardine.
I put my skirt aside for a while.
DIY Little Red Riding Hood costume for a girl: materials
Most parents buy ready-made costumes. However, this is an unjustified purchase, because you can wear the outfit 1-2 times, after which it will no longer be relevant.
To sew a Little Red Riding Hood costume with your own hands, prepare the following materials:
- several shades of fabric - black, white and red;
- vinyl;
- zipper;
- satin ribbon;
- elastic band;
- Velcro;
- lace and eyelets.
In order not to spend a lot on materials, first measure the circumference of the child’s chest, waist and hips.
Let's start with the apron
To make it less of a hassle to put on a Little Red Riding Hood costume for my daughter, I decided to make the apron and skirt one part of the costume.
I cut my apron into a rectangle with rounded bottom corners. Pre-assembled sewing was sewn to three sides of it. The top of the apron was also laid out with chaotic folds.
1. I found the middle of the apron and the middle of the skirt, aligned the centers and after that I began to sew the belt to the skirt.
2. The belt piece was stitched into a circle along the short side. I matched the seams on the waistband and the skirt panel together, folded them face to face and stitched the waistband to the skirt. I pressed the seam allowance, folded the waistband in half and pressed it again. I basted the entire length of the belt and stitched it at a distance of 1 mm from the edge, leaving a distance of 2-3 cm between the beginning and end of the stitching for threading the elastic.
3. Using a pin, I pulled the elastic through the skirt and sewed its ends into a ring. I sewed up the unstitched section for pulling through the elastic.
The result is this Little Red Riding Hood skirt.
Elements of the Little Red Riding Hood costume
A white dress of a simple cut or a white shirt is an underwear under a suit. If these items of clothing are not available, you will have to sew them separately.
Over the shirt you need to wear a dark-colored sleeveless vest. It can be either an ordinary warm vest, additionally decorated with a laced red ribbon, or specially tailored to match the Little Red Riding Hood costume.
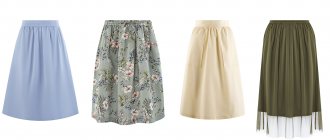
A red skirt made of satin or some similar fabric is worn on the bottom. The skirt is sewn according to a pattern, like a half-sun or flared sun. To make the girl look more elegant, you can make a tulle petticoat with an elastic band. Then the image will turn out airier and more tender.
You need to tie a smart white apron over the red skirt. This element refreshes the entire look.
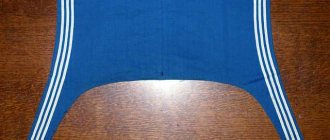
The main attribute of the Little Red Riding Hood costume is the headdress, namely the red cap. It can be sewn both in the form of a cap and in the form of a scarf. You can sew ties to the hat or leave free edges.
Many costumes require a special red cape, the hood of which is used instead of a red cap.
A hand-sewn Little Red Riding Hood costume will delight the child and become a source of pride for the mother who created this masterpiece.
White tights and red or black shoes will suit the look.
The pattern for the Little Red Riding Hood costume consists of several elements: a pattern for a headdress, a skirt, an apron, a cape, a vest, and a shirt.
The final attribute is a basket with treats for grandma, covered with a beautiful napkin.
Next, the belt
On the Internet you can find many options for the Little Red Riding Hood costume; a constant attribute is a corset or vest. I decided to simplify this and make a wide belt. I rummaged around in the bins and found thick black jersey and old jeans. I bought some braids.
I cut out a rectangle whose width = waistband width *2 + seam allowances of 1.5 cm on each side. Belt length = Waist circumference + 1.5 cm allowance. Our belt is made with lacing, so it will be better if it is not laced tightly. Sew the belt along one long side and one short side. We turn it right side out, we get something like a bag.
We recommend: Tinker Bell fairy costume
We put denim fabric into this bag for rigidity. Rectangle size: waist circumference on the wide side, belt width without seam allowances on the short side.
Fold the edges inward at the open edge and stitch along the edge. We give a similar line along the opposite edge of the belt.
Now we mark the holes for lacing. Initially I wanted to make eyelets, but there was no machine for installing eyelets and buttons in the nearest handicraft stores, the line for creating loops in the machine refused me this. Therefore, I had to sit and sew all ten loops on my hands. Moreover, this was done on the last evening before the matinee. UFFFF! I threaded through the decorative braid.
To sew a hat for “Little Red Riding Hood” I had to scour the Internet. As a result, I came across a Soviet-era book “Children’s Carnival Costumes” from 1968, which gave a pattern for a Little Red Riding Hood costume. Among all the other patterns, it seemed to me the most successful.
Here's a quote from the book: "
Sewing a Little Red Riding Hood costume
To make a New Year's costume, all you need to do is choose a master class that offers simple patterns.
Girl's outfit
To make a Little Red Riding Hood costume for a girl with your own hands, you will need the following materials:
- Red satin. A skirt and a hat will be made from it.
- White satin for making an apron.
- White lace.
- Concealed zipper or elastic band.
- Sequins.
- Adhesive interlining.
- Dark fabric to make a vest.
- Two laces.
If there is no white dress, then you will need to sew or take a white blouse from another suit. The pattern is easy to pick up in the Burda magazine. To make a blouse you will need white satin 150 cm wide.
Make a half-sun skirt from red satin If you have a white dress for the base, then a red skirt can be sewn on top of it. To do this, you need to rip off the bottom of the dress, and then sew it on again, but this time along with the red skirt. You won't need a petticoat.
In the absence of a ready-made white dress, a children's Little Red Riding Hood costume is sewn from scratch. In this case, a wide belt is sewn to the red skirt and an elastic band is threaded through it. This is if you choose the simple method.
For a more complex option, you need to sew a belt to the skirt at the waist and glue it with non-woven fabric. Here you will need a hidden zipper located on the side . Decorate the bottom of the skirt with sequins, 5 cm from the edge. Decorations can be sewn on using a sewing machine.
The petticoat is made of tulle. The width of the fabric should be three times the circumference of the hips, then gather it on a satin belt.
To sew an apron, you will need a piece of white satin measuring 20 cm in length and 23 cm in width. This rectangle has two corners rounded. Trim the edges with lace, neatly folded . The lace will need approximately twice the perimeter to which it is sewn. Next, cut out the ties for the belt on the bias and sew them to the apron, slightly gathered into folds.
To ensure that the lace lies well and does not curl, it is recommended to stitch the apron, 2 cm from the edge.
Red satin is used to make the headdress. The red riding hood pattern for the costume consists of two parts. The back piece is single, rectangular in shape with two rounded corners. The height of the part is equal to the distance from the base of the head to the crown. The pattern of the front part is also in the form of a rectangle. It should be double, glued with non-woven fabric. The width of the rectangle is equal to the distance from the top of the head to the forehead, excluding the lapel. For the lapel, it is enough to leave a reserve of 4-5 cm of fabric.
The front part of the cap is sewn to the back part, to its three sides. Therefore, the length of the front part should be equal to the sum of the lengths of the three sides of the back part.
To make the front part double, you need to fold its parts right side inward and sew them together. Then turn it inside out, iron it and stitch about 5 mm from the edge.
The front part of the hat is sewn to the back part, and the edges are finished with a zigzag. The remaining raw bottom edge of the back piece needs to be folded up and stitched.
On the Internet you can find visual diagrams of how to sew a cap for Little Red Riding Hood; there are different patterns for this accessory. The headdress can be crocheted. You need to sew strings to the cap or pin it to your hair using bobby pins.
A carnival costume will look original if you wear a vest. You can easily find its pattern in any fashion magazine. Brown spandex is suitable for making a vest. The fastener can be sewn in the form of air loops, then lacing can be done. Decorate the finished item with sequins.
The costume is ready, you can complement the look with white tights, beautiful shoes and a basket.
Halloween costume
You can sew a Little Red Riding Hood outfit for a girl . Here it is enough to copy the children's version, but make the sizes for an adult. Or change the pattern a little to emphasize the shape. Elements of a Halloween costume can include:
Little Red Riding Hood costume for adults
To create an image, you can select some details from your own wardrobe:
- When choosing a skirt, the main condition is that it should not be straight.
- Lace cuffs will help give an ordinary blouse a dramatic effect; they are suitable for both short and long sleeves. To do this, a triangle is cut out of white fabric, and lace is sewn in layers for pomp. Such a cuff should be fastened at the wrists with a button.
- The cap can be replaced with a beret; it will look very original.
- Another important detail is the lace apron. Both white and black will do, because these colors harmonize perfectly with a red skirt. It won't be difficult to sew. A semicircle is cut out of the fabric and the edges are processed, then a wide satin ribbon is sewn to the top.
Details of the costume can be decorated with flowers and beads if desired. When making your own Little Red Riding Hood costume, don’t be afraid to experiment.
How to sew a cape for a Little Red Riding Hood costume?
It's hard to imagine Little Red Riding Hood without a scarlet cloak.
To make a cape for the Little Red Riding Hood costume, follow these instructions:
- Fold the red fabric in half.
- Draw a semicircle at the fold. The diameter of the circle should be equal to the circumference of the child's head.
- Measure the required length of the cloak and cut along the contour.
Wide cape
- Finish the edges, otherwise the threads will start to come out, which will ruin the appearance of the costume. Use braid or red thread to finish the edges.
- Sew the upper part of the cloak several times. Leave one thread free so that you can form neat folds later.
- Connect the cloak and hood. The top of the neckline should be equal to the bottom of the product.
Hooded
- Tapes used to form seams can be used to create beautiful fasteners.
What is the procedure for sewing a skirt for a suit?
At the first stage, we make a lining for the skirt, without which the Little Red Riding Hood costume, made with our own hands, simply will not look impressive. To do this, take a white tulle and cut out three quadrangles from it, each 1 m wide. Moreover, their length should be 1.5-2 cm longer than the length of the skirt.
You will end up with approximately three layers of petticoats. At the second stage, we carefully grind all three layers along the short side (each separately), and machine stitch along the long side and tighten it to the size of the “TT1” segment (as on the pattern). Then we connect all the lining parts and sew them together using a stitch.
At the next stage, we make the skirt itself according to the pattern and sew the lining to its inside. And the final touch to the skirt will be a beautiful apron that will perfectly complement your Little Red Riding Hood costume. You can make it yourself using white fabric and ready-made ruffles.
For simplicity, cut out a semicircle in one layer (allowing for a small number of folds); make a belt from a small narrow piece of fabric; Sew the resulting parts. And finally, for beauty, you can sew ruffles around the perimeter of the apron. If desired, you can also embroider floral motifs on a white background.
Next, the apron can either be sewn to the skirt, or left as a separate item of clothing.
Option for an adult Little Red Riding Hood costume
To create such a carnival outfit with your own hands, you will need to sew only a few parts; the rest can be found in your own wardrobe or purchased.
You can find a red skirt and a white blouse yourself. It is advisable that the skirt is not straight.
A stylish version of the apron is lace. You can choose either black or white lace, contrasting with a bright skirt. Sewing an apron is extremely simple - you need to sew a wide satin ribbon to the semicircular base of the apron.
A very impressive detail is the lace cuffs with satin. They will come in handy if the blouse is short. Cut out a rectangle that can be wrapped around your wrist and trim it with lace. It should be connected at the wrist using buttons.
INTERESTING: How to make a ninja mask out of paper
How to sew a hat for a Little Red Riding Hood costume?
- The main attribute of the Little Red Riding Hood costume is the hat. It must be sewn from the same material as the cloak. Cut 4 identical pieces from fabric. Sew them in pairs. One of the pairs of parts will be the lining for the hat.
- The height and width of the hat should be equal, based on the circumference of the daughter’s head. Don't forget to leave 2-4 cm so that you can allow the seams to be lowered. After making all the necessary parts, sew them together along the seam. Leave the neck open. It will need to be stitched at the very end, after ironing the fabric.
cap