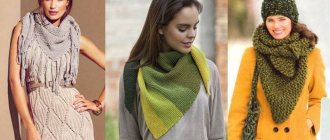
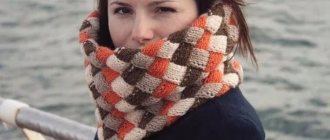
Poncho is a free-form sewn or knitted shoulder garment. It is a type of cape that is made without sleeves and armholes. Poncho is the national outerwear of the inhabitants of Latin American countries. In the original, it is a rectangular piece of fabric that is worn over the shoulders through an open neckline.
sewingbelle.co.uk
History of the poncho
Poncho is a type of outerwear that is common in almost all countries of South America. The color and material from which it is made varies depending on the region. A poncho is a fairly extensive rectangular fabric that covers the body and arms. It does not have a collar or sleeves as such. Initially, it was worn by both adult men and women, as well as children. The presence of an open swing cut is associated with climatic conditions and the need for protection from the sun and wind.
wikimedia.org
The poncho came into modern fashion in the 60s of the 20th century. At first it was used as an unusual ethnic element, then as an off-season casual outerwear.
The current version of the model is called cape. Such a wide cape over the shoulders without sleeves resembles a coat or jacket of a simple cut.
with sleeves, with a hood, chiffon, for obese women
Today we will look at many models, but we suggest starting with an easy one.
Lightweight chiffon poncho
A poncho with an unusual combination of colors and textures of chiffon and silk fabrics looks very chic:
The pattern of this poncho is very simple, you can cut it out very quickly.
It is important to cut off the finishing details on the pattern and cut them separately.
Required chiffon parts:
- One piece front half poncho;
- One piece of the back half of the poncho;
- Two parts with a fold of the poncho sleeve pattern.
- One piece of trim for the bottom front of the poncho (cut out double) with a fold;
- One piece of trim for the bottom back of the poncho (cut out double) with a fold;
- Two pieces of trim for the poncho sleeves (cut out double) with a fold.
Required silk parts:
This is a poncho pattern with sleeves
How to sew
Baste the back and front pieces to the back and front pieces respectively. Baste trim along the bottom of the sleeves. Baste and stitch shoulder seams, trim seams and press seams. Using a double needle, stitch seam allowances along the neckline. Baste and stitch the sleeves. Sew the sleeve seams with one seam, as well as the side seams. Fold the free seam allowance in half with the wrong side facing in, turn it under, and then hand baste it.
Poncho coat
A poncho coat will look just as unusual and elegant, especially if you sew it yourself, and a poncho coat pattern will help you do this
Construction
Draw two lines from point B, one vertical down, the other horizontal to the left. Along the horizontal line from corner B, retreat one third of the half-circumference of the neck +1.5 cm and down one-third of the half-circumference of the neck +2 cm. Draw out the front neckline according to the pattern.
To cut the neckline on the back, step down 2.5 cm from point B. Draw the cutout along the pattern.
Set aside the length of the shoulder plus the length of the sleeve and coat according to the measurements from the resulting points. Add a turn to the hem and fastener.
Uncover
You need two parts for the front halves with a fold over the fastener, one back piece with a fold without going over the fastener, one piece with a fold for the stand-up collar of the coat. Two pieces 10 × 20 cm for the belt.
Lining
From the lining fabric, cut two pieces of the halves of the front of the coat (up to the blue line), one piece of the back with a fold, and one piece with a fold of the stand-up collar.
How to sew
Sew shoulder seams on the front and back pieces from the lining and main fabric.
Press seam allowances. Turn the one-piece collar over to the wrong side and iron it.
Place the lining and the product face to face, and baste along the longitudinal seams to the hem.
Stitch and turn right side out. Fold in the seam allowances along the bottom edge and hem by hand.
Strengthen the stand-up collar with an adhesive lining, fold it face to face with the lining collar and stitch along the short and top edges.
Turn and iron, then topstitch. Sew the collar into the neckline, place the lining on top and sew in one line, stitching the lining along the neckline.
Sew 2 belts.
Sew the loops and sew on the buttons.
You can use any material you like, but such a poncho, sewn from drape, will not only provide warmth, but also add chic to its owner.
Poncho with hood
What is necessary
Fabric, knitted adhesive interlining and bias tape 6 cm wide.
Seam allowances are needed for double contours on patterns; for single contours, seam allowances are not needed.
At the bottom of the sleeve and the garment, allowances are 2 cm, and the rest are 1 cm.
The pattern of a poncho with a hood is almost no different from other types of ponchos, therefore it is also simple and does not require much time.
Uncover
Main fabric:
Back, front, front and back of the sleeve, large and small burlap, leaflet, 2 pieces of the back and 1 front of the hood.
This poncho coat will fit perfectly on a plump woman.
How to sew
Duplicate the leaf with non-woven fabric, bend it outward in the middle with the front side and iron it. The location of the pocket is also duplicated with non-woven fabric. Mark a longitudinal line on the leaf, which will determine the width of the finished leaf. Sew small burlap onto the inside of the leaves. Sew the leaf with the burlap down to the front side of the shelf, aligning the marking lines on the pocket and on the leaf. For short marking lines, finish the ends of the lines. Sew a large piece of burlap to the top marking line on the pocket. Cut an entrance to the pocket between the marking lines. Straighten seam allowances, then press. Stitch the edges of the burlap, securing the corners of the pocket.
Stitch the middle section of the back, overcast and iron the seam, overcast the bottom section of the front and back. Fold the bottom edge of the front parts, then stitch with a double stitch not reaching the side seam 16-20 cm.
Place both shelves and fasten them together to process them as one piece.
Sew the front part of the sleeve to the front, make a notch near the seam mark, overcast and iron onto the front. Do the same with the back of the sleeve, only stitch it to the back.
Sew the front and back along the shoulder edges, overcast and press the seams onto the back.
At the same time, sew the sleeve sections and the side sections of the back and front. Serve and press back seams.
Sew the back of the hood to the front, overcast and press the seams to the front. Stitch the middle section of the hood, overcast and press the seam. Cut the bias tape to a length equal to the hood neckline plus 2 cm. Stitch the binding into a ring, fold it right side out lengthwise and iron it. Stitch, placing a strip on the front side of the hood, fold it over and stitch along the main part along the fold, iron the seam.
Sew the hood into the neckline, overcast and iron the seam.
Overcast the bottom edge of the sleeve, fold it to the wrong side, iron and topstitch. Fold the bottom edge of the back and stitch it with a double stitch. Iron the seam.
Patterns for capes and ponchos are very easy to create yourself. To do this, you need to take a pattern for a jacket or blouse, if the pattern for a blouse is, for example, like this:
then you will need to add width.
You need to cut the pattern from point G to the bottom line and close the upper chest dart.
To build a sleeve, this pattern is suitable https://kroikashitie.ru/wp-content/uploads/2010/09/rukav1.jpg, which needs to be divided into the back and front parts and glued to the appropriate places.
The neckline needs to be increased, the depth by 2-2.5 cm, and the width by about 1.5 cm.
Cut the back pattern according to the relief, put the sleeve on and push it apart according to the shelf. The back is the same as the shelf, only without an allowance for the fastener, only the neck needs to be increased in depth by 1 cm, and in width like the shelf by 1.5 cm.
Such capes or ponchos can be sewn from the fabric that you like.
webdiana.ru
Choosing material for a poncho
Modern variations of the poncho, which can be worn for any occasion, are performed in a casual style. Suitable as a cozy cape for walks, or in the evening as a top item that covers the shoulders.
Before sewing a poncho with your own hands, you need to select the material. Considering that in European fashion this is part of a predominantly ladies' wardrobe, any costume, pile, or knitted dense materials are preferred. The demi-season cape is an easy-to-make and versatile product. There are no restrictions on the type of execution and choice of material. It is only important that the fabric or knitwear drapes well and does not stretch under its own weight. Suitable plastic dense knitwear, suit twill, polyviscose or coat drape. Typically, an out-of-season poncho is worn outdoors as a light cover-up for early fall or late spring, so soft, brushed wool fabrics will be most pleasant.
meijerstyle.com
Cutting options and manufacturing features of the poncho
Fabric poncho
The poncho pattern is a single rectangular piece with straight, rounded corners or in the form of a full circle. The lengths of the sides are selected depending on the model: they can completely cover the arms to the hands or be shorter.
A simple poncho design is based on the longest parameter - the length from the point of the base of the neck to the desired line of the end of the sleeve. If you have a basic shoulder pattern, a poncho can be modeled by closing the chest dart, expanding it along the bottom of the bodice and attaching the sleeve as in models with a one-piece sleeve.
ethnoboho.ru
In this model, the product is cut from three main parts with seams: a back and two parts of a shelf with a fastener along the side. The neckline is decorated with a stand-up collar or a simple piping.
Children's poncho
A cape for children should be comfortable to wear and easy to put on. Therefore, to sew a children’s poncho with your own hands, choose the simplest possible silhouette with one fastener and a minimum of details. The laconic cape is made with shoulder seams, a comfortable edging of the neck with a collar or hood. Children's models have a decorative function and protect from rain and wind.
simplicitynewlook.com
It’s even easier to sew a poncho for children and adults with your own hands from ready-made knitted fabric. To do this, select knitwear with a dense, stable weave that will not stretch under its own weight. In the case of canvas, it is recommended to place the cut direction diagonally.
sydax.se
If a large weave is chosen, it can additionally be used as part of the surface decoration.
The neckline is finished with knitted tape and is complemented by a high stand-up collar or a full-fledged hood. To complete the look, the lower edges of the cape are decorated with tassels, fringe, and pom-poms.
Poncho with vertical reliefs
For ease of arm movement, the long poncho is cut like a full circle with a neck hole in the center, which folds into a “half sun”.
lekala.co
If the model is built on the basis of a product with a one-piece sleeve and has an angle of inclination of the shoulder and sleeve, it is recommended to lay technological holes in the vertical reliefs. The lines are located vertically from the shoulder points where the holes for the arms are processed.
ohsewcrafty.co.uk
Fantasy poncho
Textured fabrics and fabrics with fancy patterns suggest the type of cut, which can be the most progressive or asymmetrical. In the case of designer expressive materials, it is convenient to cut out the model directly on the fabric, draping and adjusting the design to fit the figure or on the mannequin.
mycdn.me
Poncho coat
A coat with a loose silhouette looks luxurious, built on the basis of a rectangle that covers the entire length of the arm, continuing on the front and back. The share line is located vertically or horizontally. Long right angles, stretching out obliquely, create a beautiful drapery for the entire model. This poncho serves as a full-fledged demi-season outerwear product.
sewdirect.com
Knowing the principles of sewing a poncho, you can create a unique off-season model that will complement your wardrobe as an original blanket cape. Technological techniques and the finished appearance of the product depend only on the imagination of the author and the properties of the selected materials.
vogue.com
pattern model for a cape with a hood and sleeves
A cape with a hood, or a poncho cloak with sleeves are models that have recently become very popular. It is especially convenient to wear capes in the cold season: winter and autumn. A long and warm poncho coat with sleeves will keep you warm in cold weather, and will also look impressive on a woman of any age and any size.
Patterns of similar models are presented in abundance on the Internet and specialized literature. Usually the patterns for a cape with a hood are very simple. Sewing according to these patterns and then sewing the finished parts together is also not difficult.
Contents of the material
Cape with a hood, pattern and sewing: where to start
To make a pattern for a cape with a hood with your own hands, and then sew the finished product yourself, you must first prepare everything you need for work. To make a cape with a hood or a poncho with sleeves, you will need:
- Tape measure. It is necessary to take measurements. If a novice needlewoman decides to make a cape with a hood for herself, it will be more convenient to ask someone else to take the measurements. Attention: when subsequently transferring the pattern of the required dimensions onto the fabric, it is necessary to take into account seam allowances!
- A pen to write down all the dimensions of the main parts of the model.
- Finished pattern for a raincoat with a hood. It is advisable that the pattern be accompanied by a photograph of the finished poncho and a detailed description of the model.
- Special paper for pattern tracing paper for transferring the pattern onto paper in accordance with the required dimensions.
- A piece of chalk for transferring the pattern onto the fabric.
- Material for making a poncho with a hood with your own hands.
- Thread and needle to make a preliminary basting.
- A sewing machine for sewing individual parts of a poncho, and then stitching them together. You need to sew the finished poncho fragments very carefully and carefully, checking the pattern, description and photograph.
Having prepared everything you need, you can start working. The work of making a cape with a hood with your own hands consists of several stages.
- Taking measurements.
- Transferring the pattern onto paper and then onto fabric, in accordance with the expected dimensions of the model.
- Making individual fragments of a poncho with sleeves. First, all the parts need to be basted, then sewn on a sewing machine.
- The final and most important stage of the work is to stitch the finished fragments into a single whole.
Making a poncho with your own hands is not difficult, the main thing is attention and a little patience. But a model made by yourself will definitely be original and stylish.
Poncho with sleeves
A poncho as a piece of clothing consists of several fragments. The main part of the poncho includes the front, back and neck. Two sleeves are sewn into the main part. The finished model can be decorated in various ways: you can sew tassels, pom-poms, and decorative fringe around the perimeter of the model.
The work of sewing a poncho begins with the manufacture of the main part - the front and back. The next stage is making the sleeves. Then you need to start processing the neck. And finally, you need to sew on the sleeves. There are also sleeveless poncho models, but they are usually intended to be worn exclusively in the summer and serve mainly a decorative function. If clothing is initially designed to be worn in cold weather conditions, a model with sleeves seems more practical and functional.
For the autumn or winter version of the cape, it is recommended to take a thicker fabric, preferably waterproof. You can also treat the fabric for making a poncho with a special water-repellent impregnation.
We also recommend reading:
For summer and spring models, you can take thinner fabric. The length of the poncho can be any, but it must be borne in mind that the longer the finished model, the better it protects from the cold. The shape of the hood also depends on the tastes and preferences of the beginning needlewoman. The hood can be made detachable. In this case, you must use a zipper to secure it.
Pattern of a poncho with a hood and sewing a model: useful tips
In order for the cape with a hood to turn out as stylish as in the photographs, the following practical recommendations must be taken into account:
- The most important stage of work is cutting the fabric. When cutting, it is very important not to make mistakes with the dimensions, otherwise difficulties may arise later when sewing and stitching together the finished fragments. Be sure to take seam allowances into account!
- When purchasing material for making a cape with a hood, you need to buy fabric “with a reserve” so that later there are no unpleasant surprises when cutting the material.
- For convenience, the hood should be spacious. It would be desirable to be able to adjust the degree of fit of the hood to the head. To do this, the hood can be equipped with a drawstring with a cord threaded inside.
- The fabric for making a cape with a hood can be used either plain or with a pattern. For a summer or spring poncho, a fabric with an ethnic style pattern is suitable; for a winter and autumn version, a plain fabric in dark colors and shades is suitable. In the latter case, the hood can be trimmed with faux or natural fur.
A poncho raincoat with a hood and long sleeves will never go out of style. The popularity of this model of outerwear is due to the fact that the poncho protects well from wind and cold, is very comfortable to wear and suits women of any figure. Even a novice craftswoman can easily handle sewing a cape using a ready-made pattern. The main thing is attention and patience, and then everything will work out.
Attention, TODAY only!
1igolka.com
