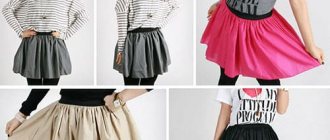
Female representatives love to wear skirts of various styles. Among all the known types, there is a place for skirt styles knitted with knitting needles. Nowadays, you can easily buy a knitted product in a store, but it will be a machine-made item. None of these models can replace a hand-knitted product that stores the good energy of your hands. Therefore, in this lesson we invite you to consider knitting a pleated skirt with knitting needles.
A stylish pleated skirt knitted with knitting needles will make your look fashionable and spectacular, and you will be simply charming. It is especially important to create your own style in the winter, when the choice of clothing models is very limited. Today, knitted skirts are so relevant that you can easily wear even those models that have been lying in the closet for a long time without use. In the absence of such items put aside for the time being, you can easily handle knitting yourself.
Knitting vertical pleating lines
Using knit and purl stitches. This option for forming pleats with knitting needles is suitable for beginner needlewomen because it is the easiest. The technique consists of the formation of vertical ribs formed by LP and IP, which are located in spaces with areas of the garter stitch pattern. These knit and purl stitches form clear edges:
As a result of using this technique, a double-sided pattern is obtained. In this case, the vertical edge of the LP forms the outer corner, and the purl PUs form the inner corner of the fold. If desired, such a fold can be folded to the right or left. To do this, you need to place 5 P on the auxiliary knitting needle, and another 5 P on the second knitting needle:
To bend the fold to the right, you need to place the removed Ps behind the work, then knit all the Ps from three knitting needles at the same time, that is, three together:
If the removed Ps are placed in front of the canvas, then it turns out to be folded on the left side:
You can turn the folds to the right or left, and place them at any distance, depending on your desire:
Pleated skirt for girls 3-5 years old
For needlework you will need 200 grams of yarn, circular knitting needles No. 2.5, and a crochet hook. This model of pleated skirt is a product formed by the easiest knitting technique of pleated folds. This option consists of making vertically directed strips formed by LP and IP. In the spaces between these vertical lines there are a number of garter stitch stitches. As a result of this technique, we get formed edges that form a kind of folds. The fabric of the pleated skirt is double-sided. Its relief on the front side coincides with the relief on the back. Vertical stripes from LP form the outer corner of the pleated, and vertical lines from PI are responsible for forming the inner corner.
Read
Properties of ribbon yarn and knitting wonderful scarves from it
First, let's try to knit a sample pleated pattern using green yarn. Let's dial the number P, a multiple of 9, plus 3 P for symmetry and two edge ones. All rows (P) are performed using the same technique. First, remove the first edge P, then knit *8 LP, 1 IP*, and repeat this rapport. At the end of P, you need to knit 3 LPs, and an edge one. The next rows are performed in the same way as the first R. As a result, we will get a pattern like this.
To make pleated knitting more expressive, it is necessary to perform it with the loops removed. In this case, the IP is not knitted, but removed, placing the yarn in front of the knitting needle.
This pleated skirt model is knitted in two halves. The direction of knitting goes from the bottom line up to the waistband. We make a set of white yarn for the first R in the amount of 171 P. After that, we knit 14 R using this technique:
- edge, * 22 LP, 1 removed P*, edge.
After the tenth row we remove the white yarn and replace it with red. Then we will continue knitting using the same technique.
From the fifteenth P we begin to perform decreases P, and we will do this in the zone of the folds where the width is greatest. In the eighteenth P we will make the first decrease in the narrow fold zone. After this, we continue to work, decreasing P alternately in narrow and then in wide zones.
When half of the pleated skirt is tied to the waist, you need to change the work pattern and knit one front P in this way:
- *2 P together, like LP, yo*.
This set of loops allows you to visually separate the belt from the skirt fabric. In addition, holes are formed at the places of the capes, which will be required to thread a decorative thin belt with pom-poms into them. Having connected this row with yarn overs, we will continue working by making the belt with a stocking stitch pattern. For the belt, you need to knit 7 R, then turn the fabric and perform the R with such a set of P * 2 P together, like an LP, yarn over *.
Read
Pullover with bat sleeve
Then we will perform the next 7 P with a garter stitch pattern, and in the eighth P we will close the P.
The second half of the pleated skirt is made in the same way as the first, after which both halves are sewn together. Then the belt is hemmed and an elastic band is inserted inside.
At the end of the work you need to make two white pompoms and a decorative cord belt. Carefully thread the belt through the holes and tie it with a bow. A pleated skirt cannot be ironed, but can be steamed and then dried.
Knitting pleated stitches using removed loops
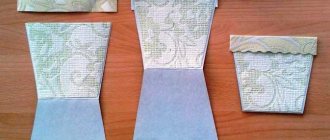
Using removed P for knitting a pleated skirt allows you to make a more expressive fabric. In addition to the removed P, in the example under consideration, an addition is used to expand the size of the folds. The addition is performed in the area of the edge of the fold. In the photo you see a sample in which the fold is expanded from 1 P to 3 P:
You need to start knitting with a set of P, the number of which is a multiple of 4 + 3 for symmetry + 2 edges. The pattern pattern has a vertical repeat equal to 2 rows (P). In the 1st row after the edge we knit 3 LPs, remove 1 loop, leaving the thread in front of the fabric, then repeat this repeat until the end of the P. In the 2nd row after the edging we remove 1 P, leaving the thread before work, then knit 3 LPs. This is the rapport of the second row. These two Ps must be repeated until the required length of the fabric is knitted. After this, add 1 P to each edge of the canvas. In this case, such additions are made at equal distances in height until the skirt reaches the desired width.
Sample
In this case, it would be very appropriate to knit a sample and see how many loops you should count on when making the product.
In fact, the sample should be made larger, since this insidious pattern can tighten more strongly with a large volume and turn out to be small. But it’s not worth carrying out huge reserves for him. Set of first stitches for 2 knitting needles
Therefore, a small sample, then we calculate how many loops are needed for 10 cm, and compared everything to the existing size.
That's all, you can continue knitting, but with the correct set of loops.
Let's look at knitted pleated skirts with a detailed description.
Pleated skirt with three elastic bands for women
A very interesting interpretation of a pleated skirt is knitted with three different elastic bands. The most interesting thing is that many masters use such simple patterns in their works so often that they don’t even consider them as something separate for the pattern of an entire model.
The work will require:
- Angora yarn thick fiber;
- knitting needles number 3.
Measurements
All sizes below are for size 46 only.
First rubber band
The main loops are almost invisible, but they are there. This is a wide elastic band that is inserted into the corresponding pocket. Stockinette stitch was used for the pocket. But it is not so noticeable, since the next pattern goes on and it is simply lost in the whole canvas.
To complete the beginning of model 46, you need to cast on 160 loops. To do this, knit 10 cm. This indicator is calculated for a width of 5 cm. Immediately after 10 cm of the front stitch, you need to move on to the first knitting. This will be a 1*1 mating. For it it is worth knitting 17 cm.
Mating second
Then the second pattern begins and again it’s an elastic band, only this time it’s not 1*1, but 1*2. For the front side you need to show side 2 of the front loops. To do this, add one loop after each knit stitch of the previous one and knit these yarn overs with knit stitches in the new row.
Important! It is safer to make additions instead of the usual yarn over by knitting the gap between the main loops (these are small connections). In this case, there will be no noticeable addition or holes, which are so often obtained after yarn over.
Knit 20 cm from the beginning of knitting 1*2 in the new pattern.
Elastic band third
The third knitting and this is the last pleated skirt pattern. This is respectively 2*2. For this, add purl stitches; the increases are very similar to the previous technique. Therefore, such an increase will not be visible. But the extension will turn out beautiful. Knit to the floor with the remaining pattern. Just close the last row according to the pattern of the canvas, but try to close it spaciously and without tightening it. This will create a lush wave that will prevent real pleated waves from moving to the side.
Now the charmer is ready and you can try it on with your favorite turtleneck. The product looks very impressive if it is made with multi-yarn yarn.
Pleated miniskirt with false English elastic band for girls
What kind of deception is created if you use a false elastic band and is it so beautiful ? Still so beautiful. The most interesting thing is that for a pleated skirt it is not a real English one that is suitable, but a copy or a false one. It doesn’t tighten the loops that way, and the pattern itself turns out to be double-sided.
The result
is a pleated effect and knitting is not so difficult .
If we compare such a rubber band in terms of complexity with the English one, then this type cannot be simpler. It's all about the false model technique. There are simply knit and purl loops here. No demolition, capping and other red tape, as was the case with the natural English model, is expected here. The work will require:
- acrylic based yarn;
- knitting needles number 2.
Measurements
Initially, it is better to knit a small sample and count the loops for your sample, even if the model is the same size as this one. Each has its own density, and the thickness of the thread may vary. This pleated fits size 42.
Rubber
Knit according to the 1*1 pattern for 20 rows . Then you will need to insert a real elastic band into this pocket so that the skirt fits well at the waist.
The basis
And finally the most interesting and intriguing part of the skirt begins - the long-awaited pleated knitting. Apply the above pattern and knit 20 repeats across a width of 26 cm. If desired, the pattern can be continued to a lower line. For example, to the knee line or create a midi skirt. But even such a shortened pleated model looks stunning.
The model is ready after the seam for the elastic is made and it is inserted into the skirt. Experiments with different colors of yarn look very nice and you can clearly see how beautifully the contrasting stripe fits in this pattern.