Such everyday items as, for example, napkins are quite suitable for making topiary. Topiary made
from napkins belongs to the category of very unusual and, at the same time, exquisite souvenirs that you would not be ashamed to leave at home or give to a loved one. A little perseverance, effort and patience will become faithful assistants in matters of creativity. Creating a real masterpiece with your own hands is much easier than it seems at first glance to an inexperienced master, and anything can serve as inspiration: fancy pictures, natural landscapes or the work of another master. Each creator has his own muse.
Topiary made of flowers from napkins: simple and beautiful
As a rule, creating a topiary from napkins takes a few hours at most. Of course, the whole process may take several days at first, but you shouldn’t worry too much about it. A couple of jobs and your hands will get used to performing all actions almost automatically.
But first you need to prepare all the necessary materials:
- Threads;
- Stapler;
- High quality glue;
- Wooden stick;
- Brush;
- Cotton pads;
- Acrylic paints;
- Napkins.
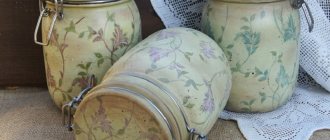
Napkins are the most economical material from which a wide variety of counterfeits can be made. The problem is that this material is very short-lived, however, if stored properly, it can delight the eye for several years.
As a rule, an ordinary pot, either ceramic or wooden, is used as the basis for the work. However, how to fill it?
There are many options:
- Gypsum;
- Papier mache;
- Plain paper;
- Styrofoam.
The last option is the most preferable, in view of the fact that it allows us to obtain the most straightforward design.
Now we have to make the tree itself. The easiest way to make its base is to pick up a flat wooden stick, subsequently wrapped with satin ribbon or twine. In turn, the “crown” is made of crumpled paper, carefully rewound with strong thread.
Do-it-yourself topiary is simple, beautiful and economical. And, what is especially important, such a souvenir can conquer any heart.
Using DIY roses from napkins
A rose made from a napkin is an affordable and easy craft to make. The flower can be used as a table decoration, to add romance to the interior (especially in winter, when fresh flowers are not so easy to buy), to decorate a gift, or even as a small independent present. If you make a whole bouquet of roses by hand, the recipient will be very happy with such a creative handmade gift.
To make a rose from a napkin, no special knowledge or skills are required.
It is enough to follow the instructions exactly to get a beautiful flower.
Roses made from paper napkins: necessary materials
You don't need any special tools for the roses. You only have to arm yourself with:
- paper towels of any color;
- scissors;
- thread;
- pencil.
For beginners, it is advisable to use a simple method of making a rose from a napkin.
Depending on the method of making flowers, you may need glue, wire and decorative elements.
Flower for topiary from a napkin: step by step instructions
Having made a tree and planted it in a pot, you can begin decorating, which is a very exciting process. Creating a flower is not at all difficult. The main thing is to choose the technology by which the actions will be carried out.
Carnation
- A regular napkin of the color you like should be folded in half to make a square;
- To prevent the resulting form from falling apart, it should be stapled in the middle;
- Attach an object with a round bottom to the workpiece, circle it;
- Cut out a circle;
- Crumple each layer of the circle towards the middle, forming a flower, but leaving the last layer intact, which will be attached to the topiary.
Carnations can be of any color and size. It all depends on imagination and desire.
Classic paper flower
- The napkin is folded lengthwise to create a long strip;
- The strip is moistened with water and wrapped in a spiral;
- The tail of the flower is fixed with glue.
The combination of large and small flowers – spirals – looks interesting. Then the topiary has every chance to sparkle in a new way.
Dahlia
- It is necessary to unfold and fold together 3 napkins of different colors;
- Bend the short side like an accordion;
- Tighten the resulting fan with thread;
- Spread both ends of the napkins in one direction and cut at an acute angle;
- Carefully straighten the product and form petals.
By placing different amounts of napkins, the flower can be made more or less fluffy. And, as practice shows, topiaries made from flowers always turn out different.
Fluffy “Ball of Happiness”
The crown of a tree of happiness made from napkins can be a fluffy ball decorated with beads and bows made from decorative ribbons, with the addition of bouquets of flowers from the same napkins made using the origami technique.
For such crowns, as shown in the photo above, you need to take an even ball, PVA glue, a thin stick, and a lot of napkins.
First of all, you can prepare the ball, take napkins, tear them into pieces and glue them with PVA glue. Take the desired colors of napkins, cut them into squares, preferably 2-4 cm, the tree will look more magnificent.
Now take a thin stick and wrap each piece of napkin onto the stick. Apply glue to part of the ball and send the “fluff” there.
It is glued, now glue all the pieces one by one in the same way, along the way you can make rosebuds from napkins and also glue them with glue.
Rose buds
- Step-by-step instructions on how to make realistic rose buds for a paper topiary topiary are provided below.
Take napkins of different colors and threads.
Cut the napkins into 4 pieces. Each square must be folded in half and rolled into tubes with a fold from top to bottom. Bend the corners inward at the end and secure with thread at the base.
Wrap the rest of the napkin on top.
Take the second color of the napkin, fold it diagonally, fold a strip of about 0.5 cm on the fold. Place our bud on it and swaddle it loosely. We also wrap the petals, but the triangles need to be increased in size, as shown in the photo, so that our bud grows.
We make leaves for the bud. We cut the napkin into 4 parts and combine two parts of them together, make a hole. We insert our bud, twist it with a short wire.
- This is the final topiary made from rose buds.
You can do it with solid colors, or you can combine it with trimming.
Topiary of lush flowers
There are a lot of options for creating flowers from napkins and all of them can be glued to crowns. Another master class “How to make topiary from simple napkin flowers.”
Take napkins and cut them into 4 parts, combine 8 parts together, colors can be combined. Visually divide them into 4 equal parts and secure them in the centers with a stapler, now cut them and you can cut out circles or flowers. Open the buds with your fingers. Now make a sufficient number of flowers and glue them to the crown of the craft you are creating.
As you can see, flower trees from ordinary cheap materials, such as napkins, are very easy to create, and they look gorgeous. One such product is made in about a couple of hours of work.
Video on the topic of the article
Source: https://DekorMyHome.ru/rukodelie/derevo-iz-salfetok-svoimi-rykami-master-klass-kak-sdelat-s-poshagovoi-instrykciei.html
MK: topiary made from napkins, product decor
After the master has managed to make all the elements of the topiary or tree of happiness, you can begin the final stage - connecting them together. Of course, for novice craftsmen this process will be quite labor-intensive, but do not get discouraged prematurely. In the end, everything will definitely work out.
The best place to start is from the bottom:
- The base of the tree is placed in a cache-pot or pot, which is subsequently filled with plaster and left to dry;
- A pre-prepared ball is placed on the base of the tree, symbolizing the crown;
- Decorative elements are carefully attached to the ball using glue or pins;
- the bottom layer of the pots is decorated with satin ribbons, gypsophila, etc.
There are no limits to perfection. Decorative elements can be advantageously combined with each other, complemented or completely changed, resulting in exquisite creations.
This master class for beginners describes step by step how to make a product in autumn style
The sphere is made from magazine sheets, they are crumpled into a tight ball and wrapped with tape. Then they cover it with paper, fix it with a glue gun and paint it yellow. Make a deep hole at the bottom, pour hot glue into it and insert a branch.
While the design is drying, they begin to create napkin art. Marigolds are perfect for creating an autumn mood. They are made as follows:
- the unopened napkin is cut into 4 identical squares;
- fold them and fasten them in the middle with two staples to form a cross;
- cut circles out of them;
- cut the edge at a distance of approximately 0.5 cm;
- then raise each row above the center.
How to make triangular leaves is described above.
Crafts from glue: 150 best ways to use glue to create crafts + simple diagrams and photos of finished works- DIY crafts from matches: step-by-step master classes and DIY craft ideas + simple and quick photo diagrams
Crafts from tubes - unusual ideas, step-by-step master classes for beginners + photo reviews of ready-made DIY crafts
When the required number of elements is ready, they are attached to the base. To do this, coat the strip around the trunk with “Titanium” and glue the leaves close to each other. The next row is attached with marigolds in the same way. And so on until the entire ball is filled.
Gypsum is diluted with water in a pot according to the instructions. Next, quickly install the tree before the solution hardens; to securely fix it, stick it to the very bottom of the pot. The barrel is painted with acrylic paint. After complete drying, a ribbon is tied to the top with a bow, which is wrapped around the shaft and glued to the base. Sisal is glued onto the plaster so that there are no gaps. It can be decorated with a chaotic scattering of beads and beads.
Advice! If you are using a foam blank, you can attach the napkin elements using flat-headed pins.
What to pay attention to
When teaching beginning handicrafts, all master classes focus on what materials to choose, how to follow manufacturing technology, etc. However, instructions are one thing, but real life is completely different. When starting work, you should not immediately take on the most difficult, even very beautiful option.
It is better to start with simple topiary, after mastering which you will move on to the next level of skill.
It is this step-by-step training that gives very quick results and allows masters to reach unprecedented heights. In addition, you should not chase expensive accessories, the use of which is by no means always justified.
Any topiary is:
- Dedication;
- Fantasy;
- Desire to learn.
How to make a rose from a napkin with your own hands
Paper rosebud - the easiest way
- You will need a napkin of a single color, folded in four, as originally in the package. We bend one side 1 cm, then wrap the material around the index finger. The main thing is that the edge that is bent is directed towards the base of the finger.
Having practiced a little and gained experience, you can begin to create an entire flower arrangement.
Important! Don't wrap the paper too tightly. It is better to wind it more loosely, so the bud at the end will have a more magnificent appearance.
- A cylinder should form around your finger. We squeeze and slightly twist the loose material that is located at the tip of the finger.
- The final stage is to open the petals. So, we take the initially bent layer and, moving in a spiral, turn it outward. The same can be done with the top 1-2 layers of petals so that the bud has a half-open appearance.
Making a rose from a napkin using this method is quite quick and easy.
Option of a bud with a stem: step-by-step instructions
- Unroll the napkin completely so that it is in one layer.
- We twist one side by 1-2 cm to make a thin tube.
- We begin to wrap the bud. This must be done slowly and carefully; it is better to roll the bud loosely, pinching the point between the stem and the beginning of the bud.
Examples of topiary from napkins (photo)
- Author: admin
Rate this article:
- 5
- 4
- 3
- 2
- 1
(1 vote, average: 1 out of 5)
Share with your friends!
Fabric rosette step by step
Method 1 – lush fabric rose
Note! When using fabric of different colors, for example, red and pink or blue and white, the flower turns out original and bright.
Despite the simplicity of execution, the flower turns out beautiful, so it is worthy to take the central place of the table as a decoration.
- Let's take several identical fabric squares.
- Place the pieces in a stack and trim the edges. The edging can be done in the form of petals, light waves or hearts.
- We fold all the pieces in the stack like an accordion and squeeze them in the middle so that the fabric takes the shape of a bow. At this point we wrap the fabric tightly with thread or braid.
It turns out such a beautiful red rose.
Method 2 – rose from a napkin in a glass
Fabric towels can serve as material for this craft - this is an excellent option for table setting. Guests will unwrap the fabric rose and use the towel for its intended purpose.
In addition to this option, fabric ones will serve as an excellent decoration and decor for every day.
- We place green fabric, folded into an accordion and tied with thread or wire, on the bottom of the glass.
- We place the red or pink material in front of us. We bend one side a centimeter, and then we wrap the fabric around our finger to form a cylinder.
- We secure the base with wire or thread.
- We spread several petals outward.
- Place the bud in a glass on top of the petals.
To make the rose more lush, you need to make more layers.