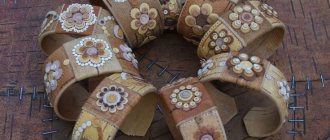
Topiary made of beads looks very beautiful and original. At first glance it may seem that it is very difficult to do it yourself, but it is not so
Today, handmade gifts and souvenirs are very popular. This gives the gift a special charm and value. One of the most common decorative items today is topiary - a tree that brings happiness and good luck. Interestingly, the word “topiar” itself refers to the ancient art of landscape design of trimming trees in various ways. Read on to learn more about the different designs and types of trees of happiness.
A matter of technology: do-it-yourself topiary made of beads, master class
Making topiary from beads is not difficult. The main qualities you need to have are perseverance and patience.
Making topiary from beads is not an easy task, but it can be done. All you need is perseverance, patience and attentiveness
To make a tree from beads with your own hands you will need the following materials:
- A polystyrene ball, the diameter of which should be 8-10 cm;
- Wooden stick 50 cm long;
- Two satin ribbons of different colors, 7 mm and 3 mm wide;
- Garland of beads 6 m long;
- Double-sided tape;
- Glue gun;
- Flower pots;
- Sponge;
- Plain organza of any bright color;
- Tissue paper is the same color as the organza.
When all the materials have been collected, you can begin the process of making the topiary.
The scope for creativity in creating topiaries is unlimited; they can be made to match any color scheme, which will greatly please lovers of bright and colorful flowers
Master class step by step:
- First you need to wrap a wooden stick with tape. Then wrap satin ribbons of different colors alternately around the tape. At the end, you need to secure the tape with a drop of glue.
- Insert the already decorated ribbon into the sponge, which should first be placed in the pot. If the sponge is smaller than the pot, you can wrap it with papyrus paper for a better fit.
- You need to make a hole in the ball into which you need to drop a drop of glue. Now you should put the ball on the upper end of the decorated stick.
- The next stage is wrapping the garland around the ball. Here you will need glue and the beads themselves, which should be glued one at a time. The density and frequency of the beads can be varied independently.
The final stage is decorating the pot with organza using a few drops of glue and then draping the fabric.
Video: master classes on creating topiary
DIY topiary Simple master class
Autumn topiary. Master Class
Outdoor topiary
New Year's topiary on a glass
Fruit topiary for beginners
Money topiary
Topiary - heart
Topiary gift heart for Valentine's Day
How to make a delicate topiary from half beads
In order to make such a topiary, you should follow the previous instructions. But for variety, you can make some adjustments.
Topiary made from half beads is a fascinating and at the same time not easy activity. It is quite rarely made, but the beauty of this finished product cannot surprise and delight
For example, decorate the stick differently by choosing ribbons of different colors, fill the vase with decorative sand, and decorate the vase itself with decorative paper and bows made from satin ribbon.
How to choose a topiary shape
At the first stage of work, you need to decide what exactly the New Year's tree will be. Typically, topiary is made in the shape of a Christmas tree or ball. The branches are woven using the coral technique using needles or loops. You can combine different options or come up with your own. New Year's topiary can also be an ordinary tree made of white beads. If you decorate it with large beads resembling balls or berries, you will get an unusual winter composition.
Stylish and fragrant coffee topiary
Coffee topiary will create home comfort, give a wonderful aroma and mood. A wide variety of materials and techniques are used to create coffee topiary.
The basis for the crown of a tree can be various kinds of materials, not necessarily round in shape. This can be newspapers, paralon, polyurethane foam, etc.
The container for topiary can be different: from pots to plastic glasses.
A topiary made from coffee beans can be placed in the kitchen and you can enjoy the coffee aroma not only in the morning
Here is one of the most optimal techniques for creating a coffee tree:
- Prepare coffee beans. They must be of high quality and not the cheapest - their aroma and shape depend on this.
- The ball has a diameter of 8 to 10 cm. You can make the ball yourself or purchase it in specialized stores.
- Flower pot, but you can take another suitable container.
- A wooden stick or plastic tube about 25 cm long.
- Decorative tape.
- Glue gun with glue.
- Alabaster.
- Double sided tape.
- Scissors.
When everything is ready, you can begin the process of making a coffee topiary.
Unfortunately, the smell of coffee topiary becomes weaker, but this can be corrected by resorting to a little trick: a drop of aromatic oil
This activity will require perseverance and accuracy:
- First, you need to make a hole in the ball corresponding to the diameter of the tree trunk. Then stick the coffee beans as close to each other as possible. Carefully ensure that each grain is glued with the strip down. Then do the same procedure, only now glue the grains in stripes up. This will give the most beautiful effect.
- The next stage is decorating the tube or wooden stick. It must be wrapped with tape, then decorated with decorative tape.
- The final step will be to install the tree and decorate the pot. To do this, you need to dilute alibastra with water to the consistency of sour cream. Pour the resulting mixture into the pot and insert the tree trunk into the prepared solution as quickly as possible.
- After hardening, coffee beans should be attached to the surface of the alabaster according to the already known algorithm: first, glue the coffee beans with the strip down, then with the strip up.
When the crown is installed on the tree trunk, it can be decorated with a beautiful bow made of organza.
Wood assembly
When the pieces are woven, take the elastic wire. It should hold its shape well, but you shouldn’t use it too thick. A diameter of 0.5 mm is sufficient. Wire with the required properties is sold in beekeeping stores and veterinary pharmacies. Cut it into 30 pieces about 10 cm long. At the end of each piece, use pliers to make a loop. It should remain open, do not bend the wire all the way. The beaded Christmas tree consists of four tiers. The first one contains the top and four branches. There are 8 branches on the second and third levels, and 9 on the last level.
Now let's figure out how to assemble a spruce branch. To do this, you need to take a base of thick wire and wind the pieces around it one after another, starting to secure the free part from below. Then, having reached the top, we collect the needles, moving in a downward spiral. After that, the resulting branch must be pulled up to form the top of the tree, and the tip must be secured. Pull the wire base down so that the loop catches on the workpiece. After this, the branch will be tightly fixed, will not move anywhere and will not unwind. We finally shape the needles by straightening or tightening them to create a denser tree. After all the branches are ready, we begin to assemble them onto a thick base using thin wire. We attach the finished beaded tree to a plaster base or place it in a pre-prepared pot.
Topiary for all occasions: made from beads and more
Those who do not want to be limited to the fairly common methods of making topiary from beads can show their imagination and make a unique tree using the most unexpected materials.
You can create topiary when you have a lot of free time or want to escape from the hustle and bustle of life and problems
It can be:
- Boxwood sprigs;
- Decorative tapes;
- Corrugated paper;
- Paper roses;
- Beaded elements;
- Candies;
- Balloons, etc.
Creating topiary has become popular quite recently, but this type of needlework rightfully deserves attention and respect
A topiary with balls and lollipops can be an excellent gift for the birth of a child or at a children's party. And topiary, which is based on a heart, will be a wonderful declaration of love for Valentine's Day.
How to choose beads for New Year's topiary
When choosing a material for wood, it is not necessary to focus on expensive brands. Any material will do. It may well be uneven and slightly different in shades, because real living Christmas trees do not look monochromatic, and their branches do not look the same. For beaded topiary, leftovers from other crafts are also suitable as material. By mixing them with each other, you can get smooth transitions, which will allow the branches to look more natural.
Topiary made of beads (photo)
Creating a tree crown
The shape of the crown is matched to the interior of the room and to the surrounding plants. The most popular crown shapes are ball, cone, coral and birch. Based on the priorities of the performers, the design of the tree of happiness is selected.
Coral is the easiest to make. It is necessary to screw several dozen pieces of wire to the tree trunk, which will serve as the main branches of the coral. The required amount of beads is placed on these branches. Branches are made in certain places. Beads are strung on them again. Each subsequent branch becomes shorter and shorter. When the last branch of the coral is finished, its trunk is finished. It is smeared with glue and wrapped with thread and beads. To make artificial coral, you should use a material that most closely imitates natural plants.
Making a futuristic spherical tree is a little more difficult. The first thing to do is to prepare a base that is appropriate in shape.
You can make a ball in the following ways:
- From a children's rubber ball. Once a hole is made in it, it will lose its shape. Therefore, you need to pump silicone inside the ball and wait until it hardens.
- From a balloon. It is inflated to the desired size and wrapped with twine soaked in epoxy glue. After the glue hardens, the ball is pierced and removed.
- Made from polystyrene foam. Several slabs of material are glued together. The resulting blank is turned into a ball using a knife and sandpaper. To make the surface of the ball smooth and hard, it must be burned over an open flame.
After this, a hole is made in the ball, which is filled with glue. This hole places the ball on the barrel. After the glue has hardened, the base is decorated with branches, leaves and flowers made of beads.
It is quite common to make artificial trees in the shape of a birch. The procedure is very similar to the technique of weaving coral. For thick branches, wire 1.5-2 mm thick is used. A thin wire for beads is screwed to it. After this, a thread with stringed beads is wrapped around the thick branches. Work continues with thinner branches. As the thickness decreases, they are made triple, double and single. The connection is made by simple twisting. The final stage of creating a birch tree is finishing it with leaves. They are made separately and attached to the branches using loops left after weaving.
- French circular weaving - for flowers;
- knotting technique - for large beads and beads;
- coral - for spruce paws;
- dense oblique weaving - for large leaves;
- American tourniquet - for fruits.
When creating one tree, several weaving methods can be used.
Branches of the tree of happiness: weaving techniques
A common technique for making coral topiary branches is to create loops by passing a thread or wire through several beads and returning it back through the same beads. Then the two ends that came out of the last bead diverge in different directions and are used to create the next loops. This method is convenient for making, for example, spruce paws. An alternative technique is to string several beads, push them into the center of the wire, then bend and twist the wire.
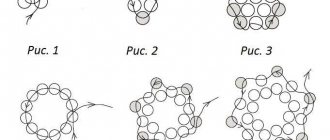
To make flowers that can be used to decorate topiary, the technique of French circular weaving or arching is used. Its essence is that at the beginning of the wire they twist a loop, string the beads of the first row, then make a loop from the other end of the wire, string the second row, close it by turning the wire around the wire on which the first row is strung. In this way, the required number of rows is collected, and then the initial small loop is untwisted and a flower is formed by passing the freed end of the wire through several beads of the last row.
The “tree of happiness” topiary is considered a kind of talisman. Many people believe that this tree attracts prosperity and positive emotions into the home.
Other techniques that can be used when making topiary:
- Knotting technique (for large beads and seed beads);
- Dense oblique weaving - for large leaves;
- American tourniquet - for fruits.
Forming branches
You can use individual beads, or you can use pre-prepared groups of several beads, leaves or flowers. By forming long loops from blanks of spruce paws, flowers or leaves, we form branches. The free ends of the loops are twisted, creating branches of the future tree.
The most common technique is to twist the pieces in pairs, then combine pairs, then pairs of such combined pairs, and so on until branches of the desired length are formed.
The frequency of arrangement of prepared leaves or flowers can be any and depend on your plan. The structure of the branches obtained by repeatedly twisting already twisted blanks is very beautiful, it resembles trees growing on the bare rocks of the northern mountains and twisted by the wind, or the trunks of Japanese dwarf bonsai trees. There is no need to decorate them with threads.
As for the materials for the tree of happiness, it can be beads, paper, stones or artificial flowers
The branches can be made differently: making two or three turns just to secure the leaf or flower, leaving straight parallel ends. Then, folding several leaves or flowers, tightly wrap the free ends of the wire with a thread coated with glue. Don't forget to leave the ends of the wire that you will use to connect the branches to the trunk.
