How to cut snowflakes?
How to cut snowflakes?
Cutting out snowflakes is a New Year's activity that we all have loved since childhood. But not everyone knows how many ways there are to cut a beautiful and original snowflake with your own hands. In our article we will tell you how to cut snowflakes correctly and not only cut them, but in general how to make completely different types of snowflakes.
To begin with, we will introduce you to how to cut simple snowflakes from paper. The general manufacturing scheme is as follows:
- A square sheet of paper is folded diagonally twice.
- The result is an isosceles triangle.
- Then you fold both edges of the triangle towards the middle so that an acute angle is formed at the top and two corners at the bottom.
- The bottom corners must be trimmed.
The following are possible cutting options:
Video on how to cut out snowflakes (the easiest way)
How to cut voluminous snowflakes-stars
You perform steps 1 and 2 from the first example. Next, cut the triangle diagonally (as shown in the picture).
When you open the star, you will have 12 folds from the center or 3 long folds from one pointy end of the sheet to the other and 3 more in between. (see photo on the link).
All bends at the sharp ends should be bent in one direction, and bends between the ends should be bent in the opposite direction. In other words, the position of the 12 folds from the center should alternate. Either relief or flatness will appear.
How to cut beautiful snowflakes from napkins
It’s better to start with the most ordinary white napkins. They are usually square and folded into quarters.
- You will also need scissors and a 60 degree triangle. It is best to use an equilateral triangle, in which all angles are equal to 60 degrees. You can print and cut out such a triangle (it is shown in the picture).
- Next, open the napkin so that it remains folded only in half.
- Bend the end of the napkin at a 60-degree angle, using a triangle for accuracy (place it in the middle of the bottom of the napkin).
- Next, do the same with the other end, then fold the napkin in half. Cut off the bottom corner and cut out the snowflake according to the samples.
Volumetric snowflakes 3D
Making such snowflakes is not much more difficult than two-dimensional ones, but they look simply gorgeous and will be a wonderful decoration on your Christmas tree, chandelier or window.
Necessary materials:
- 6 sheets of paper;
- scissors;
- tape, glue, or a stationery stapler.
- To get a regular square from a rectangular A4 sheet, bend one of the corners towards the middle and cut the rest of the sheet along the resulting line.
- Fold the resulting square in half diagonally.
- Make 3 parallel cuts of 1 cm each on each side of the middle, starting from the edges.
(see photo on the link). You can also fold the resulting triangle in half again so that the cuts come out evenly (although this is not suitable for very thick paper). - Expand the square.
Connect the corners of the inner square. To connect, you can use glue, tape, or, the simplest thing, use a stapler. - Further from the center, connect the strips, alternating directions. As a result, you should end up with a snowflake petal. (see photo).
- It is necessary to make 6 of the same petals.
- Next, use a stapler to connect the middles of the petals, first 3 at a time, then all 6 together. It would also be good to fasten the edges of the petals together for reliability.
- The finished snowflake can be hung on a thread anywhere. Such snowflakes look very good on a chandelier.
Snowflakes using quilling technique
Quilling (Amytree) - making compositions from twisted long and narrow strips of paper.
This snowflake (see photo on the link) consists of 13 paper strips of 4 inches (about 10 cm) each.
The easiest option for quilling - without using special tools - is to twist the strips by hand.
- You need to bend one end of the strip and twist the strip into a tight spiral.
- Then you need to insert the spiral into a small round hole (ruler, etc.) You will get a looser spiral.
- Next, you need to drip a little glue onto the tip of the spiral. Thus, you will have a blank - the middle for the future snowflake. In total we will need 13 such blanks.
- To make a petal-shaped blank, simply squeeze the circle blank with your fingers on both sides. This has to be done with six blanks.
- Fold the remaining six strips in half and glue from the fold to the middle, twisting the ends in different directions. (see photo on the link)
- Now carefully glue the pieces together.
We have provided you with many diagrams on how to cut out beautiful snowflakes, but you can try your hand at more complex options. In quilling, as in other presented methods of making snowflakes, there are no limits to your imagination!
Source: https://elhow.ru/razvlechenija/hobbi/podelki/kak-vyrezat-snezhinki
For window decoration
This instruction is suitable for those who want to decorate windows with snowflakes for the New Year.
1 way
To make a snowflake you will need:
- pencil or pen;
- scissors;
- napkins.
Take napkins of any color and scissors.
Cut four squares from napkins.
Fold the squares four times.
Fold the square in half. A triangle emerges.
Fold one of the corners as in the photo.
Cut all workpieces to a sharp corner; the cut can be straight or wavy - whatever you like.
Make patterns on all sides. The patterns are full of variety - choose which one you like.
Video about selecting patterns for snowflakes:
Unfold the resulting snowflake.
Cut out any number of snowflakes this way. They can be different in shape and size.
Method 2
Required for work:
- pencil or pen;
- scissors;
- foil (you can take from chocolate).
Cut out several squares from foil.
Fold as in the photo below so that you end up with six rays:
Use a pen or pencil to draw various patterns:
Cut out patterns with scissors.
Expand the snowflakes. The craft is ready! You can hang products on windows.
Photos of possible variations for making snowflakes from paper; they can also be used for cardboard with foil:
How to make a snowflake from a napkin?
White small snowflakes captivate with their beauty. And most likely, for this reason, snowflakes have become the main symbol of the New Year and winter celebrations.
From single snowflakes it is possible to later make large Christmas garlands, so such crafts have not gone out of fashion for a hundred years.
Nowadays, such snowflakes can be seen in absolutely all houses - they decorate the interior of apartments, hang them on the Christmas tree, and also decorate windows. There are a variety of techniques available for carving beautiful ornaments. We will tell you in this article how to make a snowflake from a napkin.
Getting ready for the creative process
For this you will need:
- scissors - depending on the size of the napkin and the desired pattern, you can take ordinary stationery and manicure scissors;
- napkin;
- fantasy.
To cut out ordinary snowflakes, you first need to prepare the blank, and only then fold it correctly.
Preparing the base:
- Take a square napkin and fold it in half to form a triangle.
- This triangle is again formed in half in the center.
- The acquired shape is bent in such a way that its upper corners do not move, that is, its lower part is divided in half.
- The triangle is formed in a similar way one more time.
- As a result, a narrow piece comes out with a small tail on top - it can be trimmed.
- In this form, lines are drawn along which to cut out a snowflake - here there is no need to limit your imagination.
To create an openwork pattern on a napkin, holes and slits of varying lengths and thicknesses are made with scissors on a folded base. You can imagine what this or that element will look like after a couple of test crafts have been created.
As you can see, making a snowflake from a napkin with your own hands is completely simple. It all depends on your imagination, and it’s impossible to make mistakes; every bend of the scissors will give your snowflake a zest and uniqueness.
You need to apply effort, patience and, of course, accuracy in this matter.
Video material
Do-it-yourself openwork paper napkins are now a very common type of design. Crafts made with your own hands serve as excellent decorations for home and office interiors, and for decorating special events. Openwork paper napkins are elegant and look great, and such decor will cost mere pennies.
Source: https://serviceyard.net/sovetyi/kak-sdelat-snezhinku-iz-salfetki.html
Video material
Do-it-yourself openwork paper napkins are now a very common type of design. Crafts made with your own hands serve as excellent decorations for home and office interiors, and for decorating special events. Openwork paper napkins are elegant and look great, and such decor will cost mere pennies.
The technique for making snowflakes from napkins is virtually no different from making them from ordinary paper. Even a child can easily cope with this task. You just need one of the adults to show him how you can make beautiful light snowflakes out of napkins with your own hands. Which can then be glued to the window, placed on the Christmas tree or combined into original paper garlands. And our diagrams will tell you what kind of snowflakes you will get depending on a particular contour for cutting.
How to make a snowflake out of a napkin. Scheme 1
Please note that the photographs shown do not use napkins, but plain white paper. But this is only because in this way it is easier to demonstrate exactly how to fold a napkin blank - the paper better preserves the fold lines. And you use an ordinary napkin to make snowflakes - just stock up on them in sufficient quantities. As a rule, paper napkins are already square in shape, which is very convenient. And the size of the future snowflake directly depends on the size of the napkin you will use.
So. First, fold the napkin diagonally and get this triangle.
Now this triangle needs to be folded in half again. You should end up with a smaller triangle.
Take the right corner of this small triangle and bend it to the left, about one-third.
Now cover it with the left corner of the triangle bent to the right. Like this.
Cut off the top part. You can do this straight or in a semicircle, but then your future napkin snowflake will turn out round. If you want it to have pronounced rays, you need to cut the workpiece at a slight angle. Something like this.
Many people prefer to cut out snowflakes using some ready-made templates or stencils. But if you want your snowflake to be unique, unique and unrepeatable, start cutting it yourself, trusting only your intuition and imagination. First, you can cut out several triangular-shaped pieces from the sides of the workpiece, then continue cutting out more complex shapes. When you're done, unfold your workpiece - only very carefully. And you will get your own snowflake.
In order for it to be even, you need to lightly iron it with an iron. After the snowflake has cooled, you can use it at your own discretion, for example, hang it on a string from the ceiling or attach it to a window glass.
Schemes for making a snowflake napkin with your own hands
Well, for those who do not want to rely on their own imagination and skill, we offer several different schemes for making snowflakes from a napkin. You can apply the design you like with a pencil onto your workpiece and then cut it exactly according to this design. Use sharp nail scissors to cut out small details.
There is nothing more beautiful than the New Year holidays. This is a time of magic and fulfillment for many children. And of course, not a single such holiday can do without decorative decorations. And it’s best to completely immerse yourself in this celebration atmosphere by creating decorative snowflakes with your own hands using different patterns.
At first it may seem to you that it is easy and simple and you can do it without templates, but try it and see how much imagination you have. If you want to make each snowflake different from the other, we recommend using our article
.
Napkins are a very popular material for making snowflakes. If you are just starting to learn how to make napkins, then it is best to use plain paper to create a template, and then use it to transfer the design onto a napkin.
Materials you will need to create a snowflake:
- Square napkins are usually white.
- Pencil or pen to draw the template.
- Scissors.
After you have stocked up with a sufficient number of napkins and patience, we begin to draw templates for the napkins
.
Work execution algorithm
How to make a snowflake from a napkin with your own hands?
On the eve of the New Year holidays, everyone is trying to decorate their apartments. Sparkling garlands and bright tinsel create an atmosphere of magic and wonder.
But what is New Year without beautiful snowflakes? They can be cut out of paper, but it is best to use white napkins. Snowflakes made from them are light and airy.
In our article you will find the simplest master classes in which you can make various and very beautiful snowflakes.
1
Snowflake from a napkin in 5 minutes
These beautiful snowflakes can be used to decorate windows, walls and even a Christmas tree. It is very easy to cut them out; even a preschooler can cope with the task.
- Stage 1 - completely unfold the napkin, straighten all the folds well;
- Stage 2 - fold the napkin so that you get a triangle (you need to do this diagonally);
- Stage 3 - fold the triangle again;
- Stage 4 - bend the right corner of the triangle to the left corner, slightly more than the middle;
- Stage 5 - bend the left corner in the opposite direction (you should get a small figure with a “tail”);
- Stage 6 - cut this tail in a semicircle;
- Stage 7 - randomly cut out several circles and small triangles on the resulting blank (you give the snowflake an individual pattern);
- Stage 8 - once all the geometric shapes have been cut out, carefully unfold the snowflake.
The finished snowflake can be glued to a window or hung on a Christmas tree.
2
Volumetric snowflake made from napkins
An amazing New Year's decoration can be made in 10 minutes. The process of making such snowflakes is very entertaining and will appeal to both adults and children. To make snowflakes you will need a lot of white paper napkins.
- Stage 1 - completely unfold the napkin, straighten all the folds;
- Stage 2 - give the napkin the shape of a circle (you can take a plate and circle it, cut it out according to the drawing);
- Stage 3 - start folding each napkin so that you get an accordion;
- Stage 4 - fold the accordion in half and glue it (you can also use double-sided tape) along the inner edges (you should get a fan);
- Stage 5 - prepare three identical fans, glue their edges one by one, forming a circle.
Such snowflakes look impressive on the walls.
3
Snowflake pattern
If you don’t want to experiment and show imagination, then you can make a snowflake using a template. This blank can be printed or redrawn.
- Step 1 - fold the snowflake into a triangle shape, then fold it again;
- Step 2 - apply the drawing exactly the same as it is shown under number 4;
- Step 3 - cut exactly along the drawn lines (it is better to use nail scissors or special scissors for cutting paper);
- Step 4 - carefully unfold the napkin, avoid tears, as the paper is very thin and fragile.
You will get a snowflake, which is shown in the picture.
You can also use snowflake templates with Frozen cartoon characters.
4
Openwork snowflake from a napkin
Such a snowflake requires special care and accuracy, since the aesthetics of the finished decoration will depend on the quality of the work.
- Stage 1 - make a triangle out of a napkin, cut out 10 small triangles at the base of the fold;
- Stage 2 - fold a large triangle into another, but smaller triangle and cut out 10 small semicircles at the base of the fold (there should be a distance of 2-3 mm between the cut out semicircles);
- Stage 3 - again fold the napkin into a triangle and repeat stage 1;
- Stage 4 - alternate cutting out different shapes until the triangle becomes very small;
- Stage 5 - carefully unfold the napkin, let adults do this work, as the snowflake may tear.
If you are a real pro in making snowflakes, then you can cut out more complex geometric shapes.
Involve children in such interesting and entertaining work and create real New Year's masterpieces together!
Source: https://sovetclub.ru/kak-sdelat-snezhinku-iz-salfetki-svoimi-rukami
Snowflakes in the interior (photo)
DIY Christmas tree decorations in retro style (video)
Just look at this beauty, the snowflakes are so cute, delicate and airy, and most importantly, everyone can make them, be it an adult, a schoolchild or a preschool child.
By the way, kindergartens and schools are often decorated with just such snowflakes. The diagrams presented above are ideal for beginner handicrafts, as well as children. Although in fairness it is worth noting that there are more complex schemes. In this regard, start creating this beauty with simpler schemes, and you will definitely succeed. Well, we invite you to visit the New Year's section of our website, in which we have collected the brightest, most interesting and fabulously delightful decor ideas, with large selections of various master classes. WE RECOMMEND WATCHING (we are giving a gift on MARCH 8):
How to make a snowflake from a napkin?
How to make a snowflake from a napkin?
- Many different snowflakes can be made from napkins by cutting the folded sheet in different ways. To do this, you need to carefully fold the napkin - if you do this carelessly, then you can cut with scissors where it is not necessary and simply ruin the snowflake.
- Cutting a snowflake from a paper napkin is quite simple. To do this, you need to fold this napkin several times, apply a pattern and cut it out with scissors. At the same time, the more intricate the pattern itself and the greater the number of folds, the more beautiful the snowflake turns out.
Here are 12 simple patterns for New Year's music:
And here the master talks about how to apply the pattern correctly so that the snowflake has a professional look)
- It is easier to cut a snowflake from a napkin than from paper, since the napkin is thinner and more flexible than paper. The snowflake has six rays.
Therefore, you need to fold the napkin in half and then not in half, but in three, this way you get six sides of the snowflake. Then it is folded in half again and various figures are cut out along the folds.
I remember that I need to cut out a piece to make a beautiful snowflake.
It’s easier to roll and cut out a snowflake with the number of rays divisible by 4. But it will be an incorrect snowflake; such snowflakes do not exist in nature.
In this picture we see that six Christmas trees radiate from the center of the snowflake.
Real snowflake:
- Decorating your apartment or any other room for the upcoming New Year's celebration with cut out snowflakes is the fastest and easiest way. Cutting a snowflake from a napkin is not difficult at all. To do this, you only need scissors and napkins. Moreover, napkins can be not only white. The pictures show step by step how to cut a snowflake from paper:
Take a square napkin, fold it diagonally, then fold the resulting triangle in half and fold the edges over each other.
We cut off the lower ends, then draw a line along which we will cut out our snowflake; here there is no need to limit your imagination to anything.
- As a child, I often practiced cutting out snowflakes on New Year's Eve. Here it is important to know one rule (how to fold it correctly from the beginning), and then it’s a matter of practice and imagination, the field for experimentation is open.
So, take a napkin, fold it 4 times, if it works, you can do more. The principle of addition is shown in the photo.
And then we cut off the toe (the sharp corner of the napkin). Then we make various cuts along the edge of the napkin. Experiencedly you will find the option you need. You might ruin a few napkins, but you’ll get some exercise. Here's a video tutorial to help.
- Even children can figure out how to make a snowflake from a napkin. Therefore, quite often children in schools make discounts for the New Year and paste them on the windows.
But for people who are spoiled by various innovations and scientific progress, not the banal folding of a napkin several times and cutting out pieces with scissors, but something more advanced is suitable.
Original snowflakes made from ordinary napkins are presented here:
HOW TO MAKE A SNOWFLAKE FROM A NAPKIN
- To cut an openwork snowflake from a napkin, you need to fold the napkin several times to a square, then bend the square diagonally. We place the napkin at an acute angle towards us, and the adjacent sides of the square should coincide. Next, fold the napkin lengthwise again, you should get an angle of approximately 22.5 degrees. Next, according to the diagram, cut out a snowflake.
- Snowflakes made from napkins are even more beautiful than snowflakes made from paper. However, you can use many techniques for cutting paper snowflakes to make napkin snowflakes. So, for example, this technique works well (or you can change it to suit your taste):
- In my opinion, there is nothing simpler. I think almost everyone cut out snowflakes like this in childhood. In order to get a snowflake from a napkin, you need to fold the napkin several times and cut triangles of different sizes. When you unfold the napkin, you get a snowflake.
- Take a napkin, scissors, and cut out a snowflake! It's simple))))
- I remember as a child cutting out snowflakes from napkins. I folded the napkin into a triangle several times and simply cut out all sorts of diamonds, squares or figures in different places. It turned out beautiful. The more you roll the napkin, the more holes you will get.
I suggest watching the video, it’s easier to understand, but instead of paper we take a napkin, and everything else is the same.
- In order to make a snowflake from a napkin, you need to take a thick napkin. Of course, any napkin is suitable for a snowflake, but it is better if it is thick. We fold the napkin so that we get a corner, cutting it off will create the center of the snowflake. And then do it according to the plan. Here are some video lessons.
Source: https://info-4all.ru/dosug-i-razvlecheniya/kak-sdelat-snezhinku-iz-salfetki/
Cardboard miracle
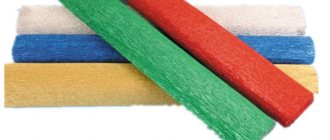
There is a huge amount of information on the Internet on how to make your own snowflake. To do this, you can use a hook, knitting needles, plastic, foil, paper, cardboard. In this master class we will look at how to make a snowflake from corrugated cardboard:
Material used:
- corrugated cardboard;
- paper;
- pencil or felt-tip pen;
- lace ribbon (about 15 cm);
- silver beads (or another color of your choice);
- scissors;
- glue;
- compass;
- thread with needle.
For this master class, blue cardboard was chosen:
First, you need to decide on the size of the future snowflake. Select the dishes according to size (or you can use a compass) and draw a circle of the appropriate diameter on plain paper.
Cut out the resulting circle with scissors.
Then fold the circle to make six rays. Draw a pattern for the future snowflake.
Cut out the drawn pattern with scissors.
Place the template on an upside down cardboard and trace the edges of the snowflake with a pen or felt-tip pen.
Next, cut out a snowflake from cardboard along the drawn outline.
Start decorating a snowflake - use your imagination.
Attach the openwork ribbon to the center of the snowflake, making small gathers and roll it into a ring.
On a note! If the ring turns out to be large, then make the gathers tighter, and vice versa.
Thus, select the desired length for the circle and sew the edges together.
On a fishing line or thread, collect the required number of beads and twist them into a ring (the size should correspond to the lace one).
Related article: Knitting patterns with descriptions: beautiful patterns of relief and Norwegian patterns with video tutorials
Attach both elements to the snowflake. The best option would be to sew them together, but not too tightly - the cardboard may tear.
All that remains is to decorate the rays of the snowflake. On smooth corrugated cardboard, the elements will stick poorly. For strong gluing, make small dimples, then pour glue into them and place the beads. Make a hole in the top beam and thread a ribbon through it - you can use it to hang a snowflake on the Christmas tree.
The craft is ready!
How to beautifully cut a snowflake out of paper step by step. How to fold paper
Who among us doesn’t remember how great it was to decorate the house for the New Year as a child? Now it’s time to teach your kids how to beautifully cut out a snowflake from paper step by step.
I have a decent collection. It includes templates for cutting (this article is already there, be sure to take a look at it), as well as three-dimensional crafts (this article is about to be published).
I am happy to share all this collected material with you!
how to beautifully cut out a snowflake from paper step by step
How to fold paper to cut out a snowflake
At the very beginning, at the preparation stage, it is worth deciding:
If you have already decided on this, then I will show you how to fold A4 cardboard. I will also show the benefits of napkins and foil.
From A4
Before you start bending the sheet, you need to give it a square shape. There are 3 ways to do this. I'll tell you step by step about each.
Method 1
- We fold thin cardboard diagonally. Cut off the excess strip.
- We get a square folded in half.
- We bend it in half 2 more times.
- Align the bottom.
Method 2
A hint can be found in the video.
- Fold the rectangle in half.
- Divide the fold side in the middle.
- From this point we bend one side and then the other side at an angle of 60⁰.
- Fold the workpiece in half.
- Cut off the “tail”.
Method 3
- We bend 2 corners to the middle of the sheet. We immediately get 2 blanks of the same size. They turn out a little smaller than regular ones.
- Cut off the bottom.
And then everything is as in the previous versions.
Napkin
This material has a big advantage - they are already square, they do not need to be aligned. Fold only; then you can cut out the pattern.
Foil
The folding pattern is the same as for paper. And the advantage of the material is that it is thin, which means you can bend it not 3, but 4 or more times. This means that the ornaments will be more delicate.
How many times can you fold a piece of paper?
It all depends on how many rays you want to get from your craft. If there are 4 rays, bending them 2 times is enough. All of the above methods are suitable for 6 beams. How can you get more rays? Not only due to the bends and folds, but also due to the design. Let's talk about this now.
How to cut beautiful snowflakes from paper
If you want to get a beautiful pattern, the easiest thing is to use a ready-made stencil with an ornament. Having a blank, you can come up with and repeat various simple patterns yourself.
There are several stencils here, see more in the gallery - pictures can be enlarged by clicking on them.
I'll tell you how to get three-dimensional designs.
New models using blanks
You will get such fluffy beauty if:
- At the base we cut off the “tail” at an acute angle.
- We make cuts parallel to the “tail”. The smaller the distance between them, the better.
- Let's expand.
You can stick a similar model on top, only smaller. It will be even fluffier.
3d model
It's amazing that you only need one A4 size cardboard!
- We make a strip out of it.
- We cut off the corners on both sides.
- We tie the middle with a thread.
- Cut so that each strip is separate.
- Fold all the strips in the middle and glue them to the base.
- Make 2 cuts on the edges. The length of the incision is 2.5 cm. The cut divided the width of the strip into 3 parts.
- The central part remains unchanged, but the outer parts are folded inward to create a heart shape.
We create a modular design
Last year we already made a modular snowflake, if you are interested, click on the picture
Ball design
You will need 12 flower parts, which we will cut out using a stencil. The picture shows a diagram of how to draw a stencil yourself, but you can take the last final version and trace it from the monitor.
- First we connect the 3 parts, threading them through the slits.
- Then, we connect each “flower” with 2 that are already in the design.
- We connect the last “flower” on all 5 sides.
It turns out to be a three-dimensional ball. You can choose its color yourself. Just in case, video on how to assemble such a ball
Another interesting option for a modular snowflake
Giant snowflake
Author of the idea and photo
To create such a huge snowflake, you can use wrapping paper.
You can repeat or create a snowflake model yourself. Show your kids and learn new ways!
We are all interested in your ideas! Tell us what you plan to make. Feel free to share this article with your friends. Don't forget to subscribe for new articles!
Source: https://daynotes.ru/kak_krasivo_vyrezat_snezhinku_iz_bumagi_poetapno/
Snowflakes from napkins. Best ideas and schemes
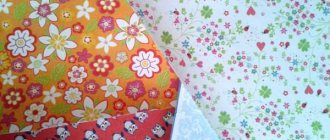
Snowflakes made from napkins , at first glance, are the simplest among the possible New Year's crafts that a preschool child can make with his own hands. But we also have ideas for experienced needlewomen that will definitely interest them. For example, we suggest using the decoupage technique, the main material of which is a napkin with a thematic pattern.
There are simple and complex, original and ordinary options for how to make a snowflake from a napkin .
You can use these ideas to decorate the interior before the New Year holidays; you can use them to decorate a kindergarten or a classroom at school.
These crafts are very simple, but with their help you can create a special winter mood in your home. And you can decorate the festive table with decorative roses.
The main advantage of the master class on how to make paper snowflakes is that this material is available to every family. Preschool children can work with it, but we also have interesting ideas for adult craftswomen.
How to make a snowflake from a napkin
The simplest option, do-it-yourself snowflakes from napkins , is to cut out an openwork figure along the contour. Using the same principle, we have already created original snowflakes using a white sheet of paper.
When working with napkins, you will not be able to cut out small elements, since the material is easy to tear and you will not be able to create thin lines. Typically, napkin snowflakes are rays consisting of large elements.
Unlike paper, it will be much easier for a child to cut several layers of a thin napkin, so preschoolers most often work with this kind of material. When you try to cut paper folded in several layers, you need to exert force and press hard on the scissors, and this can injure children's fingers.
It is impossible to draw a contour on such thin paper, so they cut them out along the lines that they imagine in the imagination. You will never get two identical New Year's snowflakes.
An original solution to using these crafts is to use them to decorate glass windows. To fix the elements on the glass, you need to attach a snowflake to the window, and on top, using a spray bottle, spray it with soapy water.
You need to sprinkle a little water so that the paper becomes slightly damp, but its integrity is not spoiled.
When it dries, it will be securely “glued” to the glass, and when the holidays are over, it can be easily removed, after which you need to wash the windows from soap stains.
Snowflakes from napkins
You can also get a snowflake from a napkin, the diagram for which should be drawn on cardboard. In this case, we will use the decoupage technique, with which you can decorate a dense figured base with napkin elements.
Firstly, in stores with various craft supplies you can find special openwork blanks for such crafts.
The blanks are made from wood, they can be decorated using the decoupage technique; additional decoration materials are also usually used: paints, sparkles, glitter, so that the snowflake turns out bright and very beautiful.
The workpiece already has a hole on one ray where you can thread a lace and tie a loop. The finished craft can be used as a Christmas tree decoration.
Such wooden toys are reminiscent of the old Christmas tree decorations that were popular in the 30s, and now flat toys are again in demand at New Year's fairs.
If you don’t want to buy a blank from a store, you can make it yourself, but for this we will not use wood (to make a blank from wood you will need not only special tools, but also special skills), but cardboard, an outline in this case can be cut using scissors.
The outline will be a traditional snowflake, consisting of six symmetrical rays. You need to draw an outline on the cardboard with a pencil, then cut out the six-pointed figure with scissors.
Make a hole on one ray with an awl, then we will insert a rope into this hole. Before you begin the decoupage technique, the brown base must be painted with white paint so that the design will then lay down beautifully.
You may need to apply several layers of paint; you can use gouache.
Make snowflakes from napkins in stages , taking the necessary pause after each stage so that the base has time to dry or the glue has time to set.
After the base is painted, it must be left for some time so that all layers of paint dry. At this time, you can prepare the napkin elements.
You need to choose napkins that depict snowflakes, winter landscapes, snow, and New Year's patterns. In any case, the choice of motive depends on your imagination.
Then the motifs need to be cut out. Each napkin consists of three layers; for decoupage, only the top layer is used, on which the design is applied.
If you decide to use the decoupage technique to decorate snowflakes from napkins, video and photo master classes from our website will help you understand this original technique for performing various crafts.
The base should be greased with PVA glue, the cut element should be attached and carefully straightened. Such snowflakes are made double-sided, they are decorated on both sides, but the designs can be different.
Source: https://myhandmade7.com/646-snezhinki-iz-salfetok-luchshie-idei-i-shemy.html
How to cut a snowflake using a paper template with your own hands
There is nothing more beautiful than the New Year holidays. This is a time of magic and fulfillment for many children. And of course, not a single such holiday can do without decorative decorations. And it’s best to completely immerse yourself in this celebration atmosphere by creating decorative snowflakes with your own hands using different patterns.
At first it may seem to you that it is easy and simple and you can do it without templates, but try it and see how much imagination you have. If you want to make each snowflake different from the other, we recommend using our article .
Snowflake from a napkin
Napkins are a very popular material for making snowflakes. If you are just starting to learn how to make napkins, then it is best to use plain paper to create a template, and then use it to transfer the design onto a napkin.
Materials you will need to create a snowflake:
- Square napkins are usually white.
- Pencil or pen to draw the template.
- Scissors.
After you have stocked up with a sufficient number of napkins and patience, we begin to draw templates for napkins .
Work execution algorithm
- Take a napkin; it should already have an even square shape. Fold it in half diagonally, a triangle should come out.
- We bend the resulting triangle in half again. Thus, look at the photo, a smaller triangle should come out.
- Now take one edge of the triangle and bend it in the opposite direction.
Make a bend about 1/3, and immediately close this bend with the other end of the triangle. Look carefully at the photo to see how this should be done. - Using scissors, trim off the excess paper to create a nice triangle again.
- Please note that you can cut off the top excess paper not straight, but at an angle, or by rounding the edges, you can be as creative as you like.
- Then we take a pencil and draw an arbitrary drawing, you can draw geometric shapes, small and large. Once you have drawn your design, you can start cutting it out.
- After you have made a snowflake from a napkin or paper, you need to iron it with an iron. So, it will be smooth and all the bends will be smoothed out.
Volumetric paper snowflakes
We described above how to make a snowflake from a napkin, now let’s look at a master class on creating a three-dimensional snowflake with your own hands . It is worth noting that cutting out and making this type of snowflakes is not much more difficult than ordinary ones, but the visual effect, of course, is much greater.
Such voluminous snowflakes are usually placed suspended on chandeliers if they are large, or on Christmas trees if they are small.
Attach it to the window and attach small ordinary snowflakes on the sides, it will be a wonderful composition, passers-by will simply be delighted with such a decorated window.
It will set a festive mood and delight the eyes of others.
Materials for creating a three-dimensional figure:
- Paper in the amount of 6 sheets, dimensions 20 by 30 cm.
- Scissors.
- Glue or it is best to use tape.
- Stapler.
Work execution algorithm
To get started, we need to make squares from 20 by 30 cm sheets of paper. To do this, bend the sheet and trim off the excess strip of paper. Do this manipulation with all sheets .
- After we have six regular squares, we begin to bend them according to the pattern. Pay attention to the photo, it shows a paper folding diagram. The squares need to be bent diagonally exactly in half.
- Take scissors and use them to make cuts on each side exactly to the middle. The width of each cut should be exactly 10 millimeters. Look at the photo to see how to correctly make parallel cuts on all sides.
- Now you need to lay out the square, and to connect the inner square, you can use glue, or best of all, a stapler.
- Then we begin to connect the strips, watch the direction of the strips, they should change. When you finish working on one of the squares, you will see that you will get one of the petals of a voluminous snowflake.
- Accordingly, we repeat all manipulations with the five remaining squares. You will get 6 beautiful petals.
- Take glue or, best of all, use a stapler and connect the petals together.
- Thread a thread and hang this beauty in your home.
Snowflake on a cardboard base, with decoration elements made from napkins
For such a beautiful fake you will need:
- Corrugated cardboard.
- Scissors.
- Stationery knife.
- Pencil.
- White napkin.
- Glue.
- Brush.
- White paint.
Video master classes on making snowflakes
Many masters and craftswomen find it much more convenient to receive information from videos. Looking at the videos, you can quickly understand how to make snowflakes with your own hands. For example, ballerina snowflakes are in fashion now. Indeed, the bizarre dance of falling snow flakes resembles the movements of ballet dancers. And at children's parties there are always several girls in airy white skirts racing around the Christmas tree, pretending to be snowflakes. This inspired needlewomen to cut out silhouettes of dancers in order to dress them in ballet tutus made of openwork paper snowflakes.
Snowflake ballerina
To make a snowflake ballerina, you will have to find a template for the silhouette, foil or white cardboard. Translating the template and cutting out the ballerina is not difficult. It is somewhat more difficult to make a flying pack for her in the shape of a paper snowflake. You can watch the video to see how to make it and dress the dancer. A ballerina is a three-dimensional product, so it needs to be hung and not glued to the window.
Large paper snowflakes
Huge snowflakes, a real New Year's panel on the wall - also an uplifting interior decoration. There are several options for making such masterpieces from napkins, colored paper, metallized lavsan and other materials. Combined snowflakes made of paper, napkins and cardboard or paper and fluffy cotton wool look interesting.