Snail
A snail is a clear example of a simple foil craft for children. It does not require special diligence to make, so it is suitable as a task for kindergarten-age children.
Since the product is simple, the result can be achieved on the first try, which is important for any child. Another advantage of this craft is that there is no need to use glue.
Prepare:
- metallized sheet;
- a Pepsi bottle cap;
- two pieces of wire.
Then follow the following instructions:
- Wrap the lid with foil.
- Fold another piece of foil into a strip. Its length should exceed the diameter of the lid by 3 times.
- Attach the parts to each other and insert the wire horns.
A snail made in this way will be an excellent decoration for a shelf with children's books.
Master class: “Making New Year’s decorations from foil”
Yulia Malashenko
Master class: “Making New Year’s decorations from foil”
Dear colleagues, I continue to introduce you to my new ideas on the topic: Making Christmas tree decorations and decorations from foil.
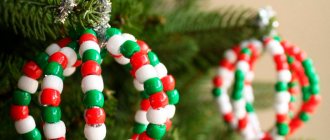
Today I will tell you how to make your own New Year's lanterns, silver decorations from plastic spools and beads for the Christmas tree.
Candy beads:
To make beads, we need empty cylinders - spools of sewing thread (they can be cardboard or plastic), decorative braid, foil or candy wrappers and a little imagination.
First, we string the coils onto the braid, leaving a small distance between them.
Then we alternately wrap the frame with foil or candy wrappers, tying the ends with thread or twisting them. If you wish, you can decorate the candies with decor. The beads are ready, you can decorate the Christmas tree with them.
Silver jewelry.
To make these jewelry I used the following materials and tools:
empty round spools of wire for beading, foil, seed beads, beads, rhinestones, buttons, “Snowflake” decor, “Bell” decor, ribbons, braid, scissors, universal glue.
We cut out two circles from foil, with a diameter slightly larger than the coil itself (allowances are needed for folding on the sides).
We first place a circle of foil on one side and tightly bend the edges, then we cover the other side of the coil.
We insert and tie a ribbon into the groove of the spool so that the decoration can be hung and begin to decorate.
Here's what I got:
New Year's lanterns.
To make lanterns, we need a cardboard frame from a box with egg cells, foil, ribbons, braid, beads, rhinestones, plastic skewers for “Canapes,” universal glue, scissors, an awl.
First you need to make blanks for the flashlight, I talked about this earlier (see Master class “Making a Christmas tree toy “Bell” from December 26, 2015). To make one lantern you will need two bell blanks, only without the “tongue”.
We pierce two holes in the upper part with an awl and tie a ribbon or braid for hanging.
Then the two halves need to be glued together and decorated with beads, rhinestones, and decorative elements from skewers. The flashlight is ready.
Under the bright light of Christmas tree garlands, these decorations will not go unnoticed, because the shine of silver will immediately attract people's attention.
Our New Year tree has been replenished with new silver decorations and beads. I suggest you try to do it yourself.
I wish you all creative success, thank you for your attention! Happy New Year.
"Autumn paper pendants." Master class on making hanging decorations Now in stores you can see and purchase a variety of ready-made products for interior decoration or select decorative elements.
Making New Year's toys from waste material. Master class The most fabulous and magical holiday is approaching: New Year! The children and I will make toys for the Christmas tree. I prefer to make toys.
Master class “Fantasies made from foil” Recently, on our favorite website, I saw crafts made from foil. They were unusual, elegant and easy to make. I decided to try it. It turned out,.
Master class “New Year's bells from foil” Master class “New Year's bells” I present to you a master class on making New Year's bells, we made this craft together.
Master class: making a toy using aluminum foil “New Year's Star” Dear colleagues, before the New Year, I continue to share with you interesting ideas for making New Year's toys using.
Master class on making New Year's decorations from CDs Hello, dear colleagues! Now the time has come when you can think about how and with what to decorate your group. There are a lot of options.
Master class “Candlestick made of foil” Greetings to everyone who visited my page! Friends, today I want to introduce you to a master class on a foil candlestick. I took the regular one.
Master class “Silver Miracle” - foil flower “Silver Miracle”. Every home always has unnecessary used things, which we often try to get rid of as quickly as possible.
Master class “Jewelry Box” Hello dear colleagues! I would like to present to you a master class on making boxes. I think these boxes would make a great gift.
Master class “Spider from foil” To make a spider you will need foil, a landscape sheet and scissors. Let's prepare sheets of foil: most of it for the body, 4 parts for the legs.
Fungus
A similar technology is used to create mushrooms. The basis for the hat can be a coat button, a semicircular cap, 1/2 an egg from Kinder-surprise. The element needs to be placed in the center of a piece of foil, wrapped in it, simultaneously twisting it into a mushroom stalk.
To make the craft more stable, it is better to make the lower part of the leg thicker. And for greater naturalness, you should dent the hat a little.
Decorating with foil
The foil can be torn into pieces and rolled into balls. In the future, they can be used to decorate various paper products. For example, by gluing them onto a sheep template, you can convey the texture of its fur.
As you can see in the photo of crafts made from foil, a similar method is also suitable for decorating a tennis ball and decorating gift wrapping.
Techniques for working with foil
There are several main ways to create light and more complex foil crafts:
- Embossing on the surface of the material.
- Rolling into tubes.
- Rolling shapes with your fingers.
For creative groups of younger ages, a simplified system for making children's crafts from foil is used by gluing a bright glossy figure onto a cardboard backing. This technique is quite simple and does not require any special tools or skills.
Fish
"Fish" is ideal for introducing children to the things that can be made from foil. To create the feeling of waves, the paper base needs to be painted blue, and then sprinkled with blue paint and sprinkled with salt.
You can use another sheet for the sky. It should be decorated in blue tones. It is recommended to rub the not dried paint with a paper napkin to make it more realistic. You need to slip a grid under the foil - when you run a stick over it, patterns similar to scales will appear.
Note!
DIY feeder - step-by-step instructions for creating a feeder + detailed diagrams with photo reviews- Do-it-yourself rugs - TOP 120 simple patterns with master classes on how to make them yourself + photo reviews of finished rugs
Do-it-yourself dolls: a master class on making a beautiful doll. Simple instructions with photo examples of ready-made options
The fish can be colored with a marker. When choosing a shade, you should use your imagination. Next, the figure needs to be cut out and glued onto a piece of paper with the sea, adding a picture of the sky to the composition.
little man
Here are the instructions for making a figurine of a man:
- Cut the metallized paper into strips measuring 100*400 mm.
- Roll each into cylinders.
- Bend the resulting blanks in half.
- Make a man's head at the bend point.
- Bend the ends of the cylinder, maintaining symmetry - these will be the handles.
- Twist the loose ends into a body, then separate them again and make legs.
Volumetric drawings
When creating crafts from foil with your own hands, you can use the extrusion technique. The simplest example is pressing the pattern of a coin with a cotton swab. If you do this with both sides of the money, and then cut and glue them together, you will get a means of payment for children's games.
Having gained experience, you can move on to making three-dimensional pictures. You need to apply the design you like onto a sheet of paper, circle it with glue and leave to dry. Then put a layer of foil on top and slowly begin to press it in with a cloth.
If you are too lazy to fuss with glue, then purchase special plastic backings with patterns.
Note!
- DIY satin ribbon bows - step-by-step instructions for creating unusual bows + detailed diagrams with photos
- Do-it-yourself furniture restoration: step-by-step master classes on restoration at home (120 photo ideas)
Do-it-yourself rack: step-by-step instructions with photos and descriptions on how to make an unusual rack
Festive flowers made of foil
A Christmas tree for the New Year 2020 will look quite unusual, decorated not with the usual balls and stars for all of us, but with flowers made with your own hands from foil. It’s very easy to make such a fragile-looking craft with a friendly family in just one evening. By spending time on such creativity, you will receive in return a spectacular transformation of your entire home on the eve of the upcoming holidays.
To do this you will need:
Progress:
- First you need to draw and cut out flowers from paper. You can use white or colored paper or cardboard.
- Foil rolled into a tube is glued along the edges of the petals. You need to do this work very carefully and then you will get a beautiful craft for the New Year 2021.
- The stem here can be wire, which is wrapped in silver material, which is used in all our products.
- In a similar way, it is worth making leaves for a flower. The more such lovely decorations you create, the richer and more elegant your forest guest will look in your home.
Video: master class on making flowers from foil
Twisting the foil
Another technique that can be used when working with foil is twisting. It is usually used if you want to make a wicker decoration.
To make flagella from foil, it is cut into strips 2 cm wide, and then each is rolled into a cylinder. Moreover, both kinks and crumpling are possible, as well as weaving the strips into each other if long blanks are required.
Flower
Another example of the use of flagella is a flower. It will require 6 - 8 pieces. Petals are made by folding strands in a certain way. The stem is also made from twisted foil.
To the end where the bud will be, you need to attach a ball rolled from a thin metal sheet. You need to insert the previously made petals into it. For greater effect, you can make leaves and stamens.
Note!
- Corrugated paper flowers: TOP 100 photos of ready-made options + instructions on how to make them yourself
DIY family tree: instructions for creating a family tree + DIY design ideas
Do-it-yourself sun lounger: photos with instructions for creating sun loungers + detailed diagrams of the stages of work
Basket
This item is more labor intensive to assemble. It can be created by children aged 7 years and older. How to make a craft from foil “Basket”? Flagella will also be needed here. From these, you first need to assemble the correct parallelepiped.
Then the decor twisted into spirals or stars should be attached to this blank. It is recommended to start from the bottom of the future basket. For reliability, the ornament can be fixed with glue.
The final stage will be creating and securing the handle. Since foil does not burn, such a craft can be used as a candlestick.
Sparkling New Year's garland
If you don’t know what crafts to make from foil for the New Year 2020 with your own hands quickly and effectively, then we advise you to be curious about our wonderful and easy idea. Despite the fact that this work will require patience and endurance, it is still worth taking advantage of this offer. After all, the result, to be honest, will unexpectedly surprise and even amaze you. A garland decorated with such variegated silver material and hung in all rooms will remind you of a shimmering scattering of silver, especially in the light of the playing lights located on the Christmas tree. You couldn’t think of anything simpler and more solemn for a New Year’s celebration. Let's look at a step-by-step master class right now, so that such beauty in your hands will turn silver today. By the way, if you have children, be sure to involve them in the creative process. It will be useful for them and quite exciting.
To do this you will need:
- Foil;
- Glue;
- fancy thread or thin twine;
- Scissors.
Progress:
- To make an elegant decoration for your home, you need to use foil. To do this, it should be cut into small strips 1 and 5 cm wide.
- Then they need to be glued into rings, joining each other. The chain must be braided to the desired length. If you want to hang it throughout the room, then you should make it as long as possible. It will look beautiful if you complement it with rings made of colored paper. This handmade craft in the form of a garland will look no less attractive on the Christmas tree for the New Year 2021.
The chic garland you have made can be diversified by adding voluminous stars attached to the main thread of the product. To do this, you should watch our video tutorial.
Master class on creating a three-dimensional star from foil and cardboard
Snowflakes
If everything turns out right for the child, then we advise you to start creating New Year’s crafts from foil - snowflakes. They can be made either according to a sample or using your own imagination.
An interesting idea is applique - for this you need to glue rolled balls to the snowflake you have made.
Flickering foil lanterns
If you still haven’t decided what crafts you will make from foil for the New Year 2021 with your own hands to decorate the whole house, be sure to check out our master class, which will provide you with the simplest option for handmade crafts at home - these are lanterns. Each of us is familiar with them firsthand, because this is one of the first works of every primary school student. Let's, as they say, remember our childhood and plunge into the world of creativity with our children.
To work you will need:
Manufacturing process:
- Take foil the size of a sheet of A4 paper and fold it in half. This way we mark the middle of the paper. After this, we align it, and fold the sides of the sheet, pulling it towards the highlighted center.
- Then, using scissors, we carefully cut strips 0.3 mm wide, not reaching 1 - 1.5 cm from the edge on both sides.
- We unfold the paper and roll it into a kind of cylinder, as in the photo.
- To prevent our craft from unfolding, we should secure its edges with small strips of tape.
- Don't forget to attach a handle to your flashlight so that you can hang the finished product on the Christmas tree.
Here, in principle, our handmade creation for the New Year 2021 is ready! This work, as you can see, does not present any difficulties. You just have to want it badly and everything will work out. By the way, in order for the interior of the house to attract everyone with its variety of colors and colorfulness, you must also use colored, corrugated and gift paper, double-sided bright cardboard and many other materials that you can easily and without problems get. You can complement ready-made lanterns or other New Year’s creations created from this entire assortment with some elegant ribbons, beads, rhinestones, rain, tinsel, confetti and sparkles. Jewelry decorated with organza or other fabrics will also look impressive. By showing your creativity and individuality, you will achieve excellent results in decorating your home.
If you suddenly don’t have foil, then don’t despair, because ordinary tea bags, which we are all used to throwing away, can also serve as a replacement. If you want to see this for yourself, then check out our video tutorial.
Master class on creating Christmas tree decorations from tea bags
Conclusion
Our article has now come to its end, which told you about how you can make many wonderful crafts from foil for the New Year 2021 with your own hands in a rather beautiful form. Believe me, with such charming works of art you can unforgettably transform not only the Christmas tree, but your entire home as a whole. With your efforts and original approach, you will transform the everyday life around you into magic, which will fill the hearts of all your family and guests with joy and anticipation of some miracle. Happy holiday, dear friends! All the best to you!
Rose
Making a rose is quite difficult. You will need special molds to create foil petals. Instructions can be found on the Internet.
Foil crafts are very popular today. This is due to the ease of their manufacture and incredibly impressive appearance. This creative activity will undoubtedly captivate everyone in the household. Creating products from foil will be interesting for both adults and children.
How to make a bunch of grapes from foil
To make the craft even easier, you can purchase a ready-made kit for making a bunch of grapes in advance at a craft store, which will have everything you need. But it’s much more interesting and exciting to create something yourself.
First of all, study the manufacturing technique and purchase foil for crafts or chocolates in such a wrapper. The latter will require about twenty pieces, so it is more practical to purchase a roll of foil for baking.
Prepare two templates: stems and berries (grapes). In order to make the latter, you need to form balls from foil with tails of two to three centimeters. To make a stem, twist the foil into a tube ten to thirteen centimeters long.
Twenty such blanks must be made of each type. Next, we tie together four or five grapes around one stem, thus forming a bunch. Make bunches from all available blanks, and then tie them into one large one.
To create leaves, you need to fold a star with five ends from foil tubes, the rays of which are also made from pre-prepared elements. Here you can show your imagination and create leaves of any desired shape. The main thing is the similarity to real leaves.
Read here: Animal crafts - a master class on how to make domestic and wild animals with your own hands (100 photo ideas)
Next, we combine all the prepared elements together and get a beautiful bunch of grapes that will undoubtedly decorate your interior.
The same method is suitable for making a large bunch of grapes for the dacha, under which you can hide from the hot sun. You can easily find photos and diagrams of large foil crafts on the Internet.

