What to make a craft house from
The following can be used as starting material:
- paper;
- cardboard;
- newspaper tubes;
- twigs or twigs;
- ready-made boxes or containers for various goods;
- polyurethane foam;
- salty dough;
- Styrofoam;
- wood and its derivatives;
- matches and other improvised materials.
When choosing a material, it is important to consider the purpose of the craft. If the house is intended for decoration, then it is easy to make it from paper. But gaming crafts must have a certain margin of safety. Therefore, it is reasonable to make a dollhouse from plywood or durable cardboard.
DIY straw crafts: photo gallery
The best posts
- Curtain or glass partition: what to choose for the bathroom?
- Adhesive for porcelain tiles: which one is better, tiled floor heating, frost-resistant outdoors, which one to choose for tiles
- Chest of drawers for storing jewelry: how to make it yourself?
- What color curtain will go with white wallpaper - Do you know?
- How to make curtains from glass beads with your own hands: master class
- Do-it-yourself installation of window sills and slopes
- How to make a homemade earth drill (pit drill, earth drill)
- DIY storage water heater
Small house made of paper
Crafting a paper house involves a lot of original design solutions.
- A spectacular paper house can decorate a New Year tree or complement the festive interior of the room.
- Made from paper, the fairy-tale house will serve as an excellent home craft for a thematic exhibition in a children's educational institution.
- Making the simplest structure using ready-made templates will help you spend your family leisure time productively.
Detailed instructions will help you cope with the work.
To create a miniature cottage you need to prepare:
- thick paper, white or multi-colored;
- glue;
- scissors;
- brush;
- markers or paints.
Schemes and templates for making a house are easy to download from the Internet.
Operating procedure.
- Having the templates, they need to be transferred to the prepared paper, traced and cut out.
- Fold the edges in the right places according to the diagram and glue them together.
- Phased production involves “installation” of the walls, fastening the structure to the base, and fixing the roof.
- You can decorate a house in different ways. Additional details can be glued on, drawn with paints or felt-tip pens.
A homemade paper structure can have a variety of designs. You can paint the house as you like, using a ballpoint pen, simple or colored pencils, or paints.
If you wish, you can create a whole series of New Year's decorations or a small paper town.
Craft a brownie from threads
The simplest option that even schoolchildren can do. Such a toy can become not only an interior decoration, but also a talisman for your home. And it will be interesting for the child to spend time creating a fairy-tale character.
The technology is very simple, and minimal materials are needed. You will need to prepare in advance: templates from the Internet, a set of colored cardboard and paper, white cardboard, yarn of any color, glue and scissors.
Probably the most difficult part of this craft is creating a pompom from yarn. If you have never made such crafts before, you will have to tinker a lot. If you can do this process, then you can make a lot of beautiful and unusual toys for any occasion.
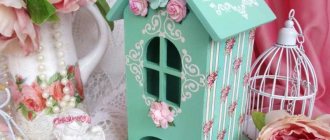
House out of a box
Using a ready-made box, making a house is quite simple. It is enough to cut holes in it for windows and cut a door. A triangular roof is made from cardboard on top.
For decoration, it is easy to use colored or wrapping paper, fabric, paints, twigs, and stones.
If the craft has a purely decorative purpose, you can not cut holes, but simply draw windows and doors.
You can use any strong boxes as a basis for creativity, including those for perfume, shoes, cereals, household appliances, various dairy products or juices.
Depending on the size of the box, in this way you can make not only a children’s craft, but also a cat house, a bird feeder, and a container for storing small items.
House made of tubes
An interesting hut can be made from newspaper or paper tubes. It’s a pleasure to make such a craft with your children.
First of all, you will need to twist a sufficient number of tubes.
Making straws
It is convenient to use newspapers as a base for tubes. If newspapers are not available, regular A4 paper will do.
- It is convenient to cut newspapers into 4 parts along the long edge. Sheets of office paper are cut in half.
- The tubes should be formed using a pencil or a thin knitting needle. The paper strip is placed at an angle of 45 degrees to the knitting needle and wound, gradually forming a long tube.
- The edge of the paper strip is fixed with a drop of glue.
The blanks can be pre-painted by placing them in a container with paint.
How to make a hut
- The tubes will need to be cut according to the dimensions of the future house.
- The log house is formed like the frame of a Russian hut.
- Having finished the walls, the roof is made from cardboard or the same tubes.
The roof can be decorated with colored paper. Stick a door and a window on the walls. If desired, you can create a whole composition by adding a fence and a well made of the same tubes to the hut.
Natural hut
If you want to make a hut from natural materials, then for this you will have to collect small pieces of natural materials. Let's collect small quantities of moss, thin branches, a few cones, and find a small, stable snag.
First, as in the first case, we will make a frame from cardboard, and we will glue natural materials onto it. It is convenient to use a heat gun for such purposes. Branches are suitable for the walls; stack them one on top, imitating the logs of a real hut, and cover all the walls.
If you decide to use cones, first soak them in the adhesive solution. Moss is suitable for decorating the roof. And a piece of driftwood that is quite stable will replace the legs of the hut. This craft is as close in appearance as possible to a natural fairy-tale hut. You can sew a pipe from matches, and use pieces of colored gray cotton wool to depict the smoke coming from it.
Related article: Rules for sharpening ceramic knives
Felt house
Those who love working with textile materials can make crafts from felt. The felt house can be voluminous or flat, in the form of an applique.
Felt is a very easy-to-work material that does not require any cutting processing. It’s easy to sew a house using ready-made patterns from the Internet or your own sketches.
Embroidery, textile appliqués, beads, braid or buttons are used for decoration.
Village made of toilet paper rolls
If you wish, it is easy to create a fairy-tale village of gnomes using toilet paper rolls as the basis for their houses.
To work you need to prepare:
- several bushings;
- scissors;
- glue;
- a couple of sheets of colored paper;
- markers.
Operating procedure.
- The bushings are cut in half, and the blanks are used as a base for houses.
- Cones of different sizes are made from sheets of colored paper. These are the roofs of the houses.
- The roofs are glued to the base.
- The houses are complemented with glued or painted windows and doors.
Using 4-6 bushings, you can quickly create an entire fairy-tale village.
Original version
We will show you a master class with photos on how to make an interesting hut. You will learn how to make a whole composition - a hut, Baba Yaga and even a mortar with a broom.
For such a composition you will need the following things:
- Set of colored paper, plain paper;
- Glue for paper, Glue moment;
- Leaves, slightly dried, a small piece of tree bark, branches, cones, moss;
- Fabric, thread, scissors;
- Felt pens and plasticine;
- And also a box for making a model.
The work begins with creating a base; we cover a regular cardboard lid with dry leaves. These can be the leaves of absolutely any tree.
Then we move on to creating the walls. The collected twigs are cut into sticks of the same length and the box is covered with them on all sides. After each side, give the glue time to dry and set well.
The roof is made from a sheet of cardboard. A rectangle of the appropriate size is bent in half and the walls are covered with it. When we glue the roof and it dries well, we decorate it with bark. We stick the legs to the bottom of the box and secure them well.
A piece of a very thick branch or a small log will serve as a mortar for our future Baba Yaga. We will mold it from plasticine. Let's take a color similar to your complexion - beige or any other light color. Let's glue parts of the face onto it, also from plasticine. Let's make the eyes black, with lighter pupils, the nose the color of the body and the mouth. We will tie a scarf on our head. Thin branches are quite suitable for hands.
Related article: DIY shoe decoupage
We will put the finished Baba Yaga in a mortar. Now let's create Baba Yaga's indispensable tool - her flying broom.
Let's collect the thinnest branches and gather them all around one larger one and tie them together. Using threads or glue that dries instantly, attach the broom to the Yaga’s branch arms.
The house should be supplemented with a ladder, which can be built from threads and branches.
Just four short crossbars and two long twigs are enough. Since we are preparing a composition for the purpose, and the house is located in the forest, we will make small pines from pine branches. To do this, we connect the prepared pine branches into a triangular shape, just like real trees.
Let's put a sitting owl made of pine cones and plasticine on a branch.
Now let's put the whole composition together. To do this, next to the hut installed and secured with plasticine, we begin to install all the prepared elements. We secure the owl's home - a branch with colorful lanterns. We install the stairs and glue the paper doors. Not far from the house we put a pine spruce, and next to it is Baba Yaga in a mortar.
Both children and adults will really like this hut with its inhabitants, and you can make it with the whole family.
Unusual crafts-houses
It’s easy to get ideas for making and decorating homemade crafts by studying photos of house crafts on the Internet.
- You can make Baba Yaga’s entertaining house from small twigs or pebbles. By using moss, reeds and dry grass for decoration, it is easy to create a unique product.
- It’s easy to make a house from polystyrene foam, polyurethane foam, plywood, leftover laminate or chipboard. It’s easy to make templates yourself or find suitable ones on the Internet.
- The house can be sewn from fabric, equipped with additional fasteners.
- Spectacular crafts are obtained by decorating cardboard bases with various natural materials.