What is mastic, is it difficult to make figures from it?
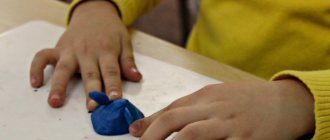
The mastic itself is an adhesive and astringent substance, which is also edible. If you knead it correctly, it will be similar in consistency to plasticine.
There are several varieties of this mass. It is created from different products and mixed in different ways. The most famous:
- Honey: This is a softer type. Suitable for sculpting almost any figures, does not crumble or fall apart;
- Gelatin-based mastic is distinguished by its high rate of hardening and hardening. Most suitable for preparing the smallest parts;
- Dairy is one of the most common. Condensed milk is used as the main ingredient. Ideal for creating a base and a continuous coating for a cake, as well as medium-sized figures;
- Marzipan is used to cover the cake. It is very soft and not suitable for sculpting figures;
- Industrial or universal mastic is bought in stores. It is used for modeling and rolled out for the base. The taste is practically no different from homemade;
- Floral - this type of mastic is best suited for creating jewelry that requires delicate work with small details.
Each of these types is good to one degree or another. In any case, you need to try different types in order to understand and adapt to this type of delicious modeling.
Soft caramel at home recipe is simple and tasty.
Read how to decorate a New Year's cake in 2021. The most complete collection of ideas.
What to cook for a children's birthday, recipes with step-by-step photos.
Recipe for sugar mastic for sculpting figures at home
| Ingredients | Quantity |
| Powdered milk - | approximately 150 g |
| Powdered sugar - | 150 g |
| Condensed milk - | 200 g |
| Lemon juice - | a couple of tablespoons |
| Cognac or flavoring - | tea spoon |
| Cooking time: 15 minutes | Calorie content per 100 grams: 383 Kcal |
Take a suitable container (a wide bowl will be enough), sift the powdered sugar into it, and then add the dry milk mixture. Stir and pour in condensed milk. Now you need to knead the mastic like dough. When mixing, add lemon juice, cognac, and dyes. The result should be an elastic mass that is pleasant to work with and sculpt.
If you do not add dyes, then the mass should be matte.
Milk mastic
Another name is condensed milk mastic. It is created on the basis of a dry mixture of cream, baby food or powdered milk.
Make sure that the powdered sugar is finely ground , otherwise the grains will give the composition heterogeneity, and the mass will tear when rolling. Condensed milk must be of high quality. The product from the Rogachev company has the necessary properties.
Recipe ingredients:
- 0.35 kg of Malyutka mixture;
- powdered sugar - 0.35 kg;
- 1 can of condensed milk.
Process:
- Stir the ingredients until smooth.
- Knead for no longer than 5 minutes, otherwise the product will change its structure and begin to crumble.
- Wrap in cling film and leave for 20-30 minutes at room temperature.
Handle the dairy product with dry, clean, starch-powdered hands. Feature of the mass: milk produces a yellowish tint . At the same time, it is impossible to achieve a snow-white color or pure blue.
Do-it-yourself children's figures from mastic for a cake step by step: instructions for beginners
The good thing about mastic is that you can use it to make a wide variety of figures and decorations for goodies. This is especially useful if you need to decorate a cake or pastries for a children's party.
Making a toddler from mastic step by step
To make such a cute little one, you will need flesh-colored mastic. To do this, when preparing the modeling mass, you need to add body dye.
Step 1. Making the body. We fashion a small oval the size of a small chicken egg. Take a toothpick and make a hole just below the center (this will be the navel).
Step 2. Sculpt the head. We take a piece of mastic about 20-25% smaller than on the body and roll it into a ball. You need to insert a toothpick into the upper part of the body. It will serve as a fastening element for the torso and head.
Use a toothpick to make a couple of holes in the head for the eyes. We sculpt the nose from a small piece of mastic: it should be a slightly flattened round piece with a diameter of about 4-5 mm.
We draw the mouth with a toothpick, and do not forget to make deeper indentations for the dimples.
For the ears we take two small balls. We roll them up and use a stack to make a dent in the center. Glue them to the head.
Step 3. We fasten the parts: we put the head on the base (toothpick).
Step 4. Making handles. Take a couple of pieces, a quarter smaller in size than the head. Roll them into sausages. Using a toothpick, make fingers at one end.
Step 5. Attach the arms to the body. If the parts do not stick together well, brush over the joining areas with a brush dipped in water.
You can diversify your baby with a toy or other elements you like.
Little mouse as decoration
First of all, prepare mastic of different colors. You will need yellow, light green, white and pink. For the eyes and mouth you will need black edible beads (powder). If black is not available, you can replace it with dark blue.
The tools you need to prepare are toothpicks, a glass, a mold for the base (a glass or glass will do), a sharp knife or cutter.
Step 1. Make a base from light green mastic. Roll it out to a thickness of 3 mm. We use either a special form or a glass (glass).
Step 2: gift. We take the yellow base. We first make a ball, and then gradually move on to a cubic shape.
The pink mastic needs to be rolled out quite thin: 1-2 mm thick. We take a knife or cutter and cut it into thin strips that will serve as ribbons for a gift. You also need to make a small bow out of them.
From the remains of the rolled out pink mastic you need to make small peas (we use a special form). Their diameter should be approximately 1-1.5 mm. Using a stack or toothpick, they are attached to the gift.
Step 3: mouse. White mastic is used to create the mouse body.
First we make the body: we roll it into a ball, then we try to give it a longer elongated shape. Next we make the paws, they are also slightly teardrop-shaped. Using a toothpick, we mark the stripes that separate the fingers.
We stick toothpicks into each part. We use halves for the paws since they are small. We fasten the body with the legs so that one serves as the base, and the second is in the air.
For the head we roll a ball, then we transform it: we make a notch just below the middle. We make a recess for the mouth and eyes. We insert black beads there. We make a nose out of pink mastic.
We take a couple of small pieces, roll them into balls, then use a stack to make indentations - these are the future ears. They need to be flattened well and the bottom part cut off. We attach them to the head.
Now we put the head on a toothpick securing the body.
The upper legs are made in much the same way as the lower ones, only they should be a little smaller. We make the tail from a thin sausage, which should become thinner towards one edge.
Step 4: flower. We make the stem for the future flower from light green mastic. Roll it into a thin strip 3-4 cm long above the mouse. We make a flower from a piece of pink base. It can be cut with a special shape. Using a stack, we make indentations on the petals. Then we cut out another flower, but smaller in size and make indentations in it. We make the middle from a yellow piece the size of a pea, rolled into a ball. We fasten everything together. From the green mastic we add a small leaf, which we add to the stem.
Lion cub
You will need 4 colors of mastic: yellow, white, brown and black, as well as tools.
Step 1: sculpt the body and head. The head should be in the shape of a ball, the body should be in the shape of a drop. From white mastic we cut out teardrop-shaped inserts on the body.
On the head for the mouth, add a little white mastic using the bent tip of a sharp stick.
We make eyes and sculpt round shapes around the mouth.
Step 2. We make the paws from yellow and white mastic: we sculpt the main part from yellow, and the part with the toes from white. Don't forget to make lines to separate the fingers.
First add white round parts to the recesses for the eyes, then, a little less, black ones. We make the nose in a triangular shape from the brown mass.
Then we sculpt the ears in the form of flattened circles, as well as the tail (a sausage that becomes thinner towards one end). At the tip we also make a triangular brush from brown mass.
Step 3. We make the mane from the brown mass. It is made in the form of separate petals, which are then attached around the head.
If there is white and black mass left, you can mix them and make pebbles on which the lion will sit. From green you can make splashes of grass.
Let's sculpt a panda step by step
Required:
- Mastic white and black;
- Modeling tools;
- A couple of toothpicks.
Step 1. Take the white mass and roll it into a ball. We make indentations for the eyes on it. We make small balls from the black mass, insert them into the recesses and expand them using a stack. Black color should be throughout the entire area of the recesses.
Add a ball of white mass (nose).
We finish the nose: add a black piece in which we make a couple of holes with a toothpick or a stack with a sharp tip.
Step 2. From small pieces of black and white mass we make eyes and ears.
The body consists of two parts: a round white one and an elongated black one. We fasten them with a toothpick.
Step 3. Make the paws from black mastic. They should be teardrop-shaped. Now you need to make pads out of white mastic for each paw.
Let's make an airplane
You need two colors of mastic: white and blue, as well as a toothpick or modeling glass with a sharp tip.
Step 1. We sculpt the white trapezoidal body of the airplane. We add a blue glass front glass to it.
Step 2. Sculpt the wings. Take a couple of balls, roll them out a little or knead them with your hands. Making triangular wings. We make the tail a little thinner and trapezoidal in shape.
Step 3. Add stripes to the wings, tail, and the main part using blue fondant.
Step 4. Make eyes from white and black mass. Draw out the mouth with a toothpick or stack.
Gelatin mastic
The confectionery mass allows you to make durable snow-white figures or achieve delicate cold shades . Once dry, the product becomes rock hard.
Products:
- gelatin - 2 grams;
- water - 2 tsp;
- 0.1 kg of powdered sugar;
- a couple drops of lime juice.
How to make mastic for a cake:
- Pour water into the gelatin and let it sit for half an hour.
- Warm up in the microwave for half a minute. Do not let it boil. Add powder, stirring constantly.
- If the product sticks, add more powder. If it crumbles, lime juice will help.
Store the workpiece wrapped in film. Pinch off pieces as needed. If the mixture has frozen and the work is not finished, try warming it up a little. But after such restoration it will no longer be possible to make fine details.
Useful tips
Sometimes, even following step-by-step detailed instructions, not everything works out and not always. Every craftswoman has a couple of secrets that help in the sculpting process:
- Sometimes it is quite difficult to cover the entire cake with fondant carefully. There are folds here and there on the sides that spoil the whole look. In this case, you should roll out the mastic in such a way that a sufficiently large reserve is maintained. Next, we place it on the cake and under its weight it should lie as it should;
- It's hard to find black dye. In this case, you can get out of the situation as follows: take three dyes (blue, yellow and red) and mix them in a ratio of 2:1:1. There is also the option of adding blue to brown paint;
- To make the mastic coating shine, it needs to be lubricated with a solution of vodka and honey. To prepare it, you need to mix both ingredients in equal quantities. Using a soft brush, lubricate the surface with the resulting liquid.
Fantasize and, perhaps, you will create your own individual figures from mastic, not like anyone else. Good luck!
Photo printing on mastic
Making cakes from mastic is combined with modern image printing technologies. Printing is ordered from companies that provide this service. Or purchase your own special printer. Photo printing on mastic for a pastry or cake is done on special paper - waffle and sugar.
Waffle - cheaper, without taste. Varies in thickness:
- Thick - does not bend, absorbs toner. The colors don't look bright on it. The material is suitable for covering dark cakes, as it is not translucent.
- Thin - translucent, the pattern on it is quite bright. Bendable, suitable for decorating light mastic. It is most often used for decorating gingerbread cookies and cupcakes, as well as for making airy details - butterflies, birds.
Do not allow the wafer paper to come into contact with creams or jams , otherwise the picture will get wet.
Images are attached to the surface with a solution:
- 1 part neutral gel;
- 3 parts sugar;
- 10 parts water or vodka.
The mixture is heated to a boil. Use after cooling.
Sugar paper is a thin paste made from sugar, which makes it sweet. Provides the best image quality - brightness, shade transition. The reverse side is protected by a film that must be removed before arranging the photograph on the product. Small elements need to be cut out without removing the protection, and only then remove the film.
Can be applied to cream if the underside is treated with melted chocolate. In other cases, the pictures are attached in the same way as from wafer paper. The protruding fragments of the decoration are collected on wire and then placed on the cake.
Sugar mastic
This species originated in the 17th century as a candy. Then it began to be used for decoration.
Ingredients:
- 0.45 kg of sweet powder;
- gelatin - 10 g;
- water - 50 ml;
- vegetable oil - 10 ml;
- chicken protein;
- 2-3 drops of lime juice.
Preparation steps:
- Pour in the gelatin and leave for half an hour.
- Sift the powder, mix with oil, juice and protein.
- Melt the gelatin.
- Mix all ingredients.
The product is highly elastic.
Honey mastic
Suitable for any job. Resistant to tearing.
Ingredients:
- sweet powder - 900 g;
- honey - 0.18 ml;
- water - 45-50 ml;
- gelatin - 3 teaspoons.
A way to make your own honey mastic for a cake for future use:
- Place gelatin in water for half an hour.
- Sift the powder.
- Stir gelatin with honey and heat in the microwave until dissolved. Add a glass of powder and add the rest to the syrup.
- Add powder as you knead.
The correct density is when, after pressing, the mass retains the shape of the depression. Product feature: can be stored for up to 3 months at room conditions.
Chocolate mastic
Made from dark or white chocolate. Easy to mix, pleasant to the taste. Classic chocolate must contain at least 53-55% cocoa beans.
Ingredients:
- chocolate two 100 gram bars;
- 60 g corn glucose;
- water 3 tsp;
- 4 tsp. Sahara.
How to make mastic for a cake:
- Boil the syrup by heating the sugar in water for five minutes. For the solution, it is more convenient to take triple the amount of ingredients, then use 1/3.
- Pour the syrup into the glucose. Melt the chocolate.
- Combine all ingredients, stir until the mixture begins to easily come away from the spatula.
Transfer to cling film, mark out portions, and leave to dry for a day. If using white chocolate, knead the product for 7-10 minutes longer.
