What is air plasticine?
Air plasticine is often found on store shelves under several names, the most common being:
- Marshmallow plasticine.
- Light plasticine.
- Solidifying mass for modeling.
- Velvet plasticine.
The material in question cannot be classified as ordinary plasticine, since when it interacts with air it begins to harden, and the crafts become similar to foam plastic products. This feature allows you not only to sculpt animals, cars and other objects, but also to play with them for a long time.
Crafts made from airy plasticine can be colored with a felt-tip pen or paint. And if the integrity of the toy is damaged, it will be enough to wet the damaged edges of the parts and press them tightly together.
We work with cardboard
Using multi-colored cardboard and paper, you can try to make various furniture for dolls and decorative items. For example, using the photos below, you can make a dressing table using old paint cardboard and pasting it with paper.
Article on the topic: Knitting a sweater with a neck for women and girls: pattern with description
The process of making a suitcase from paper can be traced using the example of a master class.
For work we will need a cardboard box, fabric, two stickers, black and openwork ribbons, four beads, scissors, glue.
Using scissors, cut the cardboard piece in half lengthwise.
We cover the outside with stickers.
We glue scraps of fabric inside and a black ribbon on three edges.
To close the suitcase, we will attach a Velcro fastener. And there are four beads on the bottom of the suitcase.
If desired, you can decorate with rhinestones. And this small suitcase is suitable for a Monster High or Barbie doll so that they can put their things in it for travel.
Advantages and disadvantages of the material
| Advantages | Flaws |
When working, you can combine several colors of the material without worrying about possible overlaps. |
|
However, regarding the last point of disadvantages, there is an option with minor manipulations that allow you to continue modeling from dried airy plasticine.
How to soften air plasticine
Crafts made from airy plasticine that were not completed due to the material drying out can be finished after the following steps:
- Plasticine is poured with boiling water;
- Infuse for 2 minutes;
- Takes out of the water and warms up.
The steps must be repeated until there are no lumps left in the material. It is important to pay attention to the fact that after the 2nd pour, not all of the plasticine is immersed in hot water, but only part of it containing lumps.
This feature is due to the fact that the material without lumps can simply dissolve in water.
Features of working with the material
The main feature of working with the material is its ability to quickly harden when exposed to air. For this reason, it is worth taking care in advance of an airtight container in which the remaining material will be stored.
Among other tips, it is important to pay attention to the following:
- Crafts should only be done with dry and clean hands. This is especially true for the manufacture of products from airy plasticine in light shades.
- The new plasticine is very soft and sticks to your fingers. To work with small parts, you should first knead it or leave it in the air for 5 minutes. Here it is important not to forget about the material and prevent it from hardening.
You need to make crafts from air plasticine quickly due to the rapid hardening of the material
- You have to work very quickly. It is necessary to avoid preparing a large number of blanks to prevent damage to the plasticine.
- When making large-sized crafts, you can use toothpicks to fix and further secure the product.
- When making food decorations, you can use a small bag. When the plasticine is new and just unpacked, squeezing it out like a real confectioner does will not be a problem.
- To make shaped or embossed parts, you can use molds and templates.
- While drying the finished craft, especially large ones, it is worth turning it periodically.
Elegant dress
The process of making a dress can be traced using the example of a master class on weaving from rubber bands. You can make it using the Monster Tail machine.
To work you will need 86 rubber bands of the same color and a hook. If you want to make a two-color dress, then you need to use 72 elastic bands of one color and 18 of another.
We put on the elastic bands, twisting them in a figure eight according to this pattern.
We throw on the next row in the simplest way.
We remove a pair of lower elastic bands in the middle using a hook. We knit the entire row in this way.
We put on the third row and again throw the elastic bands into the middle. Using this pattern, we weave eight more layers of elastic bands.
We begin to consolidate our work: from the last column we throw the elastic band onto the adjacent column.
We work on this post: we insert the hook inside it and use it to grab the bottom loop, which we will then throw onto the adjacent post. We weave clockwise.
After knitting the entire circle, put the last elastic band on the first pin.
We leave the row that is located on the line closer.
We put elastic bands on the pins and take off the bottom ones.
We weave 4 more rows like this.
When you weave six layers of elastic bands on four columns, then transfer the elastic band from the outermost column to the next one, which is counterclockwise.
Article on the topic: DIY snowflake for the New Year from napkins and foil
Now we remove the two lower elastic bands from the outermost pin for the next one. We weave to the end of the row.
At the very end, insert the hook into the post, take a couple of elastic bands, pull them tight and pass them through all the elastic bands on the post. They should be in the middle of the rubber bands. We put the second loop on the hook.
We pull another pair of elastic bands onto the hook and pull them through the previous two. So we weave three more rows.
We do not put the last loop on the hook, but hold it with our fingers. Bring it into the corner of our product and then put this loop on the end of the hook. We form a loop and tighten it, and our beautiful dress for the Barbie doll is ready.
How to make plasticine yourself?
If you urgently need airy plasticine of a certain color, then you can make the mass yourself.
To do this you will need the following ingredients and tools:
- Corn starch.
- PVA.
- Lemon juice.
- Dye of the desired shade.
- Vaseline or baby mineral oil.
- Mixing container and spatula.
The preparation of air plasticine takes place in the following sequence:
- Mix equal amounts of starch and glue. The resulting mass is placed on low heat.
- Lemon juice and oil are added to the container. To prepare 1 cup of plasticine, you need to take 2 tbsp. l. butter and 1 tbsp. l. juice The resulting mixture should have a homogeneous consistency.
- Next, dye is added to the material to obtain the desired shade. If you need a lot of colors, then the mixture is divided into several parts and dye of the required tone is poured into each of them.
- Leave the mixture on the stove for another 10 minutes until completely cooked. It is important to stir it constantly.
- Once the material has cooled slightly, it must be kneaded by hand. This will release all the air bubbles from the plasticine.
The shelf life of homemade lightweight plasticine is 4 weeks. However, the material should be kept in an airtight container or wrapped in cling film and stored in the refrigerator.
Making crafts from airy plasticine will not cause difficulties for either parents or their children. But the pleasure from such work and the impressions of the finished products will last for a very long time.
Article design: Natalie Podolskaya
Various crafts
What and how to sculpt ? It depends entirely on the child's imagination and level of skill.
I will show you pictures , videos and photos to motivate you and your kids to do what your little one can do and find interesting.
Figures
All your favorite characters can be molded from this plasticine and not just put on a shelf, but played with. Since they are durable, they do not stain your hands and do not deform after hardening.
View this post on Instagram
We tried air plasticine for the first time. I really liked it. It molds perfectly, holds its shape and sticks to each other, unlike playdoh. It dries up and turns into airy rubber. Very light. These are our first crafts made from it. It has a million uses: you can make casting molds from it, phone cases and full-fledged toys. Plasticine is very pleasant to the touch. It's nice to crush it in your hands. The child enjoyed playing with it, and mom and dad also had a lot of fun. I advise you to buy :) Advantages: Soft, silky to the touch. Beautiful colors. #what to do with a child #daynotes_play
Publication from Elena Selivanova (@daynotes.ru) June 25, 2021 at 7:04 PDT
We showed how we sculpt Kung Fu Panda using regular plasticine here.
Chips for games
Previously, we made chips from ordinary plasticine, but it sticks and loses its shape. But airy plasticine is perfect for making chips and cubes for purchased or homemade adventure games. We often sculpt the figures ourselves, because playing with ordinary cones is not interesting.
For the Minecraft adventure game, we made cubes - the heads of the characters.
For the game “Children's Corridor”, which is in the photo, we made mice and cheese from airy plasticine. By the way, a very interesting game, suitable for children of all ages and even adults. We made the field out of Legos.
Rules of the game in video from Igroveda
Food
You can make these cute cakes, donuts and ice cream yourself. Use them to decorate a child's room, make them as gifts, or use them as a refrigerator magnet.
Do you know how to make these simple cupcakes? When opening the plasticine, cut off a small corner of the bag and then, like from a pastry bag, you can decorate cakes and pastries by pressing on the bag with plasticine. A thin sausage will be squeezed out through the cut corner. By the way, by making such a small hole in the bags you protect the plasticine from drying out.
I’ll tell you a secret, or maybe not a secret: there are a lot of master classes on YouTube, look for “miniature food made from polymer clay.”
Several scans from a book on making tasty treats - enlarge by click.
Cases
In addition to funny toys, we create a very practical thing that will decorate our device and become an excellent gift for friends. You can decorate your case , or you can create your entire accessory from start to finish on a transparent silicone base.
The shape and idea of the cover itself and the appliqué on it may be different.
Great video!!! I really wanted this!))
Clothes for dolls
We prepare the dolls for winter - we make a warm dress, a hat and boots.
How to make a coat with a hood, mittens and boots for a doll.
Video - how to store, dry and remove clothes made from air plasticine:
Flowers
If you have good instructions, you can make from modest bouquets to more complex ones. Such flowers can decorate a mug, become part of jewelry, etc.
Badges
Look what cool badges you can make. If you glue them on a pin, you can decorate a backpack or jacket. If you use a magnet, you can make a superhero refrigerator. And this is literally in a matter of minutes! Even the smallest can do it.
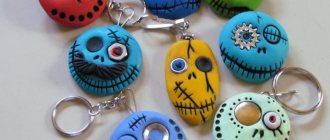
Keychains
There are a huge number of ideas for keychains. These can be goodies, cakes, ice cream and chocolates. Or maybe cute little animals, flowers and hearts, etc.
School supplies decorations
Of course, this is not all! This material is perfect for making chips and cubes for adventure games, clothes for dolls, or handmade Lego sets will look very cool! Any figures, for example, your little one's handprint, a bouncing ball, food or dishes for dolls.
