A variety of needles for felting: choosing the right ones
Needles for felting differ in shape and price. Felting or dry felting of wool is one of the few handicraft techniques that requires special tools, some of which are difficult to make yourself or replace with improvised means. In particular, this applies to all kinds of needles - the main assistants in the creation of felt products. It can be difficult for a novice felter to understand all the variety of needles offered for working with wool, because at first glance they differ in very little.
What does a felting needle look like?
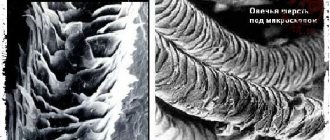
A felting needle is a sharp, thin stick with a jagged edge. Due to the fact that the teeth of such a needle catch the fibers of the wool when pierced, the return movement of the needle allows you to knock down the pile more tightly, gradually collapsing it into a tight ball. This is the principle of working with needles: frequent and deep punctures make it possible to transform the skein into felt.
Felting needles can differ in their shape and arrangement of barbs.
You can purchase needles for felting at a craft store or online
The most common types of needles are:
- A regular triangular needle of varying thickness. On all three edges of such a tool there are teeth aimed at capturing wool when piercing;
- The star needle has four edges dotted with notches. It is necessary for faster felting of wool, and at the end of the work it is easiest to correct minor defects in the work;
- The twisted “star” is a convenient needle for all stages. The notches on it are arranged in a spiral, and not above each other, and moreover, there are twice as many of them as on a regular “star”;
- The triangular twisted needle leaves virtually no holes. This is an ideal needle for finishing toys or small items;
- The “crown” needle also got its name because of its shape: its notches are located at the very tip and they do not catch a large amount of fibers. You can easily use it to roll strands of hair on a doll or carefully secure small parts of a toy.
- The reverse needle is so named because of the reverse arrangement of the notches.
For the initial stages and training in felting, it is quite enough to use a few basic triangle needles and a reverse needle.
How to Start Needle Felting 101: Tools and Techniques
Hi all! Today we will continue our adventures in learning crafts. This time we will learn what felting is and how to start a felt craft.
What are felting needles?
Felting is a technique in which different types of fibers are compressed and applied force to create a dense and durable shape. Animal fibers such as alpaca, camel, yak, cashmere, mohair, angora, and llama are widely used for felting craft. Although all these fibers have characteristics that allow them to feel.
What does it take to start felting?
- Wool using wool is characteristic of needle felting.
- Felting needles Felting needles have very sharp, piercing-cutting blades designed for professional use on wool fibers.
- Felting the surface To avoid injury, you need to get a special felting board. Sponges and foam pads work well for needle felting.
- Felt sheets are ideal for cutting into blanks, costume making, scenery, bulletin board backdrops, and school projects.
Start felting now
What are the basic techniques for starting felting?
- Firm is the most important method for needle felting. You won't have to firm very hard, but still spring back when the flattening is mainly with your feet and head.
- Rolling up the body parts is quite difficult before you start feeling it to save a little time.
- Needles for felting a short stab into your wool. Your needle should not disappear into the foam block and is unlikely to puncture the foam.
- When you feel any parts of the body, do not forget to turn on . This will add structure to your finished product.
What can you do with a felting needle?
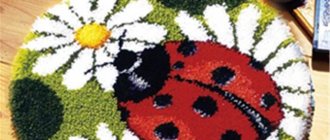
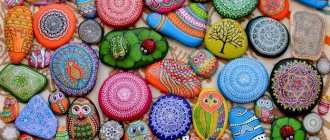
One of the most interesting creations made from felt is an animal. Because it is very easy to imitate fur with felt and the animals look very realistic. But don't limit your imagination, you can create anything with felt!
Don't know where to start? Try our wonderful DIY kits for beginners now:
| Shower sponges felt sets This creativity kit will allow you to create a washcloth soap with your own hands using the wet felting technique. You will also need bulk soap size approx. 5.5 x 9 cm. You will use special needles to attach pieces of colored SOAP wool and create a pattern according to the pattern. How to do this is described in detail in the instructions and in the video seminar (QR code inside the package). |
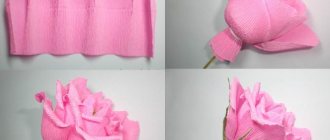
| Wall decoration painting Try a new type of painting, but use scraps of multi-colored wool rather than paint! This type of creativity is based on felting. Never heard of this technique? It's no problem; detailed instructions and a video master class are included in the kit to help you create soft and fluffy panels. |
| DIY magnet felt kits This set is ideal for children, allowing them to create crafts from the most incredible materials. An original set for creating a felt toy with magnets will really captivate a child and will be the best gift for your talented little one! The set develops fine motor skills of the baby’s hands, coordination of movements, trains perseverance, accuracy, attentiveness, helps to form visual perception and artistic taste. |
| Baby felt shakers sets This is a cute kit for making a great toy gift. Hidden object develops tactile skills, visual and auditory perception. Inside you can hide the bells, beads and glitter that are included in the set. When shaken, the theme flourishes. New sounds, bright colors and soft textures will attract your baby's attention. |
| Children's toys felt sets This kit contains everything you need to create a DIY toy using the dry felting technique. All you need is a craft kit. Now everyone, even a beginner in felting, can quickly make beautiful toys. For further work you will need a sponge or a piece of dense foam, as well as glue to attach the eyes. |
| Picture in frame felt kits - Do you want to surprise your loved ones with a great gift? Give them a felt painting in a frame. We are sure everyone will love it. |
| Iron on felt patch kit Handicrafts and sewing are a great way to spend time with your child and create an unusual felting doll. The child will be delighted with the results of their work! Children love to create crafts from the most incredible materials. The original set for creating a truly felt doll will captivate the child and will be a good gift for a talented child! |
| Felt sheet Ideal for cutting into blanks, costume making, scenery, bulletin board backdrops, and school projects; Easy to iron and safe for children, good for many crafts and sewing DIY craft. Be prepared for all holidays and celebrations. |
FAQ
- How did it feel to do it?
Felt
- A textile material that is made with matting, condensing and pressing the fibers together. Felt can be made from natural fibers such as wool or animal hair, or from synthetic fibers such as petroleum-based acrylic or acrylonitrile or wood-based rayon.
- Got a feeling where to buy? Where to buy materials for felting?
You can buy all felt crafts supplies online on our website - click here.
- Can it feel like it will wash off?
You can wash the felt in the washing machine, you just have to wash it on the delicate cycle.
- Chong>maybe felt stroked?
You can iron the felt. The temperature at which you should set the iron depends on the fiber content of the felt.
- And did you feel it, where did it come from?
Felt
is the oldest type of fabric known in human history. He began to weave and knit together.
- When did it feel like it was invented?
The first felt was found in Turkey.
What needles are needed for dry felting: size and its meaning
In addition to their shape, dry felting needles vary in size. They are designated by numbers corresponding to the thickness of the needle. Typically, needles range from 0.5 mm thick to 1 mm. The principle of their marking is reminiscent of the designation of crochet hooks or knitting needles.
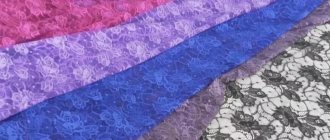
Dry and wet felting require different needles
The standard markings for triangular needles are as follows:
- Sizes No. 43-40: super-thin needles, which can be used to draw small details in detail at the final stage of felting;
- Sizes No. 36-38: medium needles, they are most often used in felting;
- Sizes No. 19-34: the thickest and coarsest needles that can be used for felting the main skein of wool at the first stage or felting wool that is too coarse.
This marking is typical for foreign needles; Russian manufacturers can use their own values. Their classification is very different.
For “Stars” the designation usually corresponds to No. 38 - a thick needle, No. 40 - a thin one.
Twisted needles can be marked with numbers 36 and 40, depending on the thickness, but “crowns” start only from size 38 - they are very thin.
LiveInternetLiveInternet
Triangular needles
Triangular needles - have a triangular cross-section and are used as starting needles for the initial stages of felting. Simple in shape, they ensure easy penetration of the needle into the product and speed up the felting process. These needles come in different thicknesses.
- Thick needles - used at the initial stage, they are used to dump coarse fibers.
- With medium-thick needles, you can felt the product from the beginning to the end.
- Thin needles are used for finishing parts.
Triangular needles come in 9 sizes. The sizes of foreign-made felting needles are given; our Russian needles have different markings.
Type Triangular (triangular section):
size 19 (very coarse and thick) Used for heavy work with coarse wool and plant fibers.
size 25 (very rough)
size: 32 (rough)
size: 34 (thick)
size: 36 (thick) Used for basic work with coarse wool.
size: 38 (medium) Universal needle.
size: 40 (fine) Suitable for fine wool fibers, small parts.
size: 42 (super thin) For final folding of the product.
size: 43 (ultra-thin)
Star needles
Star-shaped needles or they are also called “stars” have a tetrahedral cross-section. This allows wool fibers to be felted more efficiently (than triangular ones), this is due to the location and number of notches. These needles are used at the final stages of work, in voluminous toys. They polish the surface, they perfectly smooth the surface and do not leave small holes. They are also convenient for rolling flat parts.
Type Star (tetrahedral section “asterisk, star”):
- size: 38 (medium) - universal needle, suitable for working at all stages of felting. For felting flat parts (fins, ears, tails, etc.) to create reliefs.
- size: 40 (thin)
Crown needles
A distinctive feature of this needle is that the notches (notches) are located only at the end of the tip. The crown needle was developed by puppeteers. They are used to tumble in hair, eyelashes on dolls, and shaggy toys. The structure of the crown needle allows it to work only on the surface of the product and does not allow the decor to penetrate to the back side of the product. The “crown” needle does not embed the wool, but only fixes it; this is very convenient for felting patterns and decorating.
Type Crown
- size 36 Suitable for rolling hair into the head of toys, rolling spots and stripes.
- size: 38 (medium) thinner than 36 no.
- size: 40 (thin)
- size: 42 (super thin)
Inverted barb
The reverse needle got its name because the notches on it are located in the opposite direction. Using this needle, the fibers of wool are pulled out of the felted product. This allows you to achieve interesting effects, for example, fur on toys. The needle is used for final finishing of the product. Also, the reverse needle helps to finish the product on the other side, piercing it through (for places with inconvenient access, cavities, etc.). With this needle you can “comb” the wool, that is, mix the surface fibers with the fibers that lie deep inside. This can be clearly seen if the inner and outer fibers have different colors.
Type Reverse triangle
- size 32
- size 40
Fork needle
Fork needle, let’s say a few words about this needle. This needle is more often used by puppeteers than by fullers. The advantage of this needle is that with its help you can easily grab and place the smallest parts in the right place.
twisted needle
These needles are the latest in felting needles. This needle is different from standard felting needles. The difference is that the working area of this needle is twisted in a spiral. Thanks to its spiral structure, the needle is stronger than standard needles.
A twisted needle greatly speeds up the process of felting wool, due to the fact that the teeth on the twisted needle shaft are located along the entire diameter. And not one above the other, as in standard needles. In a standard needle, the lower notch captures the lint and takes it deep into the product, then the next notch may be left without work. The probability of wool fibers being caught by barbs in a twisted needle increases several times. Since the notches do not take away each other’s work, but each lay them down in its own vertical. Thus, each notch is maximally involved in the felting process. In addition to all the advantages, the holes from this needle become less noticeable due to its twisted axis.
For those who roll with a bunch of several needles (2-3 connected needles): you need to take into account that the resistance of the bunch of these twisted needles will be noticeably stronger than that of a bunch of standard needles. It will take more strength to break through the wool; strong fingers are needed here.
Type Twisted “star”
Size No. 36 (Thin needle) - on each side of the needle there are four notches - 16 in total, a regular “star” has only 8 notches. Ideal for felting toys. These needles are the fastest.
Type Triangular Twisted
Size No. 40 (Fine needle) - speeds up the felting process and leaves very small holes. They are used as finishing ones.
Reverse needle for felting: what is it for?
Separately in the general list of needles there is a reverse needle for felting. It is not used for main work, but it is still worth having in your arsenal: it will come in handy if you need to create a slight fluffiness on the surface of the product. This needle is usually used to make animal hair, hair or light fluff on felted flowers and fruits. The principle of its operation is simple: it does not just dump the pile, but pulls it out a little during the return movement.
You should definitely purchase a return needle for the rest of the kit.
Only two numbers are used to designate reverse needles:
- Size No. 32 - a thick needle for felting thick wool or pulling back large tufts of fibers;
- Size No. 40 is a thin needle that can easily create a little fluffiness.
Another important function of the reverse needle is that it allows you to felt the wool from the reverse side of the product, and this is very important when creating cavities or hard-to-reach places (for example, under the paws of animals, in complex geometric shapes).
After the differences between the needles and their purpose have become clear, it is worth taking care of selecting suitable instruments and purchasing them.
Basics of dry felting techniques
If you have decided on the choice of materials, it’s time to start working directly. Where to begin?
Rowing tape and finished wool ball
Imagine, or better yet, draw in color on a piece of paper your future product. No matter what unusual shape it has, it can be mentally decomposed into simpler component parts, and that’s exactly how the figurine will lie, in parts.
Reminder: if you are going to make a figurine taller than 15 cm, it makes sense to make basic blanks for the main parts (torso, head) from sliver or coarse wool. This will significantly reduce material costs and will not affect the final appearance of the product.
How to prepare wool for felting?
From the general skein (especially if you are working with combing tape, which is most often found on store shelves), begin to separate individual feathers of wool for the future part. They should be prepared with a fair amount of reserve.
Reminder: during the work process, the initial volume of wool will decrease by about 3-4 times!
The selected strands are again separated in different directions until they are mixed into a completely homogeneous mass. Long fibers create unsightly furrows during the felting process, which is why it is so important to separate the wool into small fibers and mix them together.
The process of preparing wool for felting
If you have to make two or more identical parts, equal volume tufts of wool should be prepared in advance for all of them. If you start felting one paw and take up the other only when the first one is completely ready, you have very little chance of making identical parts.
How to lie?
Felting is a simple process that involves repeatedly sticking a needle into a ball of wool. The fibers are intertwined, and you use your hands to give them the desired shape.
From shapeless fibers we gradually begin to form simple shapes with a needle and hands, and gradually from detailed
Basic rules for dry felting:
- should always be felted on a base
- We always start work with a thicker needle, gradually changing it to thinner ones
- the needle should enter the material perpendicular to the working plane, movements should be uniform and fast enough
- While working, constantly rotate the part, processing all its sides at the same time, including the ends of thin parts
- at the initial stages of work, try to tightly felt the core of the part, sticking the needle deep
- While the wool is soft, give it the desired shape with your fingers, as when sculpting from plasticine
- The part can be considered finished only when the wool has acquired noticeable density. There should be no voids inside, the figurine should not be fleecy and should not be deformed when pressed with a finger
- if you plan to connect one piece to another, leave loose strands of wool at the joints
Reminder: if you need to change the dimensions of a part while its surface is still loose, add additional feathers of wool in the right places.
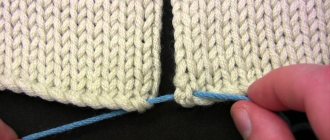
How to connect parts together?
Large pieces, such as the figurine's head and torso, are often found lying together as one piece. Smaller ones (paws, noses, ears, tails, etc.) are made separately. So that the parts can be reliably connected to each other, free, non-matted strands are left at the ends of the smaller pieces, which are then carefully rolled to the main part.
The mushroom cap has acquired a depression. There are free threads left on the legs for connecting parts
How to give the product a finished look?
Grinding
If you have connected all the details of the figure and are satisfied with the result, it’s time to proceed to the final, but important stage of the work - polishing. The surface should be dense, uniform and not lint-free.
We separate several small feathers from the main skein of wool, tearing them in different directions, turning them into light fluff without long fibers. We apply the resulting “cloud” to the part and carefully press it with the thinnest needle. We place the next cloud slightly overlapping and thus work the entire surface of the figure until it becomes absolutely smooth. The work is labor-intensive and painstaking, but without it the product will not acquire a neat appearance!
Memo: the pattern on the surface of the part is made in the same way, from downy “clouds” of the desired color.
Fungus, surface leveled, parts connected
Tinting
How to give a figure greater expressiveness and emphasize volume? To do this, it is best to use the tinting technique, applying a kind of makeup to the form. To do this, you can use acrylic paints diluted with water or crushed dry pastels. The last method is simpler and better suited for beginners.
Pastel crayons (you can use colored pencils instead) are finely crushed using a stationery knife and applied to the surface of the toy with a dry, soft brush. Krasiel can be lightly shaded with your fingers, creating soft transitions.
Crushed pastel crayons
Reminder: to give the detail greater depth, use a dark tint (2-3 tones darker than the main surface), to add volume and emphasize the convexity - lighter ones.
Anyone can learn the basics of dry felting techniques if they wish. This is a painstaking but extremely exciting creative process, the results of which will surely delight your friends and family. You can learn more about the stages of work in our subsequent master classes, from simple to complex.
Elizaveta Rumyantseva
Nothing is impossible for diligence and art.
Content
Felting (felting, felting) belongs to ancient varieties of needlework. Felted wool products created by craftswomen from all over the country sell like hot cakes in stores. Step-by-step wool felting for beginners allows you to make unique items. Felting is the creation of wool crafts by interlocking and interweaving fibers using several methods. The modern art of felting includes: wet felting, dry felting, nanofeltting.
Needles for felting wool and accessories for felting
Today you can find many brands and types of felting tools on sale, both dry and wet. The market includes both Russian needle manufacturers (for example, “Gamma”), and foreign, including English and German companies offering high-quality needles (the same “Rayher” or “Clover”). They differ primarily in price.
The quality is also slightly different: according to reviews from needlewomen, Gamma needles deteriorate faster, break easily, and are more fragile and flexible.
If you are going to engage in felting wool for a long time, it is recommended to buy only high-quality needles
If you need to choose needles for yourself, but you don’t know where to buy them, you can try ordering a trial ready-made felting kit on the Internet. Today, a large selection of such goods is offered by large handicraft trading platforms, for example, the Leonardo hobby store. Its assortment also includes other products that will be useful to the felter.
What you should buy for successful felting:
- Set of needles;
- Felting mat (it can be replaced with a wide thick sponge);
- Pimpled film for wet felting;
- Felting brush (slicker brush);
- Needle holder: in some cases it is more convenient to felt with several needles at once, which can easily be secured in the holder;
- Sliver is a base for wet felting or fabric for creating works using the “nunofelt” technique;
- Actually, wool.
If you like felting wool, in the future you can choose the most convenient needles for yourself and buy them separately. We recommend choosing needles with a wooden handle - they are more convenient to hold.
It's no secret that felting needles often break. This does not mean that you need to urgently buy a new needle, which can cost a lot of money. There are spare needles on sale that you can turn into a convenient tool yourself.
Do-it-yourself felting needle: repairing the tool
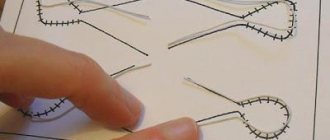
In order to fix a broken felting needle, you don’t have to be a professional or have any special abilities. The same goes for turning a not-so-convenient simple needle into a tool with a comfortable handle. All you need is an ordinary ballpoint pen with a screw-on top, foam rubber and a glue gun.
To make the needle convenient to use, you should buy a holder for it.
How to repair a felting needle:
- We wrap the foam rubber with plastic film;
- Unscrew the top part of the handle;
- We stick the needle into the foam rubber shallowly, to the level at which we will attach the handle;
- We put the upper part of the handle on the needle up to the foam;
- Pour a little silicone from a glue gun inside the top of the handle and align the needle until the glue hardens;
- Twist the handle and remove the foam from the needle.
In this simple way you can simplify your work and make the felting process a little easier, which is very important for beginning craftsmen.
Inverted barb
The reverse needle got its name because the notches on it are located in the opposite direction. Using this needle, the fibers of wool are pulled out of the felted product. This allows you to achieve interesting effects, for example, fur on toys. The needle is used for final finishing of the product. Also, the reverse needle helps to finish the product on the other side, piercing it through (for places with inconvenient access, cavities, etc.). With this needle you can “comb” the wool, that is, mix the surface fibers with the fibers that lie deep inside. This can be clearly seen if the inner and outer fibers have different colors.
Type Reverse triangle
— size 32
— size 40