Plasticine applique technique
Home → Files for downloading → Primary classes → Technology and Fine Arts
Explanatory note.
This material can be used in technology lessons, as well as in extracurricular work with children in first and second grades. The benefit of plasticine for fine motor skills lies in the modeling itself, and not in its result.
It is important that the baby crushes the plasticine, tears off pieces from it, and rolls them between his palms. And, of course, the easiest way is to get the child to perform these actions in a playful way.
Plasticine modeling helps children develop perseverance, attention, spatial thinking, imagination, and the concept of color and shape. In addition, modeling has a beneficial effect on the nervous system as a whole.
For the full text of the material Plasticine applique technique, see the downloadable file
.The page contains a fragment.
Thank you for your mark. If you want your name to be known to the author, log in to the site as a user
and click Thank you again. Your name will appear on this page.
Have an opinion? Leave a comment
Download material from Pedsovet.su Do you want to become a better computer user?
How to find and remove all extra spaces, replace E with E in Word documents
Often, when we work with documents of other people (colleagues, students, administration), we have to work not only with the content of the document, but also with its formatting and even editing of characters.
For example, some may put two or more spaces between words, make a red line with spaces, somewhere within the same text write E, and somewhere E.
Of course, if you edit this manually, it takes a lot of time, but there are automatic ways.
Direction “He and She”: arguments for the final essay
The direction will most likely require considerations of love first. Simply because this is the most common type of relationship between a man and a woman. But options for hatred, friendship and work relationships are also possible.
There is no point in listing all possible versions of works touching on the theme of love. However, it is advisable to take into account when preparing for the final essay that the topic can concern both mutual, “correct” love, and unrequited or “criminal” love, that is, illegal.
It is worth thinking in advance about how to cover such topics and on what material. If, for example, the writer intends to consider “criminal” love as an option for desirable self-expression, then it is worth turning to the novel by M.A.
Bulgakov's "The Master and Margarita" (Margarita is married, but loves the Master); if a graduate considers such love unacceptable, he can refer to the novel in verse “Eugene Onegin.”
Leave a review for the material:
Total: 10
Comment display order: Default Newest first Oldest first
Source: https://pedsovet.su/load/242-1-0-15895
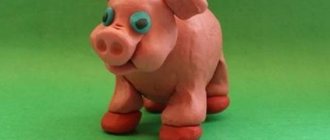
How to make a tiger from plasticine
Step 1. From the first block we create the body and head of the tiger. Cut a piece of mass into two parts and roll them into balls. From the larger piece we form an elongated body, and from the second piece we form a round head.
Step 2. Using a piece of skewer, match or toothpick, connect the two parts together.
Step 3. From the second block we sculpt the front and hind legs, tail and ears. Cut off 1/3 of the block, knead the mass and divide it into two parts. Let's give them this shape. The hind legs are ready.
Step 4. Cut off another piece of plasticine and roll it into a sausage. Cut it into two parts and smooth the edges. We got the front paws.
Step 5. Now we stick the blanks onto the body of the predator.
We complement the craft with a long tail and small rounded ears.
Step 6. From white cakes and a pink ball we form the face of a tiger.
And from white, green and black cakes we make the eyes of the animal. Add highlights to the edges of the eyes.
Step 7. Attach a fluffy white breast to the neck. We draw its outline using a stack.
Step 8. Glue pads made of white plasticine onto the hind legs.
Step 9. Now we begin the most painstaking work - creating the black stripes. Roll a piece of black plasticine into a thin sausage. We divide it into short pieces and stick them on the paws, head, tail and body of the tiger.
Print Thank you, great lesson +14
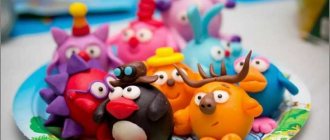
This beautiful exotic animal is listed in the Red Book as it is on the verge of extinction.
Unfortunately, there really aren’t that many tigers left on Earth, but they delight everyone with their greatness and grandiose appearance. This modeling lesson is about creating a tiger from plasticine. Here we will tell you step by step how you can create this lord of the jungle with your children. So, choose the right plasticine colors and tools and get to work. Other lessons on the topic of safari animals:
Plasticine applique lesson for children
Today we will talk about applications for children. This is something that every family can afford - to make crafts from plasticine on paper, cardboard, disk, whatever - waste material is excellent for making both appliques and children's crafts in general.
In the process of sculpting, children develop motor skills and gain shaping skills. Making plasticine crafts takes place in an emotional atmosphere. Therefore, the process cannot be left to chance. The abandoned children throw balls at each other, which are difficult to remove from their hair.
And they need to be occupied by creating applications, figurines, toys, characters from fairy tales, and favorite heroes! Then the time will pass with benefit and practical mastery of good useful skills.
Plastic art deserves special attention: it develops a child’s imagination better than other artistic materials.
Creating applications from plasticine is recommended for both children and teenagers. The difference is in the complexity of execution, the size of the work, and the timing of execution.
For an art studio, it is possible to specialize only in creating plasticine reliefs. Appliqués are much more convenient to display than three-dimensional figures.
The artistic value of works made of colored plastic is achieved through a stepwise smooth transition from simple to complex. The durability of crafts is achieved by using self-hardening masses.
How to make appliques
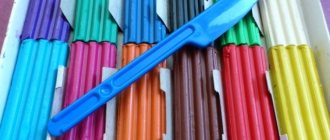
Preparation for modeling consists of purchasing wax plasticine, a plastic board, and a stack. A dry cloth is needed to clean your hands.
A mosaic of pieces of plasticine is assembled onto the lids of disposable food trays. Old computer disks will do. You can wrap the cardboard in plastic to prevent the grease-absorbing surface from becoming stained with wax.
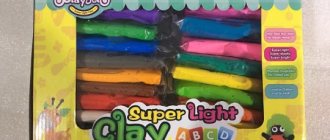
Important! A bright set with glycerin-based bars is not suitable for the learning process of creating appliqués. This kind of plasticine is difficult to knead even for an adult. Applications require softer plasticine, rather even medium softness.
At the beginning of the lesson, the topic is announced, in this case it is modeling an applique from plasticine.
The teacher demonstrates finished plasticine crafts. To activate thinking, you need photos and reproductions of paintings.
When working on a still life, you should show how to sculpt a flower, leaves, and other constituent elements. They remind you that the main techniques are rolling balls and strands, cutting and smoothing.
Modeling will help the study of Platonic solids. It is necessary to operate with trigonometric terms: prism, torus, sphere, cone, cylinder. This approach to names will make it easier to read orthogonal drawings in the future.
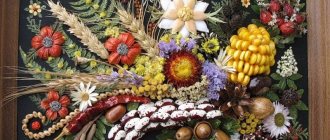
Modeling lessons are easily integrated with other subjects. After a natural history lesson with a story about the structure of a flower, it is quite logical to sculpt sepals, petals, and stamens from plasticine. A table about the parts of an inflorescence would also be appropriate for an art lesson.
Plasticineography in elementary school. Master Class
Plasticineography for younger schoolchildren
Master class on working with plasticine in a boarding school Plasticineography in a mixed group of a boarding school Plasticineography
“The Mood of Nature”
Author: Panteleeva Natalya Nikolaevna, teacher of boarding school No. 1 in Kirov
The master class is intended for children from 8 -11 years
Purpose: decoration of bedrooms. Goal: to teach how to make crafts using the plasticine technique. Objectives: teach how to perform work using the plasticineography technique;
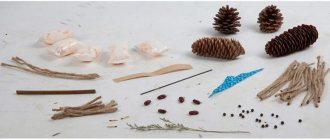
develop imagination, develop creative abilities, and the ability to aesthetically design an interior. To complete the work you will need the following materials:
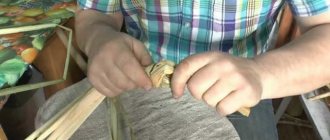
- frame - colored plasticine - stack - board for work
Progress of work:
I will mold the sky, the sun, a stream from plasticine, I will spread flowers everywhere, I will also wake up cornflowers, There are daisies, forget-me-nots and baby tulips.
Lives will smile and enjoy clear skies. With the gentle trepidation of spring, the warmth reveals itself, Who said that the world is a desert?! The grief soon faded away! I sculpt from plasticine, glass of all shades, I know for sure that I have been very lucky in my life with the world. I will collect the dew crystal - blue and inconspicuous, Let it remain forever only on a cherished leaf. I will leave a rainbow in the sky, seven colors of a beautiful soul, Let it shine as part of the world - from our bright nature. I will add beautiful birds, unique butterflies, an elk, a hare, maybe a mouse, sculpted from plasticine. And those who are dear to our hearts will be delighted by the picture, Because we are truly loved by this world! Author: Anna Pavlova Every year our school hosts the “Comfort of Bedrooms” competition. Each group tries to master a new type of creativity. Our latest hobby was plastinography.
Step-by-step process for completing the work:
1. To create a painting “The Mood of Nature” from plasticine, we need a frame, colored plasticine, a stack and a board for work.
2. Take the cardboard out of the frame to start working
3. Pinch off a little blue and white plasticine and combine them for further work.
4. Apply plasticine to the cardboard, smearing it, alternating colors
5. Finishing the white and blue background for the future painting
6. To make flowers, pinch off a small piece of red plasticine, roll the ball and flatten it with your index finger and thumb. The resulting cake should not be smooth, the edges should be wavy
7. We make several flat cakes of different sizes and bend the edges to class=”aligncenter” width=”627″ height=”470″[/img] 8. Place the flowers on the prepared background, lightly pressing them with a stack (photo 15)
9. We make flower centers. Pinch off the yellow plasticine. Roll the ball and add it to the center of the flower, pressing it with a stack of 10. We make unopened buds. We combine yellow and red plasticine (photo 19)
11. Distribute the buds evenly throughout the picture
12. To make flower stems, use yellow, brown and green plasticine
13. Combine 3 colors of plasticine and roll out the flagella, also roll out the yellow and brown stems separately
14. Adding stems to the picture
15. We complement the picture with kidneys, yellow and brown.
16. Insert the picture into the frame. The picture is ready. If desired, you can varnish the picture (use glossy wood varnish)
We recommend watching:
Master class on plasticine painting “Snowman in a snowflake”
Plasticineography. Painting Horse Application from plasticine on glass Plasticineography in elementary school
Similar articles:
Plasticineography as a means of developing the creative abilities of children with disabilities
Crafts for preschoolers for March 8th. Tulip for mom
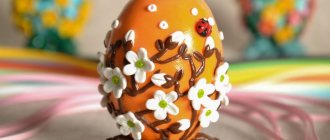
Application from plasticine. Easter Egg
Plasticineography. Reverse applique on glass
Plasticine poppy. Master Class