Plasticine pig on clover
A cute pink pig with a cute little heel and captivating eyes is a pet and a symbol of 2019, which can be a good souvenir and mini-gift for invited guests. Making it couldn’t be easier; just follow 12 step-by-step steps so that the final result is exactly the same as in the photo.
Step-by-step instructions + photos:
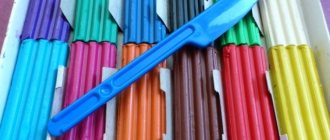
1) make 4 miniature flattened circles and use a modeling stick to make a slot on each of the legs; 2) roll an oval shape with your hands and attach it with molded legs (hooves); 3) using a plastic knife for working with plasticine, select a patch on the oval by poking holes in it; 4) mold the ears and tail, sticking them to the other parts; 5) add eyes by combining white plasticine with black; 6) use clovers cut using a special shape as a support.
How to make a pig
Before you mold a funny pig from plasticine, think about the shape. It could be a cartoon character, a book character, or a coloring book. Let the child choose the color of the figurine, decorations and sizes. Little craftsmen find it more interesting to work with simple round shapes; they are easier to sculpt. For older children, a plasticine pig with small details and decor is suitable.
A simple plasticine pig
For this figurine, a piece of mass is divided into 6 parts: a large one for the head and ears, a medium one for the body with a tail, 4 balls for the legs.
Step by step sculpting a pig from plasticine looks like this:
- roll a head ball out of a large piece;
- lightly press down the figure, highlighting the chubby cheeks;
- the eyes are made from plates of white plasticine, the pupil is black, but you can insert beads, it will turn out more beautiful;
- the patch is also made from a bead or button;
- the head is complemented with triangles of ears, they are molded from 2 small balls of plasticine;
- the middle piece is rolled in the shape of a ball - this is the body;
- the tail is made into a thin sausage, slightly twisted and fixed behind the body;
- the legs are made different - 2 larger, thicker - the rear, 2 thinner - the front;
- The ends of the future paws are divided in half by a stack, forming hooves.
The back and front legs are fixed to the body, let the plasticine good pig sit - it’s easier for the baby. The head is attached to the body using half a toothpick.
Expert opinion
Catherine
Sculpting expert
After 1–1.5 days, the mass will dry slightly, the toy can be coated with colorless or pink nail polish. The protective layer will protect the figure from dents and deformations during play.
Yellow pig made of plasticine
To fashion a yellow pig from plasticine, take a piece of material and make 2 oval blanks from it.
This will be the head and torso, then like this:
- Roll 4 small yellow sausages and 4 small pink plates. Sausages are legs, plates are hooves. The ends of the sausages are wrapped with plates, the shape is divided in half - you get hooves.
- Plates are made from 2 small ovals and given the shape of triangles. These will be the ears; they are attached to the oval of the head.
- The muzzle is decorated with eye beads and a snout button. If you don’t have any decor at hand, roll out eyes and a patch from pink or black plasticine. In the snout, 2 holes are made in a stack - nostrils.
They assemble the figurine, make a thin sausage out of a small piece of plasticine, roll it into a spiral - this is the tail. To hold the head more firmly, fix it with a toothpick.
This DIY yellow round plasticine pig can be of any size. Decorate the pig with a bow, ribbon, etc.
Piglet made of plasticine
Your child cannot live without the heroes of A. Milne’s book “Winnie the Pooh and Everything Everything” or enjoy watching a cartoon based on the works of sculpt Piglet. For this figurine you need pink, blue, white plasticine, some decor in the form of beads, a small button (nose patch) and black material for decorating the hooves.
Step by step sculpting Piglet looks like this:
- roll two balls, then make an oval for the head and a plump sausage for the body;
- A ball is rolled out of blue plasticine, several grooves are made on its surface, pressing with a stack;
- the grooves are filled with thin white sausages - these are Piglet’s pants;
- the body sausage is divided in half, one half is fixed on top of the “pants” (it’s more convenient to connect with a toothpick);
- Hands and legs are rolled out of the pink mass, their tips are decorated with black “hooves”;
- fix the legs and arms on Piglet’s carcass;
- The tip of the stacks marks the mouth, the button is attached to the muzzle (piglet);
- the eyes are made from beads;
- The ears are molded from pink plasticine, given the shape of a triangle, secured to the head, and one ear is bent.
Knowing how to make Piglet the pig, it’s not difficult to build figurines of all the cartoon characters. The child will have new toys made with his own hands.
Crafts of a plasticine pig on clover
The main nuance of sculpting is the green clover leaf on which you need to sit or lay the pig. Clover is formed from 4 plates of mass, fastened in the center; for realism, a leaf stem is attached from the same green plasticine.
After preparing the base, a figurine of a piglet is constructed. Before making a pig from plasticine, step by step think about the color and shape of the pig.
The simplest option is this:
- roll the head into a ball and the body into a sausage;
- connect two parts, smooth out the joints;
- Decorate the head with eye beads and a snout button;
- fix the ear triangles on the head;
- add a thin sausage tail to the body;
- Mark the legs in a stack, you get a lying piglet.
Now all that remains is to outline the smiling mouth in a stack and let the toy dry.
To make the figurine realistic, sprinkle a little dry dill or other herb on a clover leaf - you get a cute “pig in the hay.”
Peppa Pig made from plasticine for children
The charming fidget from the cartoon is a desirable toy for children.
There is no need to buy a figurine; sculpting Peppa Pig from plasticine will bring more pleasure:
- Prepare plasticine. You need a large piece of light material and 3 pieces of contrasting material.
- Roll a ball from the light mass and stretch it to an oval shape.
- A small cylinder is attached to the side - this is Peppa Pig's snout.
- Just below the snout, mark a mouth in a stack or make sponges from red plasticine.
- The eyes are made of beads or material of 2 colors: a black pupil on a white base.
- A sausage body is formed from a piece of mass of a contrasting shade. Roll 4 legs, the upper ones are complemented along the edges with fingers (notches with a stack), the lower ones - with hooves. The hooves are made from black plates, they are wrapped around the ends of the legs and the stack is divided in half - the hooves are ready.
- All that remains is to assemble the toy, secure the parts with toothpicks - and you can play.
The instructions on how to make Peppa the Pig step by step are simple, the child will love the game and will make the whole family of funny pigs.
Pig made from light airy plasticine
Airy plasticine is a material from which a child gets great pleasure when molding piglets. The plastic mass heats up quickly and takes any shape well. You don’t have to rub or crush the piece too much, and it’s okay if it gets on your clothes—the mass can be easily removed with a regular napkin.
Expert opinion
Catherine
Sculpting expert
Airy plasticine hardens perfectly in air within 10 hours, making the toy more durable.
The modeling is very simple - balls are rolled out of a couple of pieces, then one is completed with ears, a snout button and eye beads. The second piece (torso) is placed on 2 small round pieces (lower legs), and the tail sausage is attached to the back. The upper legs are made from two thin sausages. It turns out to be a very funny pig.
Do you often sculpt various animals?
Peppa pig made from plasticine
Children like plasticine Peppa much more than an ordinary pig. A piglet from a favorite cartoon looks much more enthusiastic than a pet living on a farm. It is enough to have plasticine of 4 shades, a modeling board and a plastic knife on hand to get a cartoon heroine from a material that creases easily.
How to make a pig from plasticine
What can you use to make a toy pig with your own hands? You can use absolutely any materials if you model crafts with your children. For example, plasticine, which is in every baby’s arsenal, is suitable. In this lesson I will show you how to make a pig from plasticine with your own hands.
DIY plasticine pig
To sculpt a pig you need to prepare:
- 1 or 2 bars of yellow plasticine;
- pink plasticine;
- white and red plasticine;
- a drop of blue plasticine;
- match or toothpick.
How to make a pig from plasticine with your own hands step by step
Prepare children's plasticine for work. Surely, you will find in it a convenient stack for dividing and processing blocks. Usually pigs are depicted as pink, but we will make a yellow one. Therefore, prepare plasticine of exactly this color. If you only have one yellow block, you can mix it with orange or white to create more mass to create a larger pig.
Knead the plasticine in your hands and roll a fairly large ball.
Divide this ball into pieces to create the head and ears, body and legs of the animal. For the head, make a smaller ball and squeeze it on one side. Also prepare small yellow balls for the ears and nose. To highlight all the details and make a patch, roll small beads from pink plasticine.
Turn 2 small yellow balls into flat droplets and stick pink beads on top. This way you will get floppy pig ears. Turn the pink ball into a round cake, stick a pink bead on top and pierce 2 holes with a match head. This way you will get a penny. Glue eyes with blue pupils and pink eyebrows onto the head.
Glue the patch in the center of the head, the bottom lip, and also the 2 ears on top. The pig's head is ready. You can put it aside for now, later we will put a New Year's hat on top.
Use the bulk of the yellow plasticine to sculpt the body - a large, weighty drop. Insert a match or toothpick into the sharp part of the drop.
Fasten the head and torso. Prepare a long red ribbon with white ends and striped with a stack. This will be a scarf for the pig. Also prepare a red cone for the cap. Add a white bead to the upper tip of the cone, and stick a white stripe at the bottom. Turn them into fur pieces.
Place a New Year's hat on your pig's head and a scarf on his neck. Also make arms and legs from the leftover yellow plasticine. Pink hooves are glued to the end of each piece.
Assemble the figurine completely, you can make the pig sit, then you will need to prepare a stand for it, or stand.
Crochet the pink sausage into a tail and glue it to the back to complete the pig's look.
Place your figurine on a pedestal and place it under the Christmas tree.
- How to crochet a dog applique
- How to make a chestnut spider
- How to make a ring with your own hands
- Autumn craft “Goldilocks Autumn”
- How to crochet a puppy with bows
- Crochet dog
- How to make a T-34 tank from plasticine with your own hands
- How to make a Jack-O-Lantern from a pumpkin
- DIY Sasha
- Puppy in a plasticine box
- Halloween pumpkin bookmark
- How to make a rat with your own hands