With a huge number of options for personal creativity, developmental complexes for children (which are also suitable for adults), ideas and materials, paper applique remains relevant, although it is developing along with the direction of paper fine art.
Abstract paper panel
Paper butterfly panel
White paper panel
Wall decoration
An incredible effect can be achieved by combining simple shapes and figures - a panel of colored paper made with scissors and glue.
Paper panel in the form of scales
Volumetric paper flowers
If we consider paper appliqués as a full-fledged material for decoration and expand our understanding of appliqué, the effect will be much greater than expected.
Paper flower panel
Wooden panel
A large abstract painting with wooden elements fits the definition of a panel. Moreover, you can try to make your own masterpiece, at the same time both an original activity and a way to relax.
A beautiful panel is made from sections of wood simply placed on glue and varnished.
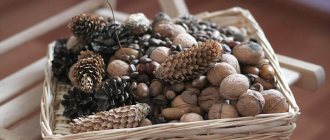
Article: what else can be made from branches for the interior - simple and beautiful
A small master class:
Look at this heart, it could adequately decorate not only an apartment, but also a stylish cafe or office. And you can do it yourself and it won’t require a lot of money (you only need to buy paint). So, let's look at a small tutorial on how to make it.
Necessary materials:
- Thin tree branches + 1 larger branch
- Dye
- Brush, palette
- Threads
- Cardboard
Step-by-step instruction:
- Step 1: Draw a heart. Take a large piece of cardboard (an old cardboard box will do) and draw a heart on it. You can also paint on paper, but then you will need to put newspapers under it so that later in the painting process the paint does not spill onto the floor, and cardboard is thick, so it immediately performs a protective function. Of course, you can draw any other outline you choose, which will be convenient to fill with twigs.
- Step 2: Lay out the branches. Place the branches inside the drawn outline. If necessary, break (or saw or cut) them to a suitable length.
- Step 3: Painting. Here the bottom half of the heart was painted, gradually changing color from bright pink at the bottom to white towards the middle. Leave to dry.
- Step 4: Attach the branches. Hang one large branch on the wall and tie all the branches to it, close to each other. Adjust the length of the threads to create a heart (or your chosen shape). Ready!
In the same way, you can make figures of other shapes, and even broken old chairs, frames, and other wooden objects are suitable for making.
More crafts from branches - with detailed lessons!
Paper accordions
Squares of colored paper are folded into accordions, then they need to be folded in half and stretched - you get a three-dimensional circle.
Paper pinwheels on the wall
Paper wall fans
You can make enough of them to cover part of the wall with them, for example, where the wallpaper is damaged (a real three-dimensional panel). Parts of the circles are fastened with glue or a stapler, then glued to the wall, randomly or in a pattern.
Easter paper panel
Doorway decor with paper
Additional crafting ideas
There are a lot of ideas for creating panels. You can use ready-made stories and add a little of your own. More creative individuals always strive to create something new and creative. The flight of human imagination is limitless, the main thing is to find ways and opportunities for its expression.
Macrame
The macrame technique is used to make flower pots, sofa cushions, small rugs and lampshades. However, knotted weaving also looks very original in the design of panels and is currently a fashion trend. It is especially relevant for interior design in Scandinavian, ethnic or eco style, and in country or Provence you simply cannot do without macrame panels. Similar compositions can be found in the interior design of cafes, restaurants or offices.
Macrame panels will decorate interiors in eco, country and many other styles.
For such work, you can take a sheet of plywood of the required size as a basis and outline the contours of future elements with a simple pencil. Then regular nails are driven along this contour at a short distance so that half the length remains on top. Afterwards, all the tops are braided with rope or twine. Weaving techniques can be different.
A panel using the macrame technique is made using nails and threads.
New Year's panel
To create a New Year's plot, you can use a regular picture frame, decorating it with fragments of broken toys using silicone glue or a gun. Secure spruce or Christmas tree branches diagonally at the bottom of the frame, preferably with cones. Spray artificial snow on them. Place an angel on one of the branches and decorate the others with Christmas tree decorations. You can stick stars or snowflakes on the top of the frame. All that remains is to choose the right place to place your New Year's masterpiece.
For the New Year's panel, fir branches, cones, and toys are used.
Children's panels
Children are perhaps the best dreamers. They love to explore the world around them and constantly come up with something. They will enthusiastically accept the idea of joint creativity.
For a children's panel "Sea Life" you can use seashells, pebbles, starfish, a fishing net, pieces of coral and even sand. You can use an already primed and dried sheet of plywood as a basis, and use regular sand as a background. To secure it, you need to coat small areas of the surface with PVA glue and sprinkle them with sand - thus filling the entire space. Excess grains of sand are shaken off and the surface is coated with acrylic varnish.
You can make a sea-themed panel out of shells with your children.
After the base has dried, you can begin to create sea creatures: fish, crabs, starfish. Decorate the seabed with grottoes made of stones and algae. It is better to use a glue gun to glue parts.
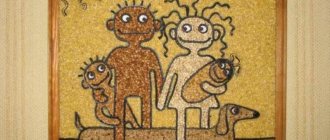
From coffee beans
Very original and stylish panels are made from coffee beans. Sometimes they are found in the interiors of cafes or coffee shops, and can also be an excellent decoration for any kitchen. It is easy to lay out a picture of any size from the grains. In addition to beauty and positive mood, such a piece will fill the room with the unique aroma of coffee.
Panels made from coffee beans look original.
To make panels, not only roasted, but also green beans are selected, as well as large and small coffee crumbs. So, for example, you can make a panel depicting two cats. Silhouettes of cats are drawn on a sheet of thick cardboard, and then coffee beans are glued in with a glue gun.
You can make one cat brown, and use white grains for the other, which are easy to obtain by spray painting. When the cats are ready, all that remains is to decorate the background: fill the lower part of the space with large green crumbs, and the top of the panel with very small brown crumbs. You can use PVA glue.
The finished work should be opened with several layers of varnish to securely fasten all the elements.
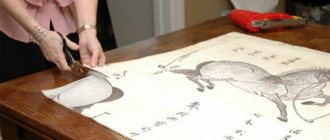
From old bright magazines
If you have accumulated old glossy magazines, you can use them to decorate the wall. All bright and beautiful photographs are cut out and pasted on the wall, you can do this in even rows or in a circle, or create a beautiful mess of elements of different or the same size.
Panel from photographs
Roses from book sheets
You can make this decor on a sheet of cardboard or plywood. And then hang it up and be surprised that it is a dynamic collage.
There are many options for using vibrant prints, especially if they are on glossy paper.
Cut strips (width depends on the size of the panel). Then lay out the strips of paper in a simple weave pattern. The resulting elements can be placed on pieces of cardboard, plywood, or simply on the wall. If this is a separate abstract painting or part of a wall decor, then it can be covered with a layer of varnish.
Panels from old newspapers
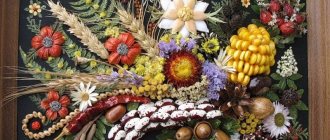
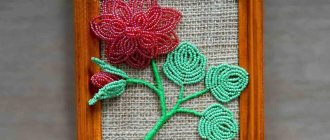
Panel of paper roses
Composition of artificial materials
The constituent elements here can be a variety of materials: plastic products, glass, hair ties, buttons, ribbons, wine corks, artificial flowers, metal buttons, rhinestones, threads, cotton wool, etc.
USEFUL INFORMATION: Priming walls under plaster is a “cure” for its destruction
The most important thing is to harmoniously combine different materials at hand into a single, readable story.
From simple forms
You can make an unexpectedly dynamic solution for an evenly painted dull wall - a decorative panel made of paper. To do this, you first need to stock up on colored paper, you can use it from a magazine, use colored printer paper, it’s better if the color is on both sides.
Decorative paper panel
Paper heart panel
Cut hearts of different colors and sizes depending on your own idea. To cut out hearts, you need to use templates of different sizes so that all the elements are the same shape. For dynamism and completeness, it is better to take several sets of different sizes.
Decorative paper tree
Geometric paper panel in the bedroom
First you need to make a set of hearts as large as possible and lay out flowers from them or use two or three of them to create volume.
Lay out the largest flowers, then lay out smaller shapes between them, you can do it directly on the wall or use a sheet of plywood, in any case you will get an unusually impressive picture.
Corrugated paper panel
To create such compositions, you can use any other shapes. If for the last given option you use bright printed material, it will be even better. You can make the original shapes white and then spray paint them before or after creating the wall arrangement.
Paper panel using quilling technique
You don’t have to adhere to the options described above, just understand the principle to start creating on your own - paper decor is perfect for this.
Paper chrysanthemums on the wall
First option
For work you will need the following tools and materials:
- Simple black pencil;
- Sheet of cardboard;
- Set of colored paper;
- PVA glue;
- The finished drawing template in our case is a mushroom.
How to get the job done? From the finished template, draw a mushroom onto cardboard.
Now let's move on to the preparatory process before the work itself. To do this, take 6 small containers and start tearing the paper into pieces with your hands. We will use the following colors:
- For the mushroom cap - brown;
- For under the hat place - beige color;
- For the mushroom stem - yellow;
- The sky is blue;
- For grass - green.
Each color should have its own bowl.
One by one, we begin to stick small pieces onto the necessary details of the drawing. After the main element has been completely completed, the remains must be glued and imitated earth. And as an addition, glue small brown pieces to the ground. Let them be small fallen leaves.
Now let's move on to the design of the sky.
The finished product must be placed under a small press, this is required so that when drying the finished application does not change its appearance.
Article on the topic: Weaving from rubber bands on a machine for beginners: figures and bracelets with photos
In this torn mosaic style you can make a postcard for any holiday. This technique is very necessary for children. After all, it is precisely this that allows you to develop fine motor skills of your hands. Also, in addition to fine motor skills, in this lesson you can teach your child to distinguish colors and tear paper into small pieces. And see how he will independently cope with the task assigned to him.
Corrugated paper
An excellent option for creativity is corrugated or crinkled paper. It comes in different colors, is very soft, flexible, and can be pulled to give shape and volume. You can make things of fantastic beauty from this material. It's worth trying once to understand how easy it is.
Corrugated paper flowers on the wall
Halloween paper bats