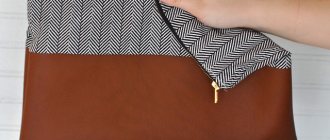
DIY rugs made from braids
Do you know how to braid hair? The usual one, of three stripes? You can make amazing rugs with your own hands. What’s great about homemade braided rugs is that you can make them from just about anything. Any old things will do. Literally any. The best place to start is with knitted t-shirts. Soft, flexible material that is easy to work with. You can also use:
- Old towels, sheets or terry robes.
- Knitted items (sweaters, jumpers, but not very thick).
You can make amazing carpets from cords - Fleece blankets and sheets that have lost their appearance or relevance.
- Cords - ready-made or woven, tied.
- Old bathrobes, colored sheets.
- Jeans.
You can make very interesting and beautiful rugs from old things. And not only for the dacha... - Children's tights (and women's, by the way, too).
- Jute ropes.
And whatever you find and consider possible to use. When selecting materials, we try to find them of approximately the same thickness and density. Then there will be no problems with weaving. At first, you don’t have to think about choosing colors. When experience comes, it will be possible to select colors. It’s more pleasant to work with knitwear and terry cloth, but old jeans and jackets can also work.
Preparing tapes
We prepare the material for the braids - we cut the found “treasures” into strips. The width of the strip depends on how thick you want the rug to be. To begin with, you can make knitted strips 6 cm wide. Strips of terry cloth are also made of the same width. But in the case of knitwear, the rug will be 2-3 cm thick, terry - at least 5 cm.
If you use T-shirts, cut off the “body” exactly at the armpits. We use the resulting pipe in this form. We cut into strips, but not completely, but leaving 5-7 cm uncut at one seam (as in the photo on the left). You'll soon understand why.
How to make a long strip of T-shirt for a homemade rug
Turn the uncut part towards you (as in the middle photo), take scissors, and cut along the bias from the bottom to the first cut. The next gap is also cut on the bias. And so on. You complete the last whole piece like the first - reduce it to nothing to the edge. The result is a long strip, several meters long, with barely noticeable seams. And there is less work - no need to sew. It’s easier with towels - you just cut off the edge, then cut it into ribbons, but they will need to be sewn.
During operation, the tapes will have to be connected. They can be tied or stitched. But there is a convenient way that allows you to reliably connect two strips of fabric/knitwear without a needle.
How to join two strips when weaving a rug
We place the edges of the strips one on top of the other, by 3-5 cm. We cut a hole 1.5-2 cm long approximately in the middle (with a strip width of 5-7 cm). We pass the free strip through this hole. The result is a reliable knot, which, nevertheless, does not interfere with weaving, does not stand out and is not felt later in the product. To understand how it works, try it on small pieces.
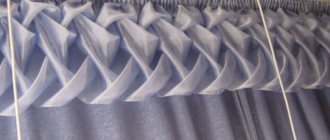
Braiding hair
The braid is usually woven from three ribbons. The length of the stripes should not be the same. They will need to be tied or sewn (it is better to sew). And it is much better if the connection points are spaced some distance apart.
Preparing the “material” for a braided rug
We fasten the selected strips together. They can be wrapped in thread, sewn, knitted. The thickest knot is obtained. This is not always convenient. We braid a pigtail. When one of the strips ends, we sew or tie the second one.
Footage - as needed or desired. It also depends on the thickness of the braid. If it turns out to be voluminous, you won’t need much length. If it is thin, then you will need 5-8 meters. In any case, you can not finish the weaving, but fix it with something so that it does not unravel. You can grab it with a thread and a needle, tie it with a rope, or use a binder.
DIY rugs made from T-shirts: you can start assembling and not finish weaving
Assembling the rug
You can make a rug of any shape from a woven braid: round, oval, square, rectangular. To make a round homemade rug from T-shirts, twist the braid into a spiral on the table. Take a large needle and strong thread and sew it together. We make small stitches, connecting the woven braid centimeter by centimeter. This is perhaps the most time consuming part. But with this method of connection, a double-sided mat is obtained.
Weaving a rug from fabric strips - sewing braids
To prevent the end of the rug from looking unsightly, make the stripes increasingly tapering for the last meter or so. So that the braid becomes thinner and thinner. The length of this “tapering” section is equal to at least half the finishing diameter of the rug. It’s not a problem to fold a narrow edge down and sew it there. You can also hide the “tail” under one of the stripes in the braid. In general, this completion is aesthetically pleasing.
Oval rug made from T-shirts, scraps, old things
If you want to make an oval rug, you need to twist the braid around a straight section. The longer the section, the longer the resulting rug will be. If you want a square or rectangular one, you will have to braid the braid “in place.” To ensure that the turns are not smooth, but sharp, a special technique is used.
How to make a twist in a braided rug
At the turning point, leave the bottom strip free. The one that is currently on top wraps around the middle one. You need to make two or three turns, sometimes more. Having turned the work, we weave in a third strip, directing it over the one that was wound and passing it under the “main”. It's difficult to explain in words, look at the picture above.
Special models
Braids woven from old things can be the basis of very interesting carpets and rugs. For example, you can make a number of braids of the same length. Tie them tightly along the edges, leaving 5-10 cm free and cutting these parts into “noodles”. Sew the resulting pieces together. You will get a rectangular rug. It will be convenient near the front door, in the bathroom, etc. You can also make a rather long rug that can be laid near a sofa, armchair, or recreation group.
Variations of rugs made from old T-shirts woven into braids
From fabric or knitted braids you can make a rug from small fragments. An example of this is in the photo on the right (see figure above). You roll up fragments of certain sizes and assemble them. From the same set of “materials” you can get dozens of variations of “carpets” and rugs.
Options for carpets made from old T-shirts. Beautiful and stylish
The imagination of needlewomen is limitless. Models of different shapes are assembled from circles of different diameters, and each of them is unique. This is not an ordinary circle or oval, these are original works.
Woven models
Rugs from shreds can be woven using a base. It looks like a small loom. Make a frame out of wood that will fit the size of your rug. It can be rectangular or square, it all depends on your idea. You need to put nails on the frame at a distance of 2-2.5 cm from each other.
For these purposes, you can use a furniture panel or an old table. Making the machine is not difficult, and it will serve you for a long time.
Strengthen warp threads made from pieces of fabric onto them. On the leftmost warp thread, reinforce the working thread. It's best to sew it on. Weave the rug by passing the rope over one warp thread and under the other. You can use more complex techniques and weave with two working threads at once. During the weaving process, the fabric must be constantly pushed up to make it denser.
Related article: Weaving leather bracelets
After weaving is completed, sew on the working thread. Remove the resulting rug from the loom studs and form a fringe from the remaining warp threads. The rectangular rug is loom woven and can be perfectly placed by the door to welcome your guests.
To create a round rug using the described method, you only need to select a base. It can be made from an old hoop or metal-plastic pipe. Holes are made at equal distances in the base and the working thread is secured in them. Weaving should be done in a circle from the center of the intersection of the warp threads.
Crochet rugs
Do you know how to crochet at least a little? You can knit homemade rugs with your own hands. Even if you only have one regular column in your arsenal. This is already enough, and for very beautiful rugs or carpets.
If you want to make a rug from old things, you will need a large hook. Very big. The biggest one you can find. They can be bought in handmade stores or online stores. Here they come in different sizes, plastic and wooden.
To crochet a rug from knitted yarn, you need a large hook
Next we prepare “yarn” from old T-shirts and things. But we make it thinner than for braids - it’s hard to knit if it’s too thick. Then you can go in several ways - knit like a regular napkin or tie some kind of cord. When using yarn (any) without a cord, the beginning may be different. You can, for example, knit a chain of 8-10 chain stitches, close it in a ring and then knit stitches into each of the loops. With or without a crochet - it’s whatever you like or what you know how to do. There is a more interesting option that allows you to make the middle dense - without a hole (which can happen in the previous option).
Start for crocheting a rug
- We make a loop from the yarn, leaving a long “tail” of 10-15 cm.
- We do not tighten the loop, but pull the working thread through it, hold the place where the threads cross, and form a loop. Once again grab the working thread with your hook.
- Pull the thread through the loop. The result was a loop, fixed at the place where the threads crossed. The resulting circle can be expanded or narrowed. But do not tug too much so that the end of the yarn does not jump out and the ring falls apart.
- Then you can knit single crochets.
- We make as many columns as you think necessary. By pulling the non-working edge of the thread, tighten the ring.
- Using an air loop, we loop the first row.
Then we knit as we want or as we know how - with or without double crochets. You can make one large round rug, or several smaller ones, which are then assembled into rugs and rugs of different shapes and types.
Crocheted pieces can be assembled into a wide variety of homemade handmade rugs
We tie the cord
Knitted cords can also be used as a basis for tying yarn. This could be new or old yarn, finely cut knitwear, jute rope, etc. The rug is more dense. It is not as “holey” as knitted from threads and really warms.
DIY rugs. The idea is the same, but we crochet the cord
You can use a cord as a basis for tying, or you can use an LED strip in a silicone tube. The result is a backlit rug. If you need soft, dim light at night, this is just the right option.
Ideas sea!
Cords with LEDs can be not only white, but also colored or even changeable colors. But that's a completely different story.
DIY rugs made from pompoms
Making pompoms is not difficult, it just takes a long time. For a rug you will need many dozens of them. Doing one at a time takes too long. There is a method that allows you to make up to a dozen pom-poms in one go. Moreover, they will all be of the same density. All you need is a regular chair, thread and scissors.
Preparation of pompoms
Turn the chair upside down. We wrap threads around the legs as a base. In the photo they are wound on two legs, but if you need a lot of identical pompoms, you can wind them on four at once.
How to make pompoms from threads quickly
Having wound the required number of turns, we take it and pull it with threads over a certain distance. Pull tightly, pulling with all your might. Having made several constrictions on the chair, remove the tourniquet and continue making constrictions. The distance between them will be approximately equal to the size of the pompom. In reality, the pompoms turn out a little smaller (about 1 cm), so take this into account.
We take scissors and cut between the two constrictions in the middle. It's not that easy to do. Especially if the constrictions are close and the thread bundle is thick. We straighten the cut pompoms, cutting off the protruding threads. We get a dozen or more balls of thread at a time. Repeat with a different color or size.
By the way, you can also make pompoms from knitted ribbons, cut from old T-shirts or fabric. Everything is the same: winding, tying, cutting. Pom-poms look and feel different, but no less attractive.
You can make pompoms from old knitwear or towels
We recommend making the threads used to tie the tourniquet longer—leaving at least 10 centimeters of hanging ends. Then it will be easier to assemble the rug.
Base for rug with pompoms
Pompoms can be tied to any net. An anti-slip carpet underlay is best. You can take a piece of rubber mats that are sold by the meter for bathrooms. They also have holes, but they are much smaller. What's good about these options? They don't slip.
DIY rugs: base for a carpet with pom-poms
You can use a painting mesh with a large mesh, or even just a piece of fabric. But we tie pompoms to the mesh, but to the fabric we have to either sew them, which takes longer, or glue them, which is not so reliable.
Assembly and drawings
A rug made of pompoms is suitable for a child's room. Due to the fact that it can be made from multi-colored pompoms, it will attract the child's attention. The interesting texture of the rug also arouses curiosity. If you use pompoms of different sizes and colors, from different threads - smooth, prickly, shaggy - you can make an “educational” rug for babies. Children need to develop tactile skills and this rug will help.
Here's how to make your own rugs from pompoms
If you use pom-poms made of cotton, microfiber and other highly absorbent materials, you can place such a rug in the bathroom. It is very soft and pleasant. From small-sized pompoms, but tightly packed, you can assemble round, oval, flower-shaped, animal-shaped or any other shape.
We tie pompoms to the net
If you have found a mesh base, we thread the threads that remain after tying the pompoms through the mesh and tie them to several knots. If you have a hook, it is easier to use it to pull the threads through the cells. You need to tie it firmly; you can pull the threads through different cells several times, tightening them each time. This is important if you plan to machine wash the rug.
Can be glued to fabric using a glue gun
Pompoms can be glued or sewn onto fabric. If you plan to wash, glue is unlikely to work. The gluing option will not work if there are small children in the family. If they manage to tear off the pom pom, it will definitely end up in their mouth.
By the way, pompoms can be sewn. To do this, you will need to cut circles of different diameters, sew them along the edges with large stitches, fill them with padding polyester, padding polyester, etc. and pull the thread. See the video below for more details.
Patchwork and grass rugs
Nowadays carpets with long pile, called “grass”, are fashionable. They are very soft and warm. True, it’s difficult to clean them without a powerful vacuum cleaner, but they look beautiful and cozy with them. Making such rugs with your own hands is not at all difficult, however, it can take a lot of time. This is if you decide to use threads. But it's very beautiful.
These are the results that can be obtained using this technique. But to make the carpet so beautiful, you need ribbon yarn or thick threads
The idea is outrageously simple: threads and strips of fabric are tied to a mesh base. There are two tying techniques - just using a knot, and making a loop. They give slightly different results, but both techniques are good. You can try and choose.
How to make rugs with your own hands from scraps
The same painting mesh is suitable as a base, but a rubber anti-slip backing for carpets is better. She's practically perfect. We tie threads or scraps of the same length to the cells of the grid - in each or through one.
Row by row we tie the scraps
If you do not have such perseverance, but you have a sewing machine, the process can be speeded up significantly. But the base must be woven. We fold “blade of grass to blade of grass” and stitch it on a typewriter. So row after row. Making patchwork rugs with your own hands is much faster with a machine.
You can also use a rubber mat with holes as a basis.
How to process the edges of carpet, overlock for carpets
Carpet is sold in rolls with raw edges. It is cut to the required size and laid with glue, tape or stretching technology. But if you lay carpet without fastening, like a rug, you will be faced with the question - how to process the edges of the carpet? The carpet must be treated or otherwise “overlocked”.
Overlocking carpet
Carpet overlocking – processing the edges of the carpet using special equipment or manually with your own hands. Thanks to this procedure, the carpet is given a finished, neat appearance, its edges do not unravel, and as a result, the service life of the material increases.
You can overlock carpet using both threads and ribbons. In modern stores there is a large selection of ribbons and threads of various colors on sale, so you can choose them to match any color of the carpet.
If you overlay the carpet, it will look more like a carpet or rug. In this case, you can round the edges of the canvas or cut out some geometric shapes. It’s unlikely to be possible to do this without an overlocker, since the edges will unravel, ride up over time, and the adhesive base will crumble.
Accordingly, processing the edges of the carpet is not required if its edges are hidden under the baseboard.
Advice! Do not rush to throw away the remnants of the carpet after laying it; they can be used to make beautiful, neat rugs after finishing the edges. They will look great in the bathroom, toilet, they can be placed under the feet of the beds.
How to overlay carpet
Overlocking is performed with threads consisting of 100% polypropylene. The synthetic material is very durable, such threads are wear-resistant, do not fray and are suitable for any type of carpet.
It is also worth noting the wide selection of colors, the resistance of polypropylene threads to solvents and various acids. They are not subject to brittleness at low temperatures.
But such threads have one significant drawback - they quickly fade in the sun.
Overlocking carpets
For the overlocking procedure, special devices are used that can operate at low and high speeds.
Small, compact models are usually used for finishing edges at home.
But for industrial rubber-based carpet, more serious units are used - stationary equipment installed in a specific location.
Where to sheathe carpet
It is possible that the store where you purchased the carpet can immediately hem the carpet. Usually the cost of overlaying is not high and in a couple of hours your coating will have beautiful, neat edges. But this option is suitable only for those who already know exactly what size carpet they need.
Video: cutting and overlocking carpet
In other cases, you may need to overlock carpet at home. Such services are provided by specialized studios or individuals. To search, you can use newspapers and websites with advertisements. A specialist with a special device will come to you and sweep the edges of the carpet according to your preferences.
Typically, the color of threads or ribbons for overlocking is selected in accordance with the color of the coating. But you can make the carpet fabric original by choosing contrasting threads or tape.
How to trim the edges of carpet with your own hands
Not everyone can afford to call a specialist to process the edges of the coating. Some people have little finances, some live far from the city or are used to doing everything on their own, etc.
What you need to overlock carpet at home
- synthetic threads or tape;
- very sharp, thick and reliable needle with a large eye;
- thimble to protect fingers;
- powerful scissors.
Advice! To calculate the approximate amount of thread for finishing the edges, multiply the total length of all sides of the fabric by 10. You will get an approximate figure, so take it with a margin.
Overlocking at home: step-by-step instructions
At first glance, the procedure is simple, especially for those who know how to hold a needle in their hands, but finishing the edges can take a very long time. The procedure is performed using a regular loop stitch.
First you need to evenly measure and cut the edges of the covering.
Now point by point:
- We make the first puncture at a distance of 5-15 mm from the edge. This indentation depends on the thickness of the coating - the thicker it is, the greater the indentation.
- We stretch the thread and throw it on the needle. Next, pull the thread to the left and tighten it well around the edge of the carpet.
- Insert the needle into the same hole again. We pull the thread again and throw it on the needle. Now pull the thread to the right and tighten it.
- We retreat a short distance from the first puncture and make a second one. The distance between the punctures depends on the density of your overlock - the smaller, the denser.
- We repeat the previous steps.
Useful video: how to make a buttonhole stitch
It is very difficult to handle the edges of carpet with a large pile. It will be easier to coat these places with PVA glue.
How to process the edge of a carpet with a ready-made overlocker
In stores you can find ready-made decorative overlock for carpet. It is usually attached to the edges with double-sided adhesive tape and glue.
This overlocker is glued to the base of the coating
Corner processing
Trimming at joints
All joints must be treated with glue
Gluing the finished overlocker
Another option for a ready-made decorative overlock
Sealing joints
Ready product
pro-kovrolin.ru