Postcard
A handmade postcard will be an original addition to the gift. It can also be the main one, for example, to congratulate colleagues at work or numerous acquaintances.
Making a postcard is a fascinating process, because in it you can show all your creative potential, and the variety of techniques and materials allows you to make a wide variety.
Before starting work, you should decide on the theme of the holiday, choose an idea and select materials. Everything you need can be found at a craft store.
For example, to congratulate everyone on Valentine's Day, you can make such a card.
Card with hearts
To make it you will need:
- blank postcard with an envelope made of thick white cardboard;
- sheets of scrap paper of various colors;
- figured hole punch;
- scissors;
- white thread;
- glue;
- needle.
First, prepare the hearts to decorate the front of the card.
Using a hole punch, punch out the required amount, based on the fact that you will need two hearts of each color.
Holes can be made with a hole punch
If you don't have a hole punch, then prepare a heart template and cut it out using it.
Place the prepared elements in two pieces of the same color on the front side of the card, secure with glue. This must be done so that they remain in place during the sewing process.
Place the hearts on the cardboard
Using a machine, sew with white thread in the middle, without going beyond the borders of the hearts. Then make a few backstitches.
Attach hearts
You can sew hearts on your hands. In this case, try to do this as carefully as possible so that the stitch “step” is the same.
Use scissors to trim off excess threads.
Bend the sewn hearts along the line.
Place the finished card in an envelope
The card is ready, you can write a few congratulatory lines and put it in an envelope.
Top most original ideas
An original gift will definitely lift an already joyful mood and add color to the holiday. What can you do to surprise the birthday boy? Let's look at the top most interesting ideas:
- Who would have thought that such creative candlesticks could be made from ordinary iron cans, which can then be hung on the wall and create coziness and romance at home;
- A real expensive item would be an ordinary tire covered with twine and glue.
- Recycling plastic spoons can also be beneficial if you use them meaningfully for a good cause. So the remaining plastic spoons will become decor for a pot of house plants. You can get such a creative container using an old jar, spoons, glue and spray paint.
- Making a mega stylish lamp is also in your hands. You will need plastic bottle caps, a wire, a switch and a socket. It is better to ask an electrician you know to assemble this structure, but it will only take a few minutes. But you will take care of the lampshade. With the help of glue, the main material - the lids - will turn into a real decorative attribute.
Giving a handmade birthday gift is not difficult, there are a lot of variations on the holiday theme, choose any one. To ensure that your creative potential meets all expectations, rely on your strength and patience. Remember, it is better to make an easy souvenir, but of high quality, than a complex, but inexpressive one. A new incarnation of ordinary objects can change your mind, act for the benefit of your ideas.
Chocolate card
A chocolate box is a handmade card that has a place where you can put a chocolate bar or another souvenir, such as money. You can give it as a gift for any occasion.
In order to make a New Year's chocolate maker with your own hands you will need:
- kraft cardboard 30*30;
- PVA glue;
- scrap paper;
- decorative elements;
- pencil;
- scissors;
- ruler;
- hole puncher;
- ribbon.
The size of the chocolate bowl directly depends on the size of the chocolate bar. Having measured it, you can start working.
Draw the dimensions of the future postcard on cardboard. In our case: height – 21 cm, width – 10 cm+10 cm, gluing area – 1.5 cm (see photo 2). Cut out the workpiece, run a runner along the fold lines, and bend it carefully.
If you don’t have a treadmill, then a pen with an “empty” shaft will do.
Glue the resulting card together and try placing chocolate there. It should fit freely inside.
Choose the size for the chocolate.
Use a hole punch to make holes at the top and bottom.
Now you can start decorating. To do this, use 2 scraps of paper, flowers, a chipboard and a die cut. In this process, you can show your creativity and use any decorative elements.
Now thread the ribbon through the holes and tie it, so the chocolate will stay in place.
Bracelet made of pins and beads
An excellent accessory for everyday use is a beautiful and original bracelet, made in haste.
Bracelet made of pins and beads
We take ordinary pins and beads or beads. We string the required number of beads onto the open point of the pin, alternating colors or sticking to one shade. When several pieces are ready, fasten them and string them on a fishing line in a checkerboard pattern - head, tail, head, tail. We try on or estimate the approximate volume. We secure the tails of the fishing line.
Making a bracelet from pins and beads
This bracelet will be useful as a gift for a not very important occasion - Sunday tea party, etc. Similar principle + creativity = ring and necklace! The set will suit denim style or ethnic outfits.
Ring made of pins and beads
If you get really excited, you can make a really beautiful and elegant decoration that you won’t be embarrassed to give as a gift for any occasion.
You can watch a master class on how to create such a cool and simple bracelet from beads and pins in this video:
Edible gifts
This category of products will appeal to any person, because they are not only tasty, but also originally designed. You can choose any sweets: chocolate bars, chocolate bars, sweets, cookies, dragees or handmade sweets.
Cardboard boxes, glass jars, wicker baskets, wooden boxes, tin boxes or other suitable containers are suitable for packaging sweets. Their shape, size and color may vary.
Beautiful and tasty gifts
Box of sweets
Making such a gift with your own hands is very simple. All you need is the original box and sweets. Choose any filling for the box.
Assembly will not take much time: the sweets need to be beautifully folded into a box, which can be decorated if desired. To do this, tie it with a ribbon or leave a small wish on the lid of the box.
Set for a sweet tooth
Delicious gift for men
You can prepare such an original gift for men on February 23 and on their birthday. The composition should be chosen based on the preferences of the person for whom it is intended. So, for filling you can choose: alcoholic or carbonated drinks, coffee, tea, chocolates, meat products, vegetables and other edible products.
Men's set
Also include useful things in the gift: diaries, pens or items of clothing.
To design such a souvenir you will need:
- wooden box;
- edible filling;
- cigarette paper;
- filler.
For the latter, you can choose sisal fiber or tissue paper.
Decoration won’t take much time: line the bottom of the box with filler and carefully arrange the food items.
Features of filling and decorating a gift can be found in this video:
Men's bouquet
DIY gift for a man. How to make a bouquet for the stronger half of humanity
Advantages of handmade
Handicrafts have always been valued in Rus', and even today manual labor can become a good additional, and sometimes the main income.
Making things with your own hands will be a good pastime for the housewife herself, and maybe for the whole family.
This is a great way to get rid of unnecessary things that have been lying on balconies, mezzanines and closets for a long time.
Additional advantages of handmade include:
- an excellent opportunity to switch from work problems and everyday affairs;
- the likelihood of making an original or useful thing;
- the opportunity to get rid of unnecessary things for your own benefit;
- the ability to reduce the cost of purchasing gifts or earn a little money by creating unique crafts.
Making souvenirs will help develop perseverance and attention to detail, artistic taste and creativity. Small details of future gifts develop fine motor skills and help strengthen neural connections in the brain, which is especially important for children and the elderly.
Sweet box with flowers
An edible gift can be complicated by slightly changing its composition. For your mother, sister or friend on March 8 or for your birthday, make a box with fresh flowers and sweets. Instead of the latter, you can put a bottle of wine, macaroon cookies or a can of coffee.
To make a box you will need:
- cardboard box (size depends on the components of the composition);
- flowers - 2 small branches;
- floral sponge (oasis);
- sweets;
- tissue paper matching the color of the composition;
- cellophane or mica sheet;
- wire cutters;
- stationery knife;
- container with water.
Gift components
If you have a small box, then it is better to use flowers with small buds, for example, spray chrysanthemums or roses, gypsophila or alstroemeria. For a large or medium-sized box, any will do. You can buy them and a sponge at a flower shop.
Before starting work, the floral sponge must be cut to the desired size and placed in a container with water for one hour so that it is completely saturated. Fulfilling this condition will allow the flowers to delight you with their fresh appearance for a long time.
If the height of the oasis matches the dimensions of the box, cut off 3-4 cm from the top with a knife, this is necessary for a harmonious appearance and so that the box can be closed.
First prepare the flower area. Attach cellophane or mica to the box to select the size of the required piece. The cut must exceed the dimensions of the sponge.
Place a sponge and wrap with tape. Mica protruding beyond the edges must be cut off. The oasis should be open at the top in order to insert flowers.
Now you can start assembling the composition. Using scissors, cut the flowers from the branch; determine the length of the stem based on the height of the box. Insert them into the sponge in any order.
Prepare a separate pocket for sweets. Cut some tissue paper and place it in the space provided in the box. Then lay out the edible gifts.
Ready box.
All additional recommendations can be found in this video:
DIY gift
Box with fresh flowers and sweets. How to make a gift with your own hands.
Bouquet of sweets
A sweet gift can also be given in the form of a bouquet. You can give it to your family or work colleague. You will like it for its appearance and will be a delicious addition to tea drinking. The undoubted advantage of such compositions is that they do not require additional care. And after all the candies are taken out, you can leave the bouquet as an interior decoration.
Example of a bouquet of sweets
All the necessary materials can be found in handicraft stores.
To work you will need:
- corrugated paper - 2 rolls of 2 different colors;
- candies;
- basket;
- wooden skewers - packaging;
- scissors;
- a thread;
- glue gun;
- glue sticks;
- green tape;
- organza – cut 70*70 cm;
- sisal fiber;
- stationery knife;
- decor;
- floral sponge or oasis.
Let's get started:
When choosing sweets, pay attention to their shape. It is better to choose a round shape; they will be convenient to work with and can be easily removed from ready-made flowers. Choose the quantity based on the size of the basket.
Having resolved all organizational issues, you can start working.
First, let's prepare the material for the buds. Cut the paper into strips about 5-6 cm long and then cut into rectangles. There should be about 6 pieces in one strip.
Cut rectangles of the same dimensions from green paper. Only the sepals need to be cut out from them (see photo 6). Use a skewer to slightly curl the ends. This will make the bud more life-like.
Then, round off the edges of each rectangle intended for flowers. Stretch the resulting blanks from the center. Before inserting the candy, tuck one “tail” so that it is not visible from the bud.
This action will not affect your ability to safely remove the candy from the flower.
Place the prepared candy in paper and twist it so that it is not visible, and the shape becomes similar to a real rosebud. Now use a thread to tie at the bottom to secure the candy.
In further work you will need a glue gun. It operates on mains power, so perform all steps carefully to avoid burns.
Let's continue to create
Let's start assembling the flower. Wrap the “sepal” around the bud and secure with thread. Using a glue gun, glue the skewer to the base of the bud, and before doing this, trim off the excess paper. Cover the joint and the skewer with tape.
The peculiarity of tape is that by slightly stretching it, it becomes flexible and can be used to give a neat look. In order to tear off a piece of tape, it is not necessary to use scissors; it is enough to sharply stretch it.
Do this with all the colors. And for now they can be postponed.
First make the buds
Cut the organza into squares measuring 5*5 cm. Roll it up, glue it to a skewer, and wrap it with tape (see photos 13,14,15). Using organza, you can close the spaces between flowers so that the bouquet does not look “empty”.
Let's start assembling the composition.
From a sponge you need to cut out the base of the bouquet, matching the size of the basket. Place sisal on top.
Carefully insert the finished flowers and skewers with organza into the sponge. Adjust the height of the skewer based on its location, shorten it if necessary with wire cutters. Try to place everything very tightly.
Collect a basket of “flowers”
The finished work can be decorated with pearls and other decorative elements, for example: artificial greenery, ribbons or rhinestones.
Corrugated paper is a unique material. You can make completely different compositions from it. Show your imagination and you will get a unique and delicious handmade gift.
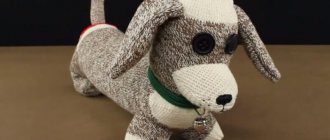
DIY soft toy
Necessary materials:
- paper;
- textile;
- buttons;
- scissors;
- a thread;
- glue gun
Process of creation
- We cut out a paper blank of an animal (in our case, it’s a bear).
- Using the template, cut out two identical shapes from the fabric and sew them together, leaving a small hole.
- We fill the resulting body of the animal with cotton wool.
- Glue buttons in place of the eyes, nose and mouth.
- If desired, you can use ribbons as decoration. Instead of buttons, you can use embroidery and much more, suitable at your discretion.
Using the same type, you can create any soft toy, bunny, cat, doll, etc.
As you can see, there are plenty of homemade gift ideas. And that's not all you can do. The main thing is to create them using your imagination and putting in your warmth, and then such gifts will not leave anyone indifferent.
https://youtu.be/WCGcHQq0NyYhttps://youtu.be/n8tuGXUAWU0
_
Interior gifts
Handicrafts can be not only tasty, but also healthy. If you have been invited to visit or to a housewarming party, then you should make a small souvenir for the interior of your home with your own hands.
Topiary
This gift will be an interesting addition to the interior of any room. Its main feature is that it does not require additional care, which means it will be able to please the inhabitants of the house for many years.
Topiary is a decorative decoration in the form of a tree. The top can have different shapes, such as round or heart-shaped. And the following can be used as decoration: coffee beans, sisal fiber, fabric or natural materials.
To make topiary from artificial flowers and sisal you will need:
- blank in the form of a ball;
- sisal in a bundle;
- snag;
- artificial flowers and leaves;
- ceramic pot;
- gypsum;
- white thread;
- glue sticks;
- glue gun;
- decorative elements.
The process of creating topiary
In order for the topiary to turn out harmonious, you should first check the consistency of the pot and the workpiece. They should be almost identical in diameter and size.
If you have a workpiece, then you do not need to carry out any additional actions with it. If you don’t have one, you can make a ball out of paper. To do this, crumple up several sheets and shape them into a ball. Do this with all the sheets, increasing the volume. When the form is ready, wrap it with thread, pressing the protrusions of the paper, this will help you get an almost even ball.
It is better to use white sheets and white thread, so you will no longer need to do anything with it. If newspaper was used, you will have to additionally cover the ball with corrugated paper.
To make sisal balls, you need to pinch off a small piece from the bunch. Use your hands to roll it into a ball shape. They should turn out quite dense, if you succeed, take a little more sisal and continue rolling. As a result, you should get dense balls with a diameter of about 3-4 cm.
Topiary threads
We continue to work
You can start decorating the workpiece. Use glue to attach the sisal balls and flowers. Glue leaves and decorative elements between them. All spaces should be filled, so the topiary will look more harmonious. Leave a small empty space at the bottom, where the snag will be attached.
Blank
When you finish decorating the workpiece, you can begin to secure the driftwood. To do this, make a small hole with scissors, pour glue and insert a piece of wood. Hold your hand strictly perpendicular to the workpiece until the glue hardens.
In order for the topiary to be stable, it must be placed in a bucket of plaster.
Choose a pot for your topiary
Gypsum can be immediately poured into the pot, filled with warm water and stirred. As it begins to harden, place a driftwood with flowers. Hold it vertically until the plaster hardens completely.
If you stain a piece of driftwood, the plaster can be easily cleaned off by hand or with a knife.
Decorate the top of the pot with sisal and flowers so that the hardened plaster is not visible.
Ready topiary
Painting in string art style
This work will truly surprise you. Her appearance is completely unusual and colorful. And working on it will be interesting and exciting.
You can choose absolutely any image in the painting: it can be an inscription or a symbol.
To work you will need:
- a small sheet of plywood;
- 2 packs of small rounded nails;
- hammer;
- template paper;
- floss threads;
- scotch.
First you need to prepare a template. It can be found on the Internet or made in one of the photo processing programs. Print and cut out.
Before work, the plywood can be painted in a neutral beige shade or a decorative panel can be used instead.
Attach the workpiece to the plywood and secure it with tape so that it does not move. Now let's start hammering nails. For convenience, it is recommended to place something under the plywood so that the nail does not pierce the place where you will be doing this.
Make a sketch
Nails should be driven along the contour of the letters and try to keep the distance between them the same. The optimal step is 1 – 1.5 cm. You need to punch along the entire contour of the word.
When you are finished hammering the nails, the template can be removed. Now everything is ready for registration.
Distribute the nails
Use a thread to connect the nails that are located side by side in a chaotic order, starting with the first letter. And do this until the end. Tie the end of the thread around the nail and carefully cut off the tail.
The entire composition can be made with thread of the same color or use different ones.
Finished work
If handicrafts are not your thing
Handmade card? Florarium or bouquet of sweets? If handmade gifts are not your thing, then the Ukhtybox gift store is what you need! Just a few clarifications about the recipient of the gift and the guys from Ukhtybox will put together the perfect gift for you. Surprise the birthday boy with your creativity!
DIY florarium
Lovers of fresh flowers will love this gift. It differs from simple potted ones in appearance.
A florarium is a small glass aquarium in which plants are grown. Due to its original appearance, it will become a real living decoration of the room.
For a florarium, it is better to use small and unpretentious plants: cacti or succulents.
To make it you will need:
- small round aquarium;
- live plants;
- priming;
- drainage - expanded clay;
- live moss;
- pebbles;
- decorative elements;
- fertilizer;
- plastic spoon;
- watering can with water.
Work process
To avoid getting your hands dirty, wear rubber gloves.
Wash and dry the aquarium.
Fill the bottom with drainage and add a few spoons of fertilizer. Then add soil.
Now you can start planting the plants. First, remove them from their pots and shake out the roots. Carefully plant them in the ground one at a time, helping with your hands and a spoon. Because space is limited, be careful not to damage the plants.
Manufacturing process
When you finish planting, cover with moss and water, and decorate with pebbles.
If the walls get dirty, wipe them with a damp cloth.
All additional information can be obtained from this video:
DIY florarium
How to make a florarium at home. Detailed instructions.
Volumetric letters
Such a handmade gift can be made in the form of a word or one letter, for example, the first letter of a first or last name. Volumetric letters will become a bright decoration of the room and will remind you of your attention. They can be made from artificial flowers, paper, fabric or natural materials.
The proposed version of volumetric letters can be prepared for Mother’s Day or her birthday.
Letters with fresh flowers
To make it you will need:
- artificial flowers;
- cardboard for letters;
- floral sponge;
- glue gun;
- glue sticks;
- a simple pencil;
- ruler;
- stationery knife.
In order for this gift to become a harmonious decoration of your home, you should choose the optimal size and suitable color scheme of the letters.
The frame of the letters will consist of glued pieces of cardboard. They must first be drawn and cut out. Use a glue gun to connect them.
Using a knife, cut the sponge into suitable pieces and insert into the recesses of the letters. It’s better to do this in small pieces, so it will take up all the space.
For this job, it is better to choose a sponge specifically for artificial flowers. It is denser, this will allow them to hold on better.
Once the letters are ready to be filled in, you can begin working with the colors. They should first be cut from the stems. Now you can insert them in a chaotic order, filling the entire space.
Fill the space with flowers
They can be attached to the wall using double-sided tape.
Accordion album
For photography lovers, you can make an original accordion photo album. In order to make it you will need
- wooden box;
- dark thick paper;
- satin ribbon;
- glue;
- photos.
The size of the box and the paper with the photo must match each other.
First, decide on the number of photographs; the number of folds, and therefore the paper, will depend on this.
First you need to cut the paper correctly. To do this, measure the width of the photo and add 1 cm to obtain the required width of the paper.
Now measure the height and also add 1 cm.
Transfer the resulting dimensions onto paper. Now cut lengthwise according to the resulting size.
You need to make several such strips and glue them together.
Draw a line according to the height of the photo. Photos will be located here, such places need to be taken in accordance with the number of photos.
Prepare the cardboard
Now use a running wheel to follow the lines to form an accordion. Glue the photos, glue a small ribbon under the first photo, you can use it to pull out the entire accordion.
Attach a loop
Candlestick
As a gift, you can make a candlestick in a romantic style. It will be an interesting decoration for a bedroom or living room. To make it you will need:
- tea candle;
- glass jar;
- jute twine;
- satin ribbon;
- lace ribbon;
- scissors;
- acrylic paint.
Using acrylic paints, apply a design to a glass jar. You can make it arbitrary or as shown in the photo.
Decorate the jar
Then tie ribbons beautifully around the neck of the jar.
The candlestick is ready!
Gifts for the birth of a child or christening
When great joy occurs in a family - the birth of a child, many friends and acquaintances rush to congratulate and present gifts to the baby and parents. If you want to surprise and make a useful present at the same time, then you can make it yourself.
Giving clothes simply is boring, wrap it in the form of a cake, and such a gift will definitely not go unnoticed.
It will require:
- clothes for newborns;
- cupcake box;
- cupcake pan;
- small tape.
Choose the color of clothing according to the gender of the child or neutral shades. For a gift you need to choose four bodysuits and two pairs of socks.
Roll each bodysuit lengthwise as shown in the picture. Insert the sock, wrap it, and secure with tape. Then put it in a mold and put it in a box.
Do this with all your clothes.
Ready gift
Crafts from pompoms for a bag
Many people probably know how to make pom-poms from threads. You need to take 2 parts and put them together. Wrap one or more colors of thread around one side many, many times. Then use scissors to cut the threads on opposite sides of the winding. Carefully separate the folded parts, stretch another thread between them and tie it around the main winding. Pull tightly, make a knot, tie the ends. Fluff the pompom. Take scissors and trim the pompom so that the ends are the same length and do not stand out. You can give the pompom any shape you like - an ellipse or even a cube.
Pom Pom Making Instructions
One long thread should be left to use for hanging the pompom. Several pom-poms of different colors strung on one thread will make up a whole composition.
Pompoms made from natural fur look no less original. Here you will have to work hard to make an original ball from the fur leftovers lying around in the closet. Armed with a thread and a needle, you need to roll it into a hemisphere and sweep it away.
Making a fur pompom for a bag
Watch the videos for several master classes on making cool pom-poms:
Handmade decorations
For those who love interesting jewelry, you can make a handmade bracelet. It is better to give such a gift to close friends or sisters, because you know exactly what they like best.
To make a bracelet you will need:
- pearls - packaging;
- satin ribbons 0.5 cm wide - 2 m;
- needle;
- a thread;
- lighter;
- scissors.
Handmade decoration
You can adjust the size of the bracelet to suit your hand by adding or subtracting a few centimeters.
Buy the tapes in two 1-meter pieces or cut them before work.
Thread the thread into the needle. Connect the ribbons crosswise and make the first stitch as shown in the photo.
And thread the first pearl.
Attach a pearl
Throw the ribbon that is at the bottom over it and sew it.
Thread the second pearl through and place the bottom ribbon on top. There should be two beads “inside” it.
Attach the next pearl
Continue working with the remaining beads
At the end, make a neat knot.
Instead of a lock, the bracelet will be tied with the remnants of ribbons; if there are long “tails” left of them, cut them off and singe the ends.
Gift for a traveler
Those who are passionate about travel will appreciate small souvenirs.
So you can give such a person an aged map of the world, on it he can mark where he has already been and where he is going.
To make a card you will need:
- a sheet of white paper;
- tea or coffee;
- lighter;
- satin ribbon
- iron.
First, the paper needs to be aged. To do this, dilute a few teaspoons of coffee or tea in hot water and soak for a few minutes.
Wet the sheet
To prevent the sheet from becoming deformed during drying, it is better to dry it immediately with an iron.
Find a suitable picture and print it on this sheet.
Sample card
Now the card needs to be aged. Singe the edges and burn a few places with a lighter. Roll the finished sheet and tie it with ribbon.
Ready map
New Year's gift
On New Year's Day it is customary to give symbolic gifts. You can make your own interior Christmas tree, Christmas balls, beautifully decorate a bottle of champagne or make a pineapple out of it. A pineapple from a bottle of champagne will become an original decoration for the holiday table.
For production you will need:
- a bottle of champagne;
- Fererro Roshe sweets;
- glue gun;
- glue sticks;
- jute twine;
- crepe paper.
You will need paper in 2 colors: green for pineapple leaves and yellow for decorating candies.
Cut the latter into small squares and glue to the candies. Do this with all the candies. Then they need to be glued to the bottle. Try to do this as tightly as possible. Try not to hide the ends of the squares; they are needed to create the effect of a pineapple peel.
Cut leaves from green paper. Use glue to attach it to the neck of the bottle so that it can be opened.
Decorate the junction of the foliage with the candies with twine.
Textile
With the help of leftover fabric you can make so many items that it would be very difficult to list them all. The simplest souvenirs include:
- Kitchen towels. They can be decorated with the initials of the future owner or with embroidery on a specific theme.
- Aprons.
- Potholders. Such souvenirs in the style of patchwork look especially unusual.
- Rugs.
- Tablecloths. And it is not at all necessary to be able to embroider with satin stitch or cross stitch, as they did in the old days. A cheerful tablecloth can be created using multi-colored scraps.
- Pillowcases. These items can become part of a sleeping set or decorate decorative pillows.
- Original curtains made from strips of fabric or ribbons.
For those who have been working with fabric for a long time, it will not be difficult to sew a bedspread with lush puffs or elegant folds. And beginners can make a cozy cape in a minimalist style.
Ribbons will help make flowers of incredible beauty, which are used to create brooches, headbands, hair ties, and bracelets.
Gift for a needlewoman
Such a small gift can be made for a girl who loves to sew. This interesting case for scissors will become her faithful companion in her favorite activity.
DIY case
To sew a case for scissors you will need:
- felt 5 colors;
- paper;
- scissors;
- curly scissors;
- threads to match the felt.
Korean felt is suitable for this work. It is better to use a hard one for the base, and a soft one for the rest of the parts.
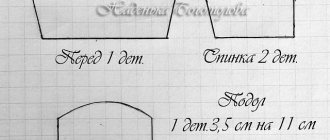
First, print out the case template (Image 2). Transfer the embedded parts to felt and cut out. You will only need one part each.
Sketch for a pattern
Cut the part behind which the scissors will be located on top with curly scissors. Additionally, you can apply a design using threads by sewing several lines.
Make patterns
Connect all the parts together and sew. Sew small stitches along the contour of the pink material with matching thread. If you wish, you can make a few decorative stitches for decoration.
Join the patterns together
Sew a loop on top along with a piece of felt
VIDEO: DIY gifts
DIY gifts
An excellent selection of ideas on what you can make for a holiday or as a gift with your own hands

