DIY colored paper crafts for children – photos and ideas
Need more variety? We took care of this too, so keep an even larger selection of craft options!
Shark made of paper and clothespins
An interesting craft made from clothespins and colored paper will be of interest to a 3-4 year old child. For this craft we need:
- Colored paper
- Glue
- Pin
- Scissors
- Match
From colored paper, cut out two parts of the shark: the bottom and the top with the fin. The top part should be made of blue paper and the bottom part should be made of white paper. Break off half of the match and glue a small figurine of a fish cut out of paper onto it. You can choose the color yourself. Set the finished piece aside.
Glue the top part of the shark's head to one half of the clothespin, and the bottom to the other. Then glue a match with a fish on the back side. This way, when the shark opens its mouth with the clothespin, a fish will be visible in its mouth.
The shark with its opening mouth is ready!
Photo frame for mom
- Take a large sheet of thick cardboard and a small flat plate.
- Place the plate on the circle so that its edges touch the surface.
- Using a simple pencil, trace the contours of the plate and cut out the resulting circle along the contour.
- Cut out 15-2 medium-sized ovals from colored paper. These will be the petals of the daisy frame.
- Glue the petals to the frame in a circle, we have a daisy.
- Now glue a photo onto the resulting circle in the center, and decorate the edges with beads, ribbons or funny designs. Ready! Mom is very happy with the gift!
Read here: Crafts from matches: detailed instructions, diagrams and a master class for making various crafts (95 photo ideas)
Little tips for big masters:
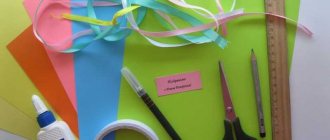
Use as many creative materials as possible for crafts: beads, tape, wallpaper, fabric, ribbons, markers, paints, glue, colored paper, glitter and anything else that comes to mind.
Apply colored tape to the joints of the paper house.
Do you want to add wallpaper to your dollhouse? Scrapbooking paper is suitable for this. Today in stationery stores you can find paper of any color and texture!
To give your craft a stylish look, paint patterns on cardboard with white paint. So, for example, you can simply draw tiles on the roof of a house, as well as clouds, snow or small snowflakes. Imagine!
Crafts from bags: master class on knitting from plastic bags and the best handmade ideas (90 photos)- Where to start drawing
Crafts from twine: a step-by-step master class on making useful and beautiful products (95 photos)
You can even make baked goods from cardboard! Cut out medium-sized circles from cardboard, glue a layer of colored paper or felt on top, and then decorate the tops of the cookies to your taste. Mmmmm... Looks so delicious!
Crafts made from corrugated paper
Corrugated paper is a popular material for making crafts yourself. Products made from it turn out unusually bright and festive.
Mosaic picture
Making such a picture is very simple: just print out a template of any drawing or take a regular coloring book to work with. You can take any colors of paper, at the request of the novice master.
Materials and tools:
- template for the picture;
- sheet of cardboard;
- corrugated paper of the desired colors;
- scissors;
- PVA glue.
Making a picture:
- Paper of the desired colors must be cut into squares. It is impossible to guess the exact number of parts in advance, so they will have to be prepared while working on the craft.
- Now each square should be crumpled and then rolled into a ball. The size of the ball will depend on the size of the paper square: the larger it is, the larger the ball will be.
Paper and cardboard crafts: corrugated paper flower
- The printed picture needs to be glued onto a sheet of cardboard to make the base of the craft stronger.
- Next, you need to lubricate part of the base with glue within the contour (without going beyond it). It is important to lubricate the paper with glue in parts because while one part of the picture is being glued, the rest of the glue may dry out.
- To get a picture, you need to place balls of certain colors on the glue, following the outline of the picture, and lightly press each one to the base.
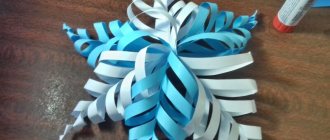
Pompom flower
What you will need:
- corrugated paper of the required colors;
- sewing threads;
- scissors;
- stapler
Process of creating a flower:
- It is necessary to cut a large square from a sheet of corrugated paper and fold it like an accordion.
- Next, you should tightly wrap the thread around the resulting workpiece in its very center and tightly tie the ends into a knot.
- The corners of the workpiece need to be cut off on both sides, giving the accordion the shape of a petal.
- Then you need to straighten the accordion, separate and stretch each petal a little, forming a lush flower. To prevent it from falling apart and keeping its shape well, you should connect the edges with a stapler.
- If you make another such flower and attach them to each other using a stapler or hot glue, you will get a lush pom-pom.
The time devoted to creating crafts is pleasant and useful. Paper and cardboard are the most affordable materials for DIY creativity, and products made from them have a wide range of applications.
Article design: Natalie Podolskaya