Instructions for making foam letters yourself
For work, prepare the following:
- polystyrene foam (several sheets);
- paper or wallpaper (to cover a future work of art);
- PVA glue;
- decorative elements.
You will also need a ruler, sharp scissors, a stationery knife, a marker and a simple pencil.
You can buy polystyrene foam at the construction market or at a store that sells building materials. The number of sheets depends on the size and number of letters you plan to cut out of it. Experts recommend using thicker foam, since thin layers will need to be glued together to give greater strength.
Sequencing:
- Draw on paper and cut out a sketch of the letters.
- Carefully transfer the template onto the foam sheet. You can immediately mark the letters on the foam.
- Cut using a utility knife. Movements must be confident and precise. All unevenness will need to be leveled by removing excess material.
- After the bases are ready, they need to be finished. To achieve an attractive appearance, the letters must be covered with wallpaper or paper, after tearing the roll or sheets into small pieces. All corners must be clearly marked.
- Decorate using your chosen decorations.
How to order three-dimensional letters if you have no desire to make them yourself?
There are a huge number of organizations dealing with this issue, this is due to the great demand for such an accessory, and not only for a wedding celebration as the main element for a photo shoot. In this case, such work is carried out much faster thanks to a special device - a thermal plotter, which is capable of cutting the necessary shapes of a pre-specified size and thickness.
Our specialists can also select the required design option or make it according to your individual order. The issue related to the installation of the product can be resolved there.
Decorative design of foam letters
Before you start decorating the letters, you need to make sure that the glue is completely dry. The final result will depend on how developed your imagination is. To decorate the letters, you can use wallpaper with a beautiful texture or decorative wrapping paper. It is allowed to use bows, ribbons, braid, beads, beads, rhinestones, Swarovski crystals, artificial and fresh flowers.
Whatever you choose as decoration, you need to start decorating the letters from the sides, smoothly moving back and forth.
As soon as the finishing process is completed, the foam letters can be considered ready for the upcoming celebration.
Backlit foam letters
If you want something unusual and memorable, then backlit letters look very impressive. The process of creating them is similar to the process of making regular letters. The difference lies in the decor used.
To make this masterpiece, purchase an LED strip or garland (of your choice). Tape is preferable as it is easier to work with. You just need to tape it with tape along the contour of the future accessory.
Experts advise choosing your own garland for each letter and not combining them into one chain. This way you will avoid many possible unpleasant consequences.
Volumetric letters made of polystyrene foam using polyurethane foam
This idea is a little more complicated. In this case, foam is used as a secondary material. It is necessary to cut out shapes from it, which then need to be filled with polyurethane foam.
The surface will need to be carefully leveled, making sure that the foam does not get on the foam. Next we carry out the coloring. The color can be any - of your choice. Such colored letters with a snow-white foam frame look very elegant.
Fixing the foam decor
Due to its lightness, foam letters are attached without problems. They can be fixed using mounting adhesive or double-sided tape. Having settled on the last option, you should remember that some types of such adhesive tape can only be attached to a flat surface. Therefore, it would be a good idea to do some training beforehand.
All products are produced according to the following algorithm:
- CNC cutting using titanium wire;
- grinding to level the surface;
- a primer that allows you to hide pores and make the surface smooth;
- painting brings the appearance of the product to perfection - we can use any shades;
- Preparation for installation: we install fasteners on the letters that allow them to stay on the roof or wall.
During production, acrylic facade paints and primers can be used, which determines the performance characteristics of the final product.
Advantages of foam letters
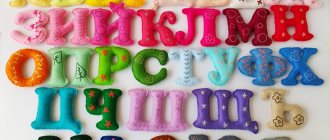
Foam letters can be a pleasant and original accent for any celebration, be it a wedding, birthday or other memorable event. They can be used as an independent element of a festive interior or as part of a fashion installation. Many people prefer to make entire inscriptions from three-dimensional letters.
This decor has the following advantages:
- Its shape, dimensions and volume can be absolutely any - to your taste.
- Light weight. You can easily move even the largest letter to another place.
- Opportunity to bring a variety of design ideas to life.
- The ability to create a certain atmosphere.
- Ease of manufacture.
- Financial inclusion.
- Ease of use.
- High moisture resistance. Foam is weather resistant. Even when it rains, it retains its attractiveness.
- Durability. Foam jewelry will last you for many years.
DIY polystyrene letters will become one of the most beautiful holiday attributes. The main thing is to approach their creation with soul - then they will acquire special energy, which they will generously share with invited guests and heroes of the occasion.
https://youtu.be/bvE60skXqo4https://youtu.be/bADnR7cn7ho
_
Wedding decor
Probably, today there is not a single wedding photo without beautiful words made of foam, for example, “love”, “family” and so on. But this is so banal! That is why we offer a master class on creating other letters that will drive you crazy with their brilliance and originality.
Looking at the photo, it seems that this is a very complex technique and there is no way you can cope with this task, but this is not so, you can easily make such letters for yourself, spending only two hours of your time.
To work you will need:
- Styrofoam;
- A foam cutter (if you don’t have one, a regular stationery knife will do);
- Colored paper, preferably with drawings, so the letter will be more original;
- Pre-prepared letter templates;
- Glue;
- Gold glitter;
- Gold colored marker;
- Gold acrylic paint;
- Simple pencil;
- Scissors;
- Water in the sprayer.
First you need to prepare a template, you can draw it or print it and cut it out. If you don’t know how to draw at all, you can use the templates below, all you have to do is print them.
It is better for beginning needlewomen to use templates with straight lines, without curls.
Now this template needs to be traced on the smooth side of the foam and cut out using a knife or cutter. It is better to heat the knife, for example, with a lighter, so the edges will be smooth. Attach the resulting letter to the back of colored paper, trace it and cut it out.
Article on the topic: Bean preparations for the Winter - 7 Best Recipes from Housewives
Paint the sides with paint. After the paint has dried, coat the area with glue and sprinkle with glitter. Spray a letter cut out of colored paper with water from a spray bottle and glue it to the front side of the foam letter.
Place the letters under the press for about fifteen minutes so that the paper sticks better.
Use a marker to outline the outline of the letter. It is advisable to cover the glitter with glue or varnish so that it does not fall off.
As you can see, the letters turned out luxurious, they will definitely be a wonderful decoration for your celebration. They can be used not necessarily for a wedding, but also for birthdays and simply as everyday interior decoration.
