The pleasure of Kinder surprises does not end with eating chocolate and looking at the toy. After all, there remains such a useful and multifunctional container.
It can be used to store small items for handicrafts, be used as a salt or pepper shaker on a picnic, and be convenient for carrying headphones.
And if you have imagination, make crafts from Kinders with your own hands.
Minions
Let's start by making minions that are cute to many. These yellow babies in blue overalls have won many hearts.
We will need:
- yellow containers;
- glue;
- markers;
- blue electrical tape;
- toy eyes.
Glue one or two eyes on the top of the egg. If there are none, then we’ll just draw them with felt-tip pens.
Wrap a piece of electrical tape around the bottom, draw in handles and a couple of hairs on the head with a black felt-tip pen. A little time, and we are the happy owners of our own army of minions!
The symbol of 2021 is a yellow pig
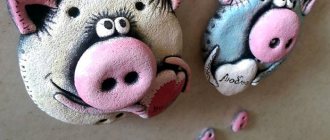
The coming 2021 will be the year of the Yellow Pig. A plastic container made from Kinder eggs is ideal for creating New Year's crafts.
We will need:
- egg capsule;
- small pink button;
- toy eyes;
- plasticine;
- glue.
Using “Moment” glue, glue the eyes and a button onto the lid of the container (it looks so much like a snout). From yellow or pink plasticine we sculpt ears, a thin tail and four hooves.
We attach the ears, and the pig’s face is ready. We try to make the tail into a spiral, like those of real piglets. Let's glue it to the back. The hooves remain. We glue them below.
You can use this Kinder craft for the New Year as a Christmas tree decoration. To do this, we will make holes in each part of the container, thread a thread through them, and secure the ends inside with knots.
Let's connect both parts and start decorating the New Year's tree.
Educational children's games that can be prepared from Kinder eggs
There is an interesting game “Catch the Bee”, which belongs to the Bilboke type of games. The essence of it is this: you need to hit a ball tied on a string to the stem of the cup. This game can be enjoyed by any number of children from 2 to 8 years old. It develops eye, coordination, dexterity and reaction speed.
Making the bilboke game “Catch the Bee” from a plastic bottle and a kinder container
The rules of this game do not exclude the possibility of playing simultaneously for all its participants. Then you can arrange a competition in which whoever gets into the cup first wins.
However, to play, you don’t have to buy it; you can make Bilboke toys with your own hands. For this you will need a plastic bottle, wire, lace, Kinder capsule, foamiran.
The bottle should be cut off, leaving the top. Make holes in the lid and capsule using an awl and thread a cord through them, tie a knot so that it does not slip through. And use foamiran to decorate the resulting bowl and egg. This can be done in the form of an aquarium and a fish, a hive and a bee, or a butterfly and a flower bed.
Advice! If you have plastic Kinder containers of different colors, you can make little animals out of them, each of which will be assigned its own color.
The child must collect them into groups according to color and type of animal. This way he can not only learn colors, but also get acquainted with various animals.
Animals made from eggs and plasticine
New Year's crafts from Kinders for the Christmas tree can be made in the form of Smeshariki.
We will need:
- plastic eggs;
- acrylic paints;
- plasticine;
- black beads.
First, together with the child, we remember what our favorite Smeshariki looks like.
We make a hole in the top of the container and attach a thread or ribbon, by which the toy will be hung on the Christmas tree. Depending on who we want to make, we paint the workpiece in the desired color.
We sculpt parts from plasticine - arms, legs, tails, needles. We attach plasticine parts to the dried workpiece, and make the eyes from beads. Our Christmas tree decorations are ready.
Craft flag - how to make it with your own hands correctly? Master class on making for holidays and parades (105 photos)Eyes for crafts: how to make templates and a master class on making eyes from various materials (100 photos)
- Craft angel - 105 photo ideas on how to make your own angel quickly and easily from scrap materials
How to make a cake from kinders and Chupa Chups: ideas, photos
This cake looks very beautiful if made in several tiers. And it doesn’t have to be huge. You need to base it on your budget. But the child’s emotions will be indescribable.
- Of course, you will need Kinder chocolates and lollipops; you can also use Kinder surprises.
- The base for such a cake should only be taken from foam plastic. After all, lollipops will need to be inserted into something. But it will be difficult to attach them to paper.
- Cut three tiers of different sizes and fasten them together. It will look very nice if you wrap each tier in wrapping paper with a beautiful pattern. You can connect them together using glue or a rod.
Cake made from kinders and lollipops
- Next, we cover each tier with chocolates, secure it with an elastic band and decorate with a ribbon. Then we cover each layer along the edge with lollipops. We insert them directly into the foam.
- At the very top we put kinder surprises. If you decide to do without them, then you can add a few more lollipops. Or simply decorate with a beautiful bow and flowers. Depending on your imagination and requirements.
Clothespins with toys for the Christmas tree
Not only eggs are useful in making Christmas tree decorations. You can make simple crafts using the children's toys themselves from Kinder.
We will need:
- glue;
- wooden clothespins;
- kinder toys;
- glitter nail polish.
First, let's coat the clothespins with nail polish. As soon as the varnish is thoroughly dry, glue the toy to the clothespin.
Let's attach the resulting toy to a Christmas tree branch.
Honeycomb
We will need:
- cardboard sleeve;
- markers;
- yellow containers;
- black thick threads;
- black beads;
- PVA glue;
- sheet of white paper.
Crafts from matches - 125 photos of original ideas for professionals and simple crafts for beginnersCrafts with children: a review of interesting and exciting ideas for creating toys and decorations (115 photos)
- Crafts from tights: 60 photos of basic ideas and sewing original crafts with your own hands
Let's form a hexagon from the sleeve and cut it into parts of equal thickness. Let's glue them together in the form of a honeycomb. Let's cut out wings for our bees from white paper. 2-4 for each toy.
Glue wings to the side of each Kinder capsule craft. We will make bee stripes from black threads, wrapping them around the egg.
We will make the eyes from beads, or draw them with felt-tip pens. Antennae can be made from wire.
Our bees are ready, they can be hung around the honeycombs on a fishing line, or glued directly to the cardboard. This kinder surprise craft is perfect to decorate a balcony, veranda or wall in a children's room.
How to make a cake from kinders and Raffaello: ideas, photos
This cake can be called gorgeous! Moreover, you can safely give it to your loved one. The process of making such a cake will not take much time and is not much different from the previous version.
- You will need Kinder chocolates and a whole box of Raffaello.
- In this composition it is better to use a foam base - it is more durable. Even thick paper can bend.
- Again, the most time-consuming step is preparing the base. It is necessary to take into account the fact that the box must be in a recess. Therefore, you will need to cut a hole in the foam of the appropriate shape and height. There will be a box on top there.
Kinder and Raffaello cake
- You can do it even simpler, take the base slightly lower than the height of the chocolate bars.
- Next, place our chocolates in a circle and tie them with a ribbon.
- The top of the foam should be covered with corrugated paper, and, if desired, additionally decorated with fresh flowers or satin ribbon. They need to be attached with glue.
- Also, don’t forget to attach a beautiful bow to the box itself. After all, this is a gift!
- By the way, you can additionally place a Kinder near the box for surprises. He will definitely appreciate it.
fireflies
We will need:
- capsules;
- awl;
- battery operated LEDs;
- toy eyes;
- foil;
- tree branch;
- fishing line;
- “fluffy” wire.”
Use an awl to make a hole in the top of the capsule. We insert the LED into the cap with the hole so that the light bulb looks into the hole.
We cut out the wings from foil and glue them to the workpiece.
We make firefly antennae from “fluffy” wire. If there is none, then wrap regular wire with colored threads. Glue or draw eyes with felt-tip pens.
Turn on the LED and close the parts of the craft. We make 5-10 of these fireflies. Roll the branch into a headband and secure with threads.
Let's hang our fireflies from the rim on a fishing line.
This glowing headband with fireflies will be a wonderful night light for a child’s room.
Mini-crafts from kinder surprises
Wrap the plastic eggs in corrugated yellow paper, secure it with a ribbon bow and draw eyes and a beak with felt-tip pens. The result was a flock of elegant chickens.
Secure the egg between two plastic spoons and wrap it around in a beautiful candy wrapper. A bouquet of tulips is ready.
Divide the container into two parts, decorate with plasticine and colored paper. You will get a set of doll dishes.
Using colored paper, you can turn the capsule into a cockerel, a kitten, or any animal the child likes.
If you know how to crochet, then tie the container so that you get funny toys with an opening mouth.
Drill holes in the container and store toothpicks in it.
For avid hikers, a plastic egg will serve as a waterproof container for matches.
As you can see, there are a lot of uses for these capsules. And making crafts with your child will bring mutual joy. Photos of Kinder crafts will take their rightful place in the family archive.
How to make a cake from kinders and chocolates: ideas, photos?
Even a child can make such a cake, because it does not need to be baked. And the ingredients are accessible and varied. The main thing is to turn on your imagination. Of course, the first thing you need to do is prepare the frame. It can be of different shapes, and it can be made from cardboard or thick paper, or from cut foam plastic.
You don't need any special skill to make this cake. But everything should be done carefully and slowly. The main components are kinders and small Kinder chocolates, but you can also take another brand.
Foam base
- The most labor-intensive part of preparing such a cake is the base. It will be faster and look nicer if you use polystyrene foam. Cut out the required shape. In this case, the height should be equal to the height of the chocolate bars.
- You can make several tiers, but this is optional. And if this is your first time doing something like this, then it’s better to go with a simpler option.
- Next we need to attach our chocolates to the base. Many people use glue for these purposes. But any glue is not so harmless, and when the decorations come off, the packaging may be damaged, and the frame may also deteriorate. Still, at the holiday everything should be beautiful and perfect.
- Therefore, you will use a regular stationery eraser. You need to put it on the frame, and then carefully insert the chocolate bar. As a result, there should be no voids or holes, and you also need to make sure that everything is even.
Kinder cake
- To prevent the elastic band from spoiling the whole picture, you can decorate the top with a satin ribbon or openwork braid.
- Place the kinders on top. It is not necessary to attach them. Yes, and not advisable. Again, glue can damage the packaging, and then the appearance will be less aesthetically pleasing. The quantity depends on the desire and size of your frame.
- You can decorate the top with more flowers. Ideally, alive. In this way, an additional stand will be created so that the kinders do not run away.
- You can also cover the top of the frame with corrugated paper. Or you can even use colored paper, but it must be bright and of high quality. It needs to be attached with glue.
Paper base
You can also create a paper-based cake.
Option 1:
- In this option, you need to spend more time and effort. You also need to be very careful and accurate in measurements.
- The first step is to cut out two circles of the same size. This will be the lower and upper part, respectively.
- Next, you need to measure the required height and cut out a rectangle. Leave another centimeter on each side. And make triangles in this area, cut out the cloves. After all, we will use them to glue them to our circles. And this is necessary so that folds do not form.
- It’s better to glue the chocolates. Because the eraser can wrinkle the paper. But, if you decide to use cardboard, then you can secure them with an elastic band.
- Next, the technique is the same - decorate with ribbons and place kinders on top.
Kinder cake
Option 2:
- For this method you only need one circle - the bottom one.
- We cut out a rectangle in the same way, but we make the cloves only on one side. After all, we won’t have an upper circle. The result will be a so-called basket.
- In this case, it is better to take thicker paper rather than regular paper. And it will look very beautiful if you use colored or patterned ones. We cover it with naked chocolates, and put kinders in the resulting hole.
Photos of crafts from kinders
Read here - Crafts from cups - 90 real photos and video instructions on how to make interesting and unusual crafts with your own hands!
Did you like the article?
0


