- November 1, 2018
- Crafts
- Legina Marina
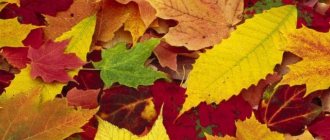
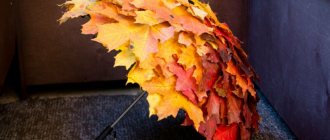
It's time to collect autumn leaves. This is waste material that is lying around in huge quantities underfoot. But it can be harvested, dried and then used throughout the winter. Dry material will retain the warmth of autumn for a long time and delight with wonderful colors. And on long winter evenings you can spend time with your children creating beautiful compositions. Today we’ll look at how to make an owl from leaves with step-by-step instructions.
Choosing leaves
The first step is to choose the leaves that will be the basis of the composition. It is better not to use large ones with carved edges, because it will be difficult to give the painting the correct contours. Cherry leaves are best. They are small, have an even contour, so they can be laid out on the selected pattern and get a good result. But small maple ones will also do.
Let's get started
Now let's find out how to make an owl from leaves. You can find step-by-step instructions below:
- Draw the outline of an owl on a piece of cardboard and cut it out. This is the basis of our preparation.
- Now we gradually apply glue and begin to fill the outline with leaves. If you are doing a craft with a small child, then you need to choose a glue stick.
- We begin to lay the leaves from the bottom, gradually rising higher. We continue to lay the material overlapping each other until we completely fill the entire workpiece.
- For the ears you need to choose oblong leaves.
- Cut out eyes, beak and paws from colored paper.
As you can see, there is nothing complicated. Make an owl from leaves. Anyone can do it with step-by-step instructions.
Paper owl
Making an owl applique from colored paper is incredibly easy. For this craft we will need multi-colored paper, scissors and glue.
- Cut out the parts for the applique;
- We glue the eyes, beak and legs to the body;
- We decorate the tummy with prints of bright paint imitating feathers;
Related article: Volumetric Pop-up card with a kitten
- Glue the wings overlapping to the body.
You can also make an owl from colored paper using leaves as decoration. Thus, you can combine two techniques into one.
For this craft we will need: cardboard for the base, glue, twigs, colored paper for the body and eyes and leaves for the wings.
To begin, cut out the details of the body, beak and eyes from colored paper. Then we glue the small parts to the body, then glue the leaves as wings. We will also make ears and paws from the tips of the leaves, glue them to the blank, and glue the blank and the twig onto the cardboard so that the twig is placed under the owl’s paws.
Our colored paper owls are ready!
Big and small
You can choose the size of the materials yourself, using the instructions as a basis, preferably step-by-step. We have already discussed above how to make an owl from leaves, but then everything depends on your imagination. You can simply lay out the applique on a sheet of cardboard. If you cut out the figure and then cover it with leaves, you will get an excellent gift option. Acorn caps can serve as eyes.
Make it a little more difficult. To do this, prepare an additional thick twig and yarn. Separately, you can make legs from cardboard and tighten them into a ring using thread. Now pass a stick through the two circles and secure this structure to the owl. The illusion is that she is sitting on a tree in the forest. Making an owl from leaves with your own hands, as it turns out, is easy and simple.
Owl made from plastic bottles
The flight of imagination of a creative person knows no bounds. Taking used material as a basis, you can create an innumerable number of masterpieces that are especially relevant in the landscape design of the site. Usually crafts are placed on the ground; an owl made of plastic bottles, conveniently located among the branches of the garden, will surprise those around you. There are several ways to make a night bird, they differ in degree of complexity. The proposed master classes will help you choose the appropriate option for making an original owl from plastic bottles with your own hands.
Impressive night hunter
Let's start with the most time-consuming option. To work you will need:
- Plastic bottles, preferably the same color.
- 5 liter plastic canister.
- PVC pipes Ø 20 mm, length 0.9 m.
- Scissors, knife.
- Self-tapping screws.
- A piece of foam.
- Aerosol paint for exterior use.
Be patient and get started:
Work begins with the formation of the owl's frame. Pipes that serve as claws are fixed onto the plastic canister with self-tapping screws. Cone-shaped shapes from the top of plastic bottles placed on the pipes with their necks down will help to give them volume. Part of the 5 liter container plays the role of an owl's breast.
When some of the parts are ready, they begin to cover the owl's paws. Having previously pierced the elements of the owl with an awl, the feathers are fixed to a plastic frame with wire.
The next stage is the torso. Usually the back of the bird is decorated with feathers first, then the sides and belly. The owl's back is left open for further fixation of the wings from plastic bottles.
In order for an owl to sit on a branch, it will need strong claws on its feet. The part is made of wire, which is decorated with a corrugated pipe. When constructing the shape, space is left between the fingers for the PVC pipe. This will give the owl additional stability. The wire part of the claws is clamped between the pipe and the bottle and secured with electrical tape or tape.
The basis for the bird’s head will be a fragment of foam plastic; the optimal thickness is 10 cm. Cutting out the desired shape will be easy with a stationery knife. The top of a 5 liter plastic bottle will help you create a voluminous nape.
Attention! Treating the foam with putty followed by sanding provides the head with a smooth surface.
The head is covered with fragments from plastic bottles. The eyes are framed with two rows of small feathers using Moment glue.
The head is attached to the body with self-tapping screws and proceed to the formation of the wings. Chain-link mesh is used for the frame. The optimal cell size is 25x25 mm. Main stages of the process:
- Begin by fixing the tail feathers.
- Attach 2 rows of long plastic feathers.
- The back area is covered with details similar to the entire body.
- Feathers cut from corrugated bottles will help make the wing more decorative.
It is preferable to paint an owl from a plastic bottle with aerosol paint, which goes on in an even layer. The areas around the eyes are highlighted with a different shade. There are many options for eye design; in our case, they are made from ready-made beads. The final touch is mounting the wings and tail onto the rest of the body.
Such an owl will successfully participate in an exhibition of folk crafts.
Simplified version
The following master class will help you make an owl with less time and effort. For creativity you should prepare in advance:
- 2 liter bottles of dark color – 5 pcs.;
- transparent plastic container;
- tin eye covers – 2 pcs.;
- glue gun;
- acrylic paints, brushes;
- scissors, awl and knife;
- pliers;
- nylon threads.
Owl made from plastic bottles master class:
Finally, the remaining elements are treated with paint and the owl from a plastic bottle is ready to take up residence in the garden.
By choosing different categories of difficulty, you can make an original bird within a day or by spending more time and effort, but the result will impress everyone around you.
Another unique design option for the nocturnal predator is presented in the video:
bouw.ru
Do-it-yourself voluminous craft
It is very simple, but at the same time effective. To make it, it is not at all necessary to collect the most beautiful and even leaves. Even plain brown ones will do. The idea is well known, but the craft turns out to be very interesting. At the same time, it is done quickly and very simply.
To make an owl from leaves in a bag with your own hands you will need:
- Leaves that you find in the garden.
- Threads.
- Transparent plastic bag.
- Colored paper.
- Glue.
- Transparent tape.
- Double sided tape.
Owl made from dry leaves or straw
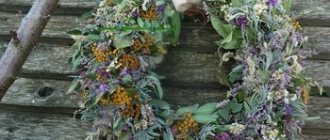
The method of geometric shapes is also relevant when making an owl from dry leaves. All that is required is to find leaves of maple, birch, and other trees. They should be dried by placing them in a book. If you leave them on the windowsill or put them in a desk drawer, they may bend and you won’t be able to make an applique. In a couple of days they can be taken out and glued to the cardboard in the required sequence.
You can also make an owlet, an adult owl, from straw. You need to pick herbs with flexible stems up to 10 cm. Dry them by placing them between books. Using threads, form several bundles from the stems and roll them in a circle. It is better to take threads to match the color of the grass. Next they are glued to cardboard or sewn. In order for the beak to appear, it is recommended to use the dried peel of a tangerine or orange, and for the eyes of a lemon, or do the opposite. Perhaps coffee beans, acorns, chestnuts will come in handy.
This work will give you a lot of pleasure. The craft will be completed without any problems, and compliments from others will definitely come. The main thing is to take your time, act confidently, and try to do everything carefully and correctly. This is a great idea for appliques, paper crafts, and other materials - choose an owl. Larks, nightingales, and sparrows are inconspicuous. Only a crow, a swan, a woodpecker, a heron, and a magpie can compete with it.
https://youtu.be/kCk-RN1xI98https://youtu.be/fCu78zJdxyI
_
Execution steps
The first step is to dry the collected leaves. You don’t have to dry them under a press, just scatter them on the bottom of the box. This is a mandatory step, because even seemingly dry leaves can contain a small amount of moisture. After packaging in a bag, condensation will form on its inner surface.
Now let's look at how to make a three-dimensional owl from leaves:
- Fill the bag with leaves.
- Tie the upper corners with thread, forming ears.
- Now you need to cut out eyes, beak and paws from colored paper.
- Fold the bottom corners of the bag towards the middle and glue with transparent tape.
- With its help, secure all the parts, including the paws.
Now your craft is ready. If it is intended for the street, then the paws can be omitted, and the eyes and beak can be glued in from the inside before folding the leaves. Now the owl can be placed on a garden tree. It’s even better if it has a hollow. Then the craft will decorate the garden all year round or welcome guests.
What other options are there for making an owl from autumn leaves? Based on the principle described above, you can make a model of both an owl sitting on a branch and a flying one. To do this, you just need to cut out the base with the wings turned upward and attach rings to them, into which you will thread a twig.
Craft an owl from a toilet paper roll.
The owl will look unusual and attractive. This is a simple craft that will stand out from other products made from this material. The secret is that in this home decoration the top (the owl's head and ears) will be hidden from view, and will be distinguished by its brevity and neat appearance.
For this craft you will need:
- Cardboard sleeve
- Black and white paper (for eyes)
- Paper orange and brown
- Glue, scissors, ruler and pencil.
Before starting work, the source material should be prepared. Select one of the sides of the bushing and first compress one part of the corner, then symmetrically the other. These actions will be quite enough to see the first results of the work and what the product will look like.
The bushing is now ready for further action. Here you can give free rein to your imagination and wrap the owl’s “body” with colored paper, stick on paper or natural purchased feathers, and you can also make characteristic patterns on the sleeve using pencils or felt-tip pens.
Let's choose option number one and prepare everything for our future craft.
Stages of work:
- We measure the length and width of the bushing base. You can do this on the paper itself.
Brown paper will follow all the curves of the frame; leave an extra edge of paper in reserve.
- Fold in half and use scissors to cut out 2 owl wings.
- Cut a circle out of orange paper - it will serve as a bright belly.
- The next stage is the eyes.
- From the prepared triangles - beak and claws.
When all the components of your craft are ready, you can proceed to assembly.
Assembly:
- Coat brown paper with glue and wrap the sleeve, making folds at the top.
- Glue the orange circle to the middle of the product.
- Just above the eyes and a sharp beak.
- Glue on the wings and bend them slightly forward.
- The final touch is the paws.
The owl is ready with your own hands!
Forest composition
If your fantasy runs wild and you don’t want to stop, you can continue to create. Make a model of a tree from cardboard. It will need to be covered with leaves, and for the crown, select those that still have green color. Or you can improve the situation a little with the help of gouache. If you make several such models, you will end up with a grove in which a family of owls will live.
Now you can move on to making birds. One can be attached to a hollow in a tree, the other can be performed with open wings - in flight. Also add a nest with little owlets. The result will be a wonderful craft that will definitely take first place in the autumn competition at school or kindergarten.
Other creative ideas
We now know how to make an owl craft from leaves. But this is not the only idea how this material can be used. This is a natural raw material that is very pleasant to deal with. The leaves smell like autumn and forest. Children always have great fun rummaging through leaves. And if you have the opportunity to create a real masterpiece out of them, then the evening is a complete success.
And when your craft is finished, you can try making something else from the leaves.
This could be a crown for a girl, which will allow her to become a real queen of autumn. Or make a cardboard blank of a carnival mask and cover it with leaves. It will be enough to fasten the elastic band at the back, and the craft is finished. You can even wear it.
Photos of owls
Read here: Craft a tie: master class and tips on how to make postcards and souvenirs in the shape of a tie (75 photo ideas)