One of the most interesting times is approaching, when adults and children will begin active preparation for the upcoming New Year holidays. The symbol of the coming New Year is the Rooster, and it is to him that the News portal “Vtemu.by” dedicates this article.
From our article you can learn how to easily and simply make a funny and beautiful cockerel with your child, using the most common materials: colored paper, cardboard, glue, etc.
The article will also be useful for primary school teachers and educators in preschool institutions, because our recommendations and detailed master classes will provide methodological assistance in organizing labor lessons.
So let's get creative...
Rooster made of plasticine
To make this simple craft, you need to prepare multi-colored plasticine. You need to roll balls of different sizes from yellow material. Connect them to each other so that you get the body, neck and head of the rooster. Carefully smooth out the joints of the balls.
Imitation of feathers can be done using longitudinal cuts. To make a scallop you will need a red mass. Next, attach the black eyes and orange beak.
The tail can be made from the brightest shades of plasticine . To do this, you need to cut the mass into small pieces, knead each portion and roll first into a ball, then into a long sausage. Collect the resulting details into a bouquet - the tail is ready, all that remains is to attach it.
Wings are best made from triangular and teardrop-shaped cakes. Red plasticine is suitable for them. Draw feathers on the wings in a stack and stick to the body. To make the craft stable, the paws need to be made using matches.
Rooster in the form of a pendant
You can make a wonderful Christmas tree decoration from quilling. For this, the simplest elements are used. The master class is suitable for beginners.
Materials:
- Paper;
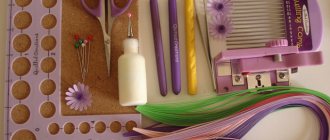
- Quilling tool or its substitute;
- PVA glue;
- Cardboard;
- Cockerel template;
- Transparent paper file.
Step by step description:
- The smaller the details, the smaller the finished cockerel will be.
- To form a drop, the spiral is clamped on one side.
- The eyes are made from the same spiral, clamping it on both sides.
- The arrow element is obtained from a spiral folded in half.
- To fasten the parts, use a paper clip until the glue dries completely.
- Among children's coloring books, choose the drawing of a rooster you like and print it out. It will be a template to work with. It is placed in a file along with a sheet of cardboard. This will allow you to separate the mold from the template after drying.
- Starting with the comb, the contours of the sketch are filled with quilling elements. Glue is applied generously so that the parts are well bonded.
- Using black, white and orange stripes, twist a tight spiral, which will be the eye of the rooster.
- White and light yellow drops fill the outline of the head, and a beak is made from a bright yellow arrow.
- For the neck, take five drops - orange and yellow. Two more, connected to each other with a clamp and glue, will serve as earrings. They are glued under the beak.
- Following the scheme, fill the entire body, wing, and legs of the rooster with droplets, arrows, and spirals.
- A large number of parts will be required to fill the tail. Bright colors are used for it.
- The finished craft is left in a warm place for several hours, during which time the glue will dry well and hold all the parts together efficiently.
In the morning, the rooster made using the quilling technique will separate from the file. All that remains is to stretch the thread through the comb and hang it on the tree. If you glue the craft onto cardboard, you will get a beautiful New Year's card.
The next year 2021 will be held under the auspices of the Rooster. This means that DIY New Year’s crafts for 2021 should be very diverse. We invite you to make a symbol of the year in a wide variety of variations. In this article you will find a number of the most interesting crafts that you will definitely make with pleasure.
Making our own crafts for the New Year
Felt cockerel.
If you plan to make a cockerel with your own hands and do not want to buy it in souvenir shops, then this master class will come in handy. You can make a beautiful bird from bright pieces of felt. You can give this toy to a child or decorate the interior of your home with it.
- So, in order to sew a toy, you need to sketch all the details. Make sketches on a regular sheet of cardboard. You can also download and print the template.
- After that, we transfer the contours of the parts onto felt and cut out individual parts of the toy from the material.
- The parts that were cut out are sewn together. In this case we use threads of the color of the material. It is also recommended to use an overlock stitch.
- When you have sewn the main part of the toy, start decorating it. Make eyes and other decorations.
Pay attention to what kind of cockerels can be sewn from felt. As you can see, there are many different options here.
Funny snowmen.
In this article you can find the most interesting New Year's crafts that you can make for the New Year 2021 with your own hands. In addition to cute cockerels, you can easily make a number of other interesting crafts.
So, for such snowmen, you should prepare white socks, as well as cereal for filling. Just fill your socks with cereal. Form snowmen and make additional decorations for them. Pay attention to the step-by-step creation of such a craft.
- Cut the light sock into two parts.
- After which, the upper part of one sock is tied with a rubber band.
- Turn the piece inside out.
- Fill part of the sock with cereal.
- We tie the top with strong threads or ribbon.
- Now take a colored sock and cut it in half.
- We put one part on the snowman, and use the other as a hat.
- Sew beads to the snowmen to act as eyes. And also decorate your craft with lace.
Fluffy Christmas tree for the New Year.
It is worth saying that today every craftswoman can create an original craft even from the simplest materials. For example, below we will tell you how to make an unusual Christmas tree using simple plastic bags. So, first of all, prepare:
- light green plastic bags,
- wire and scissors,
- small bell.
Progress:
- First of all, we make a strong frame with a stand from wire.
- Now take a stack of bags and cut circles out of them. The circles should be 12 cm in diameter. But as the Christmas tree grows, the diameter of the circles should become smaller.
- The edges of the circles should be wavy. To do this, they are stretched with your fingers.
- We collect a stack of large circles and string them onto the base. The height of your future Christmas tree at this stage should be 5 cm.
- Now cut out circles with a diameter of 11.5 cm and place them on the base again in a stack.
- In this way, we cut out and put circles on the base until the circles cover it.
- We tighten the top of the base and attach a bell for decoration.
New Year's rooster using quilling technique.
If you are interested in a technique such as quilling, then you will love making an unusual craft and giving it to someone on a magical holiday. This cockerel is very easy to make. It is worth noting that the main part of the cockerel is made from quilling forms. But the cockerel's tail is made from ordinary strips of colored paper.
In addition to simple crafts, you can easily make a real work of art using this technique.
And in order to make paper blanks, use the master class.
Cute tree made from toilet rolls.
The upcoming 2021 Year of the Rooster must be bright. And now start boldly making crafts for the New Year.
So, to create the next craft you will need toilet rolls. You should also use:
- paints,
- glue,
- Christmas balls.
Progress:
- So, first of all, color the toilet rolls.
- If the paint has dried, start building the Christmas tree. Glue the rolls together with glue.
- Attach the balls to the rolls, and also secure the beads on top of the tree.
- As a result, you have a very interesting craft.
Santa Claus from a brush.
Look at what interesting crafts you can decorate your home with in the New Year. Take a regular brush and draw facial features. Also make a hat of your own craft. In this case, choose fluffy fur.
Fairytale snowman made of white threads.
In order to make the next craft, you need to put in a minimum of effort. Your children can freely join in this process. To create a snowman take:
- white threads,
- big needle,
- glue and 5 balloons,
- felt-tip pen and blush,
- scarf for decoration.
How to do?
- We inflate all the balloons. 3 balls will be needed for the body. We use a couple of balls to create hands.
- Now we take a large needle, insert a thread into it and pierce it with ordinary office glue. We take out the thread from the other end of the bottle and wrap it around the balls.
- At the fastening points, press the balls slightly inward.
- If you have assembled the snowman, then glue the nose to it. And we paint the cheeks with blush. To draw eyes we use a felt-tip pen.
- Use a scarf for decoration.
Magic snow composition.
From this article you can learn how to make New Year's crafts for 2021. Indeed, in this publication we have collected for you only the best crafts for the New Year 2021. Now we want to invite you to make a magical composition from handy materials. To create it, take:
- a simple glass jar,
- various miniature figures,
- glycerol,
- waterproof glue,
- distilled water,
- sparkles.
Progress:
- First, stick a figurine to the inside of the lid or to the bottom of the jar.
- Now pour water into a jar and add glycerin to it.
- After that, add the snowball and close the jar with a lid. Shake it. If the glitter in the jar falls off quickly, add more glycerin.
- If you are satisfied with the result, then feel free to give your gift.
Finally
We hope you enjoy our selection of ideas. You will probably be able to choose from these ideas the most wonderful crafts that you will make on the eve of the New Year.
Crafts for the New Year always bring joy. And it doesn’t matter whether you make a large panel with a beautiful landscape or give a miniature postcard with an embroidered picture - all the same, the recipient will be incredibly happy that you paid attention to him.
Every person understands that a homemade gift is much better than one bought in a store. In any case, it is several times more pleasant. Today we want to introduce you to one interesting way that allows you to make amazing New Year's gifts in just a few minutes.
Crafts using quilling technique for New Year 2017
will allow you to feel an indescribable calming effect, and will also appeal to all the guests gathered at the holiday.
Paper cockerel
To make a rooster with your own hands from paper, you will need the following materials:
- Scissors.
- Colored paper.
- Box.
- PVA glue.
Cut off the part that covers it from the box. Make cuts along the fold lines that are half the height of the box. Bend two opposite parts along the cuts. These will be the wings. The remaining parts are the head and tail. Carefully round the wings and cut the tail into longitudinal strips. Cut the head in the shape of a triangle. All that remains is to decorate the craft, make a comb and earrings.
New Year's rooster for a DIY gift, step-by-step master class with photos
The DIY New Year's rooster from the step-by-step master class below is perfect for a gift. You won’t be able to make it in kindergarten or elementary school—it’s too complicated a craft for children. But for creative adults, a DIY New Year's rooster as a gift (master class with photos) is perfect. In addition, the finished craft turns out to be of good quality (this is not a craft made from cotton pads or paper), although it is made from a cardboard tray of eggs.
Materials for a New Year's rooster for a DIY gift
- cardboard egg tray
- glue
- scissors
- acrylic paints
- ball
- newspapers
- cardboard
Instructions for making a DIY New Year's rooster craft for a gift
- We cut off the internal partitions, cut them in half and connect the two pieces together.
- We cut off the side convex parts of the tray, as shown in the photo. We form the beak from a small triangular piece.
- From the flat part of the lid we cut out 5 blanks for the tail. From the remaining parts of the tray we cut out oblong blanks in the shape of leaves.
- Glue the leaf blanks onto cardboard in the shape of a wing (2 pcs.). We assemble the neck from the first blanks, add a beak and a comb made of cardboard. Inflate the balloon and wrap it with strips of newspaper dipped in glue.
- Let the papier-mâché dry and deflate the ball, cut off half of the workpiece and proceed to assembly.
- Paint the finished rooster with acrylic paints.
Product made from plastic bottles
To make a rooster from waste material you need:
- Three plastic bottles.
- Yellow ball from a dry pool.
- Disposable plates and glasses in yellow and red.
- Black marker.
- Stapler.
- The tape is simple and double-sided.
Cut off the top of three plastic bottles, then connect them with tape to form a body with a neck.
How to sew a rooster from fabric
To work you will need:
- Cardboard.
- Threads.
- Scissors.
- The fabric is white, orange and blue-green.
- Tweezers.
- Cotton wool.
- Scotch.
- Glue.
- Colored paper.
Draw a sample of the craft on cardboard and cut it out. Then cut it into individual components. You can use a stencil. Match each detail with separate pieces of fabric and cut out in duplicate.
White fabric is suitable for the head, blue-green for the upper part of the wing and body. Cut the lower part of the wing and tail from black fabric. Next, make a comb, beard, paws, beak and eyes from colored paper. All that remains is to sew all the parts together.
Wood craft
There are many different ways to make a rooster from natural materials. It all depends on skill and ability. A simple craft can be made if you put a rooster template on a wooden sheet or plywood and trace the contours. Then cut out the design using a knife or jigsaw. Next, the product can be painted.
A more complex option is to carve many strokes and details into the wood. This is done using additional tools. Depending on your desire, carving a rooster from wood can be voluminous or flat. Having the skill and assembly diagram of the product, you can make a rooster from several parts.
Postcard with a cockerel
It’s so nice to congratulate your family and friends on the New Year 2021 with a beautiful New Year’s card with a picture of a rooster, made by yourself. For this craft you need very little:
- scissors;
- paper;
- PVA;
- Double-sided tape.
We also recommend the article: What to wear to celebrate the Year of the Fire Rooster and how to choose accessories for 2021
And of course, a little imagination and desire.
Templates for the background and figures of the New Year symbol can be found on the Internet, printed on a color printer, and then cut out. If you have the skill of an artist, you can draw it yourself.
The color blue is suitable as a background for the craft; it’s good to add a few snowflakes to it; scrap paper with a New Year’s image already applied is also ideal for the background.
Next, we glue double-sided tape onto the inside of the cockerel figurine and attach it to the postcard to make a three-dimensional drawing; you need to cut out the same figurine from paper two more times and stick it on top of each other, clearly aligning the contours.
Then you can make an inscription, wishing everyone a Happy New Year 2021! And inside the card you can write a poetic congratulation. We think everyone who receives such an original craft will be very pleased. The ideas that you embody in your creativity always delight the soul and heart of a loved one!
Jute lamp
For the master class you will need:
- Jute threads.
- PVA glue.
- File.
- Pins.
- Paper.
- Pencil.
First you need to draw the silhouette of a rooster. Place the resulting drawing in a file. Moisten the jute thread in glue and lay it along the lines of the drawing. Make another similar pattern in the same way. Thus, you will get two cockerels. To make the base, wrap threads around a plastic jar. When the glue dries, remove the jar. The jute tube is ready.
Button panel
To create a craft you need:
- Sheet of cardboard.
- Frame.
- Fabric (plain or with small patterns).
- Approximately 100 buttons of different sizes and colors.
- Glue.
- Pencil.
It is important to choose the shades of buttons to avoid sharp transitions. For example, the paws and comb will be made of red buttons, the head will be yellow, and the neck will be orange. For the tail, it is better to use several colors: blue, purple, lilac. To decorate the body, you need to mix buttons of all these shades.
Cover the cardboard with fabric and draw the silhouette of a rooster. Then start filling the outline. Before gluing the buttons, they need to be arranged according to size. Fill empty spaces with beads.
Balloon toy
A voluminous craft will be made from balloons and threads. For this you will need:
- PVA glue.
- The yarn is yellow, red and orange.
- Two balloons.
- Colored paper.
Inflate one big balloon, the second smaller one. Moisten the yarn with PVA glue and wrap the balls.
After the glue has completely dried, pierce the balls with a needle and remove them from the thread frame. You will get the head and body of a rooster; they need to be fastened together.
To decorate the craft you will need colored paper. It is important that several bright colors are used when making the wings and tail. The comb, beak, eyes, earrings and paws are also made from colored paper. Attach all parts to the body. If desired, the paws can be made of wire, then the craft will be stable.
Anti-stress cockerel toy
It would be a great idea to make a funny New Year's anti-stress toy with your own hands; many people simply adore things of this kind. Such a cockerel can not only be crushed, but placed on a shelf as a decoration, and it will delight the eye all day with its unusual appearance.
We also recommend the article: DIY monkey crafts: make a talisman for your loved ones
To do this, you will only need pieces of multi-colored fabric, it is better to take cheerful colors, a thread with a needle, and a special filler for anti-stress toys (you can also take regular cotton wool).
Next, we perform the following procedure:
- cut a square out of fabric;
- from a red piece we make a comb and beak;
- sew the details onto the corner of the square;
- We place cotton wool or other material inside the resulting cavity;
- Next you need to sew the edges together so that you end up with a pyramid.
The new and original toy is ready, we are sure that all family and friends will like it.
Making a candy bowl
Using cardboard egg boxes, you can make a beautiful candy bowl in the shape of a rooster. To do this you need:
- Seven packages for a dozen eggs.
- Acrylic paints.
- Scissors.
- Hot glue.
- PVA glue.
- Balloon.
- Newspapers.
- White paper.
Cut the cones cut from the tray into four petals. These will be feathers. Cut each cone on one side.
greeting card
Everyone loves gifts, both to give and to receive. But you must agree that the most pleasant thing is to receive a gift that is made with your own hands. A piece of the human soul is embedded in it. A simple and at the same time unusual gift for friends or parents will undoubtedly be a postcard in the shape of a funny rooster.
For this work you need:
- Glue (pencil or ordinary PVA).
- Set of colored paper.
- Double-sided tape (can be replaced with regular tape).
- Paper scissors.
The Internet is currently replete with all kinds of models of animals and birds, among them there is a rooster. A person who knows how to draw can create a postcard layout on their own. The postcard itself can be supplemented with all sorts of details. For example, it would be appropriate to use snowflakes for a New Year’s card, a cake and candles for a birthday, but the Easter holiday would not be complete without chickens and eggs.
When completing the work, you will need to draw or print a couple of bird figures, after which they are cut out and fastened together on one side with double-sided tape. The rooster figures do not need to be cut out if you intend to create a standard A4 postcard. After fastening the parts, you can decorate the base of the card with beads, rhinestones and other decorative elements. On the second page of the postcard, as a rule, congratulations and wishes are glued or handwritten. You can come up with the text of the wish yourself or find a suitable example on the Internet.
Plaster mold
To make a rooster from plaster, you need to prepare the following materials:
- Gypsum.
- Paints.
- Water.
- Spoon.
- Mold.
- Plastic jar.
To begin, dilute the gouache. To completely dissolve the paint, pour a little water into the jar and shake. Pour gouache into the container and add gypsum. Stir the solution until it becomes liquid sour cream. Next, pour the plaster into the mold and let it dry. The rooster is ready.
There are a lot of ways to make crafts, so choosing the right option for yourself and making a charming cockerel will not be difficult.
Originally posted 2018-03-03 07:25:44.


