Star made of cardboard and fiberboard
To create a large Star of Bethlehem you will need thick cardboard and fiberboard. This will make the structure strong and reliable. Such a star can be used by carolers even in heavy snow and frost.
Materials and tools:
- Stick.
- Cardboard in golden and silver color.
- Fiberboard sheet.
- Strong threads.
- Double sided tape.
- Glue gun.
- A ruler and a simple pencil.
- Scissors.
- Tinsel and rain for decoration.
First you need to draw a star on a sheet of thick cardboard. If you want the structure to be durable, transfer the drawing to a sheet of fiberboard. Cut out the star on both the cardboard and the fiberboard sheet.
Glue cardboard on both sides to the resulting star. It is recommended to glue golden cardboard on one side and silver cardboard on the other.
All that remains is to decorate the star with rain and tinsel, and attach the decor with a glue gun. It's best to attach decorations to the ends of the star, but you can decorate the craft however you like.
You need to make holes at one end of the star, thread a strong thread through them, and tie a stick on the other side. You can use screws instead of threads. To make the holes invisible, cover them with tinsel. Thus, a star for caroling. All that remains is to prepare the carols and go congratulate your friends and family.
Christmas bead crafts
Various beads and beads can not only be used to decorate finished works, but also as the main material for creating Christmas keychains or pendants that can decorate both the interior and, for example, a school backpack.
The weaving pattern is extremely simple and will be clear even to a beginner. Work begins, as a rule, from the head, smoothly lowering down.
For a beaded Christmas angel you will need beads of different colors and sizes, thin wire or monofilament, and a needle. A pendant on a wire base will be more rigid; when using monofilament, the figure will be more mobile. You cannot use ordinary sewing threads for the base; they are not designed for such a load and will quickly break.
Very important! If a child is preparing such a craft for Christmas in kindergarten, then he should not be left unattended while working so that small parts are not swallowed or enter the respiratory tract.
Star of Bethlehem made of paper for Christmas tree decoration
A DIY star of Bethlehem for a Christmas tree is easy to make and an incredibly beautiful decoration. It can be used to decorate a holiday tree, window frame or create original Christmas compositions.
Materials and tools:
- Colored paper.
- Glue.
- Scissors.
- A simple pencil.
- Ruler.
- Ribbon.
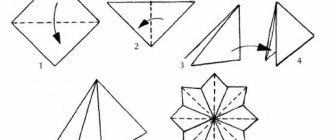
Cut out two identical squares of any size. The larger the size, the larger the star will be. From the inside of the paper, you need to mark the middle of each fold. It is also necessary to make cuts to pre-designated points. After this, the edges need to be folded inward. One of the edges of the beam needs to be coated with glue. The paper edge should be glued together so that a pyramid is formed.
Then you need to make another star out of paper. Apply glue to the folded edges of each star at a 45 degree angle. The finished star can be hung on a Christmas tree or used to decorate the interior for Christmas. To hang a craft on a Christmas tree, you need to glue a ribbon to it.
New Year symbol
At the beginning of the article, we mentioned that you can decorate not only the Christmas tree with a star, but also the front door. In this tutorial we will show you how to make a star out of foam.
Article on the topic: Crochet tunic: diagram and description of fillet knitting with photos
For this we need:
- a piece of polystyrene foam (the size is arbitrary, depending on how big you want the star to be at the end of the master class);
- compass;
- pencil;
- stationery knife and scissors;
- thick paper;
- glue;
- wrapping paper or foil (all the wealth that is in stock from past holidays).
So let's get started.
The most important thing is to cut out the base for the star from foam plastic. At this stage, you can use a template, but don’t be upset if you don’t have one, in this master class we will tell you how to make a blank yourself. Take a compass and draw two circles. Their diameters are 20 and 40 cm. Next, measure seven equal parts along the circles and draw rays to them from the center.
Then, draw lines that connect the base to the ends of the corners, and cut the workpiece strictly along the contour.
Prepare the decorated paper and cut out the parts according to the size of the center and rays. Glue on the rays and then the missing parts. To prevent the wrapping paper from fraying, follow the outline with a beautiful cord, fabric or thicker paper, cut to size and stick on. Decorate the tops of our beautiful star with bells.
You can complete the work when you decide for yourself that your work is sufficiently decorated. Use your entire flight of imagination in this master class; you can glue beads, wrap the rays with tinsel and even decorate with neon ribbon.
Star of Bethlehem made of threads
For one way to make an unusual Star of Bethlehem, you can use threads. The star of Bethlehem made from threads turns out airy and unusual. It can be used to decorate a Christmas tree or interior.
Materials and tools:
- Threads.
- Sponges for washing dishes.
- PVA glue.
- Barbecue stick.
- Pre-printed star template.
- Sewing pins.
It is recommended to dilute PVA glue with water to make it sufficiently liquid. To achieve the required thickness of the glue, it must be gradually diluted with cold water, bringing it to such a state that the fingers only stick together a little.
You need to place a thread in the prepared adhesive solution. To make a star you will need about three meters of thread. Leave the thread in the glue for 5-7 minutes so that it is well saturated.
After this, you need to put four kitchen sponges together. To prevent them from moving, glue them together. Attach the star template to the sponge and use it to make marks on the sponge. Place pins on the marks. Step back a little from the template where the stick will be placed.
It is from this place that you should start winding the thread. We draw the thread at the same level to create an outline. Then you need to wind the thread on opposite pins in a random order until the thread runs out. Tighten the thread as tightly as possible so that the structure is strong and there is no sagging. At the very end, the thread should end up on the pins, from which the winding process began.
Leave the craft to dry. This will take several hours, but you can speed up the process with a hairdryer. However, a craft that has been dried naturally will be somewhat stronger.
After drying, the star must be removed from the sponges and pins. If there are traces of sponges left on it, carefully remove them. Additionally, you can decorate the craft with sparkles, tinsel or other decorative elements. This DIY Star of Bethlehem will be an excellent decoration for a New Year tree or Christmas interior.
Bethlehem miracle
Another original way to create a star is using straws.
This time the process will be somewhat labor-intensive, but will not lose any of its fascination; it is more convenient to create if you repeat everything with four hands.
What will you need? We stock up on straws, a hammer, a board, nails, thick thread, a pencil, and a ruler.
Place the board as shown in the picture. Count out 50 straws and place them next to each other on a tight thread. Tie them in the middle, forming a bow-shaped blank. While one of you is tying the thread in the middle, the other is straightening the ends in opposite directions. Now, without letting go of the middle of the part, try to make a circle out of the “bow”. Then, fasten all the straws with thread, as tightly as possible in relation to each other. To make the task easier, drive a nail into the very center, which will secure the craft in place.
Related article: Soap bouquet: master class on making roses with photos and videos
Now tie the remaining straws in the center. The sticks are tied together, forming several of them. Well, our symbol is ready, all that remains is to form the long rays of the star, for which you need to break the straws in half and along the edges, forming corners. These rays are inserted into the spaces between the ends of the straws. The corners are also knitted using thread.
The pointed ends of the rays can be decorated with small Christmas balls, painted in any color, or decorated with the core of the star. Such crafts will not only complement the time spent by adults, but will also give children genuine joy and involvement in an interesting process.
Decorations made of fabric, threads and ribbons
Using the kazansha technique you can create not only hair decorations, but also Christmas angel pendants for the Christmas tree. To do this you will need decorative ribbons, beads, glue and a little imagination.
Almost everyone knows how to make a snowman out of threads by pasting them over a balloon, but you can make a craft for school inside such a ball using white threads that imitate snow cover. In the middle you can place an angel or figures of Mary, Joseph and a baby, made using any of the techniques listed above.
You can make a Christmas angel toy using the principle of a motanka doll, and if you have a sewing machine at home and the appropriate skills, then sew an interior doll in the Tilda style.
Crafts for Christmas are a good way to spend an interesting and useful time. After all, the finished works will become a wonderful home decoration or a Christmas gift for loved ones in honor of this bright holiday.
How to make a star stencil?
To create paper star stencils you will need the following tools and materials:
- thick paper or cardboard - the required size will depend on the size of the template, but most of the options proposed below will easily fit on an A4 sheet; You should not use regular office paper; it is better to take material with a density of 200 g per 1 m2;
- scissors and/or a paper cutter - these tools must be sharp so that they can easily cut the material without leaving torn, sloppy edges;
- backing - a special backing will protect the table from scratches during work, but if it is not there, then you can use an ordinary wooden cutting board, only dry and clean.
As you can see from the list above, everything you need to create paper stars can be found in every home. The sequence of work will also be extremely simple:
- First, you should transfer the star design you like onto paper. This can be done in two ways. If you have a printer at hand, you can download any of the templates below for free and print it. If this is not technically possible, you can redraw the star you like yourself or, by placing the sheet of paper on the screen, carefully trace the outline of the drawing with a pencil without pressing on the screen.
- After this, all that remains is to cut out the stencil, placing the printout or drawing on a protective backing. For contours and large parts, ordinary scissors are suitable, but to cut out a star with openwork monograms inside you will need a special breadboard knife.
You can make a star stencil with your child; children usually enjoy this activity, but before you begin, you should devote a few minutes to safety precautions when working with scissors and a cutter to avoid injury.


